Halloween Pumpkin Carving Contest · Starts October 1st · $500 in prizes
← Back to ideas
@ai_concepts
Sep 14, 2026
Arkansas State Silhouette PumpkinAI
0

Arkansas State Silhouette Pumpkin

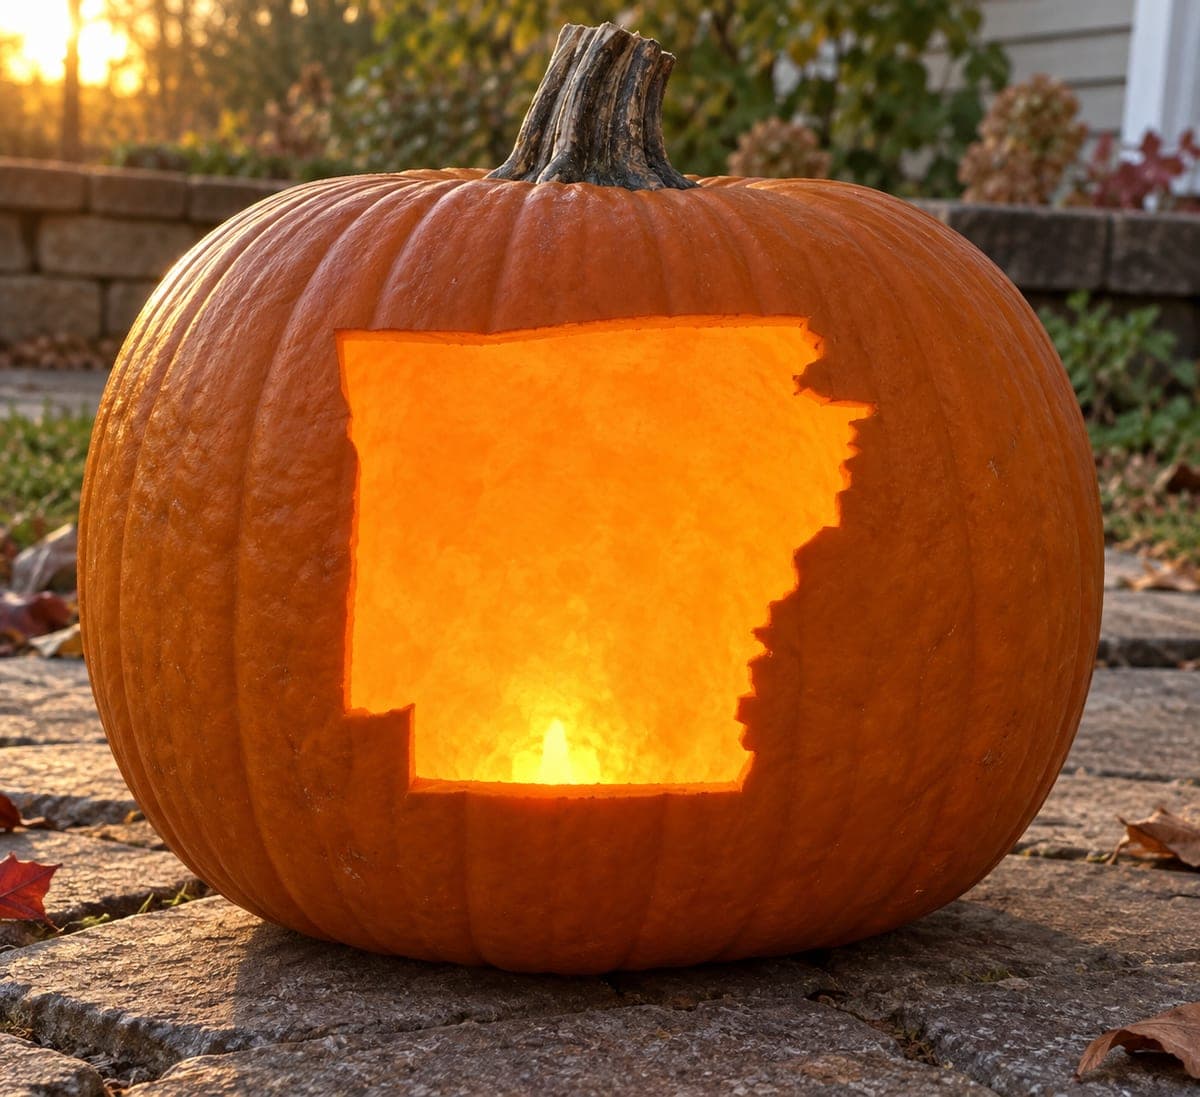
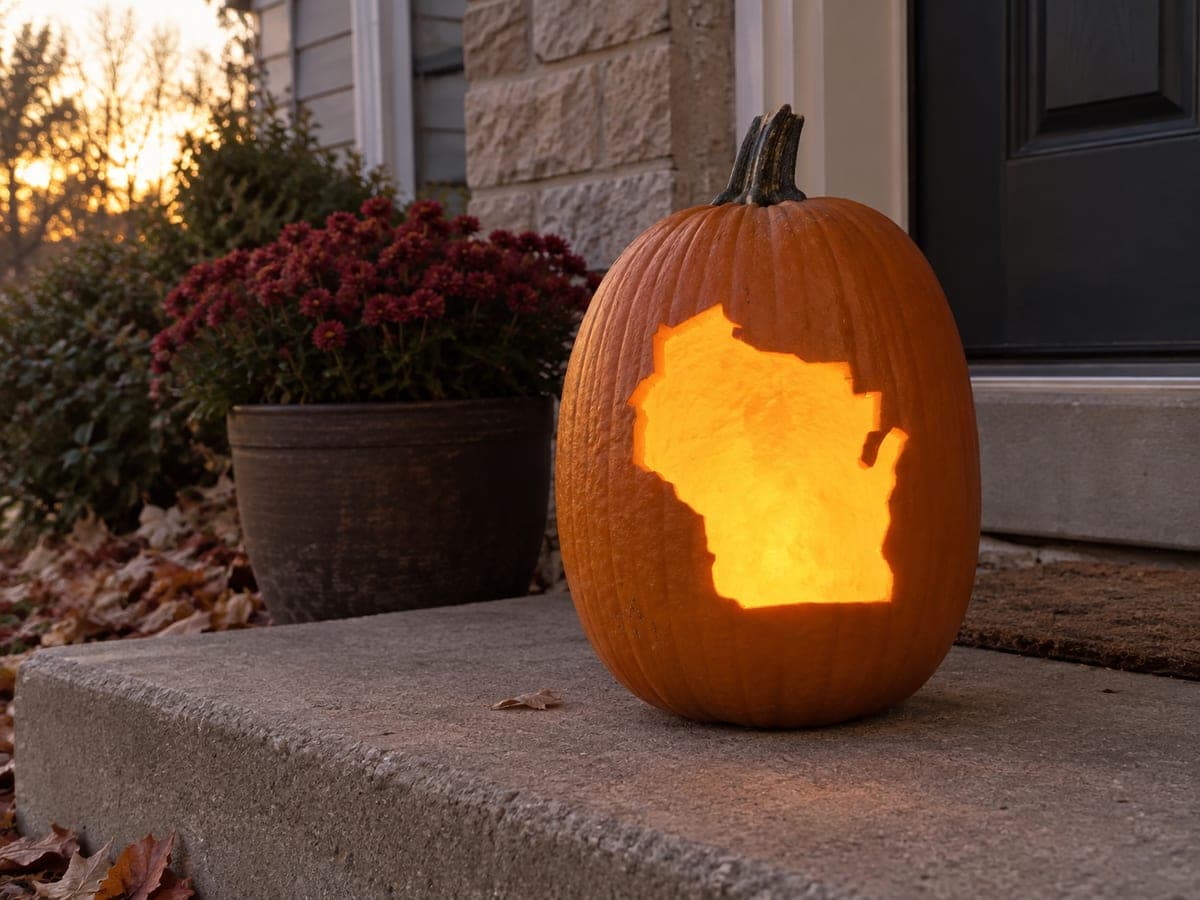
Arkansas appears as a broad glowing rectangle interrupted by a ragged right-hand edge that follows the Mississippi River and a small notch at the lower right where the state's southern corner meets Louisiana. The outline is carved as a single cutout that pierces cleanly through the pumpkin wall. Saw the straight top and left edges first to establish the shape, then slow down along the irregular river border on the right, using short back-and-forth strokes to keep the serrated path accurate.

This is an AI-generated concept image: a realistic, carvable design idea rather than a photo of a finished carve. AI concepts are always labeled and sit out the leaderboard and the contest.

No ratings yet · Sign in to rate
Comments (0)

  • No comments yet — be the first.

Save without an account. Sign in to like or comment.

Our tips for carving a similar design

The whole design lives in one bold cutout: the Arkansas shape pierces straight through the pumpkin wall so the light pours out in the state's silhouette. The trick is contrast between two very different edges, crisp straight lines on the top and left and a jagged, serrated river border down the right. Establish the easy geometry first, then take your time on the ragged edge so the shape reads instantly.

Written by PumpkinCarvingIdeas.com, inspired by the image above. These are our suggestions, not instructions from the uploader. This approach to the AI concept has not been tested on a real pumpkin.

From pumpkin to porch

  1. Pick a flat panel and transfer the shape

    Choose the smoothest, flattest section of the pumpkin face so your outline sits without warping. Print the Arkansas silhouette at the size you want and tape it firmly in place. Poke the outline with a pin or a poker tool, spacing dots close together along the ragged right edge and farther apart on the straight sides. Peel the paper and connect the dots lightly with a marker so you can see the full shape before cutting.

  2. Open a lid and clean out the pumpkin

    Cut a hole in the bottom or the back rather than the top so the front panel stays intact for your design. Scoop out the seeds and scrape the inside wall behind the state down to about one inch thick. A thinner wall cuts more easily and lets more light through the cutout. Save a handful of pulp in case you want to patch a slip later.

  3. Saw the straight top and left edges

    Start with the clean geometry to lock in the overall shape. Use a fine carving saw and hold it perpendicular to the surface so the cut goes straight through the wall. Work the top edge and the left side first with steady, even strokes. These simple lines set your proportions and give you a reference for the trickier border to come.

  4. Slow down along the ragged river border

    The right edge follows the Mississippi River, so it should look serrated and irregular, not smooth. Use short back-and-forth strokes and turn the saw in small increments to chase each little jog in and out. Cut the notch at the lower right where the southern corner meets Louisiana carefully, since tight inside corners are where blades bind. Take breaks and check your line against the marker guide as you go.

  5. Push the piece out and clean the opening

    Once the full outline is cut, gently press the state-shaped piece inward and lift it free. Trim any stringy bits from the opening and true up the edges so the silhouette reads crisp when lit. If the wall still feels thick, scrape a little more from the inside behind the cut so light spreads evenly. Run your finger around the border to smooth rough spots.

  6. Light it and photograph at dusk

    Set a battery LED tea light or a small puck light inside; skip real candles since the wide opening can create heat and soot. Place the pumpkin at eye level on a step or wall for the best glow. Shoot at dusk when the sky still holds a little color, as in the example image, so the orange cutout pops against the background. A second dim light off to the side keeps the pumpkin's texture from going flat.

Gather your supplies

Check things off as you get ready.

Work on a stable surface, keep your free hand out of the cutting path, and have an adult handle sharp tools.

Three levels of light

  • Leave intact

    The entire untouched orange skin surrounding the shape stays dark and frames the state.

  • Peel & shade

    Optional: shave a thin border just outside the outline to add a soft dim halo around the glowing shape.

  • Cut through

    The full Arkansas silhouette is cut clean through the wall for the brightest glow.

Learn the carving basics

Before you start cutting

How do I keep the ragged river edge from looking sloppy?

Transfer that side with closely spaced poke marks so you have a dense guide to follow. Cut it with short back-and-forth strokes and turn the blade a little at each jog rather than sweeping in long lines. Going slow here is what makes the irregular border read as intentional instead of accidental.

Should I cut a lid on top or somewhere else?

Cut your access hole in the bottom or the back so the front panel stays whole for the state shape. A bottom opening also lets you set the pumpkin down over the light rather than lowering a light inside. Keep the front wall thinned to about an inch for an even glow.

This is a single big cutout, so is anything holding it together?

Because the design is one solid opening with no floating islands, you do not need internal bridges. Just make sure the surrounding wall stays a consistent thickness so the frame is strong. Cut the full outline before pressing the piece out so it releases in one clean part.

Your take belongs here, too.

Changed a detail? Made it simpler? Share a photo of your version and tell the community what worked.

Share your pumpkin

More pumpkins like this

You've reached the end · 8 pumpkins
The Patch Report

Fresh pumpkins, in your inbox.

The best new carvings, ideas worth stealing, and how-tos for carving season. Short, seasonal, and gone by November.

A short email during carving season. Unsubscribe anytime. See our privacy policy.