Halloween Pumpkin Carving Contest Β· Starts October 1st Β· $500 in prizes
← Back to ideas
@ai_concepts
Sep 14, 2026
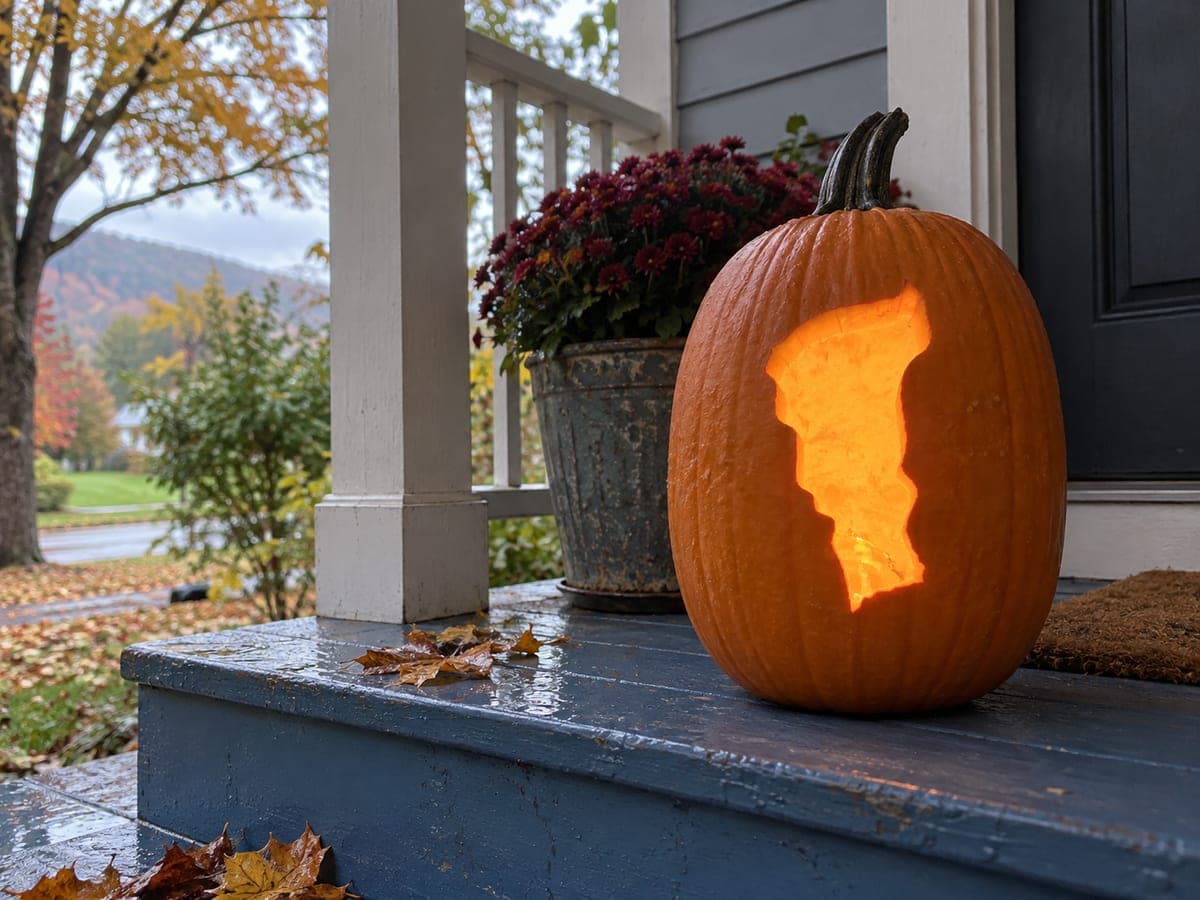
Vermont State Map PumpkinAI
0

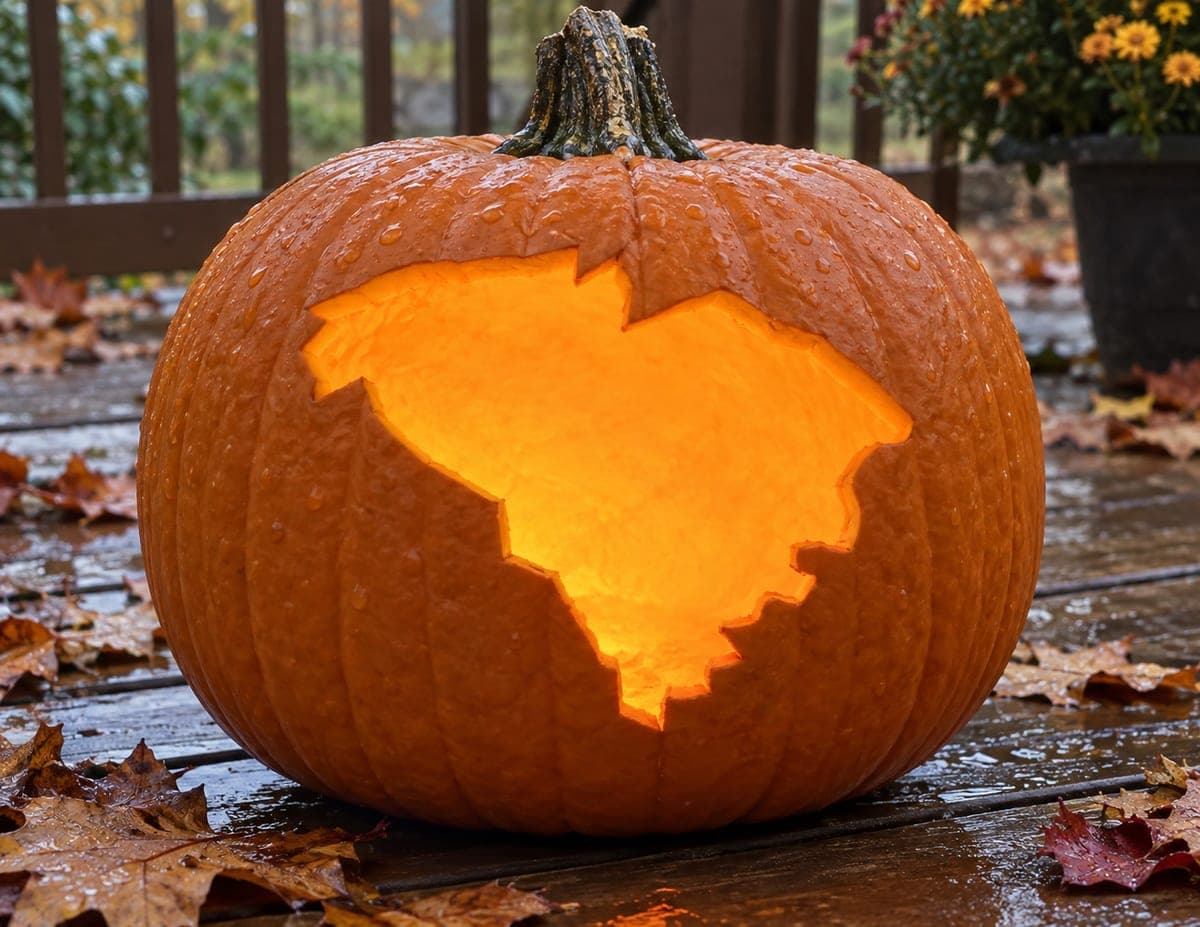
Vermont State Map Pumpkin

Vermont's narrow silhouette is cut through the right side of this rain-damp porch pumpkin, the straight western edge running vertically while the eastern side traces the wavy, indented Connecticut River corridor all the way down to a pointed southern tip. The jack-o-lantern pumpkin carving idea pairs naturally with a tall, elongated pumpkin because Vermont's proportions are much taller than wide. Carve the smooth western border first as your anchor cut, then work across to the complex eastern edge in short controlled strokes so the thin northern end stays supported.

This is an AI-generated concept image: a realistic, carvable design idea rather than a photo of a finished carve. AI concepts are always labeled and sit out the leaderboard and the contest.
No ratings yet Β· Sign in to rate

Comments (0)

  • No comments yet β€” be the first.

Save without an account. Sign in to like or comment.

Our tips for carving a similar design

The whole design rests on one bold shape: Vermont's tall, narrow silhouette cut clean through the pumpkin so the LED glows through the opening. The trick is treating the smooth western edge as your anchor line, then working the wavy eastern river border in short strokes. Because the state is much taller than wide, a tall elongated pumpkin keeps the proportions honest.

Written by PumpkinCarvingIdeas.com, inspired by the image above. These are our suggestions, not instructions from the uploader. This approach to the AI concept has not been tested on a real pumpkin.

From pumpkin to porch

  1. Pick a tall pumpkin and plan the layout

    Choose an elongated pumpkin taller than it is wide, since Vermont's shape is long and slim. Wipe the surface dry so your stencil and marks stay put. Center the state shape on the smoothest panel, leaving a good margin of skin all around. Tape a printed Vermont stencil in place and check that the pointed southern tip has room above the base.

  2. Open and clean the pumpkin

    Have an adult cut a lid or a wide bottom opening so you can reach the carving area. Scoop out the seeds and pulp, then scrape the inside wall behind your design down to about one inch thick. A thinner wall is far easier to push a blade through and gives a brighter glow. Save the flat scraped area right behind where the map will sit.

  3. Transfer the outline

    Poke closely spaced holes along the stencil edge with a pin or transfer tool, following the straight western line and the wavy eastern river corridor. Remove the paper and connect the dots lightly with a marker so you can see the full outline. Double check the northern end stays narrow and the southern tip comes to a clean point. Fix any gaps before you cut.

  4. Cut the straight western edge first

    Using a small serrated carving saw, cut the smooth vertical western border top to bottom as your anchor line. Keep the blade straight in and out, letting the saw do the work rather than forcing it. This clean edge gives you a stable reference for the trickier side. Do not push the piece out yet.

  5. Carve the wavy eastern border in short strokes

    Work the indented Connecticut River side with short, controlled strokes, turning the pumpkin instead of twisting the blade. Take the curves slowly so the thin northern neck stays supported by uncut skin until the end. Save the final connecting cuts near the narrow top for last so the shape does not crack. Gently press the cutout inward and lift it free.

  6. Light it and photograph

    Drop in a battery LED light and set it inside so the beam fills the opening evenly. Skip candles, since the tall shape and thin wall dry out fast. Clean up any ragged edges with a small knife for a crisp state outline. Set it on a porch step at dusk and shoot slightly off angle to catch the glow.

Gather your supplies

Check things off as you get ready.

Work on a stable surface, keep your free hand out of the cutting path, and have an adult handle sharp tools.

Three levels of light

  • Leave intact

    The entire outer pumpkin skin stays untouched and dark, framing the map

  • Peel & shade

    Optionally shave a thin skin border just outside the cutout for a faint halo

  • Cut through

    The full Vermont silhouette is cut clean through for the brightest glow

Learn the carving basics

Before you start cutting

Why use a tall pumpkin instead of a round one?

Vermont is much taller than it is wide, so a round pumpkin would squash the proportions. An elongated pumpkin lets the long north to south shape read correctly. It also gives the pointed southern tip enough vertical room above the base.

How do I keep the narrow northern end from snapping?

Cut the straight western edge first, then work the wavy eastern side, and leave the connecting cuts near the thin top for last. Turn the pumpkin as you go rather than levering the blade. Keeping the area supported by uncut skin until the final strokes prevents cracks.

Do I need the eastern edge to be perfectly accurate?

Not exactly. The wavy Connecticut River corridor just needs a few gentle indents to suggest the real border, and viewers will recognize the tall slim shape. Focus on a clean straight west side and a crisp southern point, since those sell the state at a glance.

Your take belongs here, too.

Changed a detail? Made it simpler? Share a photo of your version and tell the community what worked.

Share your pumpkin

More pumpkins like this

You've reached the end Β· 8 pumpkins
The Patch Report

Fresh pumpkins, in your inbox.

The best new carvings, ideas worth stealing, and how-tos for carving season. Short, seasonal, and gone by November.

A short email during carving season. Unsubscribe anytime. See our privacy policy.