Halloween Pumpkin Carving Contest · Starts October 1st · $500 in prizes
← Back to ideas
@ai_concepts
Sep 7, 2026
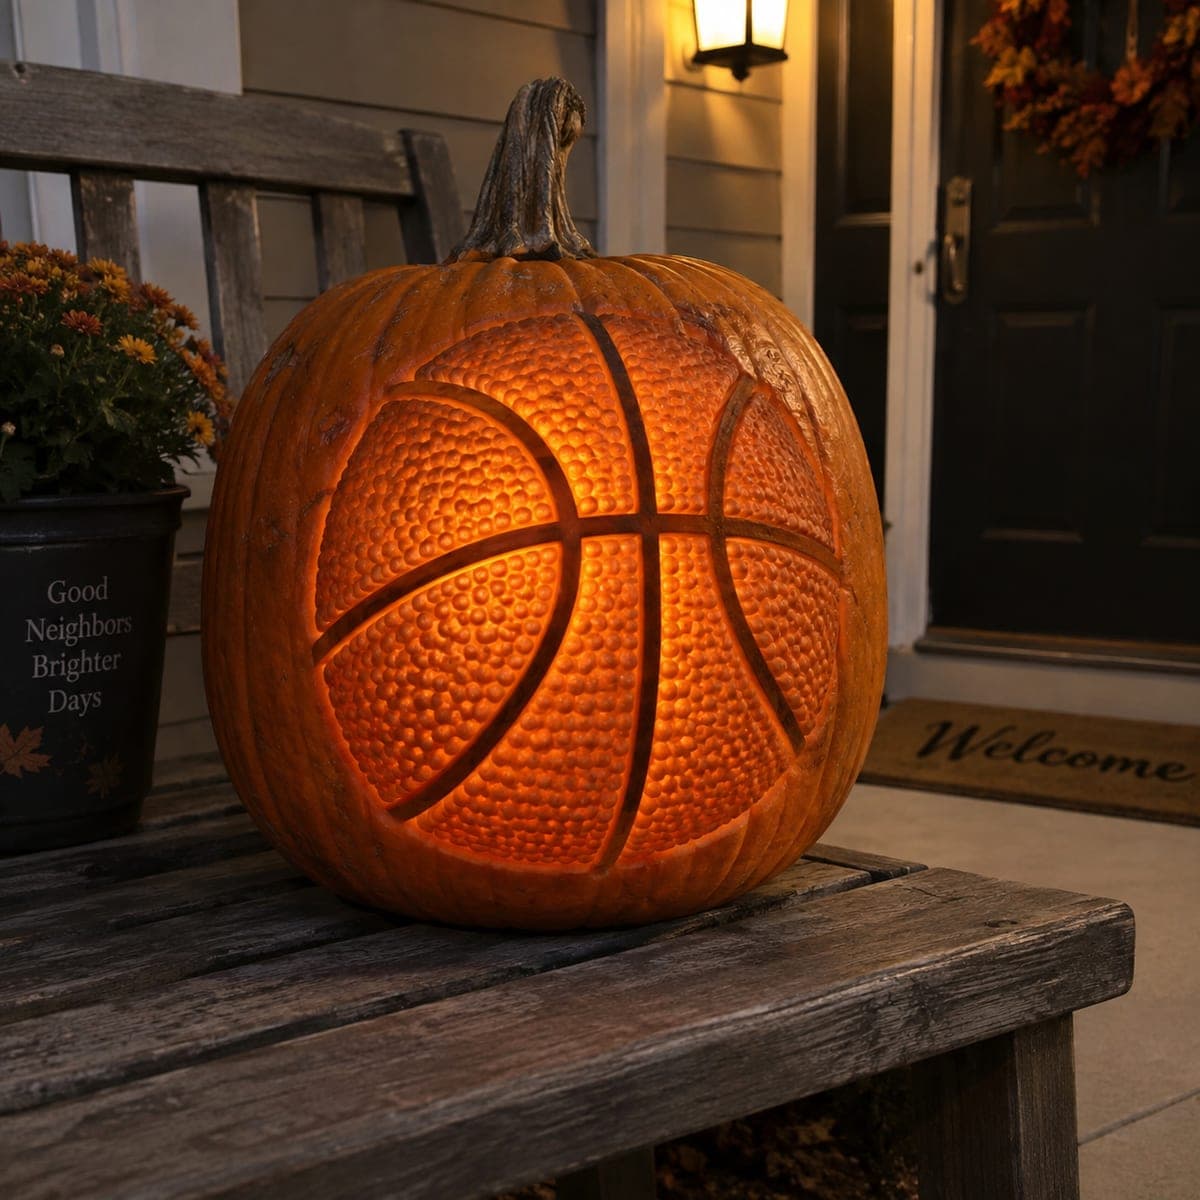
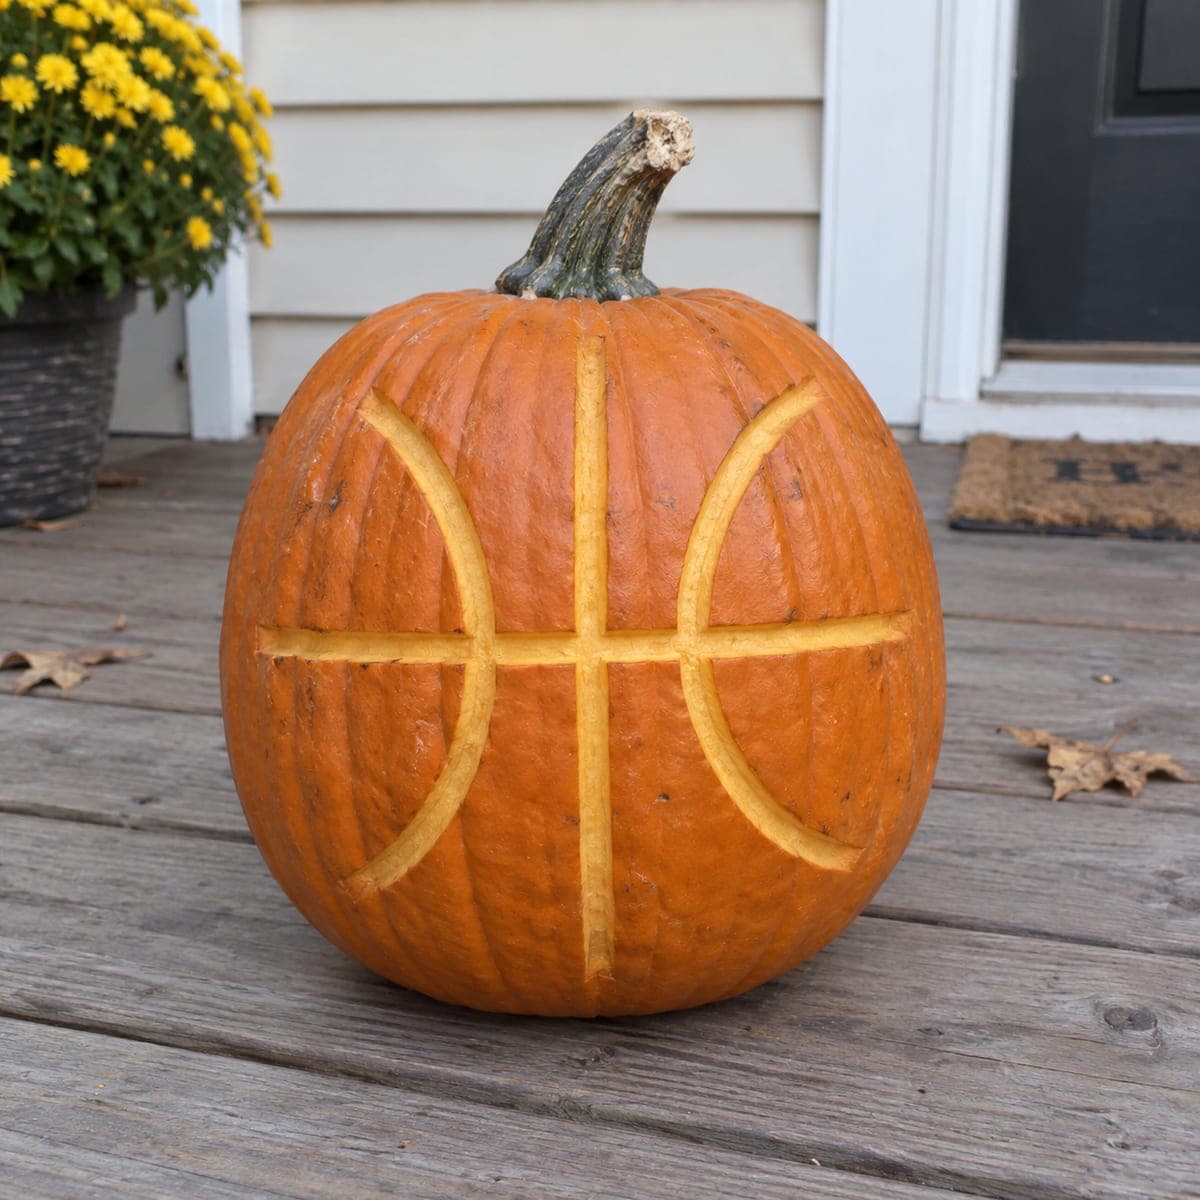
Basketball Jack-O-Lantern With Dimpled TextureAI
0

Basketball Jack-O-Lantern With Dimpled Texture

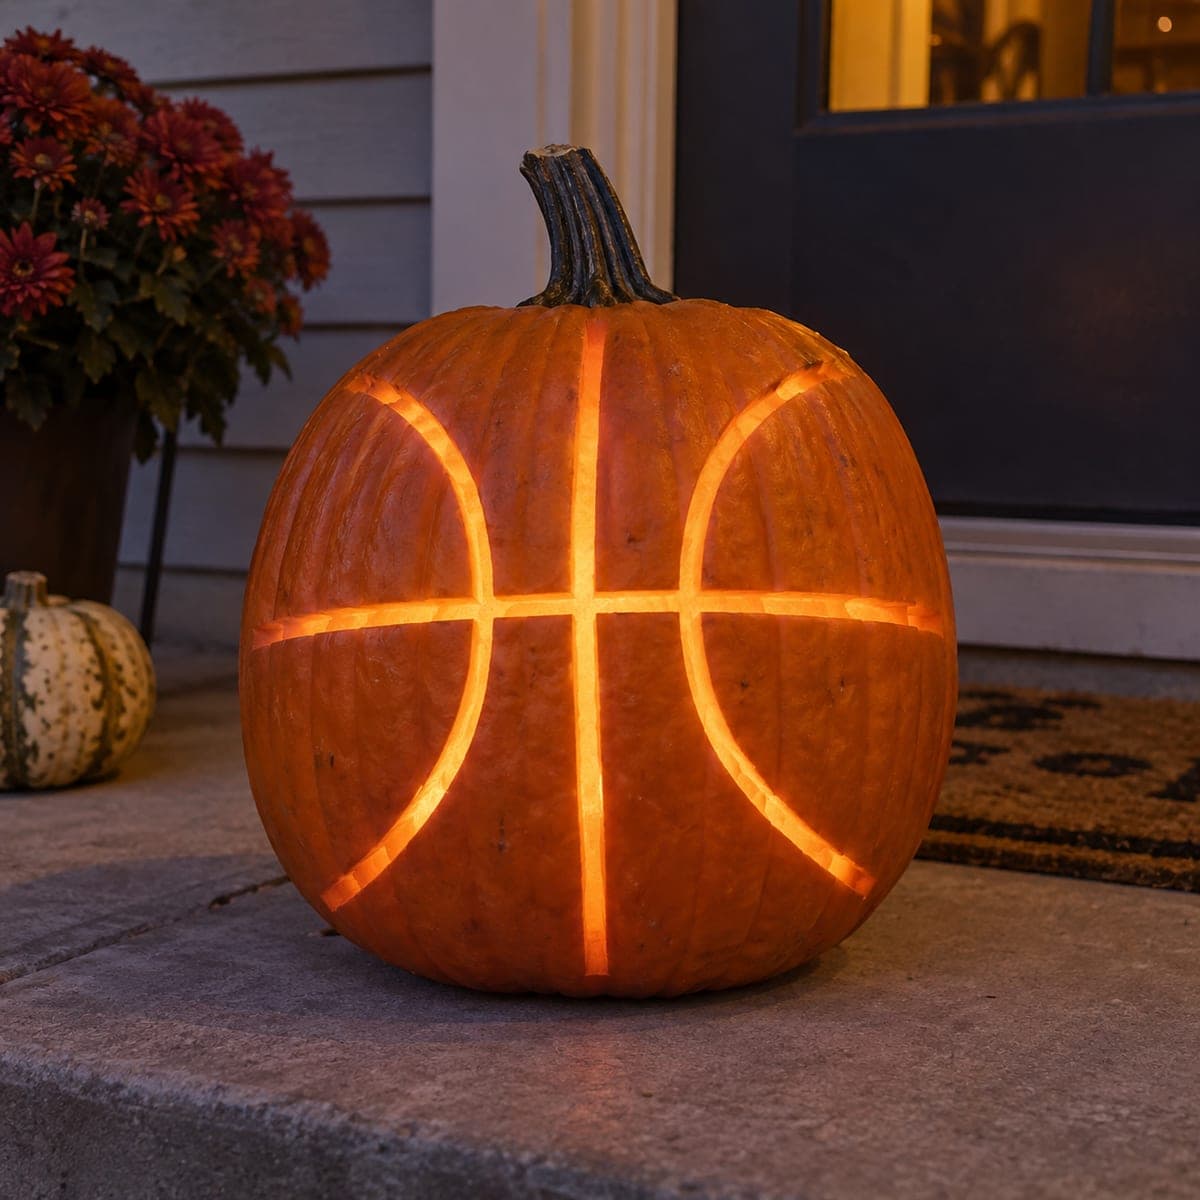
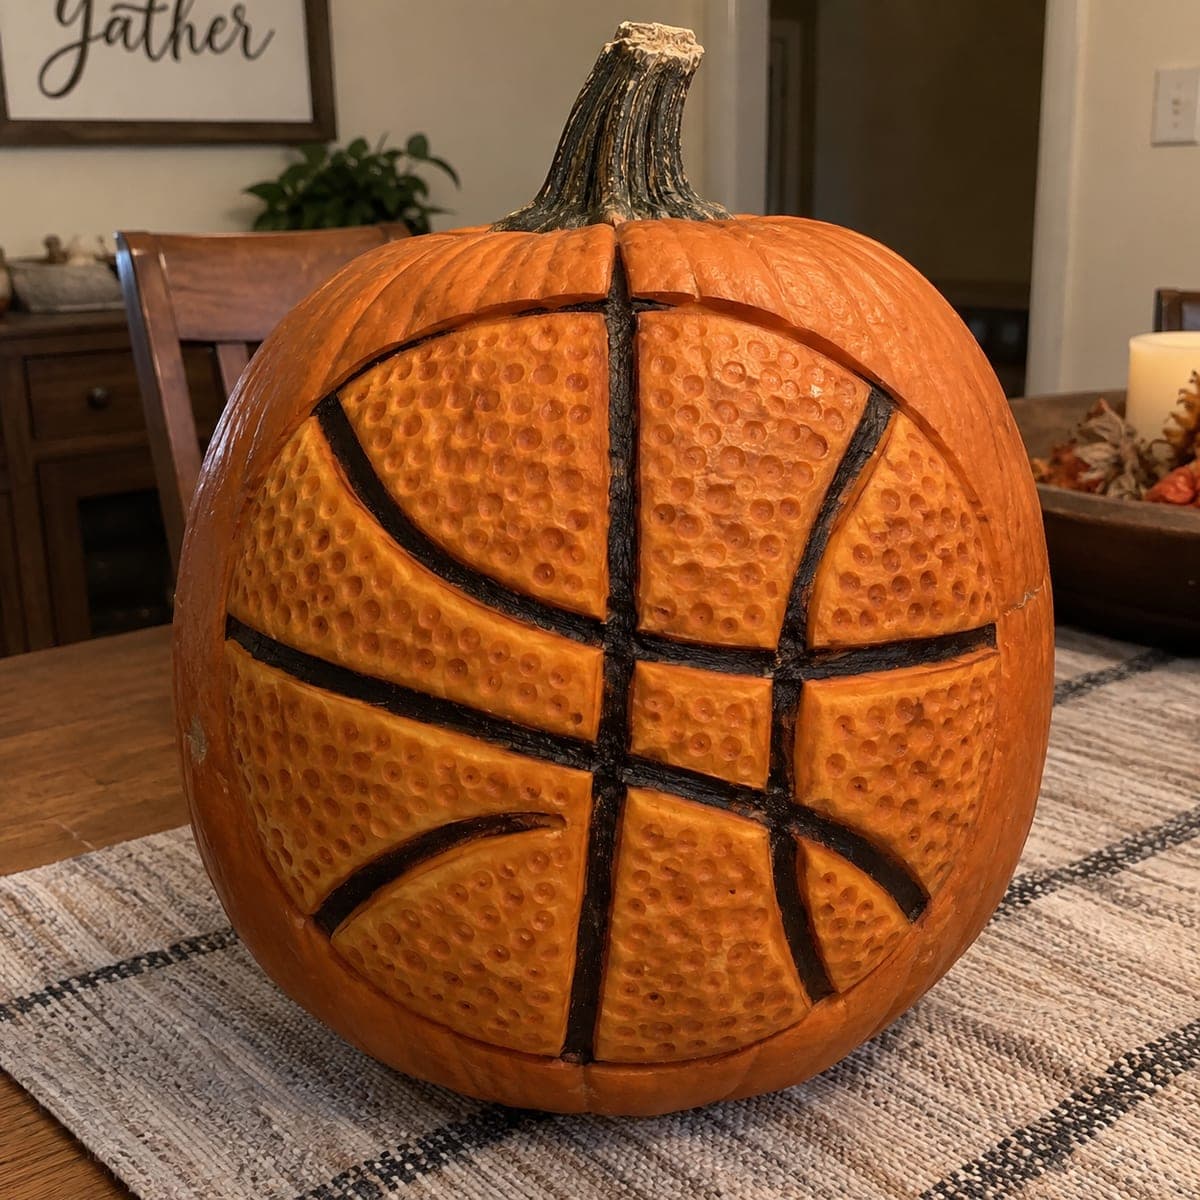
This pumpkin becomes a glowing basketball, with deep carved seam lines and an all-over dimpled pebble texture that catches the interior light. The pumpkin's round shape does half the work; the seams are wide shallow channels and the texture is thousands of small dots pressed with a ball tool or drilled at a consistent shallow depth. Carve the seams first so the panels are defined, then dimple panel by panel. A slam dunk for hoops fans and team-party porches.

This is an AI-generated concept image: a realistic, carvable design idea rather than a photo of a finished carve. AI concepts are always labeled and sit out the leaderboard and the contest.

No ratings yet · Sign in to rate
Comments (0)

  • No comments yet — be the first.

Save without an account. Sign in to like or comment.

Our tips for carving a similar design

The core trick is letting the pumpkin's natural round shape read as the ball while the surface does the storytelling. You carve five wide, shallow seam channels to divide the panels, then fill each panel with a field of shallow dimples that glow when the interior LED shines through the thinned skin. Nothing is cut all the way through, so the whole design stays strong and even.

Written by PumpkinCarvingIdeas.com, inspired by the image above. These are our suggestions, not instructions from the uploader. This approach to the AI concept has not been tested on a real pumpkin.

From pumpkin to porch

  1. Pick a round pumpkin and open the base

    Choose the roundest, most symmetrical pumpkin you can find so it already reads like a ball. Have an adult cut a wide access hole in the bottom rather than the top, so the stem stays as a fun handle detail. Scrape the inside wall behind your carving area down to about one inch thick with a sturdy loop tool. A thinner, even wall lets light pass through the dimples later.

  2. Map the five basketball seams

    With a washable marker, draw the classic basketball layout: one seam that curves around like a vertical circle and two more that arc out from it to form the side panels. Step back often and check that the panels look balanced from the front. Keep the lines smooth and continuous, since these channels define the whole design. Redraw until it looks right before any blade touches the skin.

  3. Carve the seam channels

    Use a small gouge or V-tool to cut wide, shallow grooves along your seam lines, removing only the outer skin and a little flesh. Aim for a consistent depth so the seams glow evenly instead of poking through as bright cuts. Keep the channels smooth and rounded rather than sharp, which matches a real ball's grooves. Do not cut all the way through, and let the seams stay slightly deeper than the dimples so they glow a touch brighter.

  4. Dimple the panels

    Working one panel at a time, press or drill a grid of small, evenly spaced dots with a ball-end clay tool or a shallow drill stop. Keep every dimple to the same gentle depth so the panel glows as one soft texture rather than random bright spots. Follow the curve of each panel and keep your spacing tight and regular for that pebbled leather look. Take breaks to rotate the pumpkin and check the pattern stays consistent.

  5. Test the glow and even it out

    Set a battery LED puck inside and view the pumpkin in a dark room. Panels that stay dull need a touch more scraping from the inside or slightly deeper dimples; spots that blow out too bright were cut too thin, so leave those alone. Adjust gradually, since you can always remove more but cannot add flesh back. Aim for a warm, even pebble glow across all the panels.

  6. Stage and photograph

    Wipe the surface, coat cut edges with a little petroleum jelly to slow drying, and place the pumpkin on a porch bench or step. Use a warm white LED for that firelit orange tone and avoid open flame near the deep texture. Shoot at dusk so the dimples read against the fading light. A doormat or team decor nearby sells the game-day theme.

Gather your supplies

Check things off as you get ready.

Work on a stable surface, keep your free hand out of the cutting path, and have an adult handle sharp tools.

Three levels of light

  • Leave intact

    The untouched outer skin around the stem and lower body stays dark, framing the ball shape.

  • Peel & shade

    The dimpled panels glow a soft, even mid orange as light passes through the thinned pebble texture.

  • Cut through

    The seam channels are gouged deepest, so they read as the brightest glowing lines dividing the panels.

Learn the carving basics

Before you start cutting

How do I keep the dimples from glowing unevenly?

Consistent depth is everything, so use a drill stop or mark your ball tool at a set depth and press to that line every time. Thin the interior wall evenly first so no panel is thicker than another. Test with the LED inside partway through and fix dull or bright spots before moving on.

Should I cut the seams all the way through?

No, keep them as shallow channels that only remove skin and a little flesh. Cutting through would leave bright gaps that look like cracks, not basketball grooves, and would weaken the panels. A gentle glowing line reads far more like a real ball seam.

This is a lot of dimples. How long does it take?

Plan on a couple of hours for the texture alone, since a full ball can take several hundred to a thousand dots. Work panel by panel and take breaks to rest your hand and check spacing. Carve it the day you plan to display it, because all that thinned skin dries and shrivels faster than a simple cutout.

Your take belongs here, too.

Changed a detail? Made it simpler? Share a photo of your version and tell the community what worked.

Share your pumpkin

More pumpkins like this

You've reached the end · 8 pumpkins
The Patch Report

Fresh pumpkins, in your inbox.

The best new carvings, ideas worth stealing, and how-tos for carving season. Short, seasonal, and gone by November.

A short email during carving season. Unsubscribe anytime. See our privacy policy.