Halloween Pumpkin Carving Contest · Starts October 1st · $500 in prizes
← Back to ideas
@ai_concepts
Sep 4, 2026
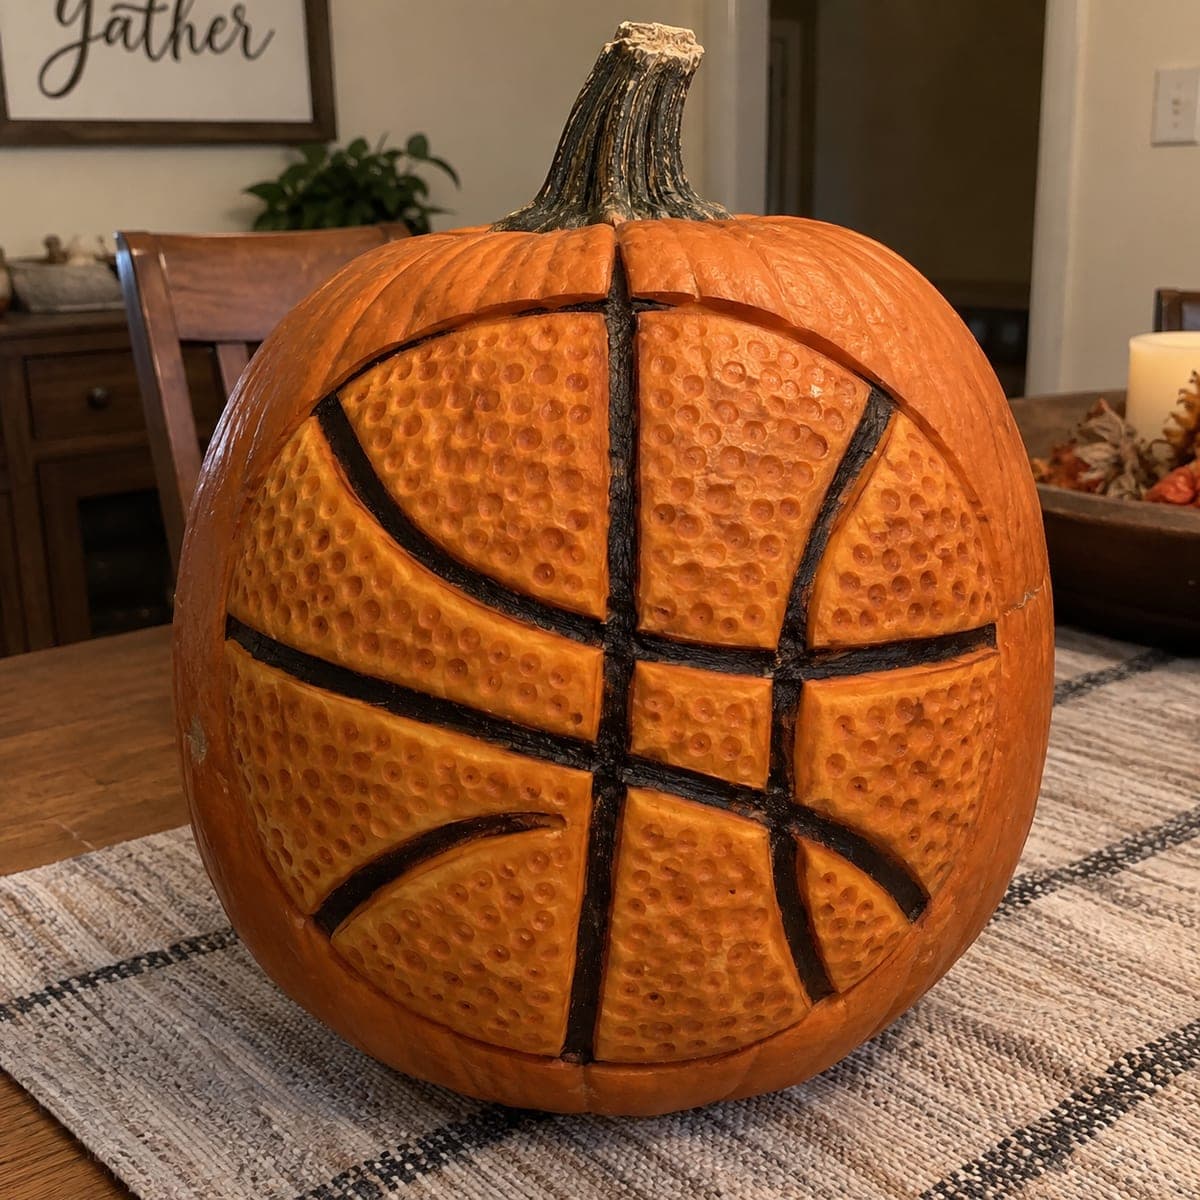
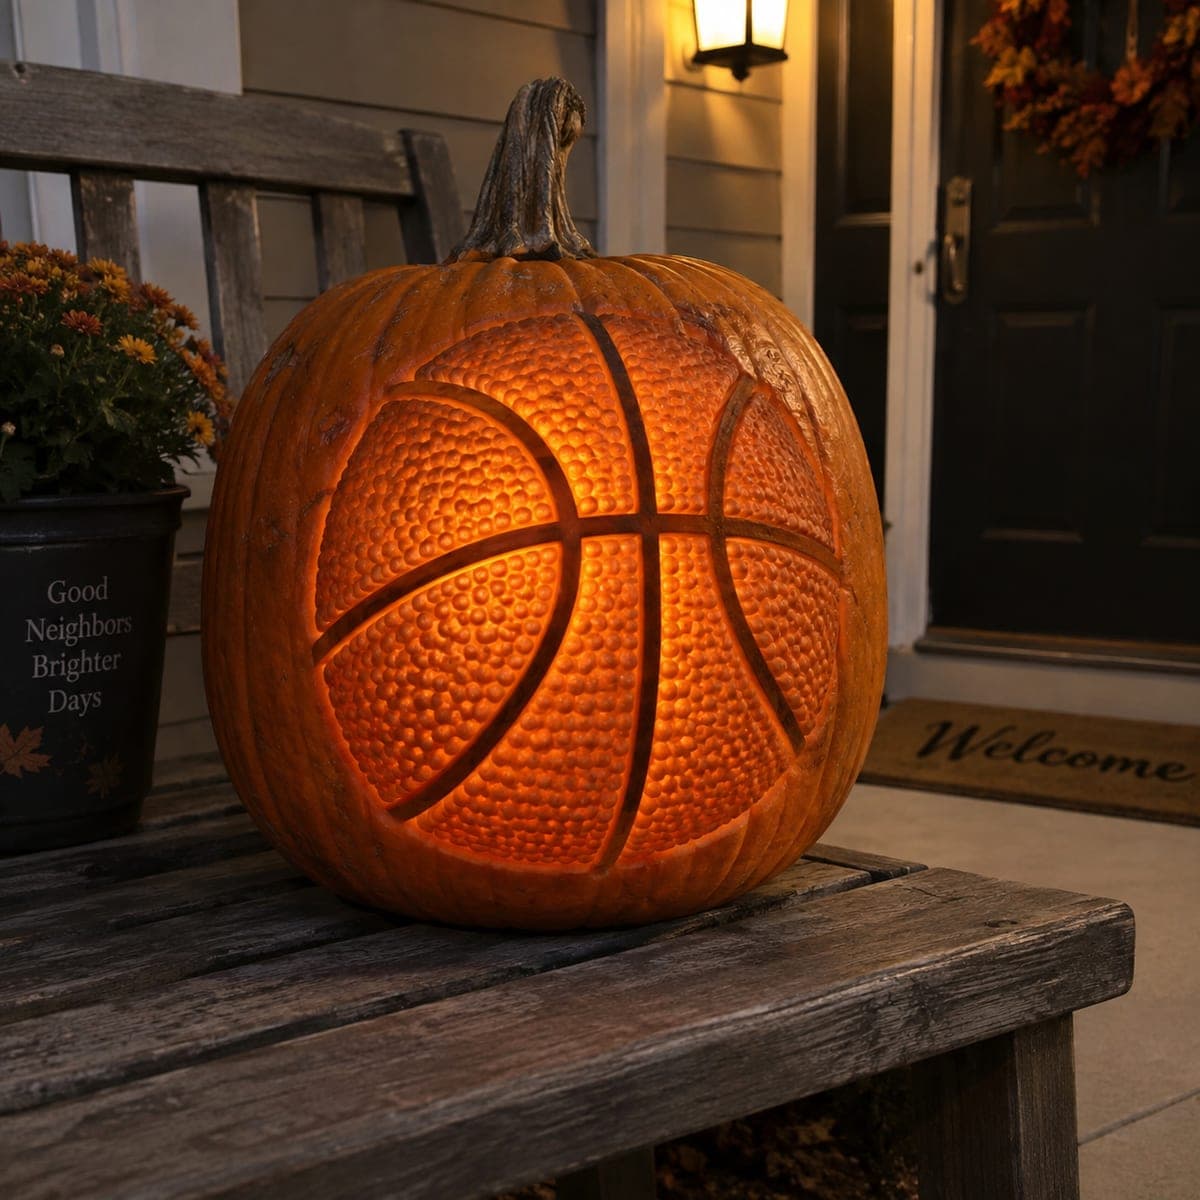
Realistic Basketball Carved Pumpkin for Sports FansAI
0

Realistic Basketball Carved Pumpkin for Sports Fans

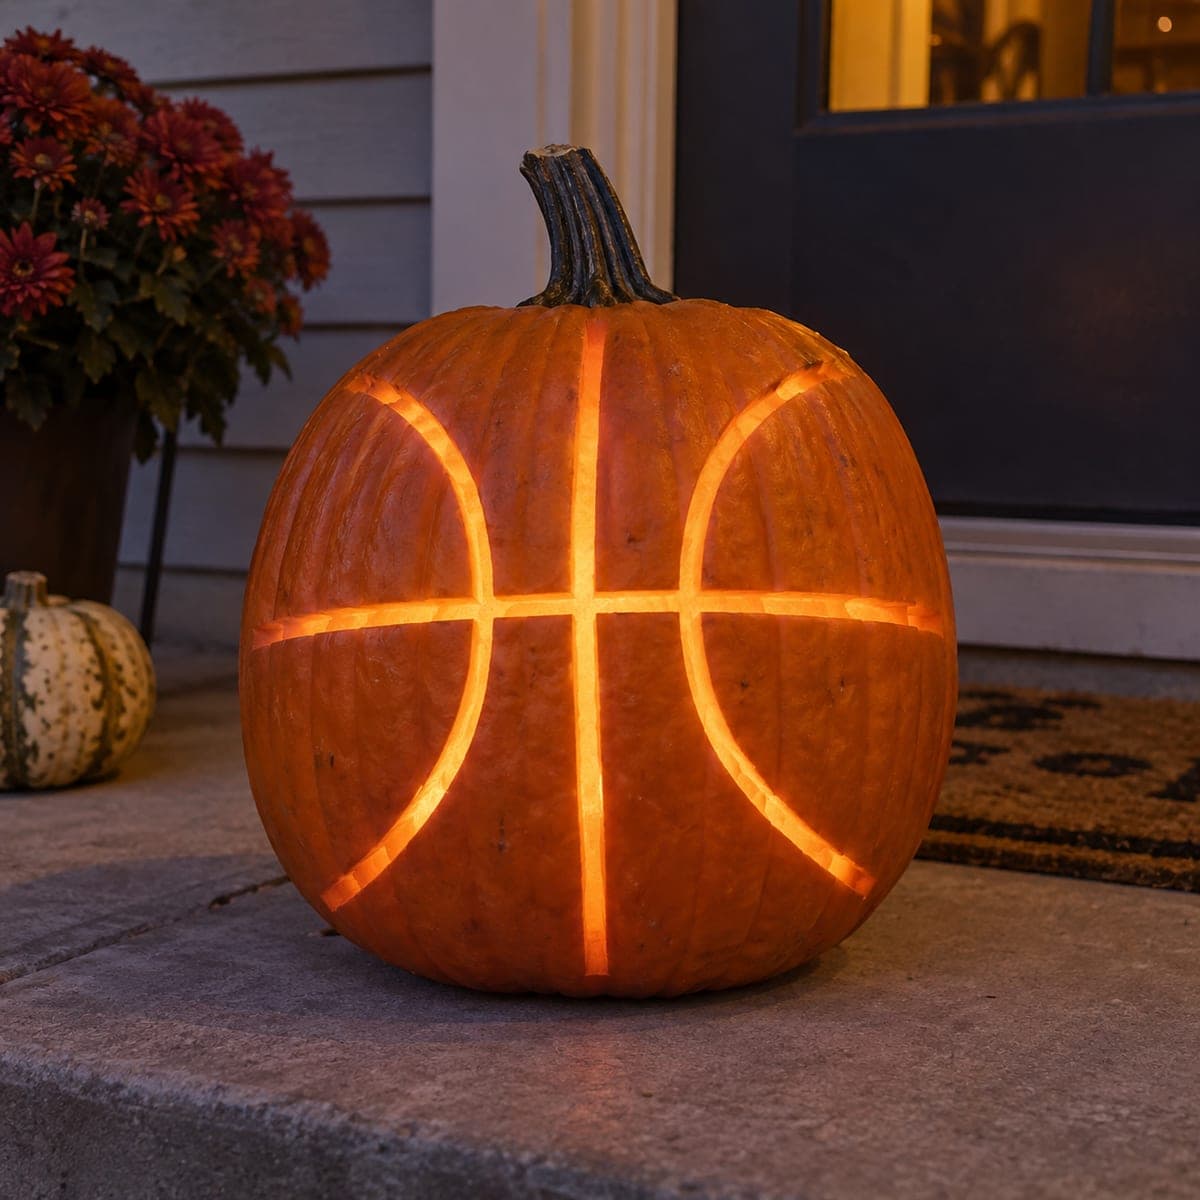
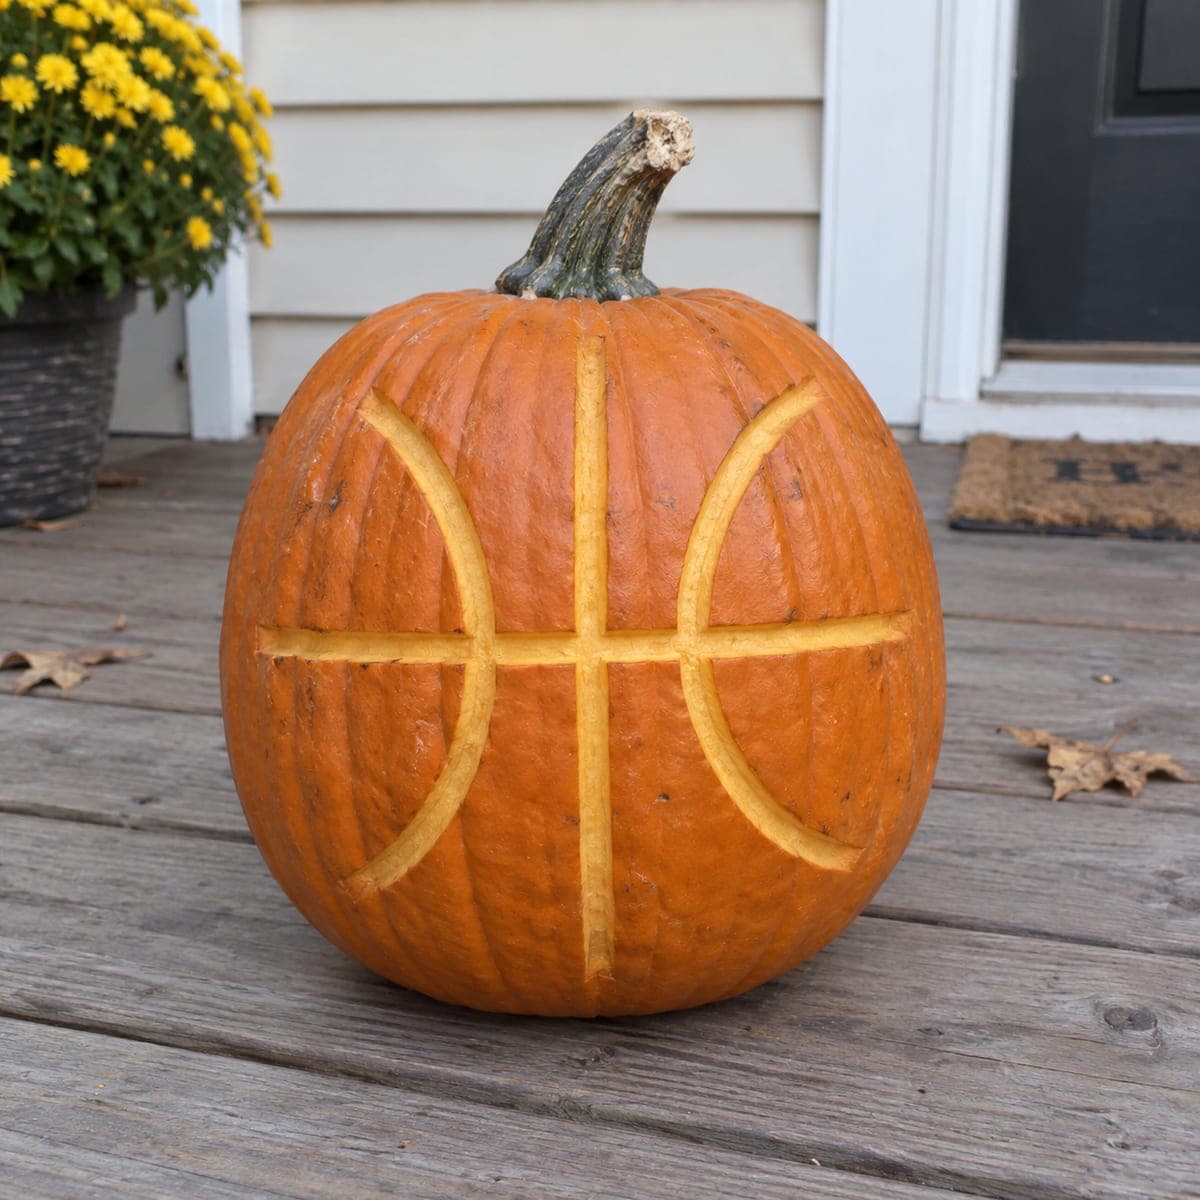
Carved pebble texture and deep black seam lines turn this round pumpkin into a convincing basketball, a slam dunk decoration for a hoops household. A naturally spherical pumpkin does half the work, so shop for shape first. Rout the curved seams with a V-gouge and darken them with black acrylic, then stamp the dimpled texture across each panel using the tip of a ballpoint pen or a small melon baller.

This is an AI-generated concept image: a realistic, carvable design idea rather than a photo of a finished carve. AI concepts are always labeled and sit out the leaderboard and the contest.

No ratings yet · Sign in to rate
Comments (0)

  • No comments yet — be the first.

Save without an account. Sign in to like or comment.

Our tips for carving a similar design

The core trick here is treating the pumpkin as a giant basketball, letting its natural round shape do half the work while carved seams and dimpled texture sell the illusion. The plan is to shade curved seam lines with a V-gouge and black acrylic, then stamp thousands of tiny dimples across each panel for that pebbled leather look. Because this is a concept image, think of it as surface work rather than a hollow lantern, so almost nothing gets cut all the way through.

Written by PumpkinCarvingIdeas.com, inspired by the image above. These are our suggestions, not instructions from the uploader. This approach to the AI concept has not been tested on a real pumpkin.

From pumpkin to porch

  1. Shop for shape and prep

    Pick the roundest, most symmetrical pumpkin you can find, since the sphere is doing most of the work. Wipe it clean and dry, then set it on the surface where it sits most evenly so your seam layout stays balanced. You can leave the pumpkin solid for a pure surface design, or have an adult cut a small lid at the very back if you want to add an LED later. Keep the stem as the top reference point.

  2. Draw the seam layout

    With a washable marker, sketch the classic basketball lines: one vertical seam, one horizontal seam, and two curved arcs that sweep around the sides. Step back often to check that the curves are even and mirror each other. Adjust freely while it is still just marker. Getting these lines right now saves a lot of grief later.

  3. Rout the seams with a V-gouge

    An adult should trace each marked line with a V-gouge, carving a shallow channel rather than cutting through the wall. Keep the depth even, around a quarter inch, and let the tool follow the curve slowly. Do not try to cut all the way through, since these seams need to stay as grooves for the paint to sit in. Clean out any stringy bits so the channels are crisp.

  4. Stamp the pebbled texture

    Across each panel, press the rounded tip of a ballpoint pen or a small melon baller into the skin to make tiny dimples. Work in loose rows and keep the spacing fairly even so it reads as leather grain. Leave the shading of the skin intact between dimples for contrast. Take your time here, since the density of the texture is what makes it convincing.

  5. Darken the seams

    Once the pumpkin is dry, brush black acrylic paint into each V-gouge channel with a fine brush. Wipe any stray paint off the raised skin right away with a damp cloth. Let it dry fully, then add a second coat if the black looks thin. The deep black lines against the orange panels are what make it pop.

  6. Style and photograph

    Set the finished basketball on a table runner or near other fall decor and let daylight or a warm lamp show off the texture. If you cut a back lid, tuck a battery LED inside for a soft evening glow, never a candle. Shoot from slightly above to catch the dimples and seams. Snap a few angles before the pumpkin starts to soften.

Gather your supplies

Check things off as you get ready.

Work on a stable surface, keep your free hand out of the cutting path, and have an adult handle sharp tools.

Three levels of light

  • Leave intact

    The pebbled panels keep their orange skin, staying warm and matte like leather.

  • Peel & shade

    Lightly scraping a panel or two would give a softer, brighter orange if you want subtle glow under an LED.

  • Cut through

    Only an optional small back lid gets cut through, purely for access, not as a visible opening on the front.

Learn the carving basics

Before you start cutting

How do I keep the four seams even and symmetrical?

Mark everything in washable marker first and check the layout from several angles before any tool touches the pumpkin. Use the stem as your top center point so the vertical seam lines up. If a curve looks off, just wipe it and redraw until both arcs mirror each other.

Will the black paint smear onto the orange skin?

It can, so keep a damp cloth handy and wipe stray paint off the raised skin immediately. Use a fine brush and load it lightly, working the paint down into the V-gouge channels. Let each coat dry before adding another.

Should I light this pumpkin from inside?

This design reads best as a surface carving lit from outside by daylight or a lamp, since the panels are not cut through. If you want an evening glow, have an adult cut a small lid at the back and drop in a battery LED. Skip candles entirely to avoid scorching the thin seams.

Your take belongs here, too.

Changed a detail? Made it simpler? Share a photo of your version and tell the community what worked.

Share your pumpkin

More pumpkins like this

You've reached the end · 8 pumpkins
The Patch Report

Fresh pumpkins, in your inbox.

The best new carvings, ideas worth stealing, and how-tos for carving season. Short, seasonal, and gone by November.

A short email during carving season. Unsubscribe anytime. See our privacy policy.