Halloween Pumpkin Carving Contest · Starts October 1st · $500 in prizes
← Back to ideas
@ai_concepts
Sep 5, 2026
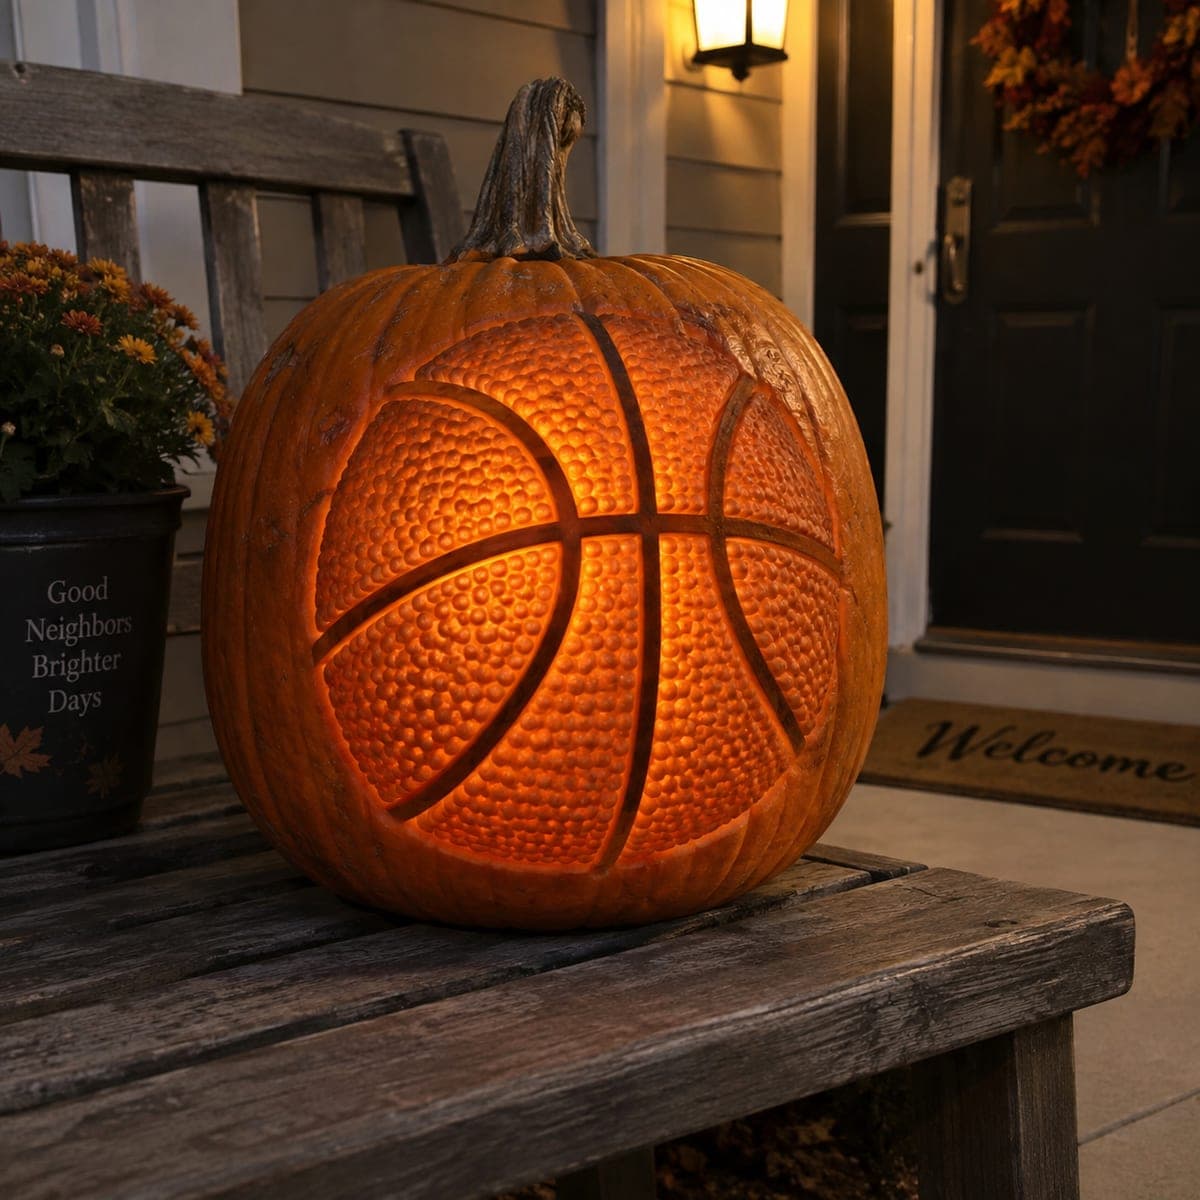
Basketball Jack-O-Lantern With Glowing Seam LinesAI
0

Basketball Jack-O-Lantern With Glowing Seam Lines

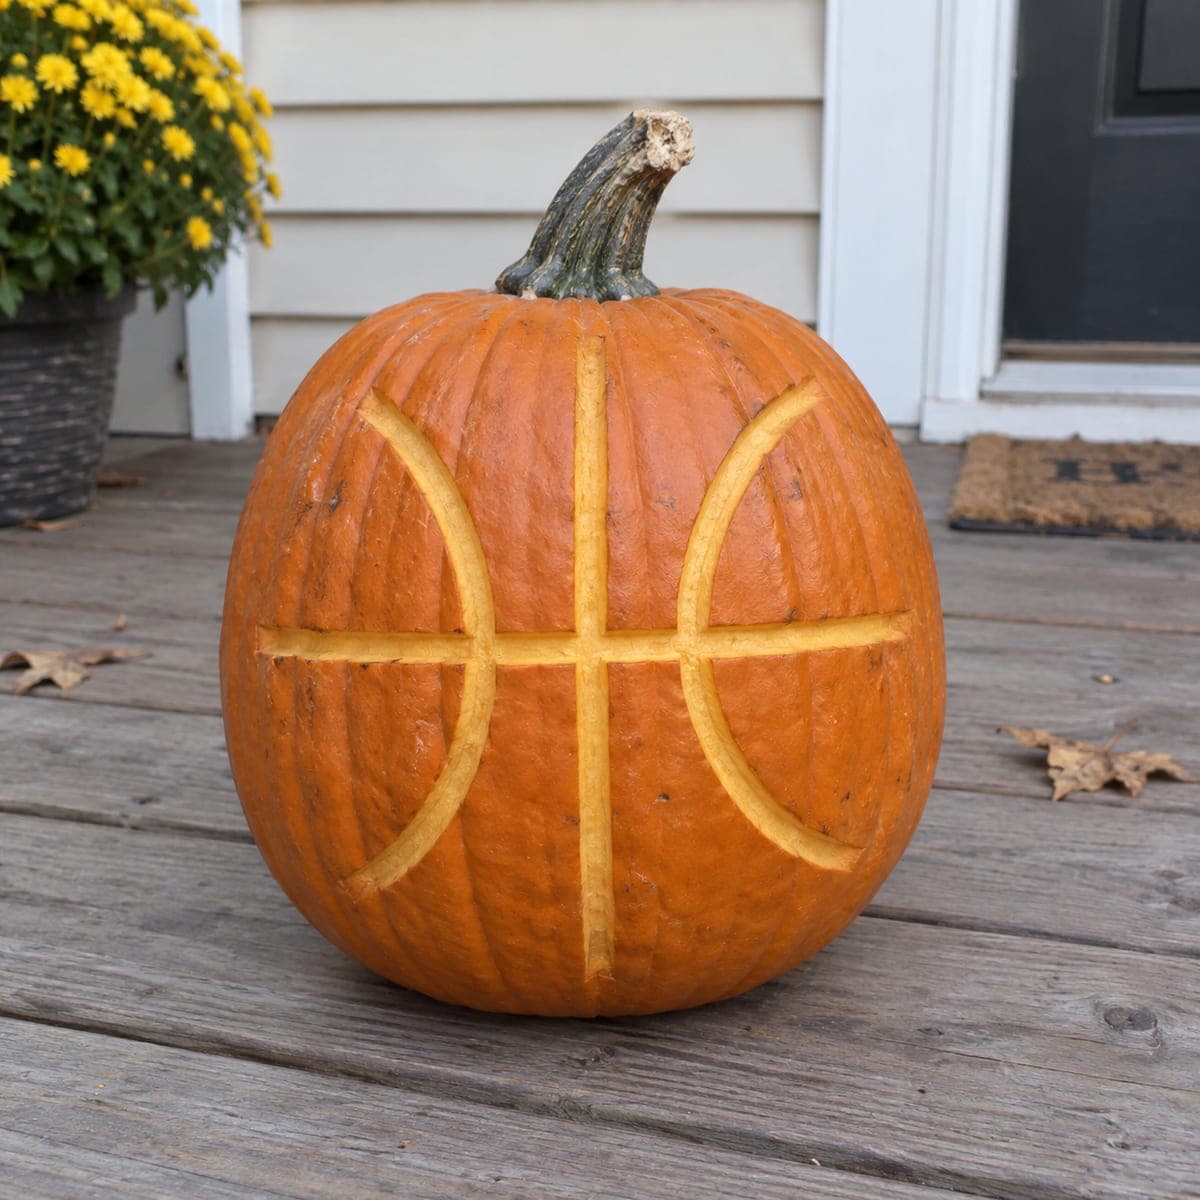
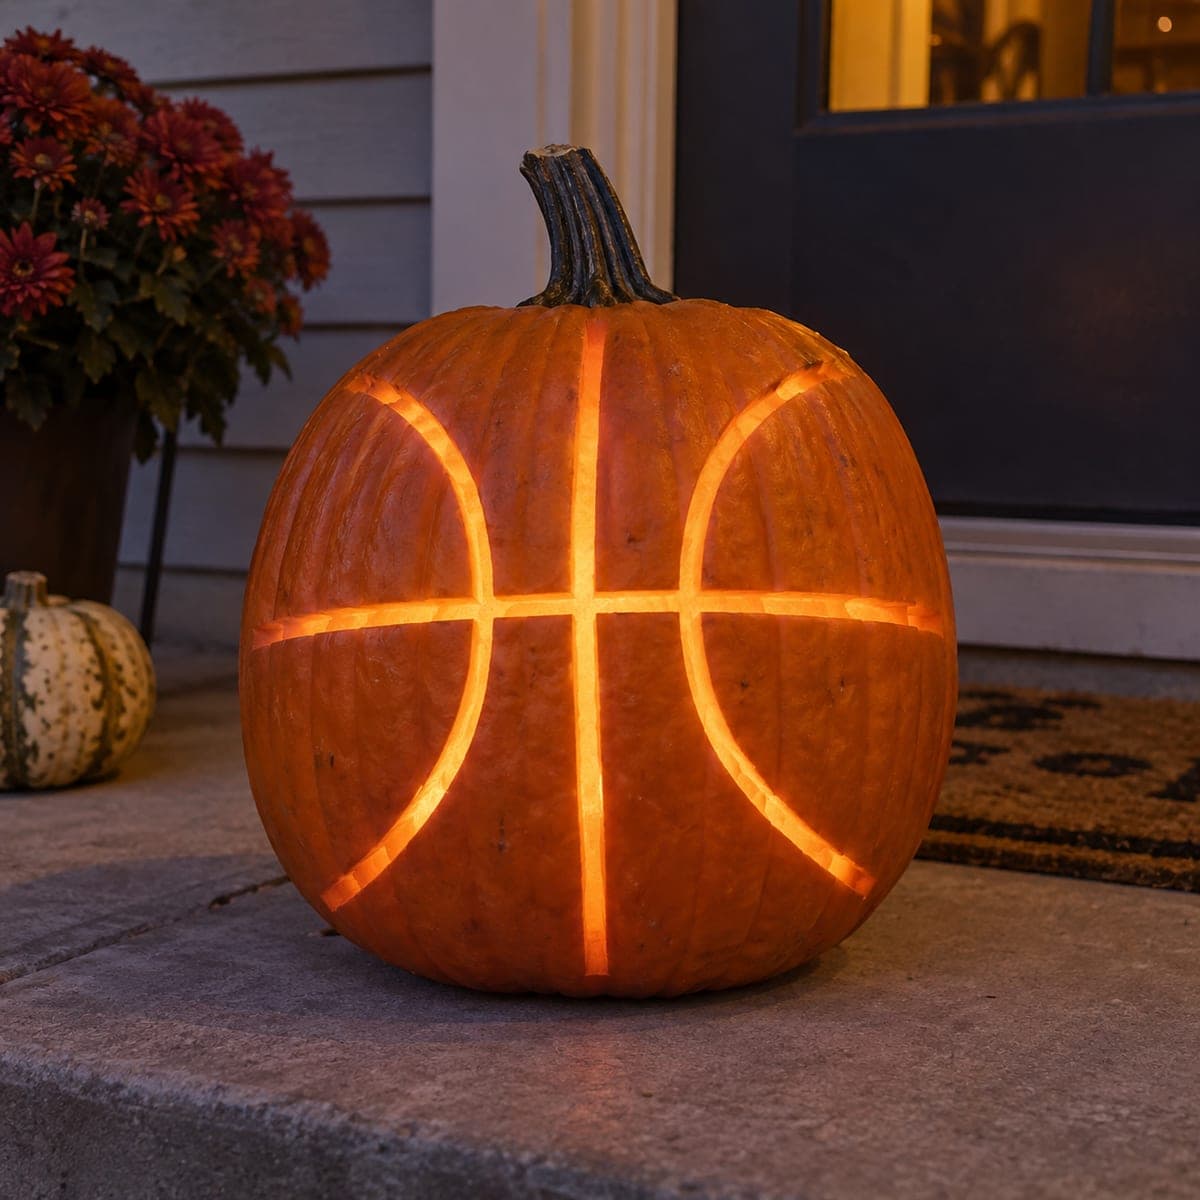
Glowing seam lines turn a round orange pumpkin into a giant basketball, a slam-dunk pumpkin carving idea for a sports fan's porch. Only the ball's channel lines are cut through, so the whole project needs just a few long curved strokes. Draw the center vertical and horizontal lines first, add the two side arcs, and cut each channel about a half inch wide so the light reads from the street.

This is an AI-generated concept image: a realistic, carvable design idea rather than a photo of a finished carve. AI concepts are always labeled and sit out the leaderboard and the contest.

No ratings yet · Sign in to rate
Comments (0)

  • No comments yet — be the first.

Save without an account. Sign in to like or comment.

Our tips for carving a similar design

The core trick here is that only the basketball's seam lines get cut through, so a naturally round orange pumpkin does most of the work for you. You draw the center vertical and horizontal lines, add the two curved side arcs, then cut each seam as a narrow channel about a half inch wide. Because the light only escapes through those thin lines, the whole ball pattern reads clearly from the street.

Written by PumpkinCarvingIdeas.com, inspired by the image above. These are our suggestions, not instructions from the uploader. This approach to the AI concept has not been tested on a real pumpkin.

From pumpkin to porch

  1. Pick a round pumpkin and plan the lines

    Choose the roundest, most even pumpkin you can find, since the shape sells the basketball look. Wipe the skin clean and dry. To copy this design, picture the classic basketball seams: one line straight down the center front, one straight across the middle, and a gentle arc curving down each side. A rounder pumpkin means smoother, more believable seams.

  2. Open the pumpkin and clean it out

    An adult should cut a lid from the bottom rather than the top so the stem stays intact for looks. Scoop out the seeds and pulp, then scrape the front wall down to about one inch thick with a sturdy spoon or scraper. A thinner wall makes the channels easier to cut and lets more light glow through. Save the seeds for roasting if you like.

  3. Draw the seam pattern

    With a washable marker, draw the vertical center line from top to bottom of the front, then the horizontal line straight across so they cross in the middle. Add one long curved arc on each side that sweeps from near the top seam down to the bottom seam. Step back and check that the lines look balanced and evenly spaced. Adjust with a damp paper towel before you cut.

  4. Cut the channels

    An adult should use a small serrated carving saw to cut each seam as a channel about a half inch wide, following your drawn lines. Cut the two crossing center lines first while the pumpkin is strongest, then do the side arcs. Keep steady, shallow strokes and let the saw do the work rather than forcing it. Push the cut pieces inward and out to keep the edges clean.

  5. Light it and test from the street

    Set a battery LED light or two inside, since candles can scorch the thin walls and are a fire risk. Skip flames entirely on a porch piece like this. Turn the lights out and check that every seam glows evenly. If any line looks dim, widen that channel slightly or thin the wall just behind it.

  6. Stage and photograph

    Place the pumpkin on a flat porch step with the seams facing the walkway. Fall mums or a second plain pumpkin nearby frame it nicely without competing. Shoot at dusk when the glow reads strongest against the darker background. Take your photo slightly off center so the round shape stays obvious.

Gather your supplies

Check things off as you get ready.

Work on a stable surface, keep your free hand out of the cutting path, and have an adult handle sharp tools.

Three levels of light

  • Leave intact

    The entire orange surface of the ball stays untouched so it looks like solid basketball leather.

  • Peel & shade

    Optional: lightly scrape the skin just alongside each seam for a soft halo if you want the lines to read wider.

  • Cut through

    The center vertical and horizontal lines plus the two side arcs are cut fully through for bright, crisp glowing seams.

Learn the carving basics

Before you start cutting

How wide should I cut the seam lines?

Aim for about a half inch wide so the light carries to the street without weakening the pumpkin. Thinner lines can look faint from a distance and clog with shadow. If your pumpkin wall is thick, thin it from the inside so the glow comes through evenly.

Will the pumpkin stay strong with all those cuts?

Yes, because the seams are narrow channels rather than large openings, plenty of solid skin remains between them. Cut the two crossing center lines first while the structure is fully intact, then finish with the side arcs. Avoid connecting the lines into one giant hole.

Do I need a stencil or can I freehand it?

Freehand works well here since a basketball is just a few simple lines. Draw them lightly first and check the balance before cutting. If you want perfect symmetry, a simple basketball seam stencil taped to the front gives you clean guide lines to follow.

Your take belongs here, too.

Changed a detail? Made it simpler? Share a photo of your version and tell the community what worked.

Share your pumpkin

More pumpkins like this

You've reached the end · 8 pumpkins
The Patch Report

Fresh pumpkins, in your inbox.

The best new carvings, ideas worth stealing, and how-tos for carving season. Short, seasonal, and gone by November.

A short email during carving season. Unsubscribe anytime. See our privacy policy.