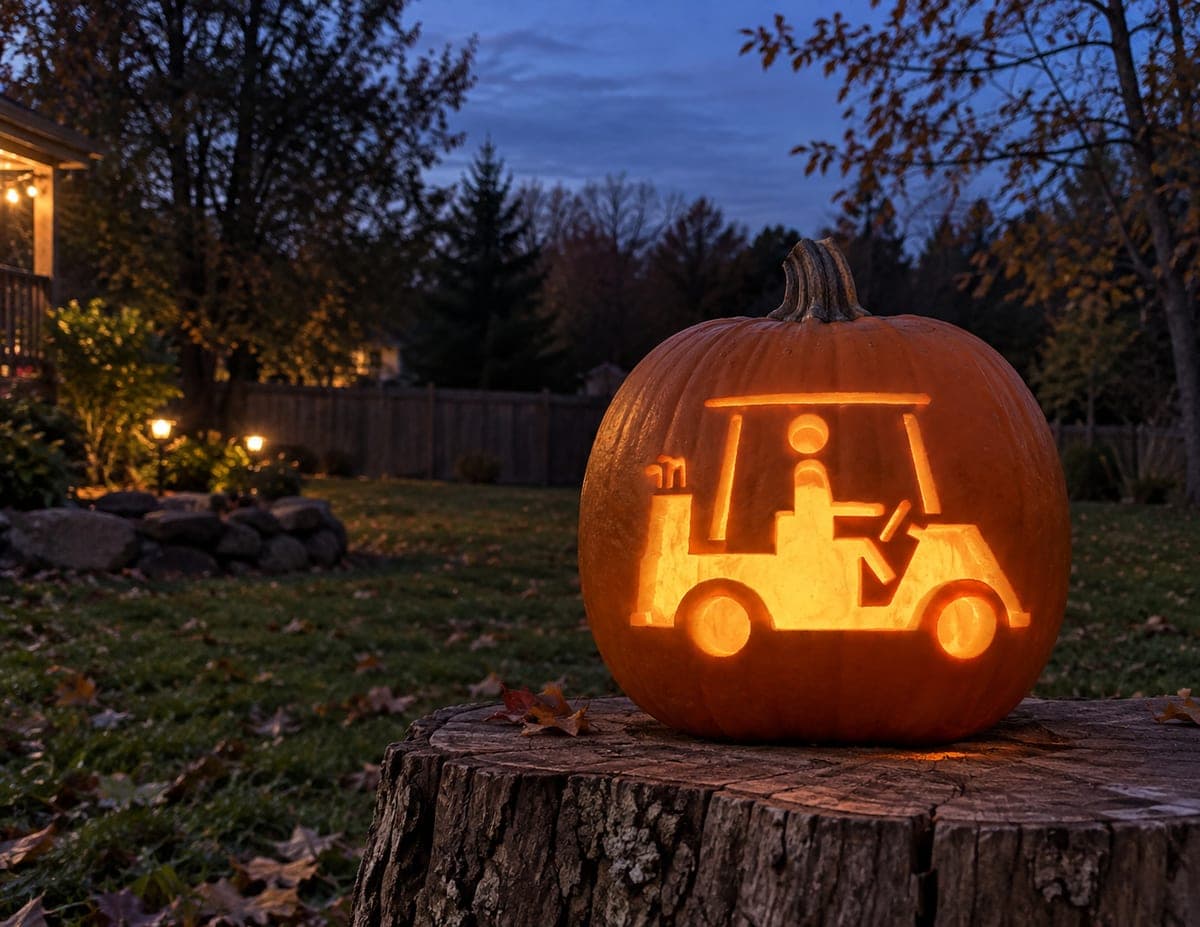
A golf cart is cut through the rind with a circular-headed driver seated under a flat canopy roof, two large round wheels below, and a golf bag visible at the rear, all outlined against the glowing pumpkin interior. The driver's round head and the wheel circles are the smallest enclosed shapes, so pierce those first with a drill bit or a pointed knife tip before cutting the larger cart body sections. Positioning this pumpkin carving idea on a stump or elevated surface gives viewers the side profile at eye level, where all the cart details read best.
This is an AI-generated concept image: a realistic, carvable design idea rather than a photo of a finished carve. AI concepts are always labeled and sit out the leaderboard and the contest.
The core trick here is a bold silhouette read from the side, where the whole cart, driver, and golf bag glow as clean cutouts against a dark rind. Plan the design so the tiny shapes, the driver's round head and the two wheel circles, go first while the pumpkin wall is still strong, then open the larger cart body and canopy last. Keep a few thin uncut ribs between the roof, posts, and body so nothing sags.
Written by PumpkinCarvingIdeas.com, inspired by the image above. These are our suggestions, not instructions from the uploader. This approach to the AI concept has not been tested on a real pumpkin.
From pumpkin to porch
1
Prep the pumpkin and pick your side
Choose a tall pumpkin with a smooth, flat face so the side-profile cart reads clearly. Cut a lid from the bottom or back rather than the top so the stem stays intact and the silhouette is unbroken. Scoop the inside until the front wall is about one inch thick, which makes clean cutting easier. Let an adult handle the large knife for the opening cut.
2
Transfer the design
Print or draw the golf cart at a size that fits your pumpkin's flat face with margin on all sides. Tape the stencil down, then poke the outline with a pushpin or transfer tool, spacing dots close on the small curves. Peel the paper and connect the dots lightly with a marker so you can see the shapes clearly.
3
Pierce the smallest shapes first
Start with the driver's round head and the two wheel circles while the wall is still fully supported. Use a small drill bit or a pointed knife tip to make the first entry, then work a fine carving saw around each circle. Doing these tiny enclosed shapes early prevents cracking once the bigger openings weaken the face.
4
Cut the cart body and canopy openings
Move on to the larger open areas of the cart body, the space under the canopy, and the golf bag at the rear. Cut slowly and keep the flat canopy roof connected to the body by leaving the vertical posts uncut. These posts act as bridges, so plan your cuts to stop short of them rather than slicing straight through.
5
Clean the edges for a crisp glow
Trim any ragged inner edges with the tip of your saw so each cutout has a smooth line. Bevel the cuts slightly outward on the back side to let more light escape and sharpen the silhouette. Check that the wheel circles and driver's head are fully open and free of pulp.
6
Light it and stage the photo
Drop in a battery LED puck or string light, never a candle, since the thin bridges near the roof heat up fast. Set the pumpkin on a stump or elevated surface so the side profile sits at eye level for viewers. Shoot at dusk when the sky is still deep blue for the warmest contrast against the glow.
Gather your supplies
Check things off as you get ready.
Work on a stable surface, keep your free hand out of the cutting path, and have an adult handle sharp tools.
Three levels of light
Leave intact
The uncut rind around the cart and the thin canopy posts stay dark to frame the silhouette.
Peel & shade
Optional shallow skin scraping on the cart roof or bag edge gives a soft dim halo without cutting through.
Cut through
The driver, wheels, cart body, and golf bag are cut clean through for the brightest glow.
How do I keep the flat canopy roof from collapsing?
Leave the vertical support posts between the roof and the cart body uncut so they act as bridges. Cut around them rather than through them, and keep each post at least a quarter inch wide. If a post feels weak, widen it slightly before opening the large body sections.
What order should I cut the shapes in?
Always start with the smallest enclosed shapes, the driver's round head and the two wheel circles, while the wall is still strong. Save the largest openings like the cart body and canopy space for last. This keeps the face from cracking as it loses support.
This is an AI concept image, so can a real pumpkin look like this?
Yes, the design is fully carvable on a real pumpkin as long as you keep the canopy posts and body outlines as connected bridges. Do not try to float the driver or roof as separate pieces. Pick a pumpkin with a broad flat face so all the cart details have room to read.
Your take belongs here, too.
Changed a detail? Made it simpler? Share a photo of your version and tell the community what worked.
Comments (0)