Easy Happy Ghost Cutout Jack-O-Lantern for Beginners
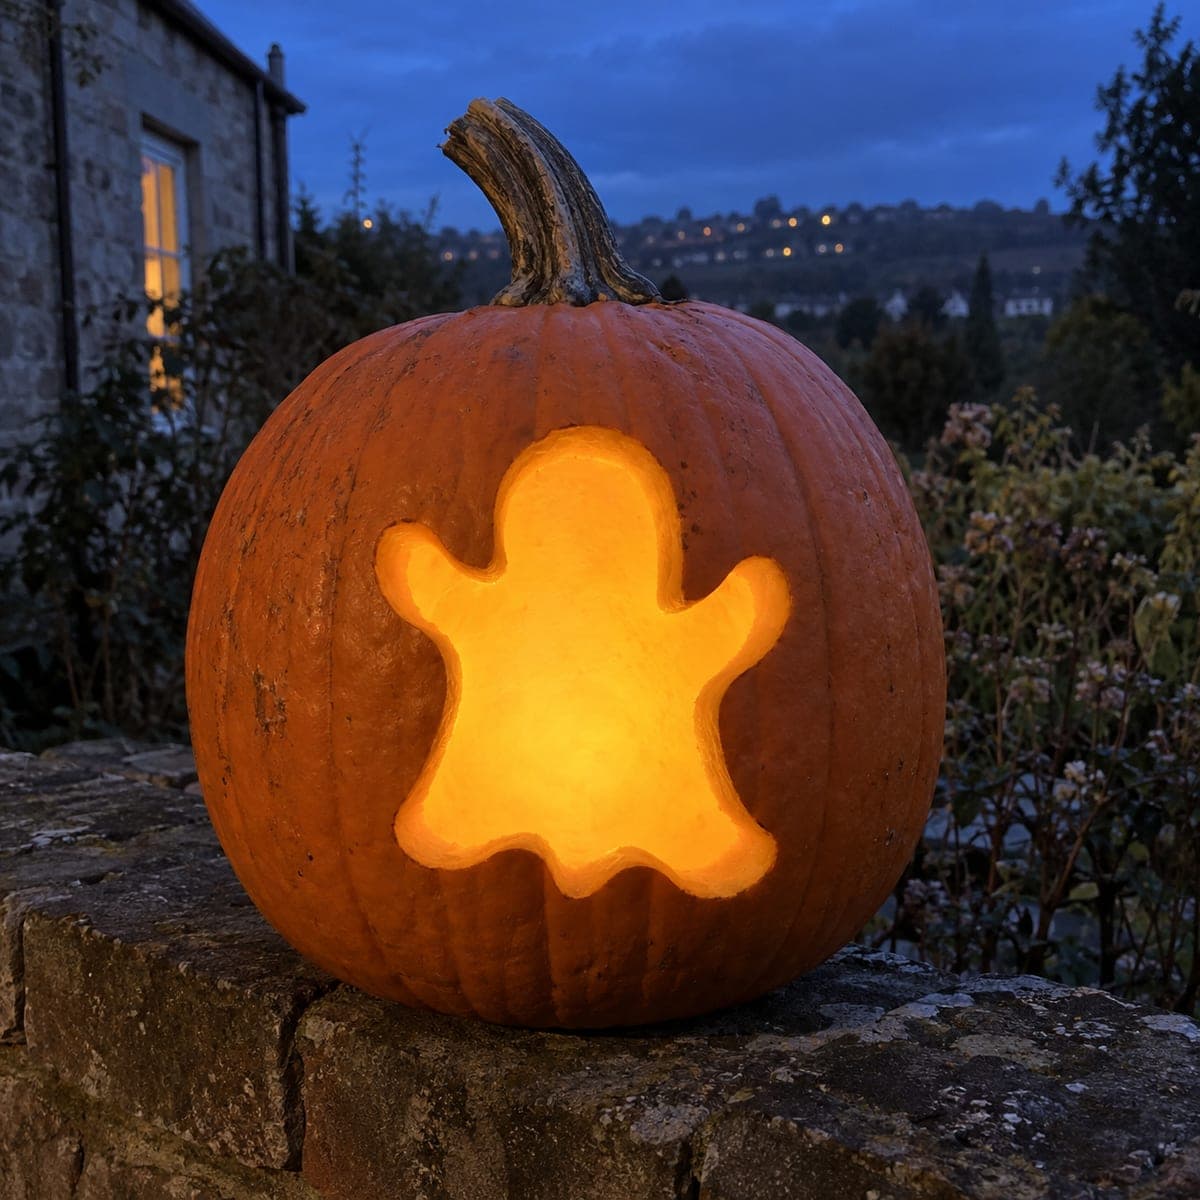
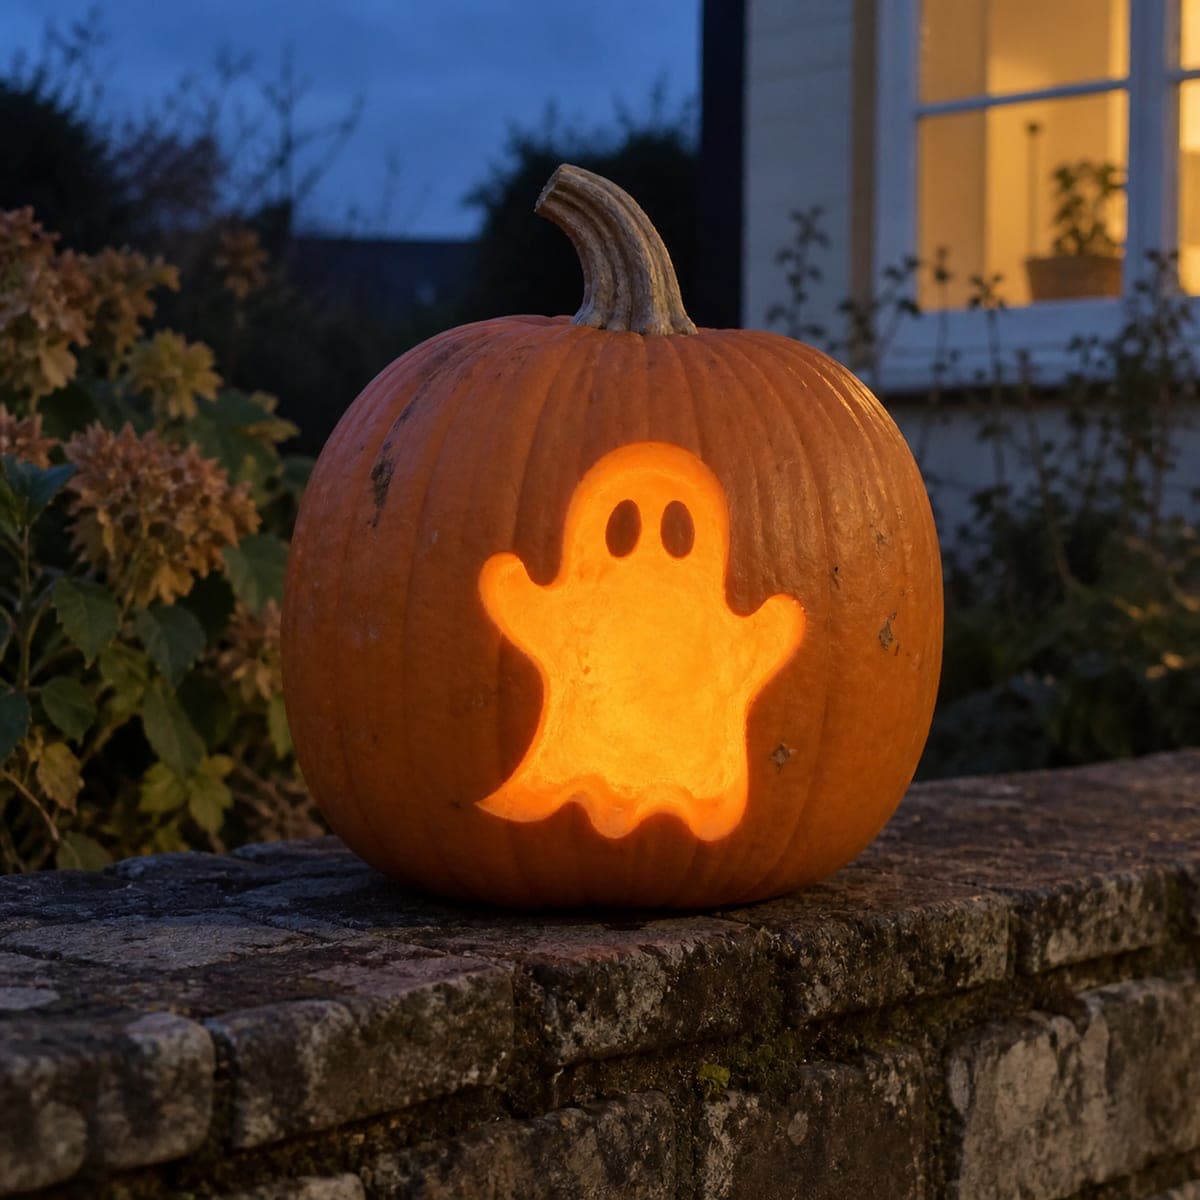
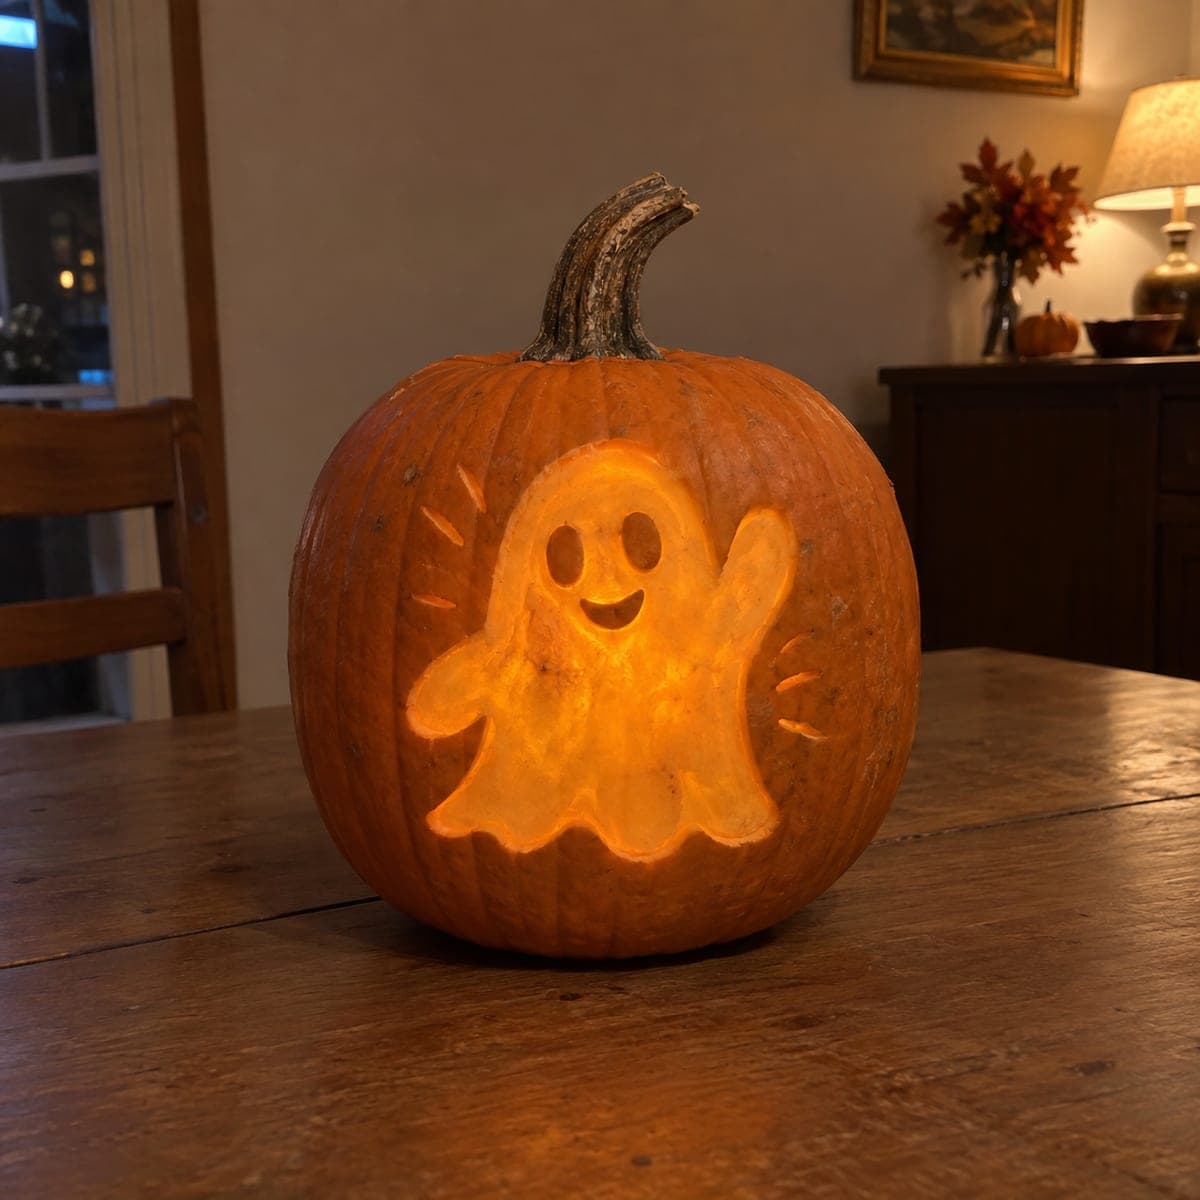
One big friendly ghost, arms up and mouth open, is all this beginner jack-o-lantern needs, cut as a single large opening. Because it is one continuous shape, kids can draw the ghost themselves and an adult can saw it out in ten minutes. Smooth the inside edges with a spoon so the glow is even, and use two tea lights to fill the wide shape.
This is an AI-generated concept image: a realistic, carvable design idea rather than a photo of a finished carve. AI concepts are always labeled and sit out the leaderboard and the contest.
The whole design is one continuous shape, a wide-armed ghost with a scalloped bottom, cut as a single opening so there are no fiddly bridges to worry about. The trick is keeping that shape big and bold, then thinning the pumpkin wall around it so the light spreads evenly across the cutout. Plan it as draw, gut, thin, then cut, and finish with a couple of LED tea lights inside.
Written by PumpkinCarvingIdeas.com, inspired by the image above. These are our suggestions, not instructions from the uploader. This approach to the AI concept has not been tested on a real pumpkin.
From pumpkin to porch
1
Pick the pumpkin and plan the lid
Choose a round pumpkin with a smooth, flat area on one side for the ghost to sit. Cut a lid from the top around the stem, angling the knife inward so the lid rests without falling in. If you prefer, cut a hatch in the back instead, which keeps the front clean and makes it easier to reach the lights. Scoop out the seeds and pulp with a sturdy spoon.
2
Thin the carving wall
Scrape the inside of the front wall until it is about one inch thick where the ghost will go. A thinner wall lets the light glow through and makes cutting far easier. Use an ice cream scoop or a loop tool and work slowly so you do not punch through. Check the thickness by pressing gently from both sides.
3
Draw the ghost
Sketch one big friendly ghost directly on the pumpkin with a washable marker, or tape on a printed stencil. Keep the arms rounded and raised, and give the bottom a gentle wavy edge like a sheet. Make the shape large and simple so it reads well from a distance. This is a great step to let a kid draw the outline themselves.
4
Cut the single opening
An adult should do the cutting with a small serrated pumpkin saw. Start with a poke hole inside the ghost shape, then saw along the outline with slow, steady strokes and let the saw do the work. Because it is one continuous shape, you can cut the whole thing in one pass and lift the piece straight out. Save this big opening for last if you added any small detail cuts elsewhere.
5
Smooth and clean the edges
Run a spoon or your loop tool around the inside edge of the cutout to round it off. Smoothing the edges softens the light and gives that warm, even glow across the whole shape. Wipe away marker lines with a damp cloth. Trim any stringy pulp still clinging near the opening.
6
Light it and photograph
Set two LED tea lights inside, spaced apart so both arms and the body fill with light evenly. Skip real candles, since the wide open shape catches wind and the LEDs give a steadier glow anyway. Place the pumpkin on a low wall or step at dusk and shoot with the background slightly darker than the ghost. A dab of petroleum jelly on the cut edge helps slow drying if it will sit out for days.
Gather your supplies
Check things off as you get ready.
Work on a stable surface, keep your free hand out of the cutting path, and have an adult handle sharp tools.
Three levels of light
Leave intact
The whole orange surface of the pumpkin stays untouched and dark, framing the ghost.
Peel & shade
Optionally shave a thin halo just outside the ghost outline for a soft dim ring around the shape.
Cut through
The entire ghost body, raised arms, and wavy hem are cut clean through for the brightest glow.
No, and that is the beauty of this design. The ghost is one solid opening, so the arms are just part of the outline, not thin standing pieces. There are no fragile bridges to snap, which is why it works so well for beginners and kids.
Why does the inside of the cutout look so evenly lit?
That even glow comes from thinning the front wall and smoothing the cut edges. A wall around one inch thick lets light pass through softly instead of sitting in a hard, dark ring. Rounding the edges with a spoon spreads the light rather than casting a sharp line.
One tea light or two?
Use two for this shape. The ghost is wide, especially across the raised arms, so a single light tends to leave the outer edges dim. Space two LED tea lights apart inside so the whole body fills evenly.
Your take belongs here, too.
Changed a detail? Made it simpler? Share a photo of your version and tell the community what worked.
 AI
AI

Comments (0)