Halloween Pumpkin Carving Contest · Starts October 1st · $500 in prizes
← Back to ideas
@ai_concepts
Sep 14, 2026
Curved-Panel Volleyball PumpkinAI
0

Curved-Panel Volleyball Pumpkin

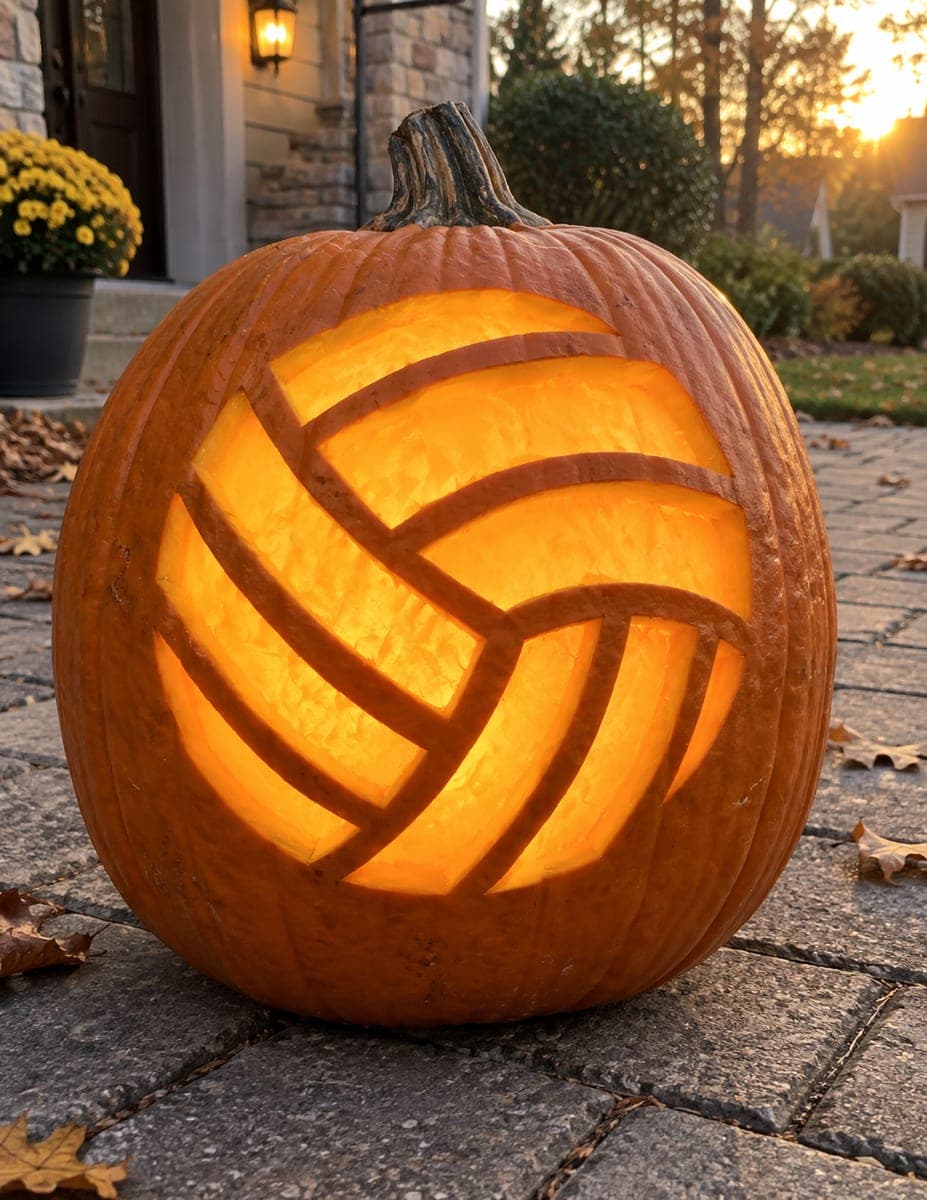
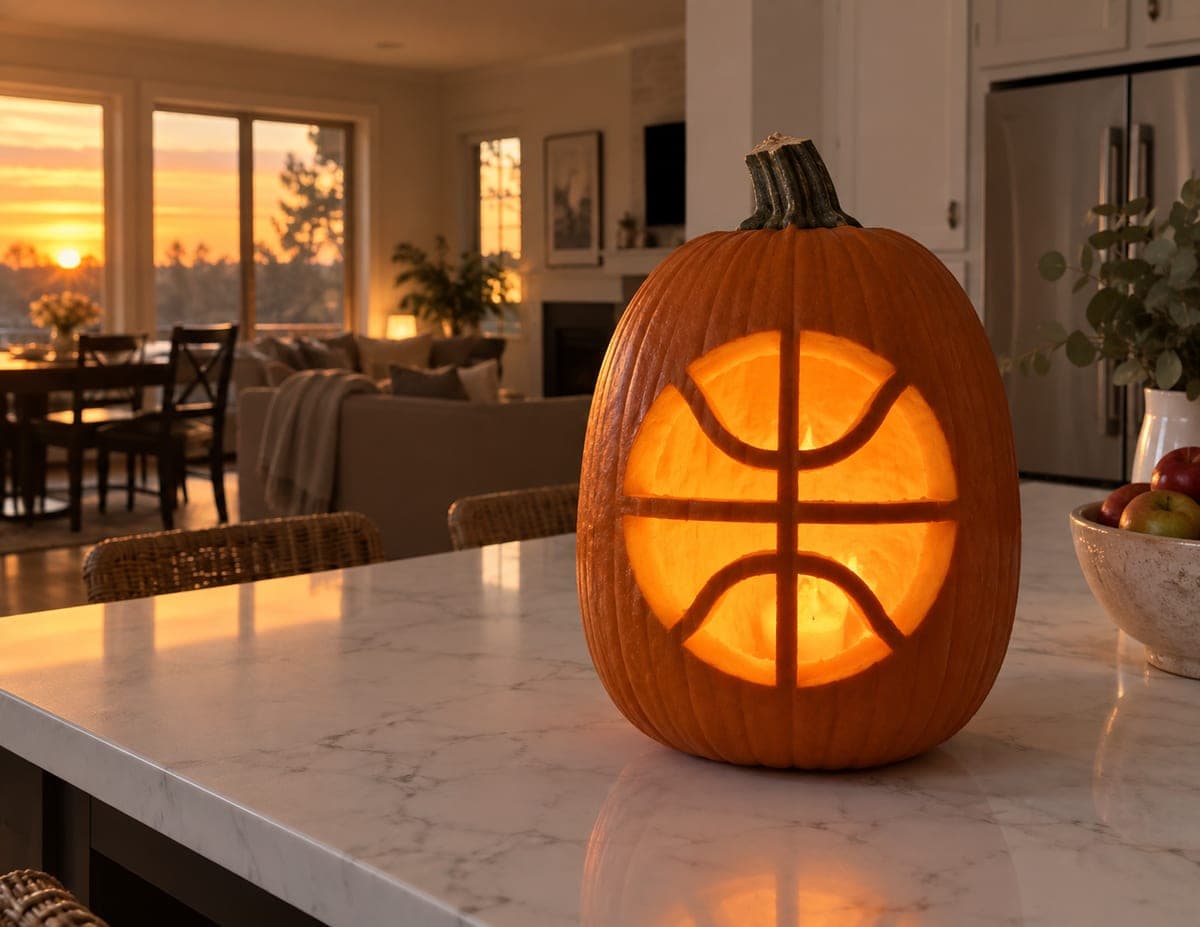
A volleyball is shown as a large glowing circle with three curved seam lines running across it as dark uncut rind stripes, instantly recognizable as a sports pumpkin carving idea from any distance. Removing the open areas of the ball while leaving the seam stripes intact is what creates the silhouette effect. Mark all three seam lines onto the pumpkin with a thin marker before cutting so the curves stay symmetrical when the surrounding sections are opened up.

This is an AI-generated concept image: a realistic, carvable design idea rather than a photo of a finished carve. AI concepts are always labeled and sit out the leaderboard and the contest.

No ratings yet · Sign in to rate
Comments (0)

  • No comments yet — be the first.

Save without an account. Sign in to like or comment.

Our tips for carving a similar design

The whole effect comes from one trick: cut away the open panels of the ball so they glow, while leaving the three curved seam lines as narrow strips of untouched rind. Those dark strips become the volleyball's signature curves against the bright interior. Map the seams first, then treat every glowing section as its own careful cutout around those preserved stripes.

Written by PumpkinCarvingIdeas.com, inspired by the image above. These are our suggestions, not instructions from the uploader. This approach to the AI concept has not been tested on a real pumpkin.

From pumpkin to porch

  1. Draw the ball and its seams

    Sketch a large circle on the smoothest face of the pumpkin, filling most of the front. Inside it, mark the three curved seam lines with a thin permanent marker, keeping each stripe a consistent width of roughly half an inch. Step back often to check that the curves stay balanced and symmetrical before any cutting begins. Shade the panels you plan to open so you never confuse a cut zone with a keep zone.

  2. Open a lid and clean out

    Have an adult cut a lid in the back or bottom of the pumpkin so the front stays uninterrupted. Scoop out the seeds and pulp, then thin the inside wall behind the ball to about one inch thick. A thinner wall makes the panels cut cleaner and lets more light through. Save some scooped flesh in case you need to test-fit anything later.

  3. Score the seam edges first

    Before removing any panel, lightly trace along both sides of each marked seam line with a poking tool or fine saw. This defines the edges of the stripes you are keeping so a slip does not eat into them. Work slowly at the tight curves where the seams bend. Treat these thin rind stripes as bridges that hold the whole design together.

  4. Cut the panels one at a time

    Using a small serrated carving saw, cut through each glowing panel between the seams, removing one section before starting the next. Angle the blade straight in and pop each piece out gently to avoid cracking a neighboring stripe. Cut the largest central panels last so the pumpkin keeps its strength while you work the smaller edges. Clean up ragged edges with light passes for crisp curves.

  5. Peel for soft edge glow

    If you want the ball to feel rounder, use a shallow gouge or a loop tool to skin-peel a thin border just inside the outer circle. Peeled skin glows a dim orange and softens the jump from dark rind to bright cutout. Keep the peeled zones shallow so you do not accidentally break through. This step is optional but adds depth.

  6. Light it and photograph

    Drop in one or two battery LED lights, never a candle, and aim them toward the front wall for even brightness. Test in the dark and reposition the lights until every panel glows evenly and the seam stripes read as clean dark curves. Shoot your photo at dusk so the interior glow pops against the fading sky. Wipe the cut edges with a little petroleum jelly to slow drying.

Gather your supplies

Check things off as you get ready.

Work on a stable surface, keep your free hand out of the cutting path, and have an adult handle sharp tools.

Three levels of light

  • Leave intact

    The three curved seam stripes and the rind outside the ball stay untouched and dark.

  • Peel & shade

    An optional thin border just inside the ball's outline, skin-peeled for a dim orange edge.

  • Cut through

    The open panels of the volleyball between the seams, cut fully through for the brightest glow.

Learn the carving basics

Before you start cutting

How do I keep the thin seam stripes from breaking?

Score both edges of each stripe before removing any surrounding panel, and cut the panels one at a time rather than all at once. Keep the stripes at least half an inch wide so they stay strong. Leaving them fully attached at both ends means they act as bridges and support the whole face.

Since this is a concept image, can a real pumpkin look this clean?

Yes, though real rind has ridges, so pick the smoothest, flattest face you can find. Keep your seam curves a touch wider than the render suggests to give them structural strength. A steady marker layout and slow cutting will get you very close to the crisp look.

What size pumpkin works best for this design?

A medium to large pumpkin with a broad, rounded front gives you room for the full circle and clean curves. Very small pumpkins force the seams too thin and make the panels hard to cut. Aim for a face at least eight inches across.

Your take belongs here, too.

Changed a detail? Made it simpler? Share a photo of your version and tell the community what worked.

Share your pumpkin

More pumpkins like this

You've reached the end · 8 pumpkins
The Patch Report

Fresh pumpkins, in your inbox.

The best new carvings, ideas worth stealing, and how-tos for carving season. Short, seasonal, and gone by November.

A short email during carving season. Unsubscribe anytime. See our privacy policy.