Halloween Pumpkin Carving Contest · Starts October 1st · $500 in prizes
← Back to ideas
@ai_concepts
Sep 14, 2026
Five Interlocking Rings PumpkinAI
0

Five Interlocking Rings Pumpkin

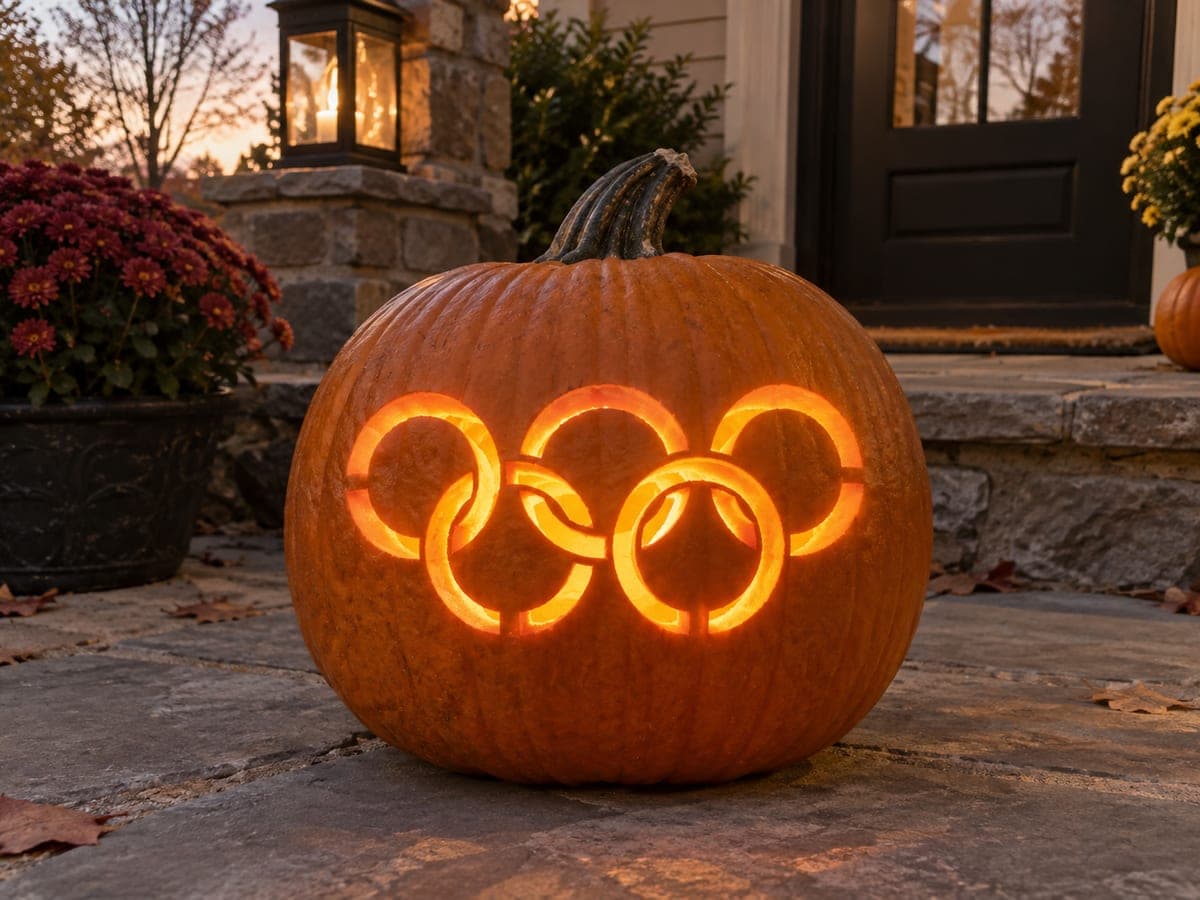
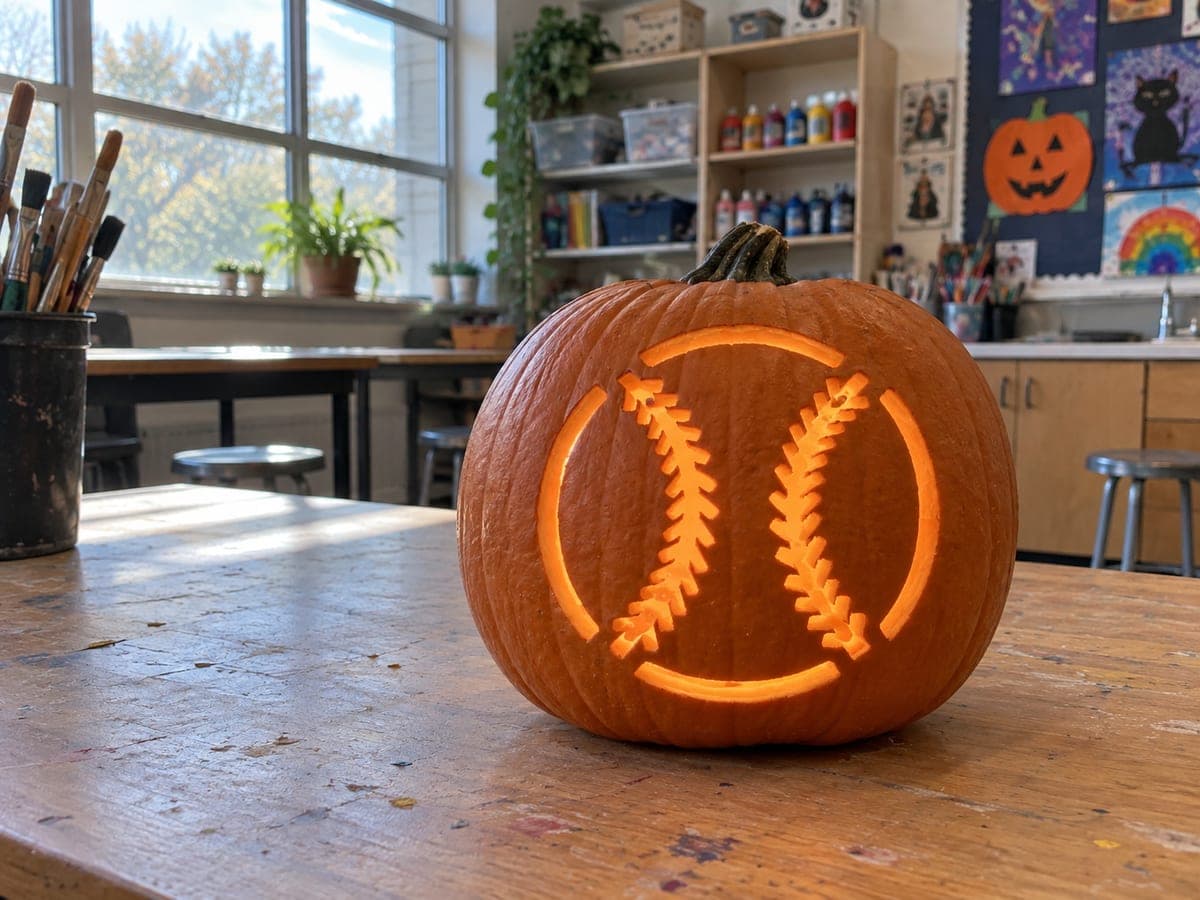
Five interlocking rings glow side by side in two offset rows on this sports-themed pumpkin carving idea, with the overlapping sections carved as short connecting bridges of rind. Each ring is pierced through so candlelight fills the full circle outline. Transfer the rings in pencil first and make sure the two horizontal rows are parallel before cutting; the small overlap bridges at each intersection are load-bearing, so trace them carefully and cut them last. A bright LED inside makes the linked circle pattern pop without flickering.

This is an AI-generated concept image: a realistic, carvable design idea rather than a photo of a finished carve. AI concepts are always labeled and sit out the leaderboard and the contest.

No ratings yet · Sign in to rate
Comments (0)

  • No comments yet — be the first.

Save without an account. Sign in to like or comment.

Our tips for carving a similar design

The whole effect rests on one trick: where the rings overlap, you leave short strips of rind as bridges so the circles read as interlocked instead of collapsing into one big hole. Plan three rings across the top row and two tucked into the row below, then cut each ring as a thin pierced band. Save every overlap bridge for last so the pattern stays strong while you work.

Written by PumpkinCarvingIdeas.com, inspired by the image above. These are our suggestions, not instructions from the uploader. This approach to the AI concept has not been tested on a real pumpkin.

From pumpkin to porch

  1. Sketch and check your layout

    Draw all five rings in pencil first, three across the top and two offset below so they interlock. Use a coin or small jar lid as a tracing guide to keep every circle the same size. Step back and confirm the two rows are level and parallel before any blade touches the pumpkin. Mark each overlap point clearly so you remember to leave rind there.

  2. Open and clean the pumpkin

    Have an adult cut a lid or a wide hole in the back rather than the top, which keeps the smooth front face intact for your rings. Scoop out the seeds and pulp, then thin the inside wall behind the design to about one inch. A thinner wall makes the narrow ring bands far easier to pierce cleanly. Dry the surface so your pencil lines stay readable.

  3. Score the ring outlines

    With a small detail saw, trace over each ring line as a shallow scoring cut first, without pushing all the way through. Keep the two edges of each band close and even so the ring reads as a slim outline. Go slowly around the curves and let the saw do the work instead of forcing it. Remark any overlap bridges that got faint.

  4. Cut the ring bands, bridges last

    Now deepen your scored lines into full cutouts, freeing the inner and outer edge of each ring so light passes through the band. Work one ring at a time and leave the little overlap strips uncut for now. Those bridges are load bearing, so cutting them last keeps the surrounding rings supported. Push waste pieces gently inward and lift them out.

  5. Finish the interlock detail

    At each intersection, carefully carve away only the crossing part of one ring so the other appears to pass over it, leaving a short rind bridge to hold the shape. Trim these last and take your time, since they are the most fragile spots. Clean up any ragged edges with your knife tip. Rub a little petroleum jelly on cut edges to slow drying.

  6. Light it and photograph

    Set a bright LED puck or string inside, never a candle, so the linked rings glow steady without flicker. Position the light low and centered so it fills all five circles evenly. Test in the dark and nudge the light until every ring shows. Shoot at dusk on the step for that warm porch look.

Gather your supplies

Check things off as you get ready.

Work on a stable surface, keep your free hand out of the cutting path, and have an adult handle sharp tools.

Three levels of light

  • Leave intact

    The broad pumpkin face around and between the rings stays untouched and dark.

  • Peel & shade

    The thin overlap bridges and any shaded ring edges can be skin-peeled for a soft dim glow that reads as depth.

  • Cut through

    The full ring bands are pierced all the way through for the brightest light.

Learn the carving basics

Before you start cutting

How do I keep the overlap bridges from breaking?

Trace them carefully and treat them as load bearing, cutting them last after every ring is otherwise freed. Keep each bridge a bit wider than feels necessary, since a narrow strip snaps easily. If one does break, a toothpick pushed through both edges can splint it for photos.

What size should I make the rings?

Pick a circle that fits five across two offset rows on your pumpkin's flattest face with a little room to spare. A coin or small jar lid gives you consistent size and clean curves. Test the layout in pencil first so the interlocks all line up before you cut.

Since this is a concept image, can a real pumpkin look this clean?

Yes, with a little patience. This is an AI concept, so no real pumpkin was carved, but the design is achievable if you thin the wall, use a fine saw, and keep the ring bands from getting too skinny. Even curves come from tracing a round guide rather than freehand cutting.

Your take belongs here, too.

Changed a detail? Made it simpler? Share a photo of your version and tell the community what worked.

Share your pumpkin

More pumpkins like this

You've reached the end · 8 pumpkins
The Patch Report

Fresh pumpkins, in your inbox.

The best new carvings, ideas worth stealing, and how-tos for carving season. Short, seasonal, and gone by November.

A short email during carving season. Unsubscribe anytime. See our privacy policy.