Halloween Pumpkin Carving Contest · Starts October 1st · $500 in prizes
← Back to ideas
@ai_concepts
Jul 27, 2026
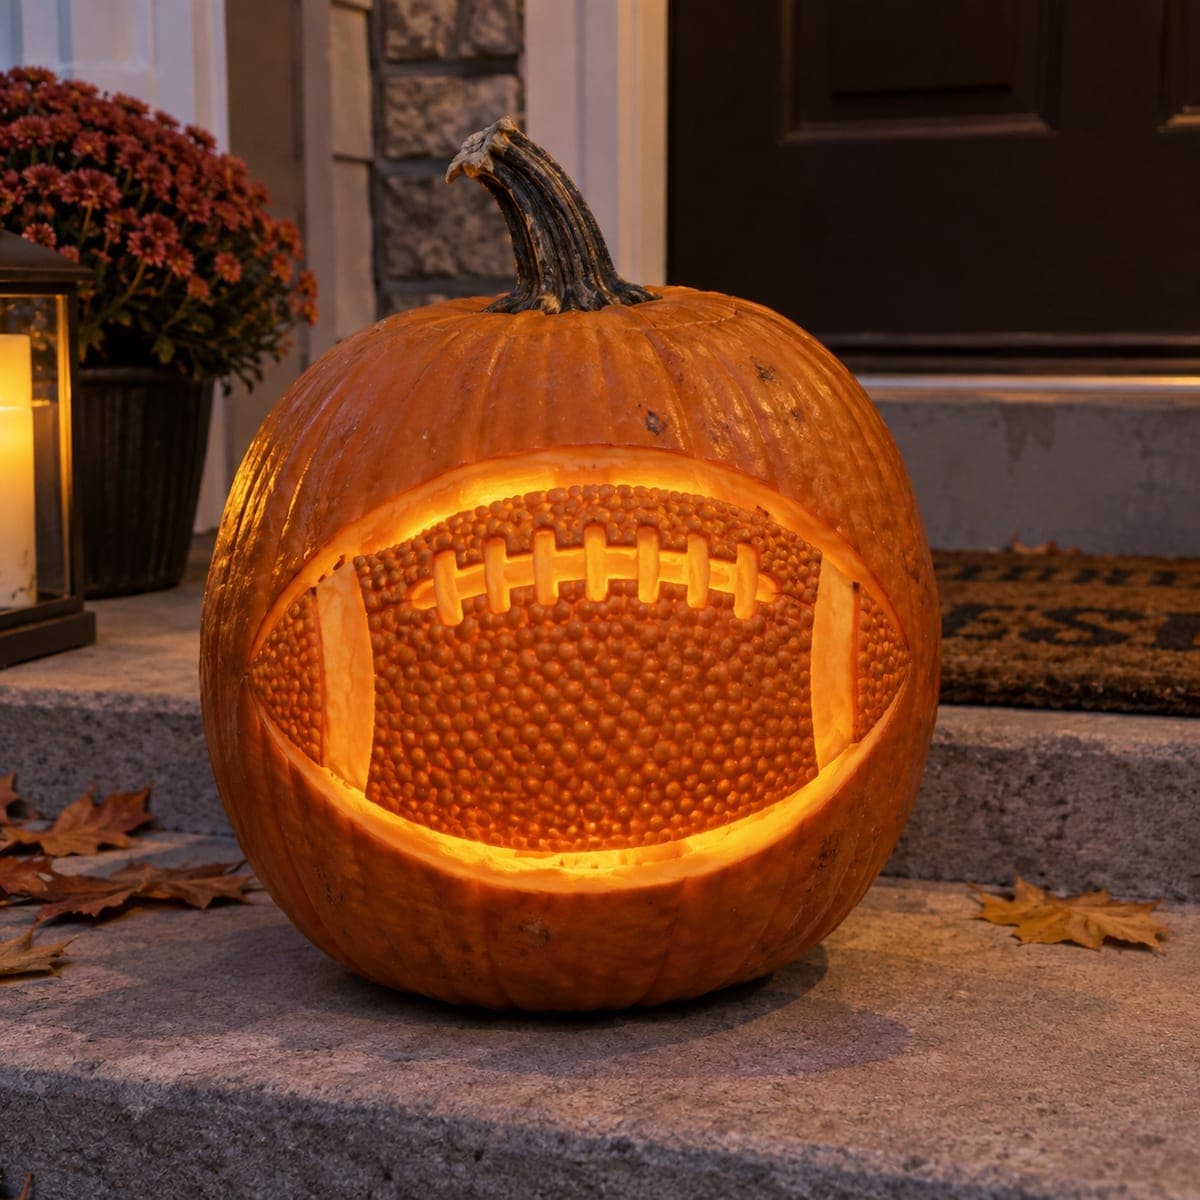
Textured Football Etched Pumpkin for Game DayAI
0

Textured Football Etched Pumpkin for Game Day

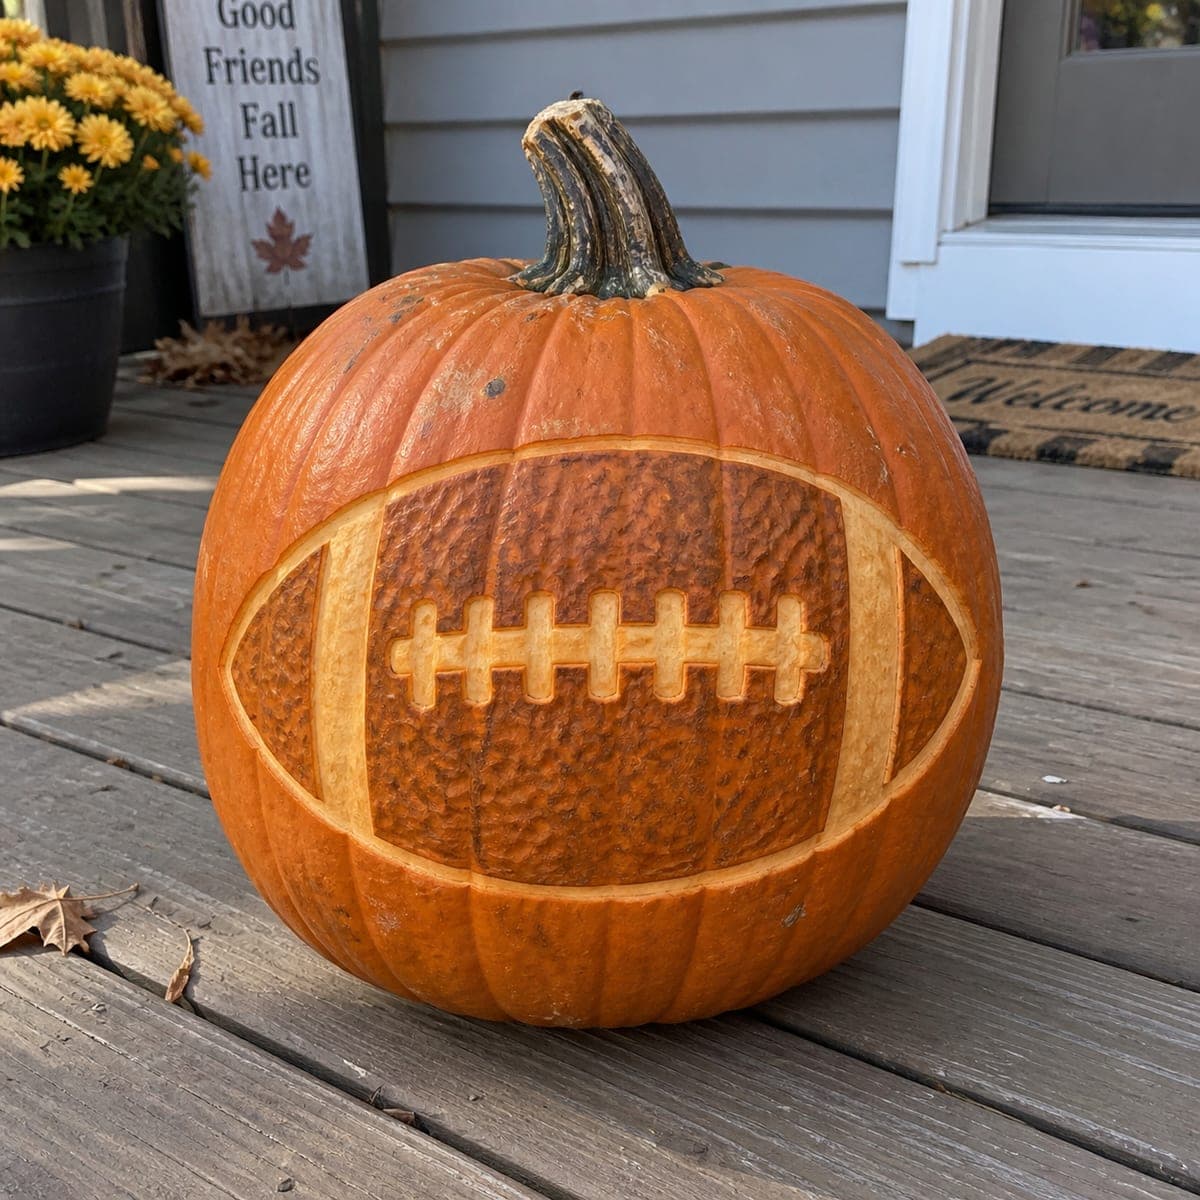
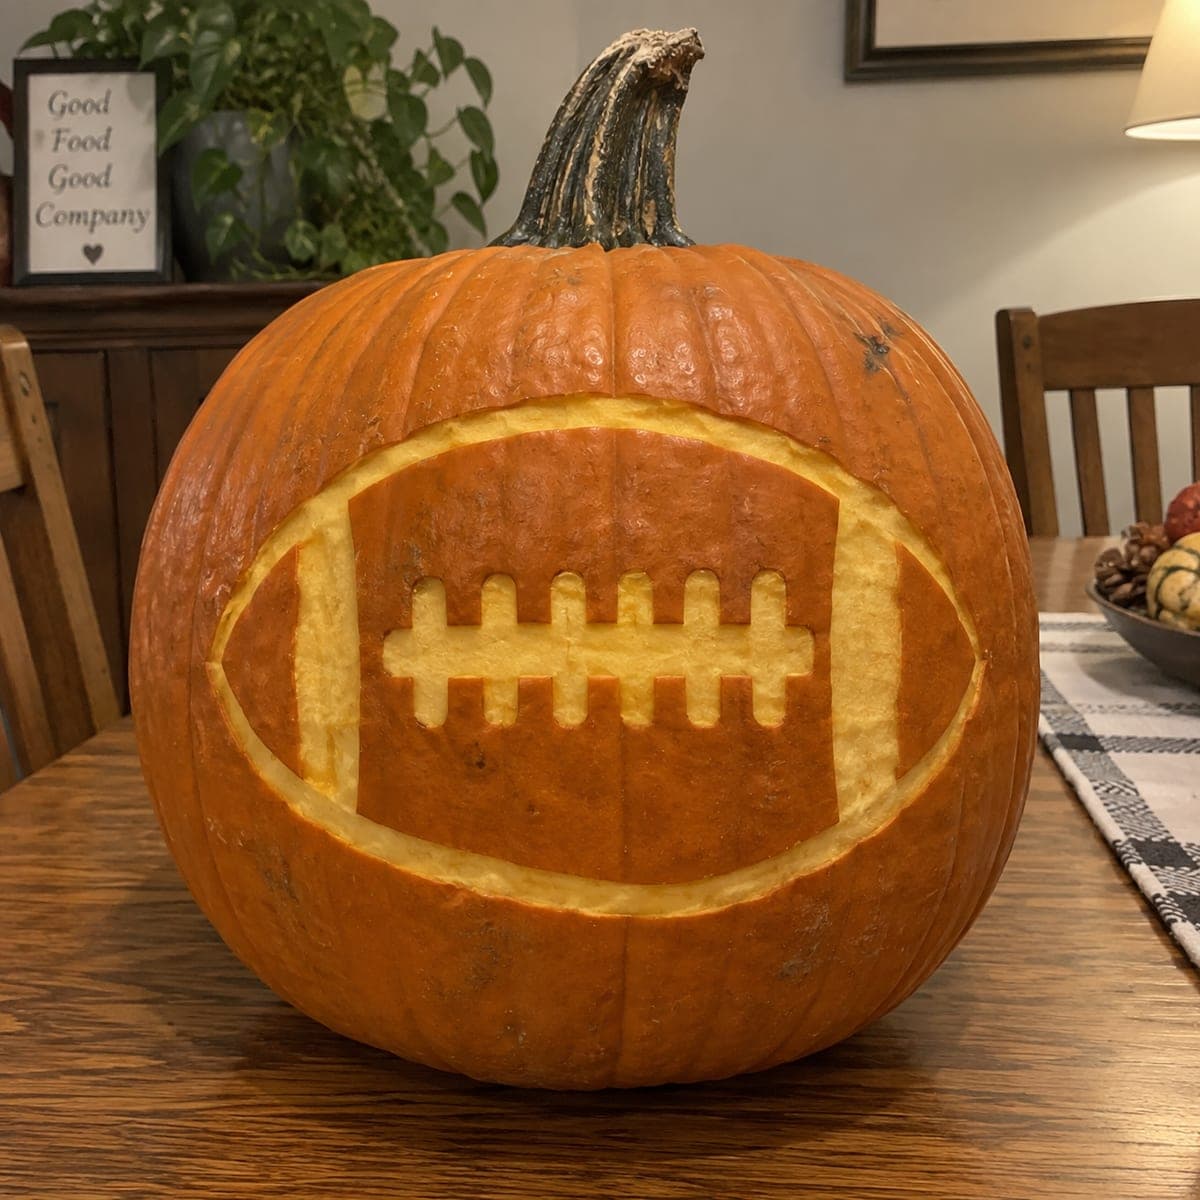
A football with laces and stripes fills this pumpkin, the pebbled leather texture stippled into the peeled surface so it looks convincingly grippy in daylight. It is an easy win for a tailgate table or a game day porch next to team-colored mums. Peel the football shape and its stripes first, carve the laces as clean bright dashes, then stipple the brown areas with a dotting tool or nail to build that leather grain.

This is an AI-generated concept image: a realistic, carvable design idea rather than a photo of a finished carve. AI concepts are always labeled and sit out the leaderboard and the contest.

No ratings yet · Sign in to rate
Comments (0)

  • No comments yet — be the first.

Save without an account. Sign in to like or comment.

Our tips for carving a similar design

The core trick here is a peeled skin surface that glows soft orange, worked with a stippled leather grain so the football reads as pebbled in daylight. You could map the whole ball as one big oval, peel the leather and the two end stripes to that dim glow, then cut only the laces through to full brightness. The stippling is what sells it, so build that texture last once your shapes are clean.

Written by PumpkinCarvingIdeas.com, inspired by the image above. These are our suggestions, not instructions from the uploader. This approach to the AI concept has not been tested on a real pumpkin.

From pumpkin to porch

  1. Transfer the football layout

    Pick a wide round pumpkin and wipe it dry. Tape your football stencil across the flattest part of the belly, then poke the outline of the oval, the two end stripes, and each lace with a pin or a transfer tool. Keep dots close together on the curved lace ends so the shape stays readable. Step back and check the oval sits level before you cut anything.

  2. Open a lid and clean the wall

    Have an adult cut a lid at the back or bottom so the front stays uninterrupted. Scoop the pulp and scrape the inside wall behind the design down to about one inch thick. A thinner wall makes peeling and shading much easier and lets the glow come through evenly. Save some scooped flesh in case you need to test your dotting tool.

  3. Peel the football and stripes

    Using a shallow gouge or a peeler-style loop tool, remove only the orange skin inside the oval, leaving the pale flesh exposed for a dim glow. Do the same for the two lens-shaped end stripes so they read a touch brighter than the leather. Keep the depth even and shallow, since you are removing skin, not carving through. Leave a clean unpeeled border around the whole oval so the ball edge stays crisp and dark.

  4. Cut the laces for full light

    Now cut the center lace bar and each cross stitch all the way through the wall with a fine detail saw. These are the only true openings, so take your time and keep the little bridges of pumpkin between stitches intact for strength. Cutting the laces after peeling means you are not stippling around fragile holes. Clean the edges so each dash stays sharp and bright.

  5. Stipple the leather grain

    Take a dotting tool, a nail set, or a rounded nail and gently press repeated pits into the peeled brown areas of the ball. Work in even rows so the pebbled texture looks consistent, keeping the two end stripes and the laces smooth for contrast. Do not push through the wall, just dimple the surface. This shading is what makes the leather look grippy in daylight, so cover the whole leather field.

  6. Light it and stage for game day

    Drop in a battery LED puck and set it toward the back so light spreads across the peeled oval without blowing out the laces. Skip candles, since the thin lace bridges and long burn of a display pumpkin do not mix with flame. Set it on a porch step or tailgate table with team-colored mums nearby. Snap a photo in both daylight and dark to show off the texture and the glow.

Gather your supplies

Check things off as you get ready.

Work on a stable surface, keep your free hand out of the cutting path, and have an adult handle sharp tools.

Three levels of light

  • Leave intact

    The clean border around the oval and the whole pumpkin body stay unpeeled and dark to frame the ball.

  • Peel & shade

    The leather field and the two end stripes are skin-peeled for a dim orange glow, with the leather stippled for grain.

  • Cut through

    Only the center lace bar and the cross stitches are cut through for the brightest light.

Learn the carving basics

Before you start cutting

Do I really need to cut all the way through anywhere?

Yes, but only the laces. Peeling gives you a soft glow across the ball, while the laces cut through the wall become the bright focal point. Keeping the openings limited to the small lace dashes also keeps the pumpkin sturdy.

How do I keep the stippled texture even?

Test your dotting tool on a scrap of scooped flesh first to find a comfortable pressure. Then work in steady rows across the leather field, spacing the pits fairly close and consistent. Leave the stripes and laces smooth so the texture stands out by contrast.

Will the peeled surface last for a game day display?

Peeled pumpkin dries out faster than uncarved skin, so carve it within a day or two of when you want it on display. Rub the peeled areas with a little petroleum jelly to slow drying, and store it somewhere cool overnight. Refresh it with a quick rinse if it starts to look dull.

Your take belongs here, too.

Changed a detail? Made it simpler? Share a photo of your version and tell the community what worked.

Share your pumpkin

More pumpkins like this

You've reached the end · 8 pumpkins
The Patch Report

Fresh pumpkins, in your inbox.

The best new carvings, ideas worth stealing, and how-tos for carving season. Short, seasonal, and gone by November.

A short email during carving season. Unsubscribe anytime. See our privacy policy.