Halloween Pumpkin Carving Contest · Starts October 1st · $500 in prizes
← Back to ideas
@ai_concepts
Aug 7, 2026
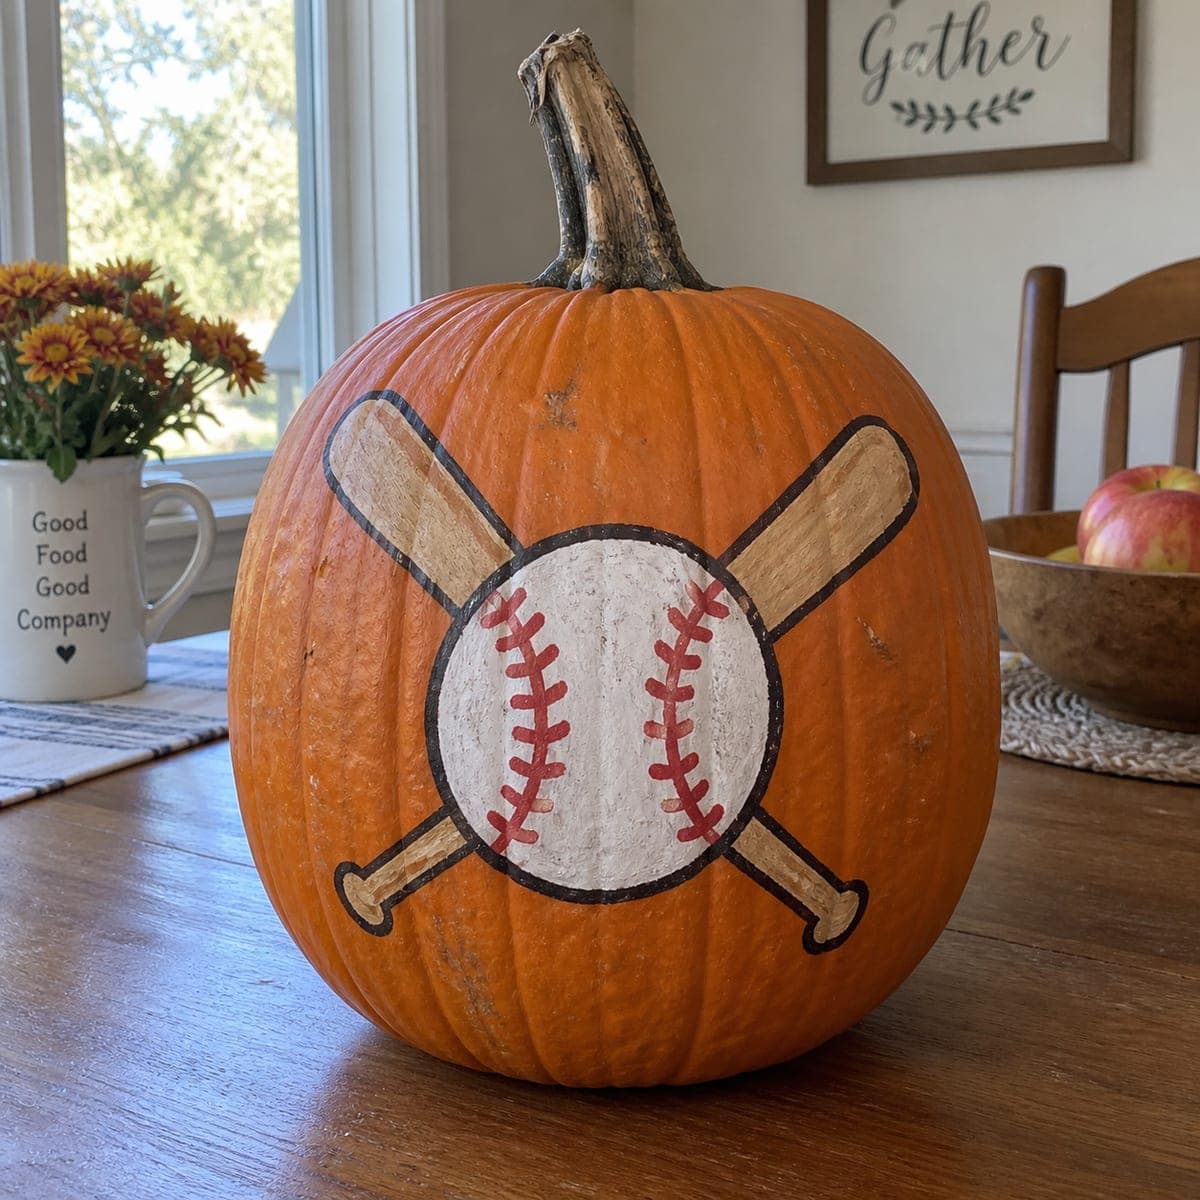
Baseball and Crossed Bats Etched PumpkinAI
0

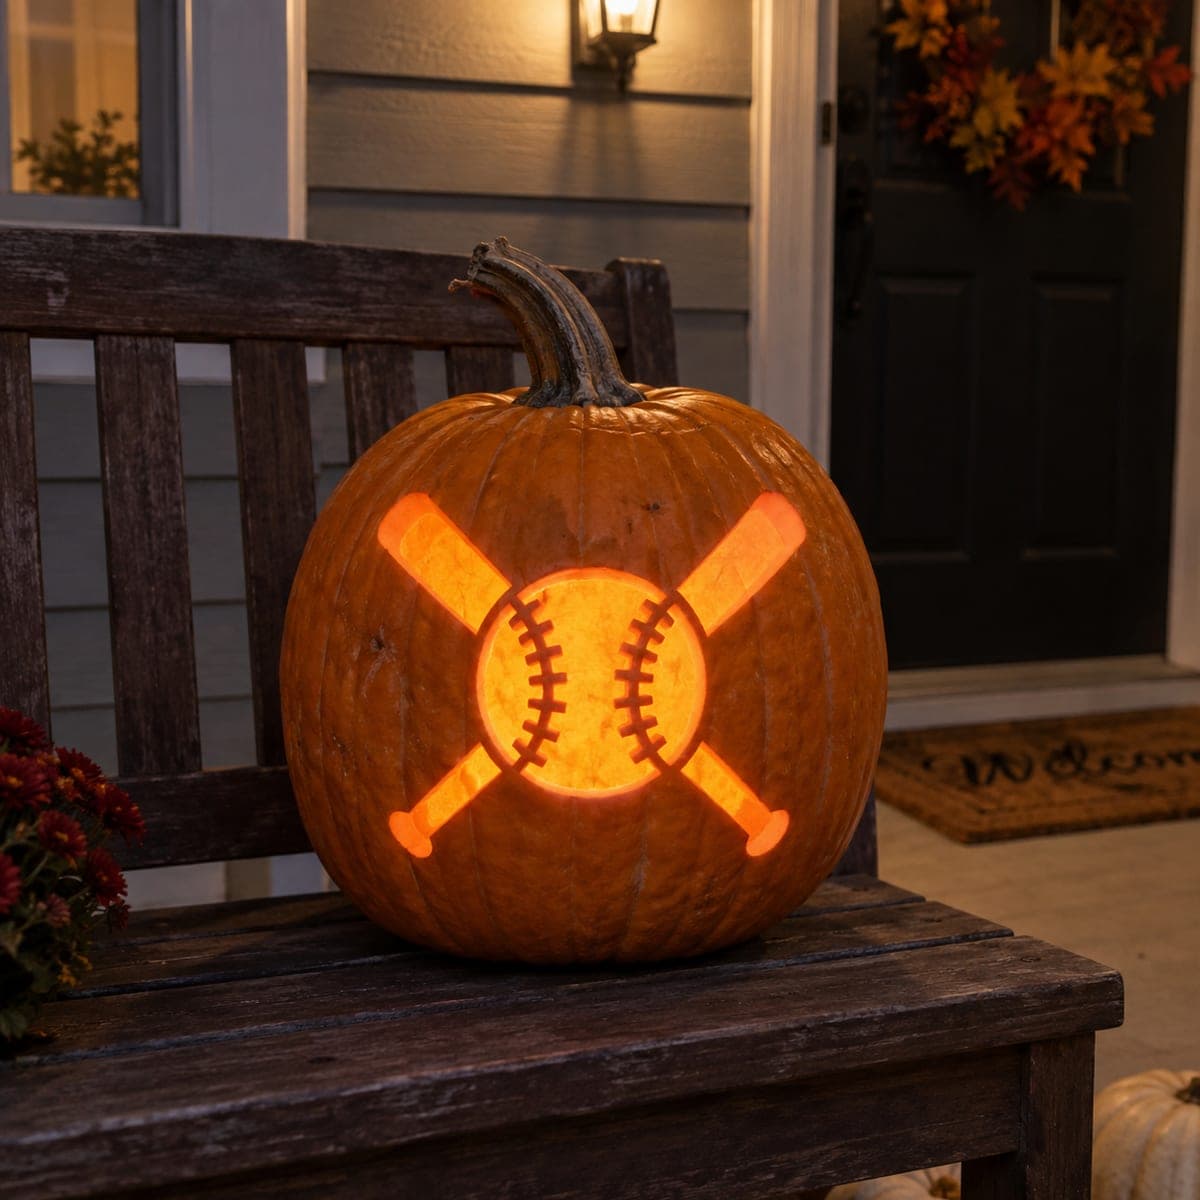
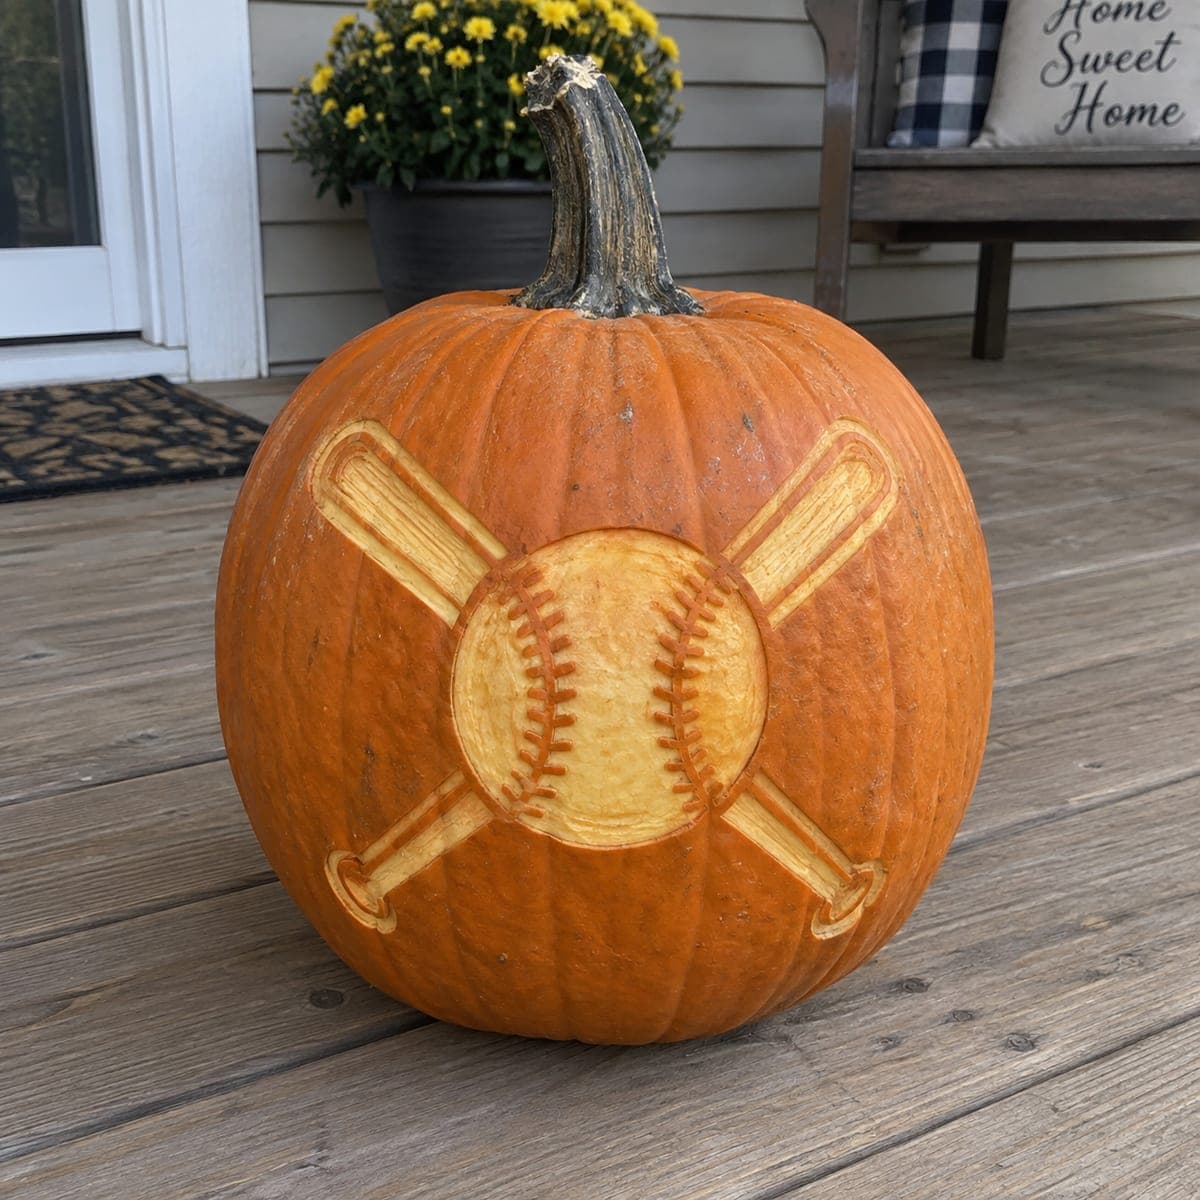
Baseball and Crossed Bats Etched Pumpkin

Two crossed bats frame a stitched baseball in this sports pumpkin, all rendered by peeling the skin so the design shows in full daylight on a porch or dugout table. The classic emblem layout suits a team party, coach gift, or a fall birthday for a baseball fan. Score the ball's circle and the bat outlines first, peel inside the shapes evenly, then cut the stitching as short paired nicks along two curved lines.

This is an AI-generated concept image: a realistic, carvable design idea rather than a photo of a finished carve. AI concepts are always labeled and sit out the leaderboard and the contest.

No ratings yet · Sign in to rate
Comments (0)

  • No comments yet — be the first.

Save without an account. Sign in to like or comment.

Our tips for carving a similar design

The core trick here is that almost nothing is cut all the way through. You peel the outer skin off the ball and the two crossed bats so the pale flesh shows in full daylight, then add depth by cutting the red stitching as short paired nicks. Plan the layout with the ball centered and the bats crossing behind it so the emblem reads clearly from a few feet away.

Written by PumpkinCarvingIdeas.com, inspired by the image above. These are our suggestions, not instructions from the uploader. This approach to the AI concept has not been tested on a real pumpkin.

From pumpkin to porch

  1. Pick a broad, smooth face and transfer the design

    Choose the flattest part of the pumpkin so the ball circle does not distort across a rib. Tape your stencil in place and poke the outlines of the ball, both bats, and the two stitch lines with a pin or awl. Space the dots close on the curves so the circle stays round. Step back and check the bats cross evenly behind the ball before you commit.

  2. Score all the outlines first

    With a fine detail blade, cut just through the skin along every outline: the ball circle, both bat shapes, and the handle knobs. Keep the cut shallow, only a couple of millimeters deep, since you are outlining not cutting through. This gives you clean edges to peel up to. Do the scoring while the design is still fully supported by uncut skin around it.

  3. Peel the skin inside the shapes

    Use a ribbon loop tool or the edge of a spoon to shave the orange skin off the ball and both bats, staying inside your scored lines. Work to an even depth so the exposed flesh glows a consistent pale color in daylight. Take it slow near the crossing points so the bats stay crisp where they pass behind the ball. Wipe away pulp to check your depth as you go.

  4. Cut the stitching as paired nicks

    Along the two curved stitch lines on the ball, cut short angled pairs that look like little V shapes or slashes. Cut these slightly deeper than the peeled area so they read as shadow lines against the lighter ball. Keep the pairs evenly spaced and matched in size for that stitched-leather look. This is the detail that sells the baseball, so take your time.

  5. Add grain and knob shading to the bats

    Lightly deepen the peel along the bat barrels and around the handle knobs to hint at rounded wood. A shallow line down the length of each bat suggests a highlight without cutting through. Leave the surrounding pumpkin skin untouched so the pale bats pop against the darker background. Brush off crumbs and even out any patchy spots.

  6. Preserve, light, and photograph

    Wipe all cut surfaces with a little lemon juice or a spray preservative to slow browning, since peeled flesh dries fast. This design shines in daylight on a porch or table, so photograph it in the morning sun. For evening, set a small LED puck behind or beside it rather than inside, as there are no through-cuts to light. Keep it cool and shaded between shows to extend its life.

Gather your supplies

Check things off as you get ready.

Work on a stable surface, keep your free hand out of the cutting path, and have an adult handle sharp tools.

Three levels of light

  • Leave intact

    The background pumpkin skin around the emblem stays untouched and dark to frame the design.

  • Peel & shade

    The ball face and both bat barrels are skin-peeled so they glow a soft pale orange in daylight.

  • Cut through

    The paired stitch nicks are cut deepest so they read as the sharpest shadow lines on the ball.

Learn the carving basics

Before you start cutting

Do I need to hollow the pumpkin if nothing is cut through?

Not for the look, since this is an etched surface design that reads in daylight. That said, scooping the inside thins the wall slightly and helps the peeled areas glow a touch brighter if you add a side light later. If you plan to keep it purely as a daytime porch piece, you can leave it solid.

How do I keep the two bats crisp where they cross behind the ball?

Score the ball circle first and treat it as the top layer, then peel the bats up to that line so they appear to pass behind it. Work slowly at the crossing points and avoid over-peeling into the ball's edge. Keeping a clean scored border between shapes is what makes the layers read.

The peeled flesh started browning. How do I slow that down?

Peeled pumpkin dries and discolors faster than skin, so wipe every exposed surface with lemon juice or a preservative spray right after carving. Store it somewhere cool and out of direct sun between showings. Re-wiping once a day helps keep the pale color bright for a party or gift.

Your take belongs here, too.

Changed a detail? Made it simpler? Share a photo of your version and tell the community what worked.

Share your pumpkin

More pumpkins like this

You've reached the end · 8 pumpkins
The Patch Report

Fresh pumpkins, in your inbox.

The best new carvings, ideas worth stealing, and how-tos for carving season. Short, seasonal, and gone by November.

A short email during carving season. Unsubscribe anytime. See our privacy policy.