Halloween Pumpkin Carving Contest · Starts October 1st · $500 in prizes
← Back to ideas
@ai_concepts
Aug 12, 2026
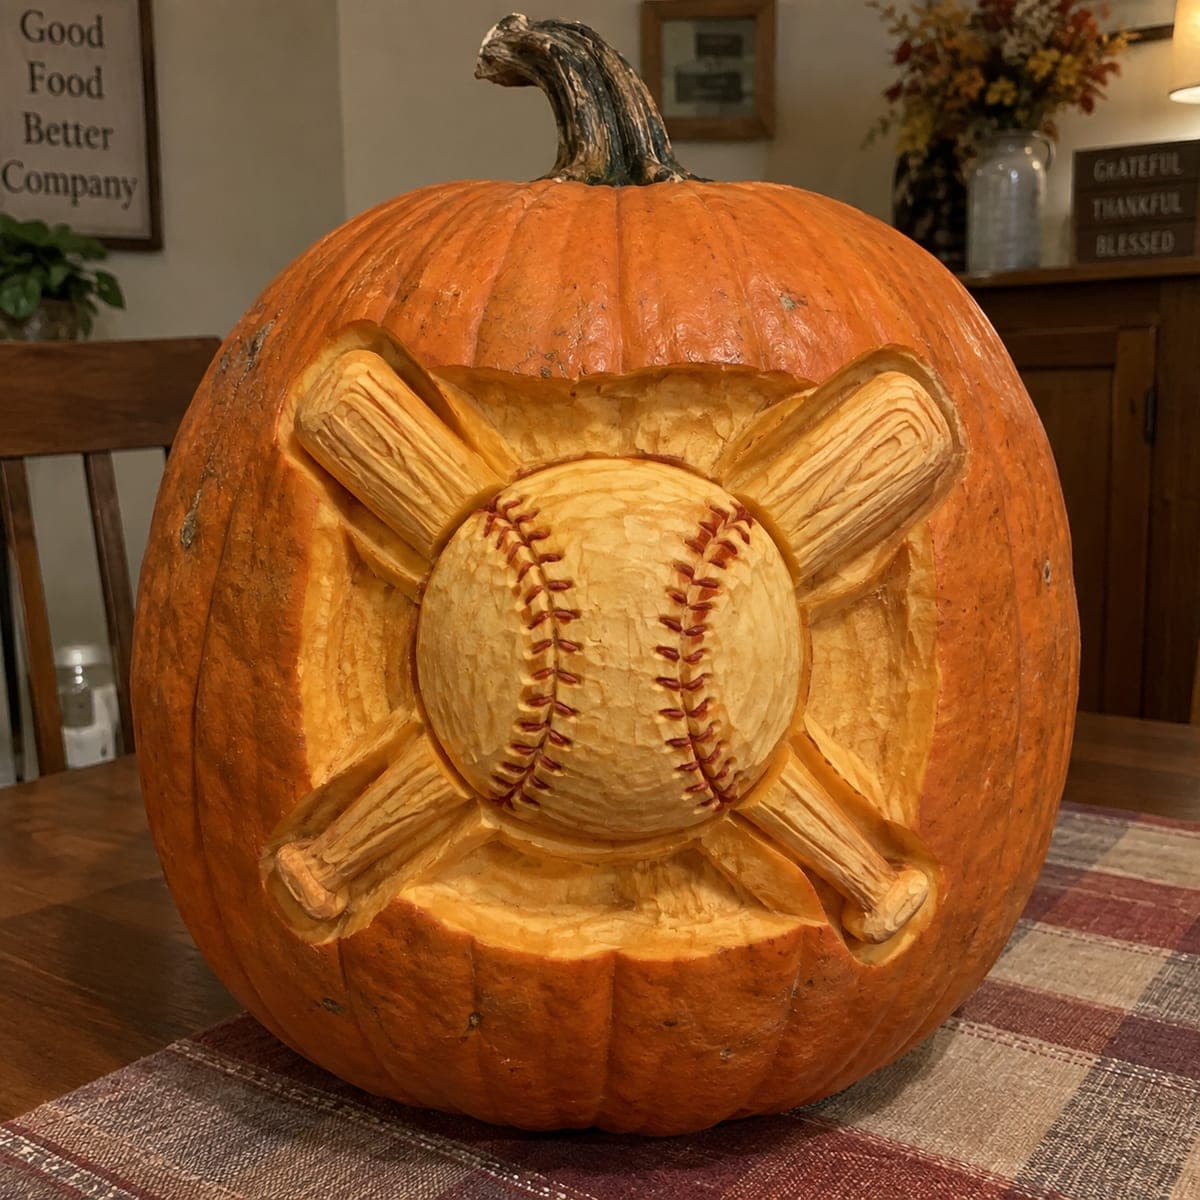
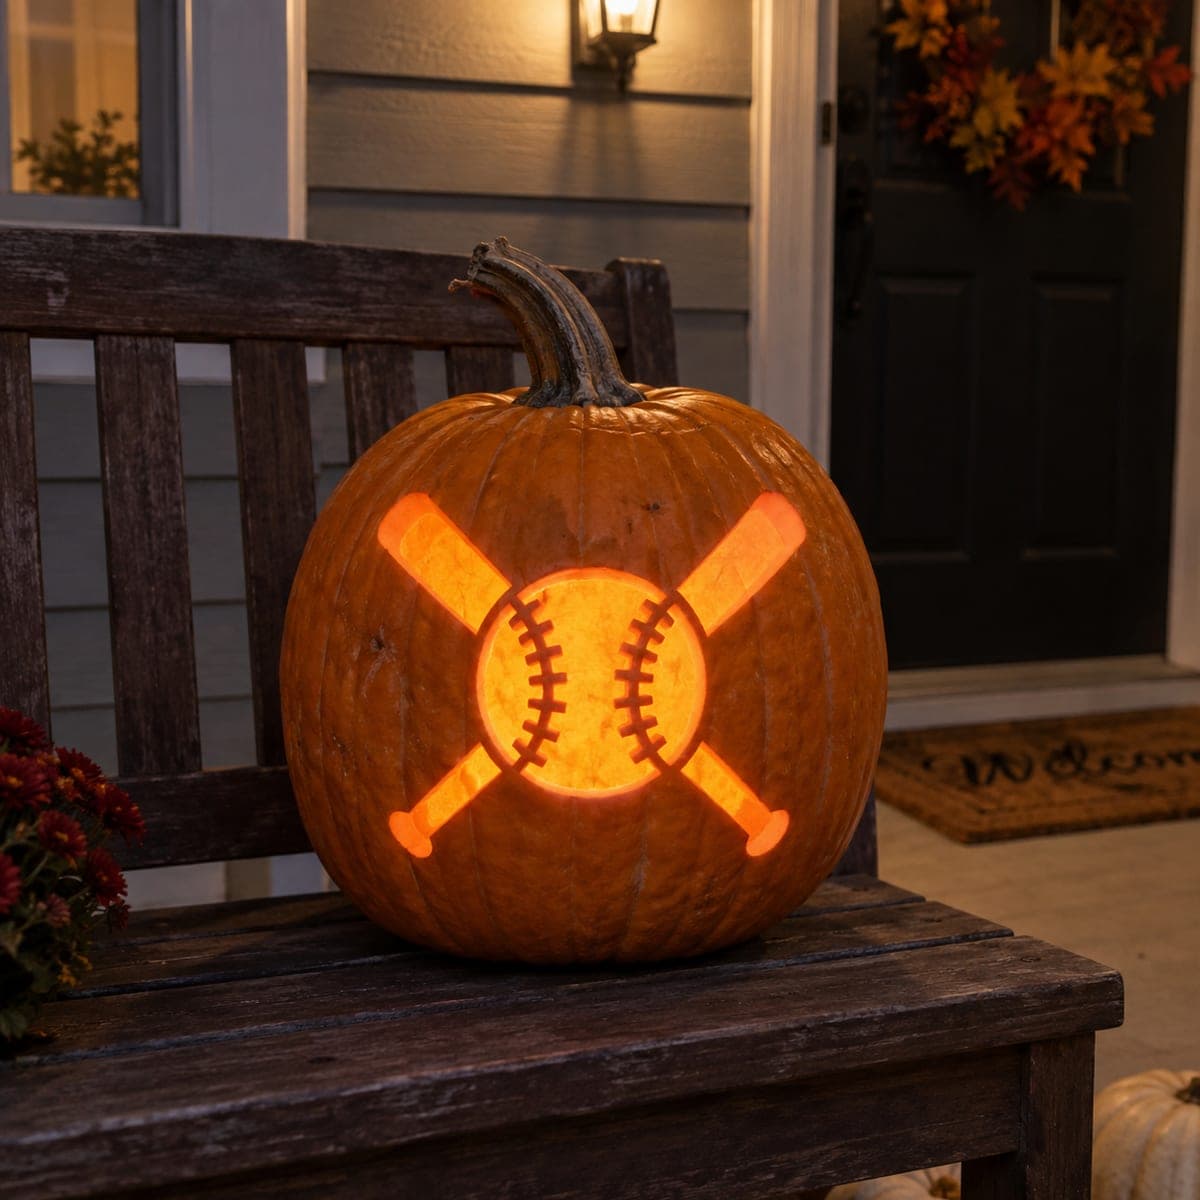
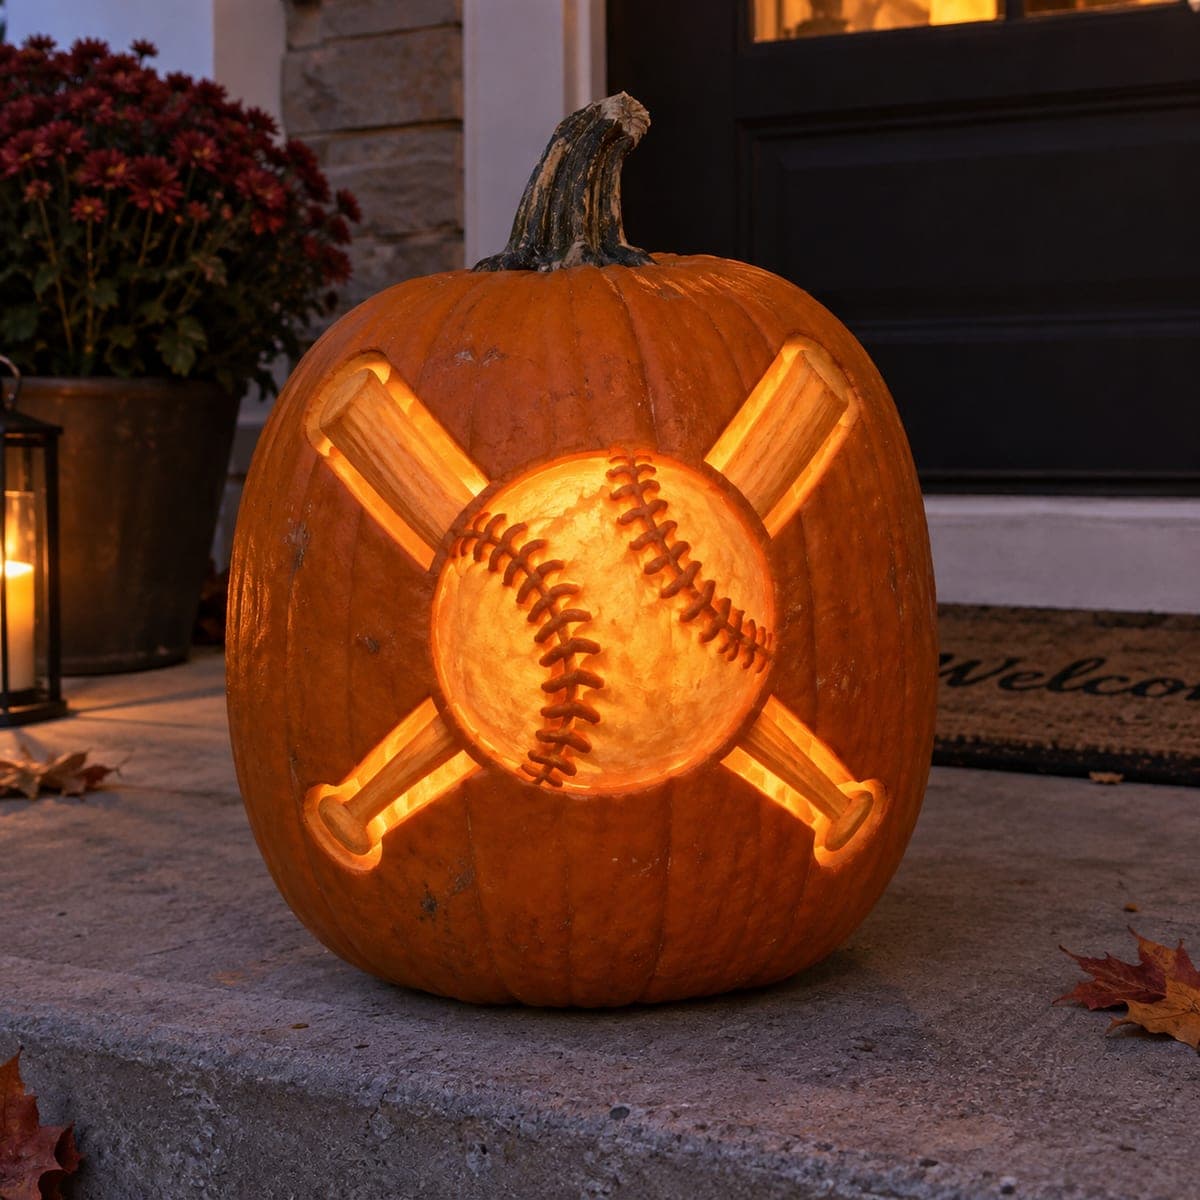
Baseball and Crossed Bats 3D Pumpkin ReliefAI
0

Baseball and Crossed Bats 3D Pumpkin Relief

A baseball with raised red stitching sits over two crossed wooden bats, all sculpted in deep three-dimensional relief that pushes out from a recessed panel. The background is excavated a full inch so the ball and bats stand proud, with wood grain scored into the barrels and stitches carved as paired angled nicks. Rough out the recess with a large gouge before refining the shapes, and leave the stitch lines for the very end. A trophy piece for a baseball household.

This is an AI-generated concept image: a realistic, carvable design idea rather than a photo of a finished carve. AI concepts are always labeled and sit out the leaderboard and the contest.

No ratings yet · Sign in to rate
Comments (0)

  • No comments yet — be the first.

Save without an account. Sign in to like or comment.

Our tips for carving a similar design

The core trick here is relief sculpting, not cutting through the shell: you excavate a recessed panel about an inch deep so the ball and bats stand proud in the light. Plan the whole layout first, rough out the background with a big gouge, then slowly refine the raised shapes and save the fine stitching and wood grain for last. Because this is an AI concept image, treat it as a target look rather than a real pumpkin and keep every raised edge thick enough to hold together.

Written by PumpkinCarvingIdeas.com, inspired by the image above. These are our suggestions, not instructions from the uploader. This approach to the AI concept has not been tested on a real pumpkin.

From pumpkin to porch

  1. Pick a firm pumpkin and transfer the design

    Choose a large pumpkin with a thick, dense wall and a flat, unblemished front, since relief work needs plenty of material to carve into. Wash and dry the surface, then draw or trace a rough circle for the ball with two bats crossing behind it forming an X. Mark the outer boundary of the recessed panel so you know exactly how far the excavation extends. Keep your lines light so you can adjust as the shapes emerge.

  2. Rough out the recessed background

    With a large gouge or a loop tool, start scooping away the background skin and flesh around the ball and bats, working slowly toward roughly a one inch depth. Do not carve all the way to the ball and bat outlines yet; leave a little extra material so you can refine clean edges later. Keep the floor of the recess fairly even and check the depth often so you do not thin the wall too much. Work in good light and take breaks, because this stage removes a lot of material.

  3. Shape the raised ball and bats

    Once the background is roughed in, round the ball into a gentle dome and taper each bat from a fat barrel down to a thin handle and knob. Undercut the edges slightly where the ball overlaps the bats so the ball reads as the front layer. Smooth the domed surfaces with a small loop tool so they catch light evenly. Step back often to make sure the crossed bats stay symmetrical behind the ball.

  4. Score the wood grain and refine surfaces

    Use a small V-gouge or detail knife to score long, slightly curved lines down each bat barrel to suggest wood grain. Keep the grain lines shallow and parallel so they read as texture rather than cracks. Peel a thin layer of skin off the ball dome and bat surfaces so they will glow warmer than the dark outer pumpkin. Blend any tool marks with light strokes for a clean, sculpted finish.

  5. Carve the stitches last

    Now add the baseball stitching as paired angled nicks running in two curved lines down the face of the ball. Make each stitch a short, shallow cut so the pairs look like tiny V shapes, and keep them evenly spaced along the seams. Cutting these last protects the delicate lines from getting bumped during heavier carving. Go slowly here, since these small marks are what sell the whole piece.

  6. Light it and take your photo

    Set a battery LED puck or a string of LEDs inside so light rakes across the recessed panel and casts soft shadows around the raised ball and bats. Avoid an open flame, which can scorch the thin sculpted areas and is a fire risk. Mist the carved surfaces with water and store the pumpkin somewhere cool between showings to slow shrinking. Shoot your photo in a dim room so the shadows show off the depth of the relief.

Gather your supplies

Check things off as you get ready.

Work on a stable surface, keep your free hand out of the cutting path, and have an adult handle sharp tools.

Three levels of light

  • Leave intact

    The dark outer pumpkin skin around the panel and the deepest stitch and grain nicks stay untouched and read as shadow.

  • Peel & shade

    The domed ball face and the bat barrels are skinned thin so they glow a soft, warm orange and stand forward.

  • Cut through

    No full cutouts are needed; the thinnest carved floor of the recessed background lets in the most glow if you add an internal light.

Learn the carving basics

Before you start cutting

Do I cut all the way through the pumpkin for this design?

No, this is a relief carving, so almost all of it stays as sculpted surfaces rather than open holes. You excavate the background about an inch deep but keep a solid wall behind everything. If you want it to glow, add an internal LED and carve the recess floor a little thinner for warmth.

How do I keep the crossed bats from looking flat?

Taper each bat from a thick barrel down to a slim handle and knob, and undercut the edges slightly so they cast their own shadow. Where the ball overlaps the bats, carve the ball to sit clearly in front. Scored wood grain lines add the final sense of roundness.

Why leave the stitches until the very end?

The paired stitch nicks are small and shallow, so they get bumped or smeared if you carve them early. By shaping and smoothing the ball dome first, you give yourself a clean surface for crisp, even stitches. Cutting them last keeps the detail sharp for your photo.

Your take belongs here, too.

Changed a detail? Made it simpler? Share a photo of your version and tell the community what worked.

Share your pumpkin

More pumpkins like this

You've reached the end · 8 pumpkins
The Patch Report

Fresh pumpkins, in your inbox.

The best new carvings, ideas worth stealing, and how-tos for carving season. Short, seasonal, and gone by November.

A short email during carving season. Unsubscribe anytime. See our privacy policy.