The 2026 contest winners are inGrand Prize, People's Choice and Most Creative, all crowned.
@ai_concepts
Sep 25, 2026
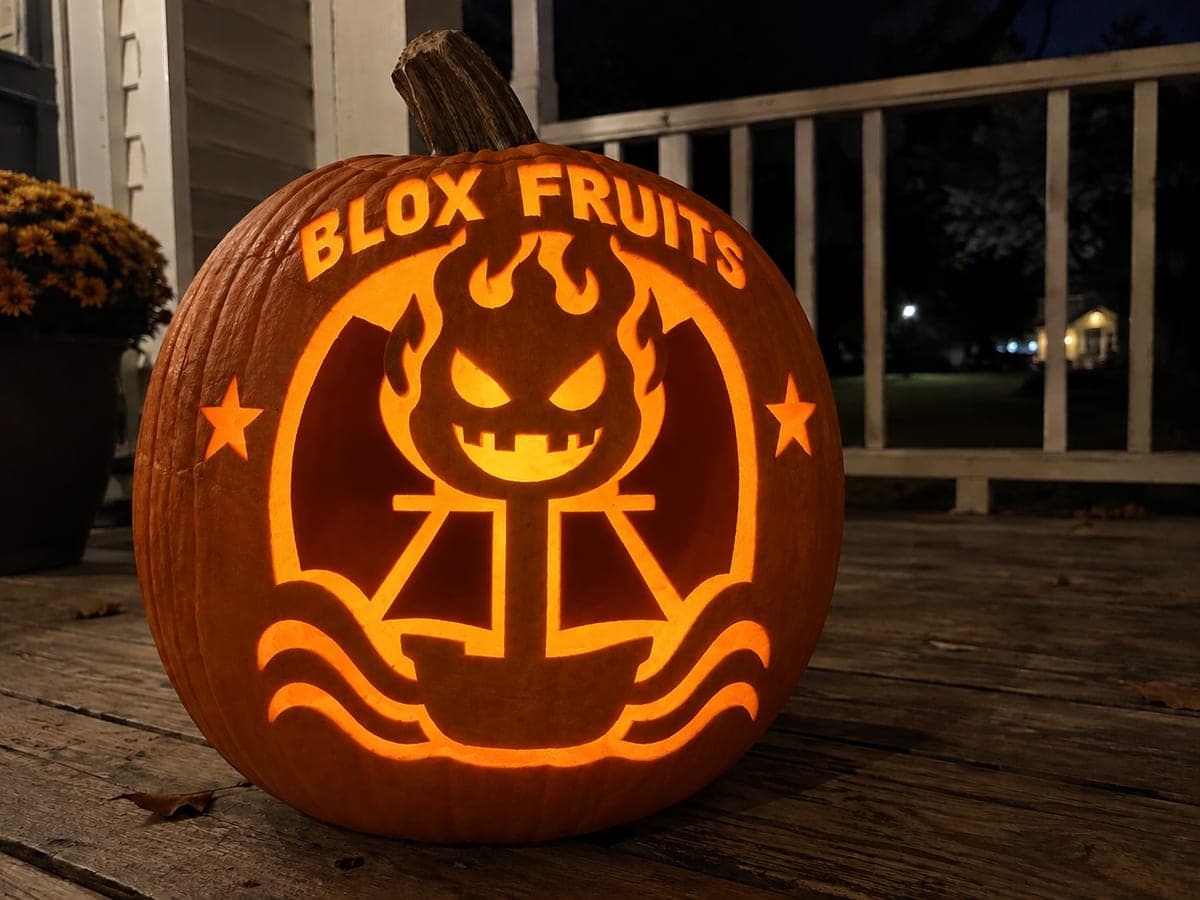
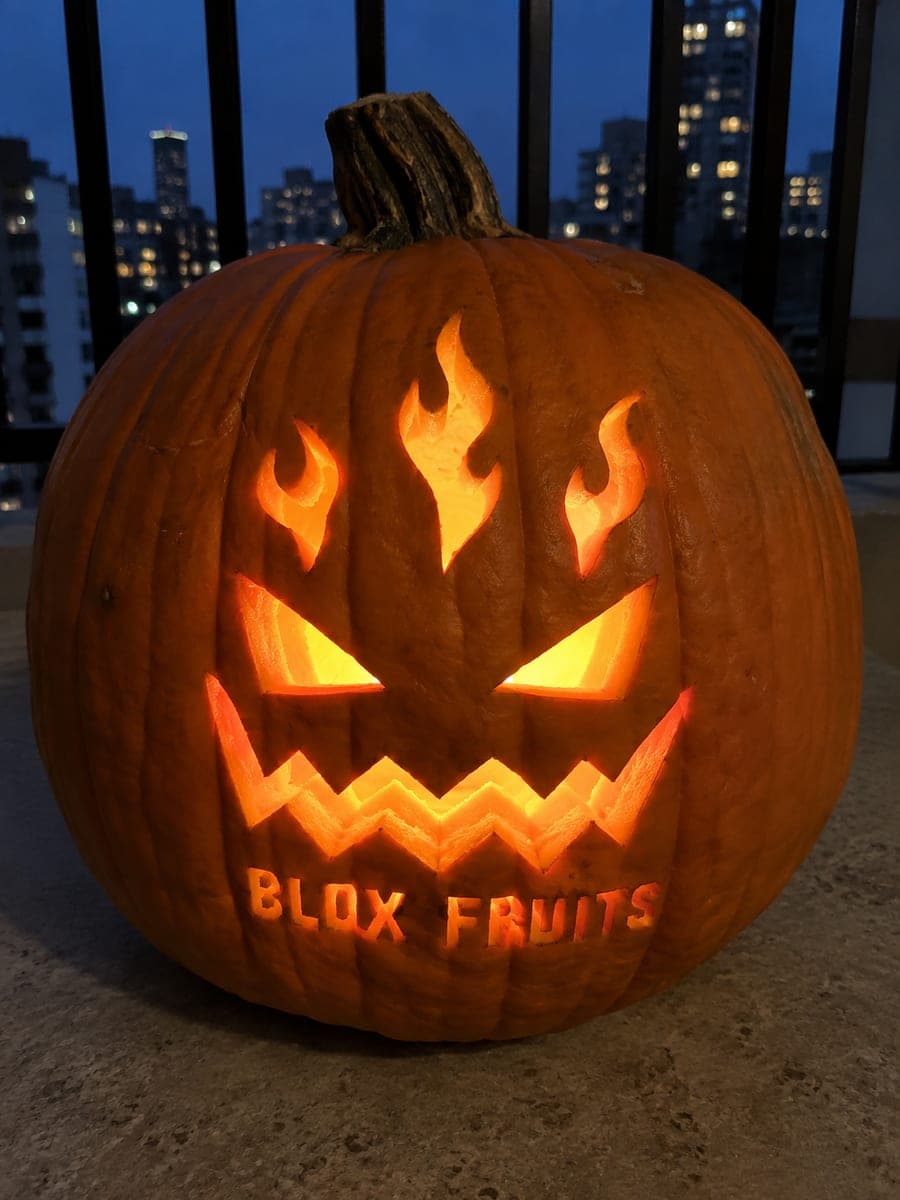
Blox Fruits Fiery Face PumpkinAI
0

Report this carving

Tell us what is wrong. Reports are private.

Blox Fruits Fiery Face Pumpkin

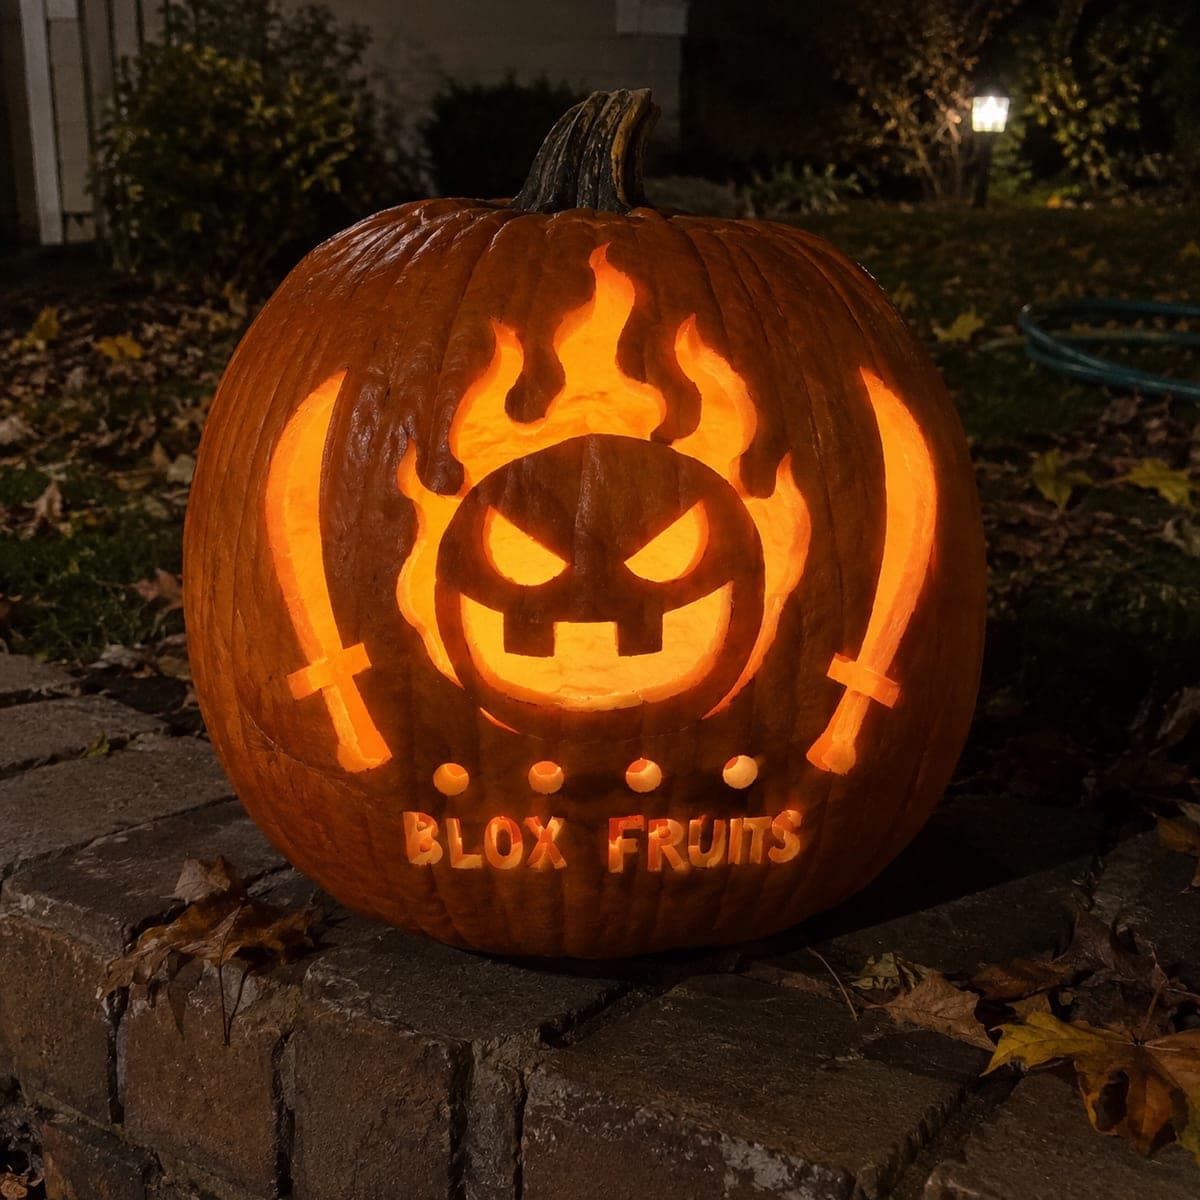
This easy blox fruits pumpkin carving cuts separate eye holes, a grinning mouth, and flame-shaped holes while the game title is added as a shallow backed detail in the intact rind. Space the flame holes evenly above the face before cutting so the design reads as a crown of fire, and keep the rind between each flame at least a half-inch wide. The finished pumpkin glows best on an elevated balcony where the flame openings can be seen from below.

No ratings yet · Sign in to rate
EasyFantasyCuteClassic Cutout
blox-fruitsfantasyvideo-gamerobloxcuteeasyflamegrin

Save this design for carving night, then share a photo of your own jack-o'-lantern once it's glowing.

Roblox and all related characters, names, logos, and trademarks are the property of their respective owners. This is an unofficial fan carving shared by our community for inspiration only. PumpkinCarvingIdeas.com is not affiliated with, sponsored by, or endorsed by any rights holder or person depicted, and no such connection is implied.
Comments (0)

  • No comments yet. Be the first.

Our tips for carving a similar design

Separate eye holes, a wide grinning mouth, and evenly spaced flame-shaped holes above the face do the entire visual work here. The shallow-backed game title in the rind adds a finishing detail without requiring any through-cuts. Spacing the flame holes before starting to carve is the key prep step that makes the crown of fire look intentional rather than improvised.

From pumpkin to porch

  1. Prep the pumpkin

    Cut the lid from the back of the pumpkin and scoop out all seeds and pulp. Flatten the interior wall to about 2 cm thickness, especially in the area above the eyes where the flame holes will sit. Consistent wall thickness gives the flame openings a clean, even glow.

  2. Plan and mark the flame spacing

    Before transferring your stencil, use a ruler to mark five or six evenly spaced points in an arc above the face area. Each flame hole should be at least 1.5 cm wide and separated from its neighbor by at least 1.2 cm of rind. Consistent spacing makes the fire crown read as deliberate design.

  3. Transfer your stencil

    Pin your stencil to the pumpkin and perforate along the eye, mouth, and flame hole outlines. Use a separate small dot pattern for the shallow-backed title letters. Remove your stencil and connect the pin dots with pencil before beginning to cut.

  4. Cut the eyes and grin

    Carve both circular or oval eye openings first, pressing straight through the rind. Cut the grinning mouth next as a wide curved opening. Make sure any teeth inside the grin are attached at the top or bottom edge rather than floating, so they do not fall inward.

  5. Carve the flame holes

    Cut each flame-shaped hole from its base point upward to its tip, keeping the blade vertical. Leave at least 1.2 cm of rind between each flame and between the outermost flames and the edge of the pumpkin. Cutting these last, after the face is established, lets you adjust their height slightly for balance.

  6. Etch the title and display

    Use a small gouge or detail knife to shallow-etch the game title letters into the rind below or beside the face. Place an LED tea light inside and carry the pumpkin to a balcony railing where it can be seen from below, so viewers see the flame openings backlit above the grin.

Written with AI to match this design

Gather your supplies

Check things off as you get ready.

Work on a stable surface, keep your free hand out of the cutting path, and have an adult handle sharp tools.

Three levels of light

  • Leave intact

    The broad rind between the flame holes, around the eyes, and below the mouth stays dark, forming the face structure.

  • Peel & shade

    The game title lettering is skin-peeled with a shallow gouge for a subtle glowing text effect.

  • Cut through

    Both eye openings, the grinning mouth, and all flame-shaped holes above the face are cut fully through.

Learn the carving basics

Before you start cutting

How pointed can I make the flame tips without them breaking off?

Keep each flame tip at least 3 mm wide at its narrowest point. Very sharp points have almost no structural support and will snap when touched. A gently rounded tip carved with a fine detail knife holds up far better and still reads clearly as a flame shape.

Should I cut the flames or the face first?

Cut the face first. The eyes and mouth establish the composition center, and you can then adjust the flame arc above to balance the overall height. Cutting flames first can leave the face feeling too low or too high relative to the fire crown.

What LED color looks most like real fire for the flame holes?

A warm amber or flickering orange-toned LED tea light reads closest to fire when seen through orange rind. Standard white LEDs make the flame holes look cool and slightly clinical. Some craft stores carry LEDs that cycle between orange and yellow, which creates a convincing flicker effect.

Your take belongs here, too.

Changed a detail? Made it simpler? Share a photo of your version and tell the community what worked.

Share your pumpkin

Want more designs like this? Browse our full library of pumpkin carving ideas, or pick a free printable stencil. Every pattern and template in our own collection is free to print at home.

More pumpkins like this

You've reached the end · 8 pumpkins
The Patch Report

Fresh pumpkins, in your inbox.

The best new carvings, ideas worth stealing, and how-tos for carving season. Short, seasonal, and gone by November.

A short email during carving season. Unsubscribe anytime. See our privacy policy.