Halloween Pumpkin Carving Contest · Starts October 1st · $500 in prizes
← Back to ideas
@ai_concepts
Sep 13, 2026

Boho Llama with Tassel Necklace Painted PumpkinAI
0

Boho Llama with Tassel Necklace Painted Pumpkin

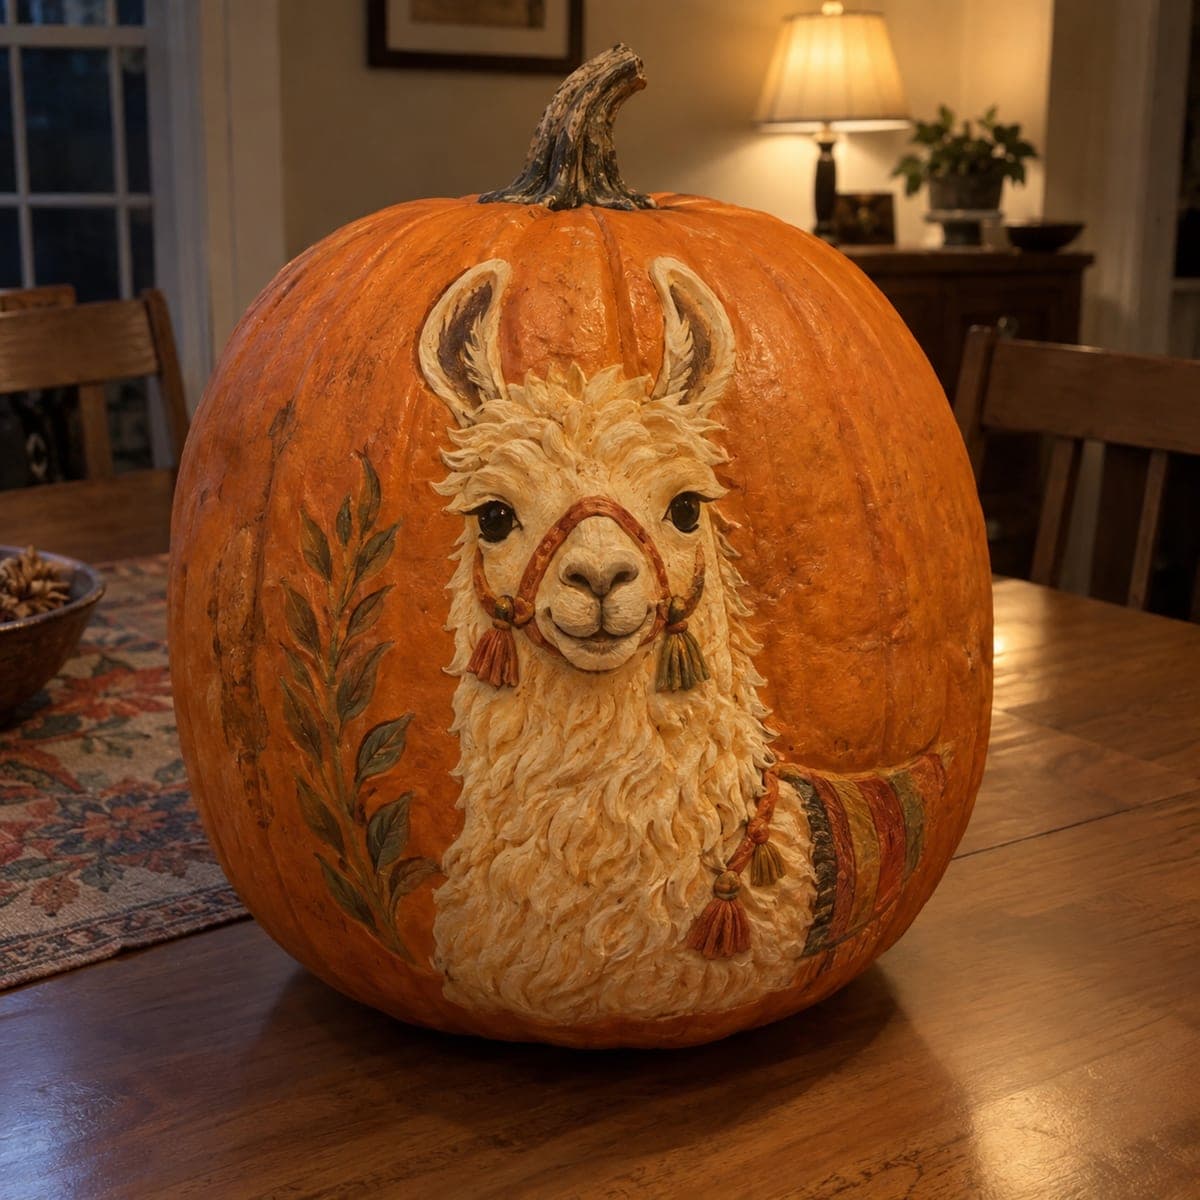
A fluffy white llama with long lashes, a soft muzzle, and a colorful tassel necklace is painted in folk-art style on this orange pumpkin, blending fall seasonal decor with boho charm. The no-carve design works equally well as a Thanksgiving centerpiece or a Halloween accent. Layer the white fur in short, overlapping strokes before adding the face details, and paint the multicolored tassels last with a fine liner brush for the clearest color definition.

This is an AI-generated concept image: a realistic, carvable design idea rather than a photo of a finished carve. AI concepts are always labeled and sit out the leaderboard and the contest.

No ratings yet · Sign in to rate
Comments (0)

  • No comments yet — be the first.

Save without an account. Sign in to like or comment.

Our tips for carving a similar design

The core trick here is building a fluffy llama out of short, overlapping white brushstrokes so the fur looks soft rather than flat, then dropping in crisp face details and a colorful tassel necklace on top. Since this is a fully painted, no-carve design, the pumpkin stays whole, which makes it a long-lasting centerpiece. Work light to dark and save the tiny multicolored tassels for last.

Written by PumpkinCarvingIdeas.com, inspired by the image above. These are our suggestions, not instructions from the uploader. This approach to the AI concept has not been tested on a real pumpkin.

From pumpkin to porch

  1. Clean and sketch

    Wipe the pumpkin with a damp cloth and let it dry fully so paint grips the skin. Pick the smoothest, flattest face for your llama. With a pencil or washable marker, lightly sketch the head shape, the two ears, and a rough oval for the muzzle. Keep the outline low and centered so there is room for the tassel necklace below.

  2. Block in the white body

    Load a medium flat brush with white acrylic or outdoor craft paint and fill the head and body shape. Use short, overlapping strokes that follow the outer edge so the border reads as fluffy fur rather than a hard line. Let this base coat dry, then add a second coat for solid coverage over the orange. Two thin coats look cleaner than one thick one.

  3. Add fur texture and ears

    Once the white is dry, use a smaller brush to flick short strokes of slightly gray-white shadow under the chin and along one side for gentle depth. Paint the inner ears with a soft pink, leaving a thin white rim. Keep the muzzle area smooth and pale since the face details will sit there. Let everything dry before moving on.

  4. Paint the face

    Switch to a fine liner brush and a little black paint for the two oval eyes, then add curved lashes and thin brows above them. Paint a soft rounded nose and a simple curved smile below it. Add a faint pink blush on the muzzle with a nearly dry brush. Take your time here, since the face sets the whole personality.

  5. Add the tassel necklace

    Draw a thin curved garland line in olive or tan across the lower chest. Hang small dots along it, then paint each tassel below in a different color: red, teal, and yellow. Use short downward strokes at the bottom of each tassel to suggest fringe. A fine liner and a steady hand give you the cleanest color separation.

  6. Seal and style

    Let all paint cure for several hours, then brush on a thin coat of matte outdoor sealer to protect against smudges and moisture. Set the finished pumpkin on a counter or shelf away from direct heat. For evening ambiance, place a battery LED nearby rather than inside, since this design is not cut open. Snap your photo in soft daylight to catch the fur texture.

Gather your supplies

Check things off as you get ready.

Work on a stable surface, keep your free hand out of the cutting path, and have an adult handle sharp tools.

Three levels of light

  • Leave intact

    The entire orange pumpkin skin stays intact and unlit, since this is a painted, no-carve design.

  • Peel & shade

    For subtle dimension you could lightly scuff the muzzle area with fine sandpaper before painting so the pale nose sits softly, but no glow is created.

  • Cut through

    No cutouts are needed; if you want evening light, set a battery LED beside the pumpkin rather than carving into it.

Learn the carving basics

Before you start cutting

Do I need to carve anything for this llama?

No, this is a fully painted design, so the pumpkin stays whole. That makes it last longer and keeps the surface strong for detail work. If you later want a glow, just place a battery LED next to it.

What paint works best on a pumpkin surface?

Acrylic or outdoor craft paint sticks well and dries fast. Use two thin coats of white for solid coverage over the orange, and let each layer dry before adding the next. A matte sealer at the end protects the finish from smudges.

How do I keep the tiny tassels from smearing together?

Paint them last, after the white body and face are completely dry. Use a fine liner brush and let each color dry before adding the one beside it. Keeping the paint slightly thick rather than watery gives you the crispest color edges.

Your take belongs here, too.

Changed a detail? Made it simpler? Share a photo of your version and tell the community what worked.

Share your pumpkin

More pumpkins like this

You've reached the end · 8 pumpkins
The Patch Report

Fresh pumpkins, in your inbox.

The best new carvings, ideas worth stealing, and how-tos for carving season. Short, seasonal, and gone by November.

A short email during carving season. Unsubscribe anytime. See our privacy policy.