Halloween Pumpkin Carving Contest Β· Starts October 1st Β· $500 in prizes
← Back to ideas
@ai_concepts
Sep 25, 2026
Painted Bingo Heeler Pumpkin No-Carve DesignAI
0

Report this carving

Tell us what is wrong. Reports are private.

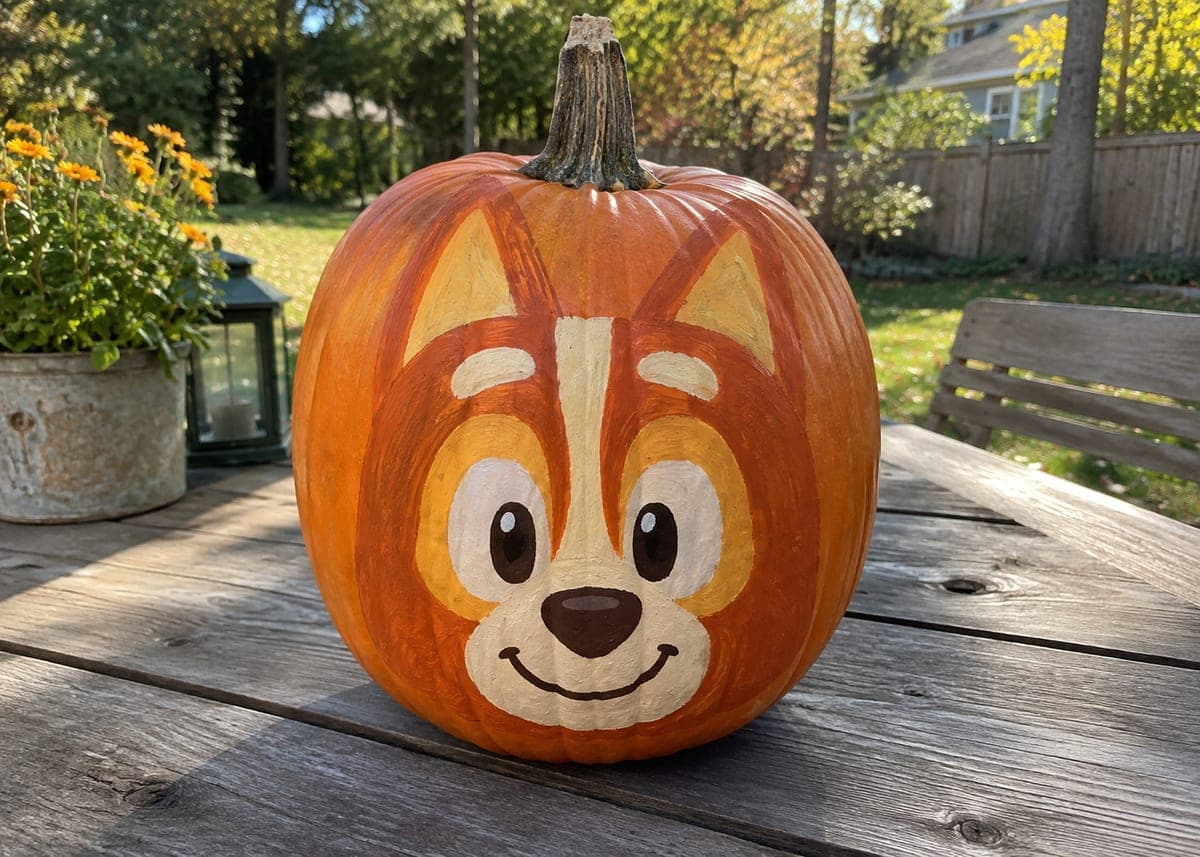
Painted Bingo Heeler Pumpkin No-Carve Design

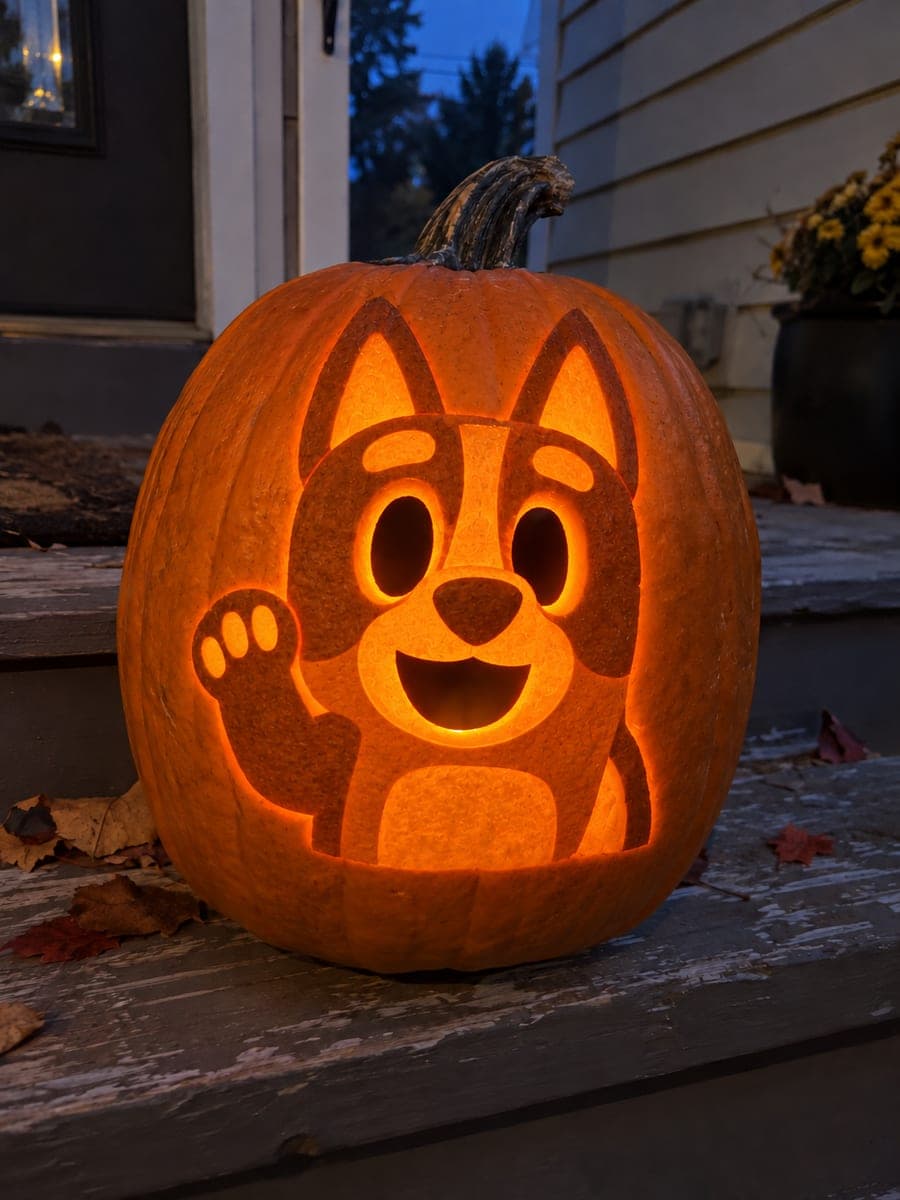
This no-carve bingo pumpkin idea uses flat acrylic paint to bring the blue heeler to life on an intact gourd, building up a burnt-orange and gold heeler head with a cream muzzle, white oval eyes, and a simple dark nose and smile. Start with the lightest colors first so darker tones can overlap cleanly without muddying. A matte sealer spray after the paint dries locks in the details and keeps the pumpkin looking fresh through the season.

No ratings yet Β· Sign in to rate

Comments (0)

  • No comments yet β€” be the first.

Save without an account. Sign in to like or comment.

Our tips for carving a similar design

This design builds up a burnt-orange and gold heeler head with a cream muzzle and simple dark features using flat acrylic paint on an uncut gourd. The golden rule here is light colors first: laying down the cream muzzle and white eyes before the dark nose and smile prevents muddy mixing. A matte sealer spray at the end locks the whole design in for the season.

From pumpkin to porch

  1. Clean and dry the pumpkin

    Wipe the surface with a slightly damp cloth and dry it well before starting. Remove any stem debris or soil from the skin. A clean, dry surface gives the paint a stable base and prevents peeling later in the season.

  2. Sketch the heeler head

    Use a soft pencil to outline the large rounded head, the triangular ear shapes, and the oval muzzle patch. Bingo's head is wide and blocky relative to the ears, so draw the ears smaller than feels instinctive. These pencil lines will be covered by paint, so draw confidently.

  3. Apply the base coats

    Fill the head shape with burnt-orange acrylic, letting it dry fully before laying a wash of gold over the top for warmth. For the ears, use a mix of orange and light brown so they read as slightly darker than the main head. Two thin coats beat one heavy one for coverage without cracking.

  4. Paint the cream muzzle and white eyes

    Once the base coats are dry, paint the oval muzzle patch in cream and let it dry before adding two large white eye circles. Keep a small gap between the eyes and the ear edges so each element has breathing room. Light colors layered before dark ones stay clean and opaque.

  5. Add the dark details

    Use a thin round brush to paint a small dark nose oval at the top of the muzzle, a curved smile below it, and a black pupil circle on each white eye. A tiny white highlight dot on each pupil adds sparkle. Step back and adjust the smile arc if needed before the paint dries.

  6. Seal and display

    Allow all paint layers to cure for at least one hour before applying two light coats of matte sealer spray, letting the first coat dry completely between applications. Display the pumpkin in a sheltered spot so rain does not erode the paint before the sealer fully cures, which takes about 24 hours.

Written with AI to match this design

Gather your supplies

Check things off as you get ready.

Work on a stable surface, keep your free hand out of the cutting path, and have an adult handle sharp tools.

Three levels of light

  • Leave intact

    The natural orange rind outside the painted head area stays untouched and unlit.

  • Peel & shade

    None, this design leaves the shell fully intact.

  • Cut through

    None, position an outside spotlight or porch lamp to illuminate the painted face from the front.

Learn the carving basics

Before you start cutting

How do I get Bingo's distinctive burnt-orange color right if I only have basic acrylics?

Mix standard orange with a small amount of burnt sienna or raw umber until it reads as a warm, earthy tone rather than a bright Halloween orange. Test the mix on a paper towel against the pumpkin's natural color before committing. Adding a touch of yellow lightens it if the mix goes too dark.

The muzzle cream looks gray against the orange base. How do I fix it?

Apply a thin coat of white paint first over just the muzzle area and let it dry, then paint the cream tone on top. The white underlayer blocks the orange from showing through and keeps the cream clean. This is called an undercoat and makes a big difference with light acrylic colors.

Can I use paint markers instead of brushes for the detail work?

Paint markers work very well for the thin liner details like the smile curve, nose outline, and pupil dots. They give a more controlled line than a brush, especially if you are not comfortable with a liner brush technique. Just make sure the surrounding paint is fully dry before running the marker over it, or it will drag and smear.

Your take belongs here, too.

Changed a detail? Made it simpler? Share a photo of your version and tell the community what worked.

Share your pumpkin

More pumpkins like this

You've reached the end Β· 8 pumpkins
The Patch Report

Fresh pumpkins, in your inbox.

The best new carvings, ideas worth stealing, and how-tos for carving season. Short, seasonal, and gone by November.

A short email during carving season. Unsubscribe anytime. See our privacy policy.