Halloween Pumpkin Carving Contest · Starts October 1st · $500 in prizes
← Back to ideas
@ai_concepts
Sep 25, 2026
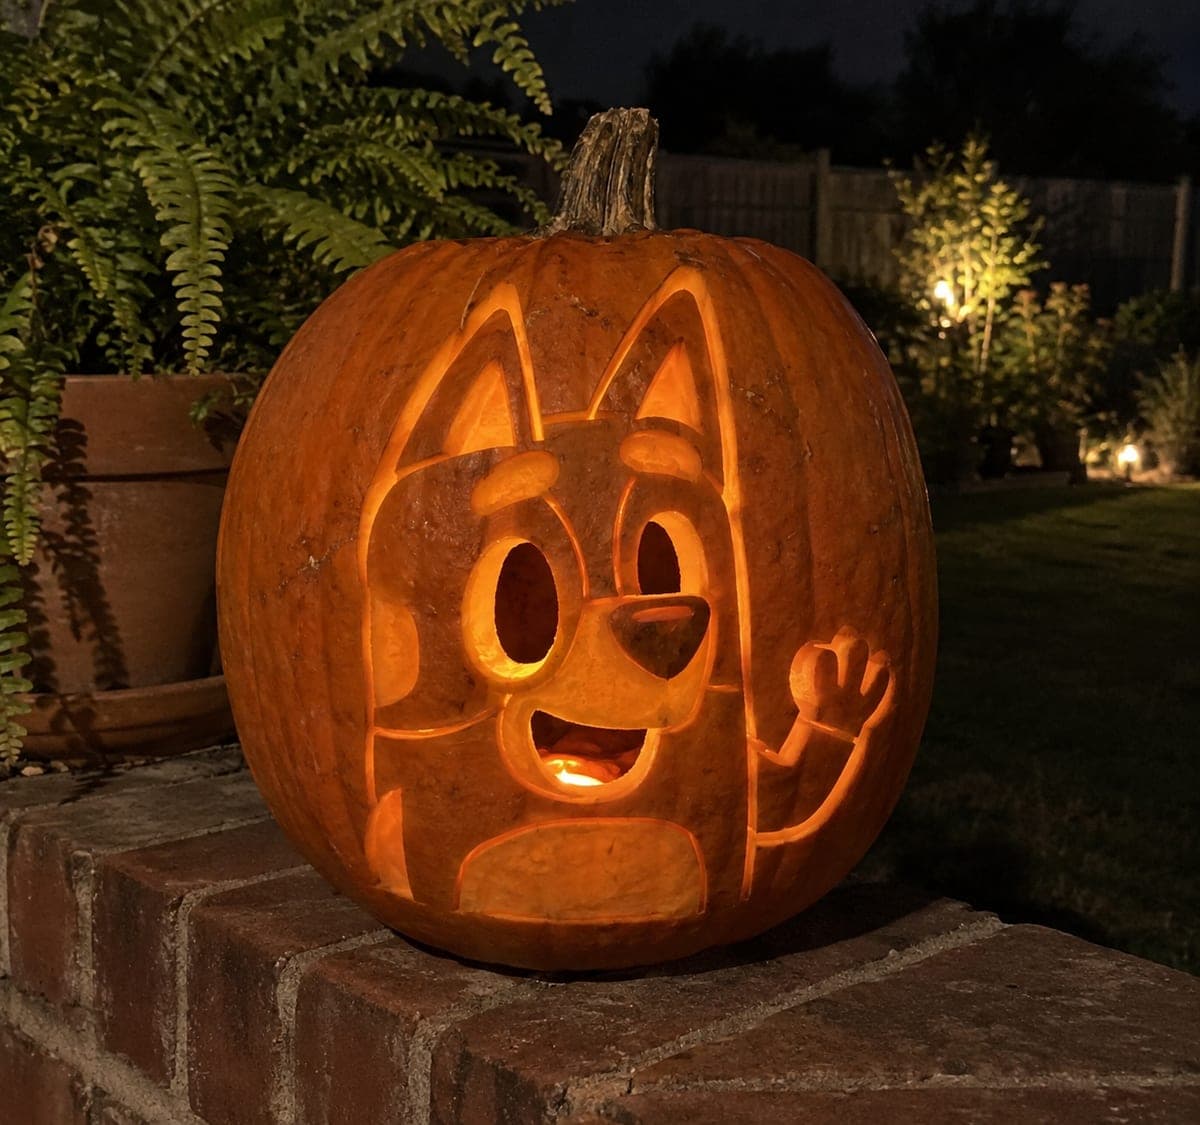
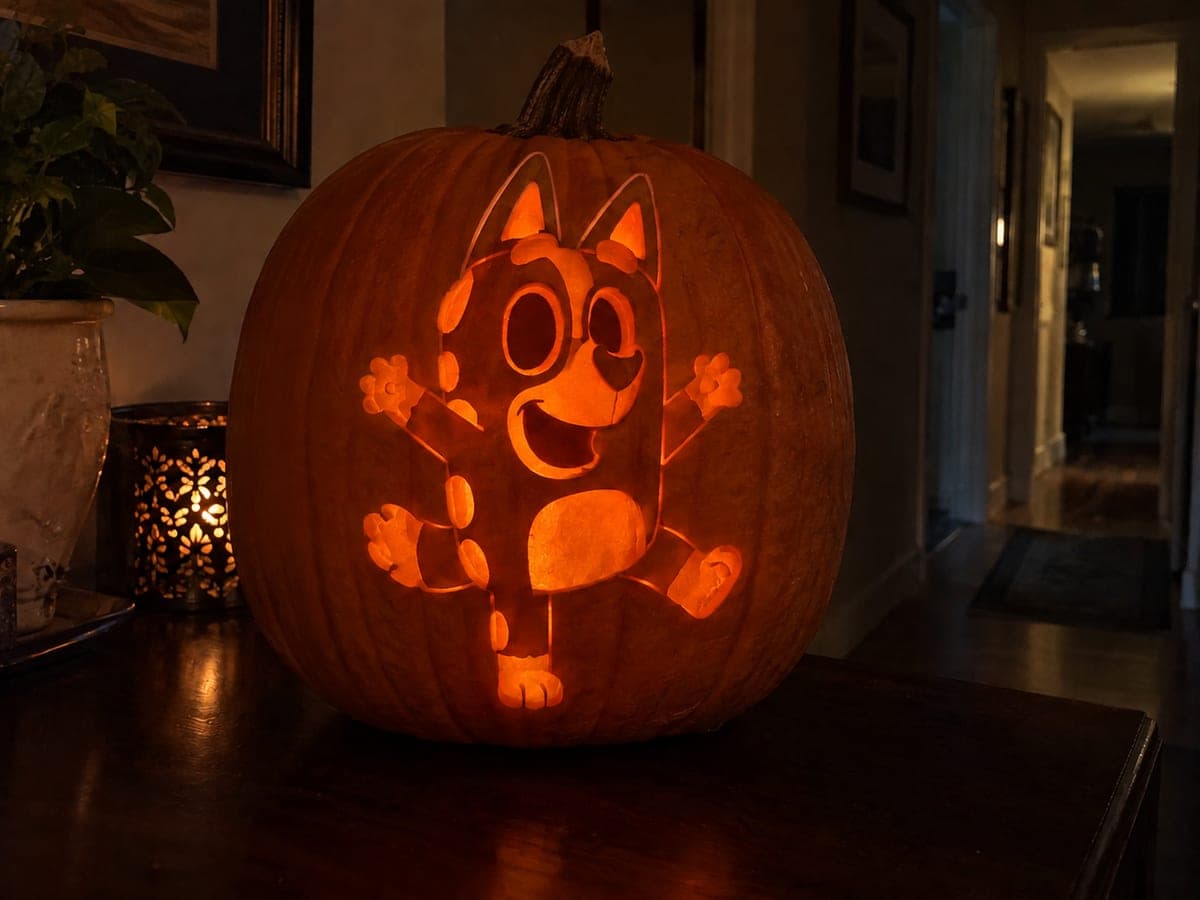
Hard Bluey Waving Bust Pumpkin Carving with Groove DetailAI
0

Report this carving

Tell us what is wrong. Reports are private.

Hard Bluey Waving Bust Pumpkin Carving with Groove Detail

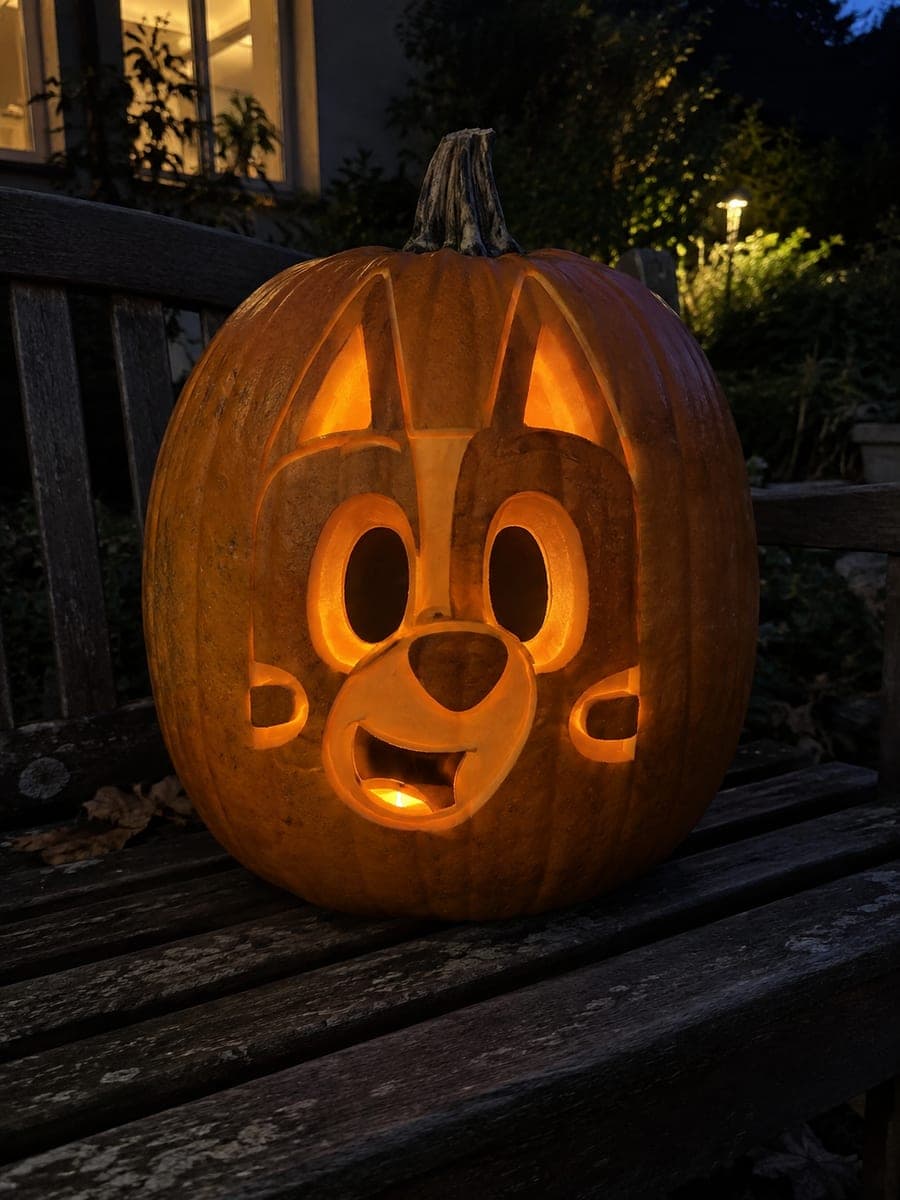
At the hard level, this Bluey pumpkin carving extends to a waving bust with hollow eyes and an open smile, the full figure outlined by shallow-backed grooves and the paw remaining broadly attached. The groove work requires a steady hand and consistent depth to look clean. Score the body outline first as a guide, then hollow the eyes and smile before working the groove details inward. Backlighting catches every groove line and makes the waving pose fully legible.

No ratings yet · Sign in to rate
Comments (0)

  • No comments yet — be the first.

Save without an account. Sign in to like or comment.

Our tips for carving a similar design

This hard Bluey design extends to a waving bust with hollow eyes and an open smile, the full figure outlined by shallow-backed grooves with the raised paw remaining broadly attached to the shell. The groove work requires consistent depth and a steady hand across a large surface area. Scoring the body outline first as a guide before cutting the eye and smile apertures ensures the composition is placed correctly.

From pumpkin to porch

  1. Hollow and layout the full bust

    Cut the back lid and scoop to one inch throughout. The waving bust covers most of the pumpkin face, so select a large, broad pumpkin. Mark the full bust boundary on the front surface before placing the template so you can confirm the composition fits the pumpkin size. Dry the interior completely.

  2. Transfer the waving bust template

    Transfer the full figure outline including the waving paw position, the body silhouette, and the head with eye and smile apertures. Mark the groove line positions across the body. Label the paw attachment zone clearly since that area must remain broadly attached to the outer rind throughout.

  3. Score the body outline as a guide

    Before cutting any apertures, use a detail knife to lightly score the outer body outline as a visual guide. This establishes the composition boundary on the rind surface and acts as a reference point during the groove work later. Score at surface depth only, not deep enough to function as a cut.

  4. Cut the hollow eye apertures and smile

    Cut both oval eye holes first, then the open smile opening. The face apertures are the structural anchors of the bust composition. Confirm they are clean and all pieces removed before starting the groove work that extends across the full body.

  5. Carve the body groove detail and bust outline

    Use a flat gouge to back-carve the full body outline zone to about half wall depth, working from the scored outer body boundary inward. Then use a narrow V-tool to add the groove detail lines across the body surface, each at about one-quarter depth. Keep the groove lines smooth and follow any body contour curves in the template. Leave the paw area broadly attached at full depth.

  6. Light and display

    Insert a steady cool white LED to read all groove depth levels clearly. Display on a surface at eye height so the full waving bust pose is visible from a standing position. The combination of bright aperture eyes and smile, the mid-depth body outline, and the fine groove lines creates three distinct visual layers.

Written with AI to match this design

Gather your supplies

Check things off as you get ready.

Work on a stable surface, keep your free hand out of the cutting path, and have an adult handle sharp tools.

Three levels of light

  • Leave intact

    Outer rind beyond the bust boundary and the broadly attached paw zone stay at full dark depth

  • Peel & shade

    Body outline back-carved zone at half depth provides mid glow; groove lines at one-quarter depth provide fine softer detail lines

  • Cut through

    Oval eye holes and open smile aperture are fully cut through for bright light

Learn the carving basics

Before you start cutting

How do I keep the groove lines consistent in depth across a large body area?

Use a marking gauge or a pencil wrapped with tape at the target depth as a depth stop on your V-tool handle. Work each groove line in a single pass from start to finish without stopping and restarting mid-groove. Consistent stroke pressure is easier to maintain when you are moving the tool continuously rather than in short segments.

The paw attached to the shell looks clumsy at the connection point. How do I refine it?

Use a narrow gouge to define the paw finger shapes and wrist line within the attachment zone without fully separating the paw from the shell. Adding contour lines that suggest the paw edge reads as intentional design rather than a structural compromise. The viewer will interpret it correctly as long as the basic paw silhouette is clear.

The bust outline takes up most of the pumpkin face. Is there enough dark rind around it to frame the design?

Leaving at least half an inch of full-depth rind around the outer bust boundary is enough to frame the composition clearly. If your pumpkin is on the smaller side, scale the template down until this border space exists. The dark frame is what makes the lit bust read as a deliberate silhouette rather than a random carved area.

Your take belongs here, too.

Changed a detail? Made it simpler? Share a photo of your version and tell the community what worked.

Share your pumpkin

More pumpkins like this

You've reached the end · 8 pumpkins
The Patch Report

Fresh pumpkins, in your inbox.

The best new carvings, ideas worth stealing, and how-tos for carving season. Short, seasonal, and gone by November.

A short email during carving season. Unsubscribe anytime. See our privacy policy.