Halloween Pumpkin Carving Contest Β· Starts October 1st Β· $500 in prizes
← Back to ideas
@ai_concepts
Aug 1, 2026
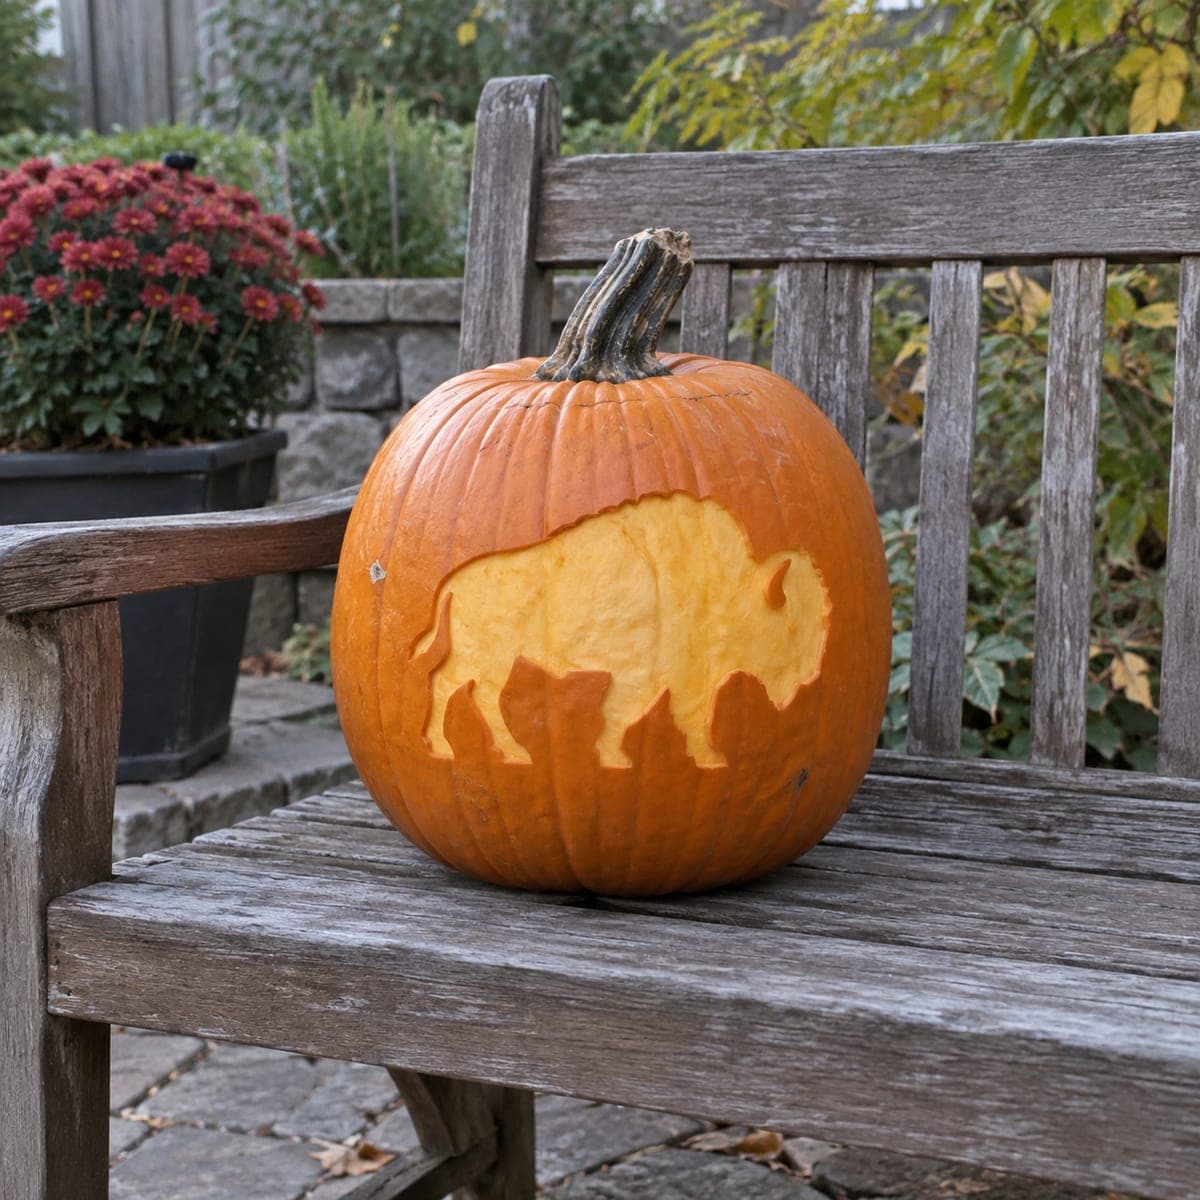
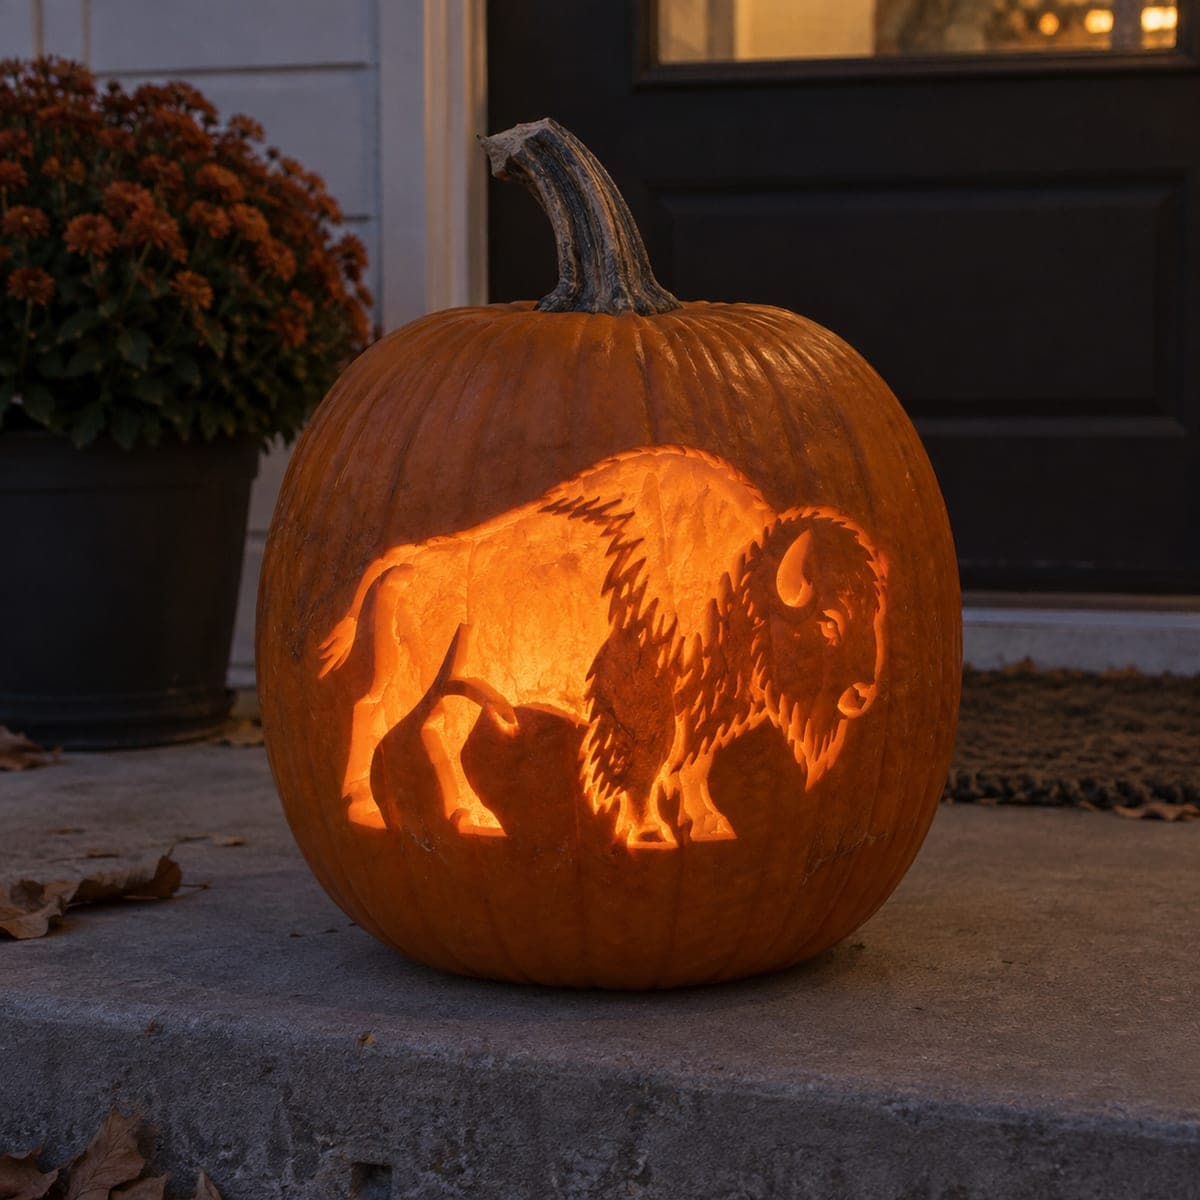
Buffalo Silhouette Peel Carved PumpkinAI
0

Buffalo Silhouette Peel Carved Pumpkin

A standing buffalo is peeled from the rind in one bold flat shape, giving this pumpkin a clean western feel that reads perfectly in daylight. Solid-shape peels are among the most forgiving carving projects: trace the outline, score it deeply with a knife, then lift the skin inside with a vegetable peeler or spoon edge. Keep the edge crisp around the horns and legs, since the silhouette carries the whole design.

This is an AI-generated concept image: a realistic, carvable design idea rather than a photo of a finished carve. AI concepts are always labeled and sit out the leaderboard and the contest.

No ratings yet Β· Sign in to rate

Comments (0)

  • No comments yet β€” be the first.

Save without an account. Sign in to like or comment.

Our tips for carving a similar design

This design leans on the peel carving trick, where the whole buffalo is a single flat shape lifted from the rind rather than cut through. You score the outline deeply, then shave away just the skin inside so the exposed flesh glows a soft orange in daylight and lights up gently at night. The plan is simple: transfer the outline, cut the edge crisp, and peel the middle evenly.

Written by PumpkinCarvingIdeas.com, inspired by the image above. These are our suggestions, not instructions from the uploader. This approach to the AI concept has not been tested on a real pumpkin.

From pumpkin to porch

  1. Pick a smooth face and clean the pumpkin

    Choose the flattest, blemish free side of the pumpkin for the buffalo. Wipe it dry so your stencil sticks well. If you want interior light later, cut a lid or a back access hole and scoop the inside wall down to about one inch thick behind the design area. A thinner wall peels and glows more evenly.

  2. Transfer the buffalo outline

    Tape your buffalo stencil flat against the chosen face, easing out wrinkles around the curves. Poke closely spaced dots along the whole outline with a pin or a poker tool, paying extra attention to the horns, ears, and legs. Remove the paper and lightly connect the dots with a washable marker so you can see the full silhouette. Double check the legs are spaced clearly before you commit.

  3. Score the outline deeply

    With a small detail saw or a sharp paring knife, cut along the outline about a quarter inch deep. This scored line is what keeps your edge crisp, so take your time on the horns and the gap between the legs. Do not cut all the way through the wall, you only want to define the border. Adults should handle all the sharp tools here.

  4. Peel the skin inside the shape

    Starting near the middle, use a vegetable peeler, a spoon edge, or a shallow ribbon tool to lift the orange skin off inside the outline. Work outward toward your scored line so the border stays sharp and clean. Aim for an even depth across the whole body so the glow looks uniform. Leave the horns and hooves fully skinned right up to the edge, since those thin points carry the shape.

  5. Refine the edges and thin details

    Go back around the border and clean up any ragged skin with the tip of your knife. Keep the horn tips and legs slightly rounded rather than razor thin so they do not crumble. If a spot looks too shallow and dark, shave it a little deeper for a brighter glow. Wipe away the marker lines with a damp cloth.

  6. Light it and photograph it

    Drop a battery LED puck inside, or simply set the pumpkin in daylight where this peel design reads best. Test the glow at dusk and shave any dull patches thinner if needed. Coat the peeled area with a thin layer of petroleum jelly to slow drying and keep the color fresh. Snap your photo the same evening while the edges are still crisp.

Gather your supplies

Check things off as you get ready.

Work on a stable surface, keep your free hand out of the cutting path, and have an adult handle sharp tools.

Three levels of light

  • Leave intact

    The untouched rind around the buffalo stays dark, framing the animal.

  • Peel & shade

    The entire buffalo body is skin peeled to a soft mid orange glow.

  • Cut through

    No full cutouts are needed, though you could pierce a tiny eye dot for a bright accent.

Learn the carving basics

Before you start cutting

Do I need to cut all the way through for this to work?

No, that is the beauty of a peel carve. The buffalo is only skinned, not cut through, so it glows a warm orange in daylight and softly at night. Keep the wall behind it around one inch thick if you also want to add an interior light.

How do I keep the horns and legs from looking messy?

Score those thin edges deeply and cleanly first, then peel up to the line rather than across it. Round the horn tips and hooves slightly instead of carving them razor sharp so they hold together. A steady detail knife tip does the final cleanup better than a big blade.

This is a concept image, so how do I get the same look on a real pumpkin?

Pick the flattest face you can find and use a real buffalo stencil sized to fit it. The single flat shape peels the same way on an actual pumpkin, just work slowly for an even depth. Choose a pumpkin without deep ribs across the design area so the silhouette stays readable.

Your take belongs here, too.

Changed a detail? Made it simpler? Share a photo of your version and tell the community what worked.

Share your pumpkin

More pumpkins like this

You've reached the end Β· 8 pumpkins
The Patch Report

Fresh pumpkins, in your inbox.

The best new carvings, ideas worth stealing, and how-tos for carving season. Short, seasonal, and gone by November.

A short email during carving season. Unsubscribe anytime. See our privacy policy.