Halloween Pumpkin Carving Contest · Starts October 1st · $500 in prizes
← Back to ideas
@ai_concepts
Aug 19, 2026
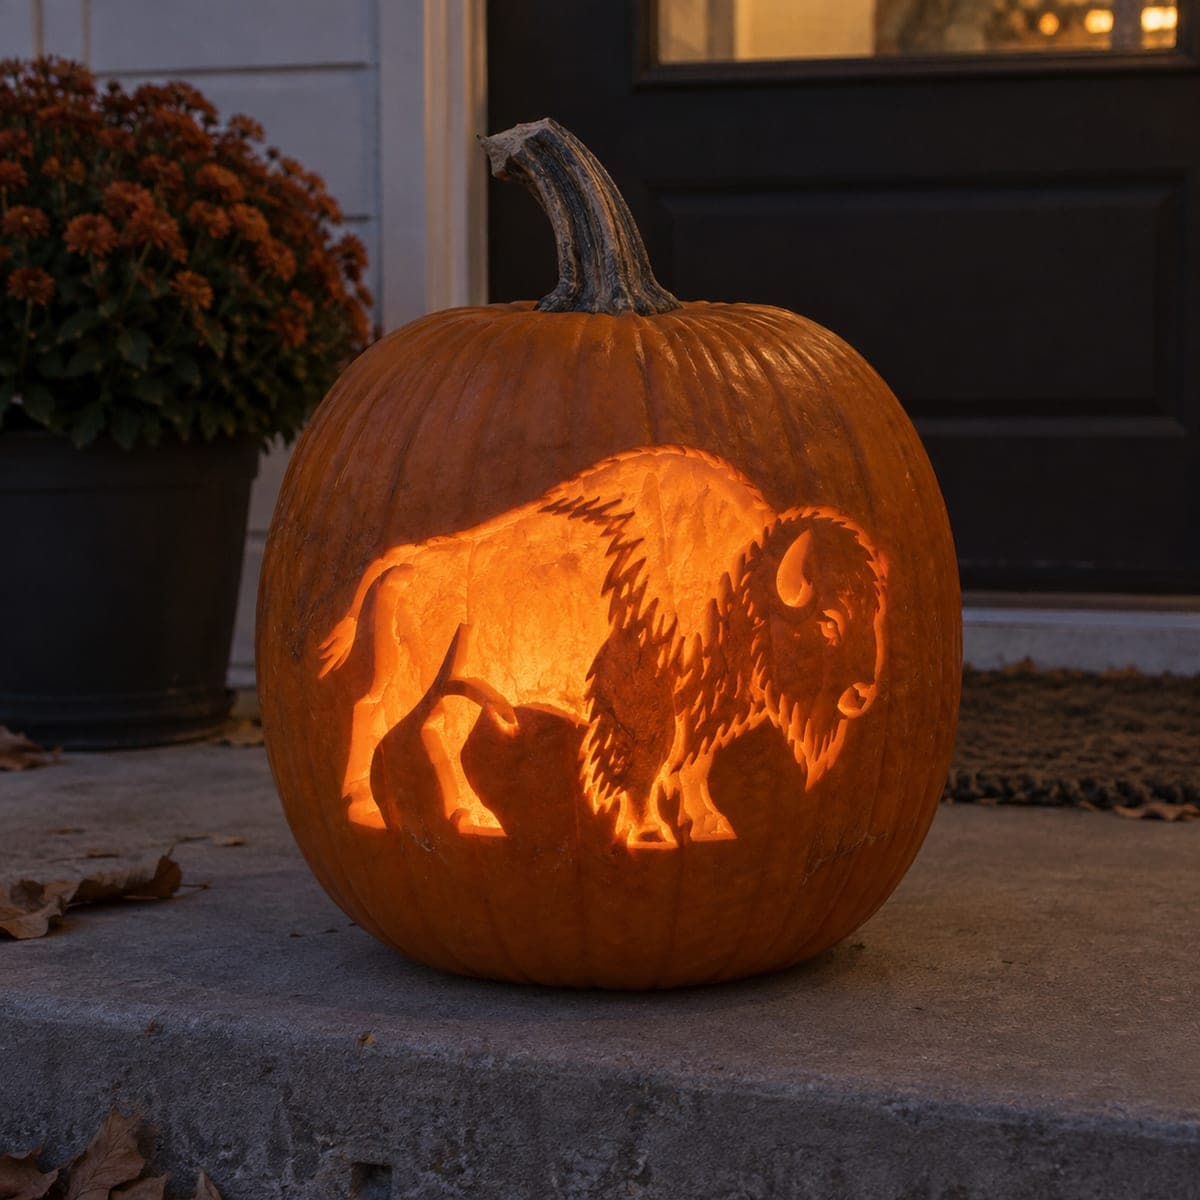
American Bison Shaded Pumpkin PortraitAI
0

American Bison Shaded Pumpkin Portrait

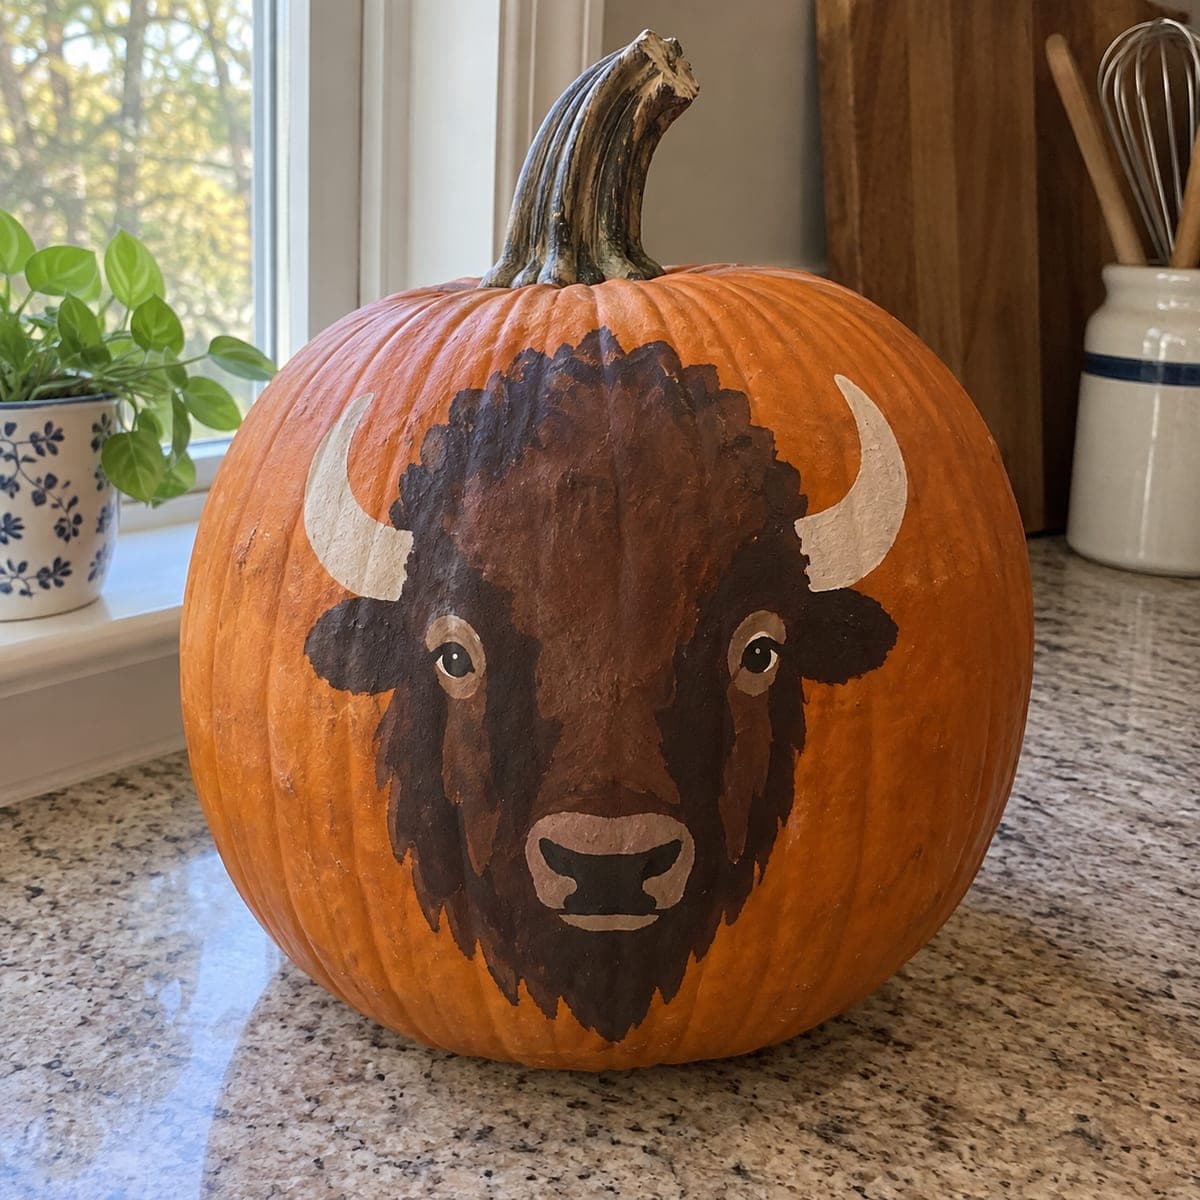
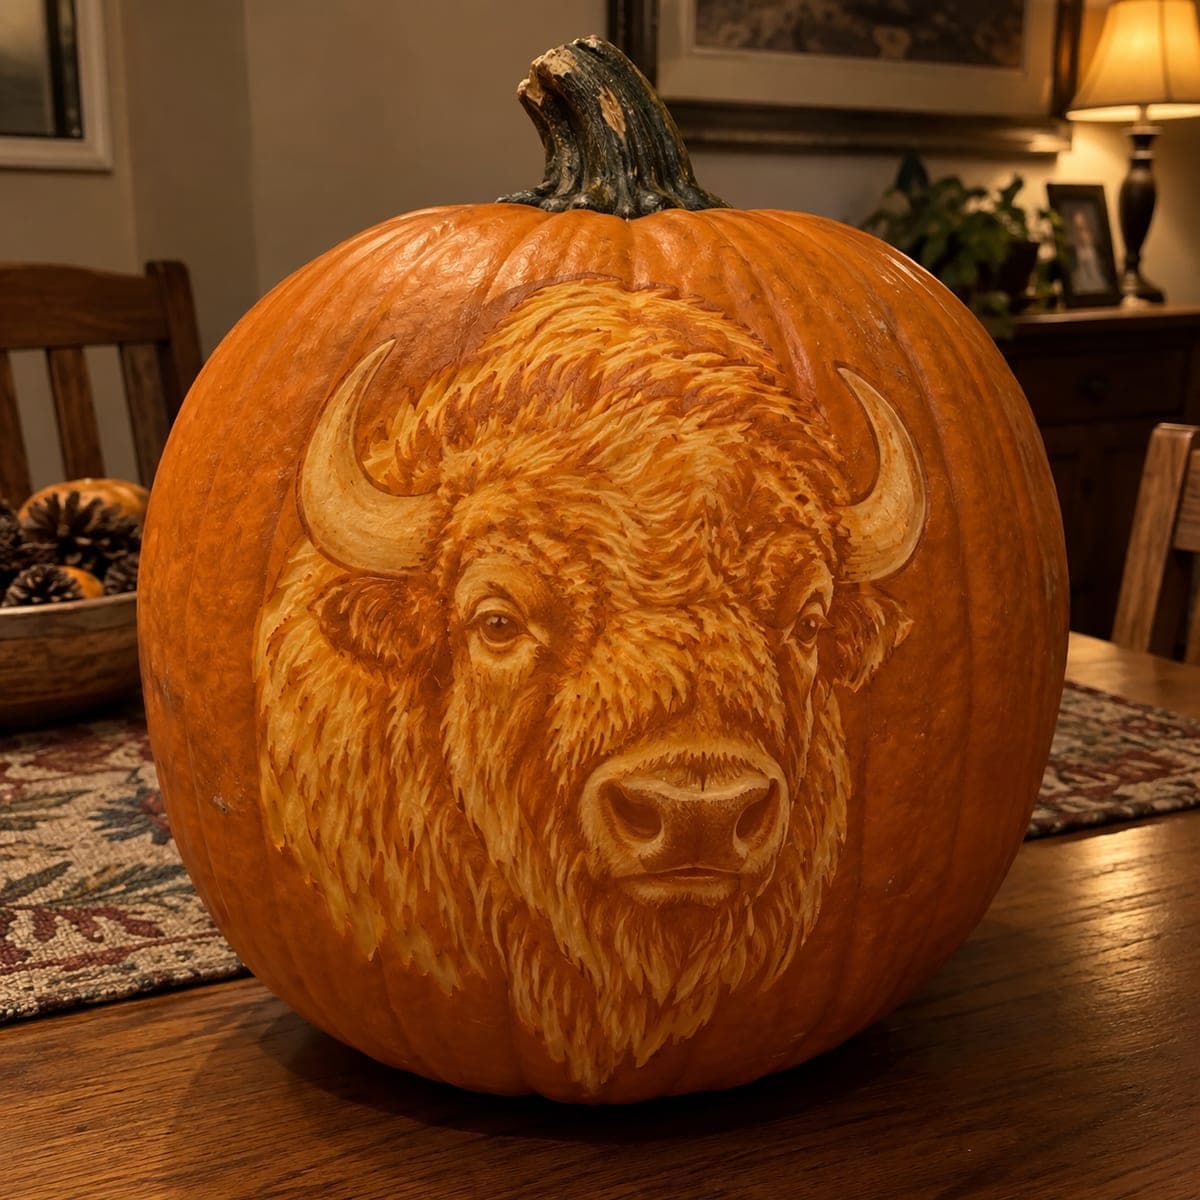
A shaggy American bison stares out from this pumpkin, its woolly mane, curved horns, and broad wet nose built entirely from layered surface shading. Hundreds of short overlapping strokes create the fur, cut in the direction of growth with a fine gouge, while the horns are peeled smooth for contrast. Establish the dark eyes and nose early since they anchor the whole face. Lit softly from inside or photographed by lamplight, the texture reads like an oil painting on the rind.

This is an AI-generated concept image: a realistic, carvable design idea rather than a photo of a finished carve. AI concepts are always labeled and sit out the leaderboard and the contest.

No ratings yet · Sign in to rate
Comments (0)

  • No comments yet — be the first.

Save without an account. Sign in to like or comment.

Our tips for carving a similar design

The whole face is built from layered surface shading rather than cut-through openings, so almost no light passes through the rind. The core trick is depth by contrast: skin left dark for shadows, thin peels for the woolly fur, and smooth polished peels for the horns and nose highlights. Plan the eyes and nose first because they anchor everything, then work the fur outward stroke by stroke.

Written by PumpkinCarvingIdeas.com, inspired by the image above. These are our suggestions, not instructions from the uploader. This approach to the AI concept has not been tested on a real pumpkin.

From pumpkin to porch

  1. Prep the pumpkin and transfer the design

    Pick a large pumpkin with a broad, smooth front face and leave the guts inside since you will not be cutting through. Wipe the skin clean and dry it. Tape your bison stencil flat over the front and poke through the main outlines with a pin: the eyes, nose, horns, and the edge of the mane. Remove the paper and connect the dots lightly with a washable marker so you have a clear map before any blade touches the rind.

  2. Set the eyes and nose first

    These dark anchors give the face its life, so cut them early while your surface is fresh. Use a small detail knife to score the eye outlines and the nostrils, then leave those areas as untouched dark skin for the deepest shadow. Peel a thin skin ring around each eye to lift it slightly and suggest the brow. Keep the nostrils as narrow dark slots and do not open them all the way through.

  3. Peel the horns and nose highlights smooth

    Switch to a ribbon tool or a wide gouge and shave the two curved horns down to smooth, even skin so they glow brighter than the shaggy fur around them. Follow the natural curve of each horn from base to tip in long strokes. Do the same on the broad muzzle top and the raised bridge of the nose. Keeping these areas clean and continuous is what makes them read as hard, wet surfaces against the soft coat.

  4. Build the fur with short overlapping strokes

    This is the slow part. Use a fine V gouge to carve hundreds of short strokes, each following the direction the fur grows: down the cheeks, out along the mane, and swirling over the forehead. Overlap them in rows and vary the depth so some catch more light than others. Work in small patches and step back often to check the flow, since the texture only reads right when the strokes stay consistent.

  5. Deepen shadows and refine edges

    Go back over the recesses under the chin, beside the nose, and inside the mane and remove a little extra skin to darken and separate the layers. Leave the outer edge of the mane as ragged, unpeeled skin so the whole head seems to fade into the dark rind. Compare left and right sides for balance and tidy any stray strokes. Resist opening anything all the way through, since the portrait depends on shading, not cutouts.

  6. Light it and photograph

    Because this is a shaded design, an interior LED does little on its own, so light it softly from a low outside angle or by warm lamplight to rake across the texture. If you do want a faint inner glow, cut a small vent hole in the back and drop in an LED puck, never a candle. Mist the pumpkin lightly to bring out contrast for a photo. Shoot it soon, since peeled shading dries and darkens within a day or two.

Gather your supplies

Check things off as you get ready.

Work on a stable surface, keep your free hand out of the cutting path, and have an adult handle sharp tools.

Three levels of light

  • Leave intact

    The ragged outer mane edge, the eye centers, and the nostril slots stay as untouched dark skin for the deepest shadow.

  • Peel & shade

    The shaggy fur across the face and mane gets thin, layered peels for a soft mid glow.

  • Cut through

    Nothing is fully cut through on the face; the smoothest polished peels on the horns and nose bridge read as the brightest highlights.

Learn the carving basics

Before you start cutting

Do I cut all the way through anywhere on this design?

No, this is a surface shading portrait, so the light and dark come from how deep you peel, not from open holes. Cutting through would break the painterly fur effect and weaken the rind. If you want a faint inner glow, add a single small vent hole hidden in the back for an LED.

How do I keep the fur strokes from looking messy?

Work in small patches and always cut each stroke in the direction the fur grows, overlapping rows like shingles. Step back every few minutes to check that the flow curves correctly around the cheeks and forehead. Consistent direction matters far more than making every stroke identical.

This looks like an AI concept. Can a real pumpkin actually hold this detail?

Yes, a design like this is achievable with patience, though it takes hours and a steady hand. The key is that everything is shallow surface work, so nothing thin is left unsupported. Keep the horns as solid peeled skin rather than cut outlines and the whole face stays structurally sound.

Your take belongs here, too.

Changed a detail? Made it simpler? Share a photo of your version and tell the community what worked.

Share your pumpkin

More pumpkins like this

You've reached the end · 8 pumpkins
The Patch Report

Fresh pumpkins, in your inbox.

The best new carvings, ideas worth stealing, and how-tos for carving season. Short, seasonal, and gone by November.

A short email during carving season. Unsubscribe anytime. See our privacy policy.