Halloween Pumpkin Carving Contest · Starts October 1st · $500 in prizes
← Back to ideas
@ai_concepts
Aug 19, 2026
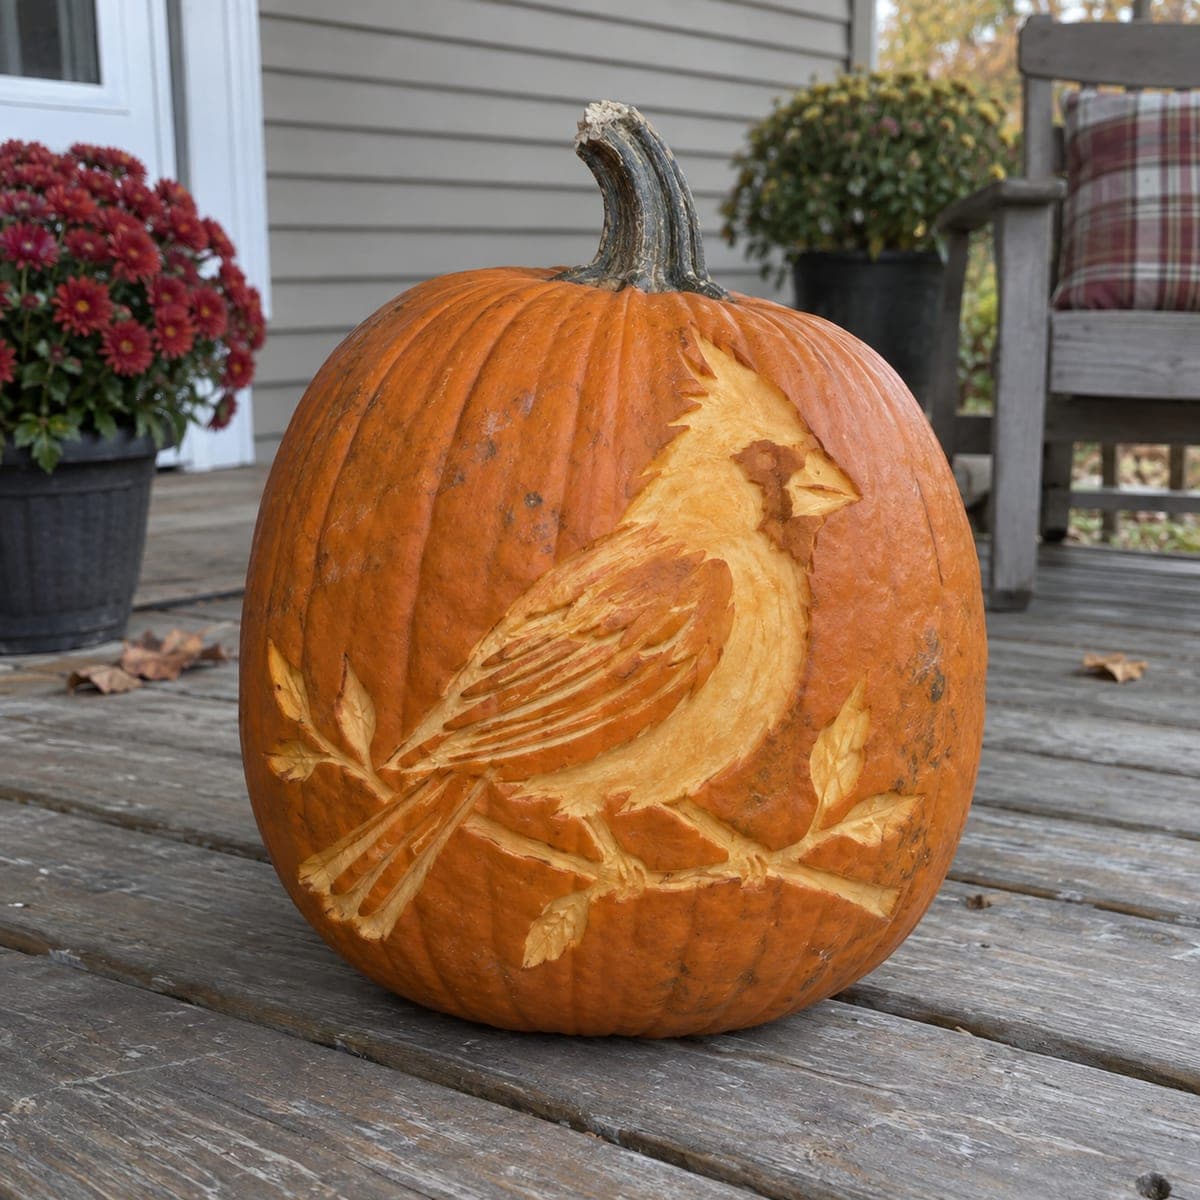
Cardinal on a Branch Carved PumpkinAI
0

Cardinal on a Branch Carved Pumpkin

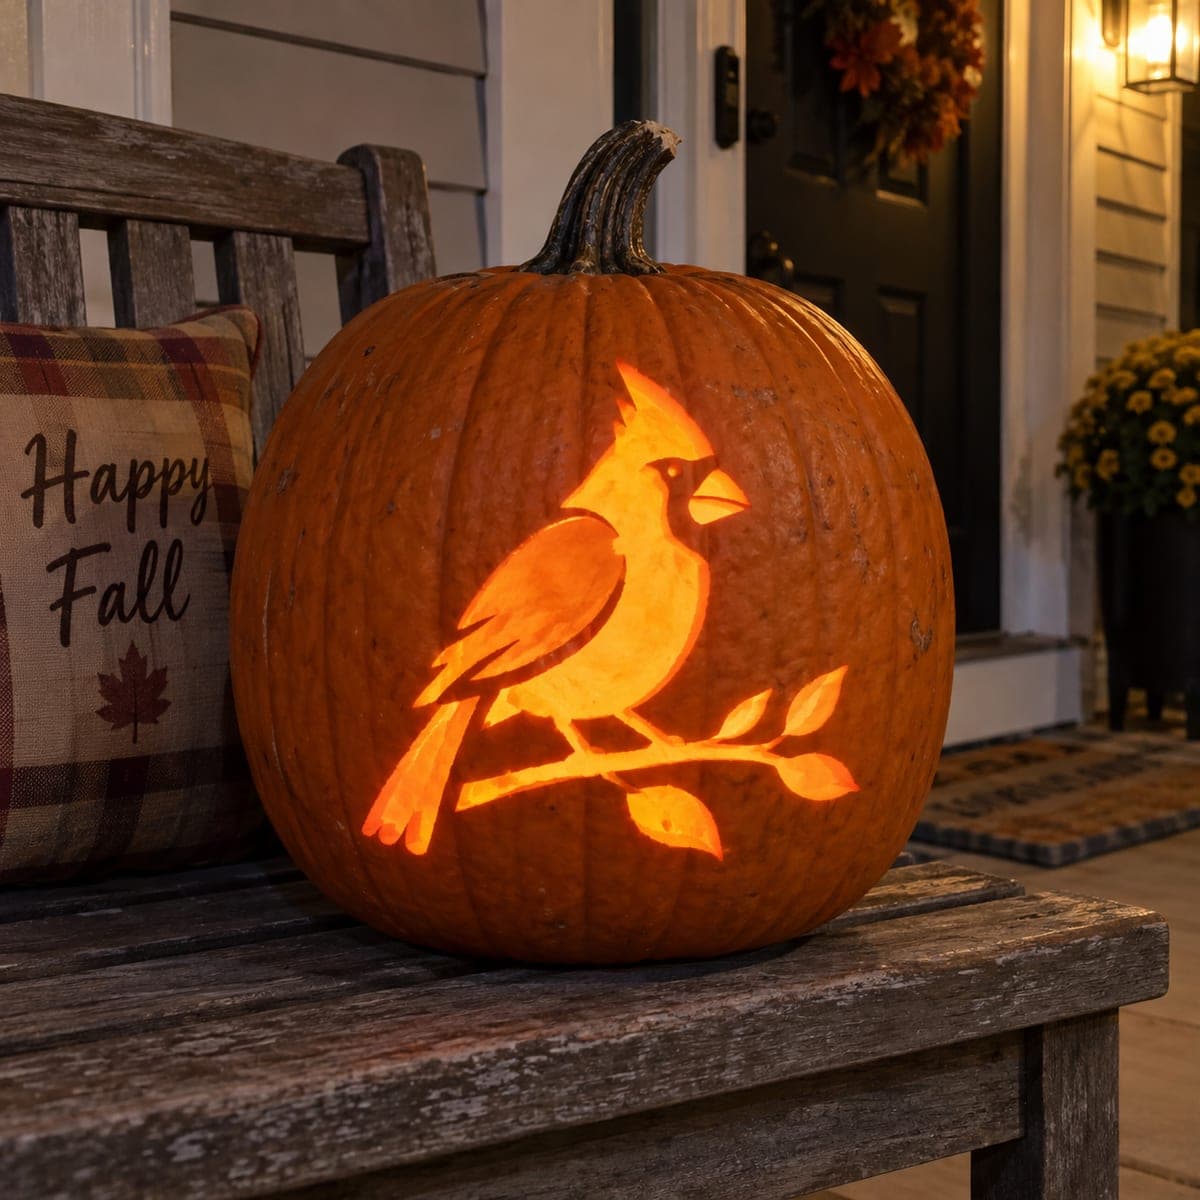
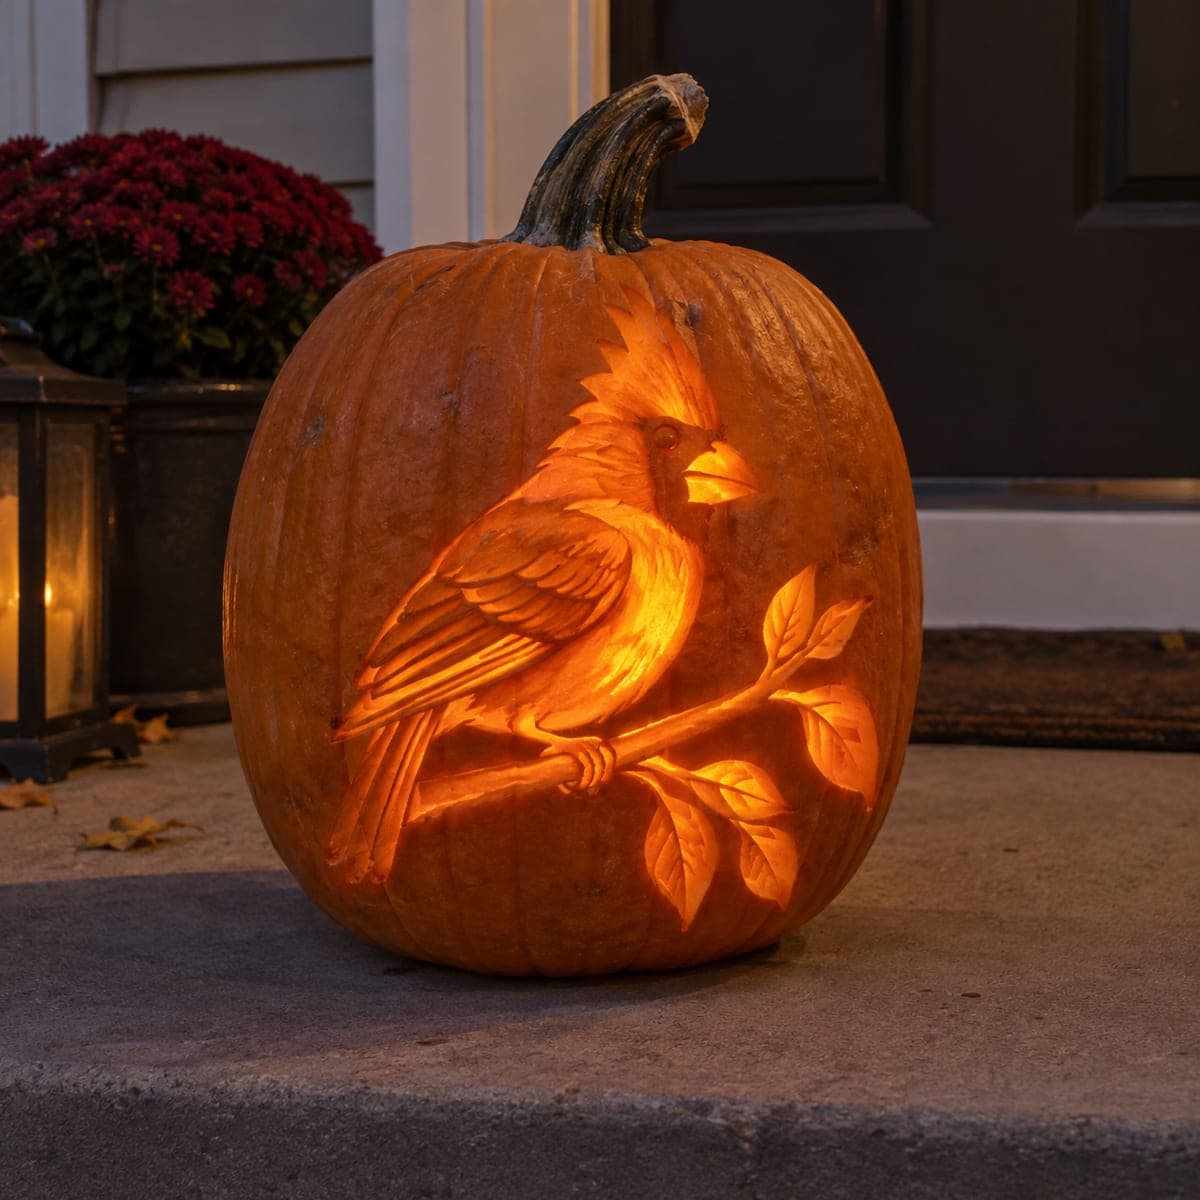
A crested cardinal perches on a leafy branch in this surface-carved pumpkin, with every wing feather and leaf vein etched at a slightly different depth. The bird's body is shaved thin so it glows brightly, while the outline stays deep-cut to read crisply from the street. Start with the beak and eye since they set the character of the whole bird, then work outward through the feathers before finishing the branch and leaves.

This is an AI-generated concept image: a realistic, carvable design idea rather than a photo of a finished carve. AI concepts are always labeled and sit out the leaderboard and the contest.

No ratings yet · Sign in to rate
Comments (0)

  • No comments yet — be the first.

Save without an account. Sign in to like or comment.

Our tips for carving a similar design

This design is built almost entirely with shading rather than cutouts, so the trick is controlling depth. Peel the bird's body thin to make it glow, etch feathers and leaf veins at slightly different depths for texture, and keep a deep, crisp outline so the shape reads from the sidewalk. Since this is an AI concept, treat it as a plan for a real pumpkin: keep the beak and thin twig connected to solid rind so nothing snaps.

Written by PumpkinCarvingIdeas.com, inspired by the image above. These are our suggestions, not instructions from the uploader. This approach to the AI concept has not been tested on a real pumpkin.

From pumpkin to porch

  1. Prep the pumpkin and transfer the design

    Pick a tall pumpkin with a smooth, flat front panel and cut a lid or a rear access hole so you can reach in and thin the wall from behind. Scrape the inside of the front wall down to about one inch so light passes through evenly. Tape your cardinal and branch stencil to the front and poke the outlines with a pin, or draw them on with a washable marker. Have an adult handle all the blades and let kids help with cleanout and light placement.

  2. Set the beak and eye first

    Start with the small, controlled details that give the bird its character. Lightly score the beak outline and shave a shallow relief so it catches a little glow without cutting all the way through. For the eye, remove just a tiny dot of skin so it reads as a bright pinpoint. Work slowly here with a fine detail knife or a small loop tool, since these cuts define the whole face.

  3. Shade the crest and wing feathers

    Move outward from the head into the feathers, peeling the skin at slightly different depths so each feather has its own tone. Deeper shaving glows brighter, thinner scraping stays dimmer, and that variation is what makes the wing look layered. Keep the outer edge of every feather slightly raised to cast a soft shadow line. Take your time and step back often to check the flow of the feathers against the body.

  4. Thin the body for the bright glow

    The chest and belly are the brightest part of the design, so shave those areas thinnest, almost down to the flesh. Leave a clean deep-cut groove around the whole bird outline so the silhouette stays sharp. Do not cut fully through the body; you want a warm glow, not open holes. Blend the transition from the bright belly into the darker back so it looks rounded.

  5. Carve the branch and leaves

    Etch the branch the bird perches on and give it a shallow woody texture with short parallel scrapes. Add each leaf by outlining it, then scraping a mid depth interior and pressing in a center vein and side veins at a lighter touch. Keep the twig attached to solid rind on both ends so it stays strong. Save the thinnest scrapes for the leaf tips so they fade gently into the dark skin.

  6. Light it and take your photo

    Slip a battery LED puck or a string of warm LEDs inside and avoid open flames, since a candle can scorch the thin shaved areas. Set the light low and toward the front so it pushes brightness into the belly and face. Rotate the pumpkin until the glow is even, then shoot at dusk on a porch step for the warmest look. Rub a little petroleum jelly on the cut edges to slow drying if you want it to last a few extra days.

Gather your supplies

Check things off as you get ready.

Work on a stable surface, keep your free hand out of the cutting path, and have an adult handle sharp tools.

Three levels of light

  • Leave intact

    The dark background around the bird and the untouched rind between the leaves stay solid orange in shadow.

  • Peel & shade

    The wing feathers, crest, branch, and leaves get skin-peeled at varied depths for a soft mid glow and texture.

  • Cut through

    Nothing needs a full cutout here; the thinnest shaved belly and the tiny eye dot read as the brightest points.

Learn the carving basics

Before you start cutting

Do I need to cut any holes all the way through?

No, this is a relief and shading design, so the glow comes from thinning the skin rather than opening it. Keep the front wall intact and just vary how deep you scrape. That is what gives the smooth, painted look instead of a jack-o-lantern silhouette.

How do I keep the beak and thin twig from breaking?

Carve them as shallow shaded relief rather than cutouts, and leave them connected to the surrounding solid rind. The twig should stay attached to full-thickness pumpkin at both ends so it cannot snap off. Because this is a concept image, plan those thin parts on a real pumpkin with a little extra thickness for safety.

Why start with the eye and beak?

Those small features set the personality and proportion of the whole bird, so getting them right first keeps everything else aligned. If the face looks correct, the feathers and body will feel natural as you work outward. It also lets you commit your most careful cuts while your hand is fresh.

Your take belongs here, too.

Changed a detail? Made it simpler? Share a photo of your version and tell the community what worked.

Share your pumpkin

More pumpkins like this

You've reached the end · 8 pumpkins
The Patch Report

Fresh pumpkins, in your inbox.

The best new carvings, ideas worth stealing, and how-tos for carving season. Short, seasonal, and gone by November.

A short email during carving season. Unsubscribe anytime. See our privacy policy.