Halloween Pumpkin Carving Contest · Starts October 1st · $500 in prizes
← Back to ideas
@ai_concepts
Aug 30, 2026
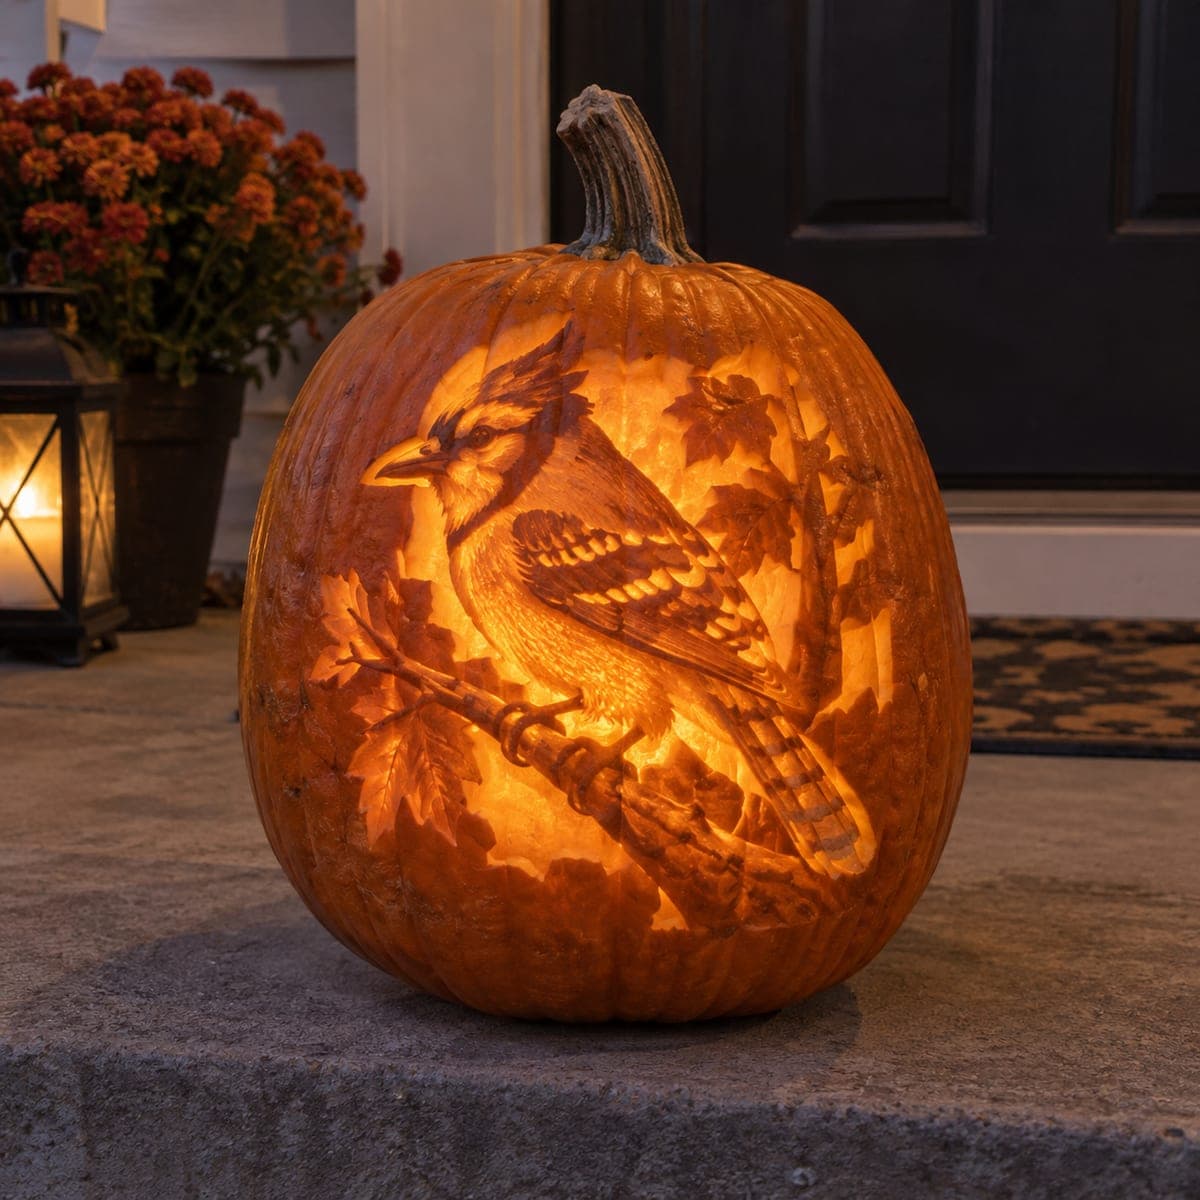
Blue Jay on Oak Branch Etched PumpkinAI
0

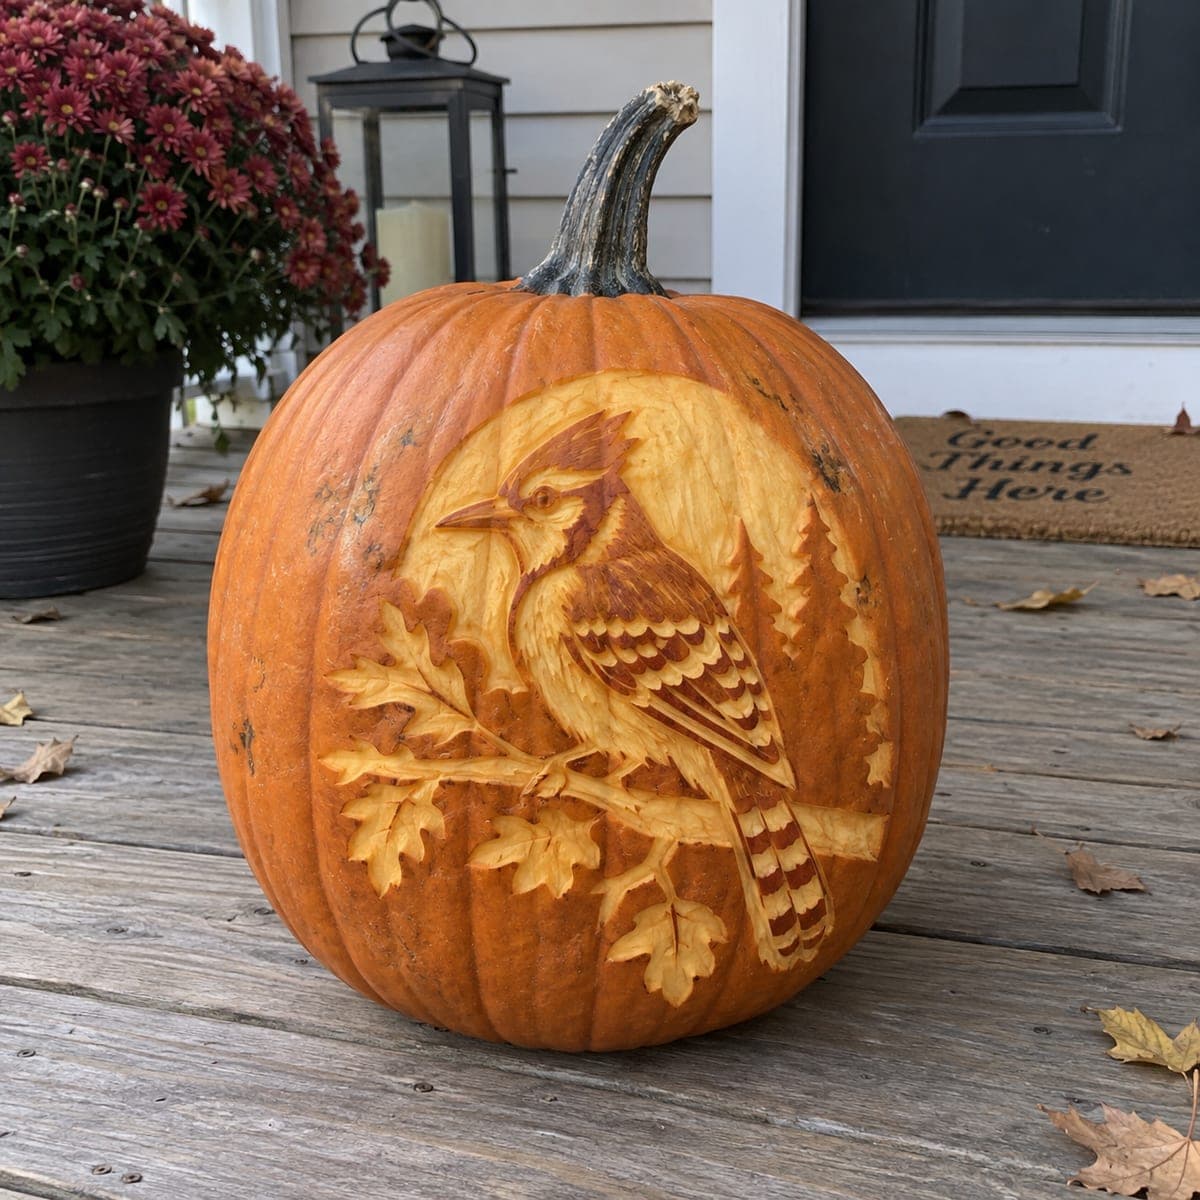
Blue Jay on Oak Branch Etched Pumpkin

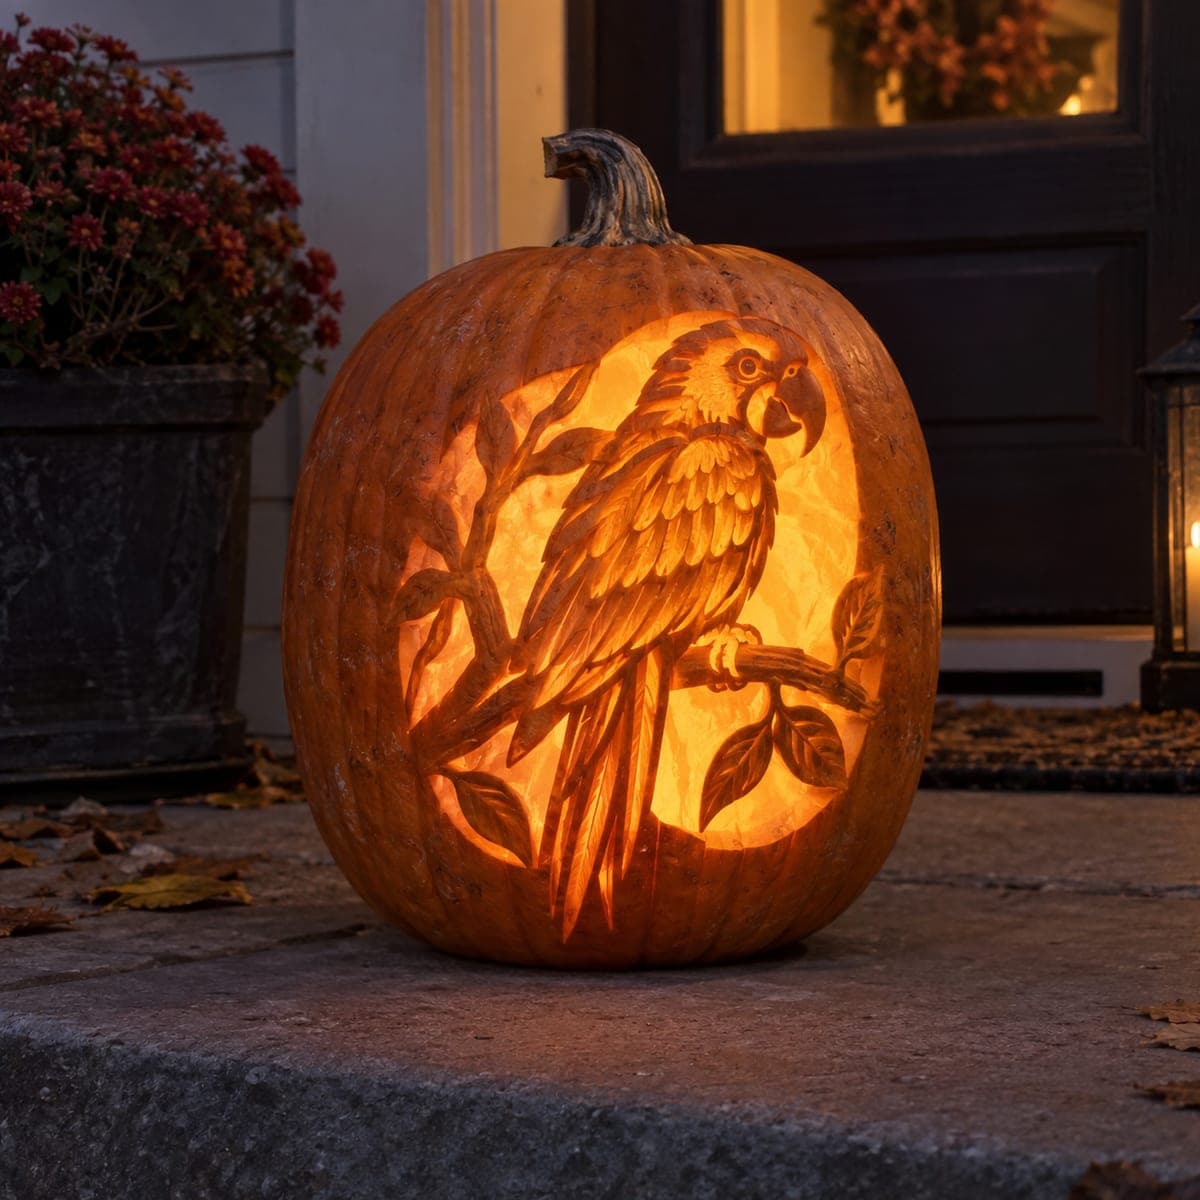
A crested blue jay perches on an oak branch inside a carved moon circle, every wing bar and tail feather rendered in etched relief with pine trees behind. This pumpkin carving idea relies on shallow peeling at several depths, so use loop tools and work from the lightest background areas down to the fine feather lines last. Set it near a porch light rather than a candle; side lighting shows off the surface texture better than an internal glow.

This is an AI-generated concept image: a realistic, carvable design idea rather than a photo of a finished carve. AI concepts are always labeled and sit out the leaderboard and the contest.

No ratings yet · Sign in to rate
Comments (0)

  • No comments yet — be the first.

Save without an account. Sign in to like or comment.

Our tips for carving a similar design

The core trick here is relief etching, where you never cut all the way through the wall and instead peel the skin and flesh to several shallow depths so light reflects off the surface rather than shining through. Plan the whole scene as a moon circle background, a crested blue jay in the middle ground, and fine feather lines as the final detail. Work from the largest, lightest areas down to the tiniest tail bars last so you always have solid pumpkin to lean on.

Written by PumpkinCarvingIdeas.com, inspired by the image above. These are our suggestions, not instructions from the uploader. This approach to the AI concept has not been tested on a real pumpkin.

From pumpkin to porch

  1. Prep the pumpkin and transfer the design

    Pick a tall pumpkin with a smooth, flat front panel and wipe it clean and dry. Since this is a concept image, choose a fresh real pumpkin and plan to leave it uncut inside so it stays strong for etching. Cut a small lid or a back access hole for your LED later, not through the design face. Tape your stencil down and poke or trace the moon circle, the bird outline, the oak branch, and the pine tree edges so you have a clear map before any tool touches the surface.

  2. Skin the moon circle background

    Use a wide loop tool to peel just the outer skin off the whole circle behind the bird, revealing the pale flesh so it glows a soft even orange. Keep this pass shallow and consistent so the background reads as one flat plane. Work in the same direction to avoid gouges and stop cleanly at the bird and branch outlines. This lightest layer is your canvas, so take your time keeping it smooth.

  3. Carve the pine trees and set the depths

    Etch the pine trees behind the jay slightly deeper than the moon background so they read as a darker mid tone against the bright circle. Establish your depth plan now: background lightest, pines and shadowed feathers a touch deeper, and the darkest bird areas left nearly at full skin. Use the tip of a smaller loop to shape the jagged tree edges. Checking the tones under angled light as you go helps you keep the layers separated.

  4. Shape the blue jay body and crest

    Block in the jay by peeling the lighter chest and face areas while leaving the crest, wing, and back at a darker, shallower depth for contrast. Round the shoulder and belly with gentle scoops so the bird looks three dimensional. Keep the crest peak and beak edges crisp with a fine detail tool. Leave narrow ridges of skin between light and dark zones to act as natural outlines that hold the shape together.

  5. Etch the oak branch, leaves, and fine feathers

    Carve the oak leaves and branch with mid depth peeling, then add vein lines and the delicate wing bars and tail feathers as your very last, most shallow strokes. Keep every feather line as a scratch in the surface rather than a cut through, so no thin piece breaks away. Save the finest tail banding for last when the surrounding flesh is already shaped and supportive. Blow away debris and check that all detail lines connect cleanly.

  6. Light it and photograph

    Skip the internal candle and instead aim a warm LED or your porch light across the face from the side. Side lighting rakes across the etched surface and makes every feather bar and leaf vein cast a tiny shadow. Set the pumpkin on a porch board near mums or a lantern for a cozy fall scene. Take photos in the evening blue hour when the low light shows off the texture best.

Gather your supplies

Check things off as you get ready.

Work on a stable surface, keep your free hand out of the cutting path, and have an adult handle sharp tools.

Three levels of light

  • Leave intact

    The crest, wing, back, and darkest feather masses stay near full skin for depth

  • Peel & shade

    The moon circle, jay chest and face, pine trees, and oak leaves are skin-peeled for a soft mid glow

  • Cut through

    Nothing is cut fully through on the design face; this is a surface etch lit from the side

Learn the carving basics

Before you start cutting

Should I cut all the way through anywhere on this design?

No, this is a relief etch meant to be viewed by reflected light, so the face stays intact. Cut only a small lid or back hole to place your LED. Keeping the wall solid also protects the fine feather lines from cracking.

How do I keep the feather bars and tail bands from breaking?

Etch them as shallow scratches into the flesh rather than cutouts, and save them for the very last step when the surrounding area is already shaped and firm. Never remove the flesh between two thin lines, since that leaves a fragile sliver. Light pressure and a sharp fine tool give clean lines without tearing.

Why side lighting instead of a candle inside?

Because this design relies on surface texture at different depths, an internal glow would flatten it out. A raking light from the side or a porch fixture casts small shadows in every etched line, making the feathers and leaves pop. Always use an LED, never an open flame, for safety.

Your take belongs here, too.

Changed a detail? Made it simpler? Share a photo of your version and tell the community what worked.

Share your pumpkin

More pumpkins like this

You've reached the end · 8 pumpkins
The Patch Report

Fresh pumpkins, in your inbox.

The best new carvings, ideas worth stealing, and how-tos for carving season. Short, seasonal, and gone by November.

A short email during carving season. Unsubscribe anytime. See our privacy policy.