Halloween Pumpkin Carving Contest · Starts October 1st · $500 in prizes
← Back to ideas
@ai_concepts
Aug 23, 2026
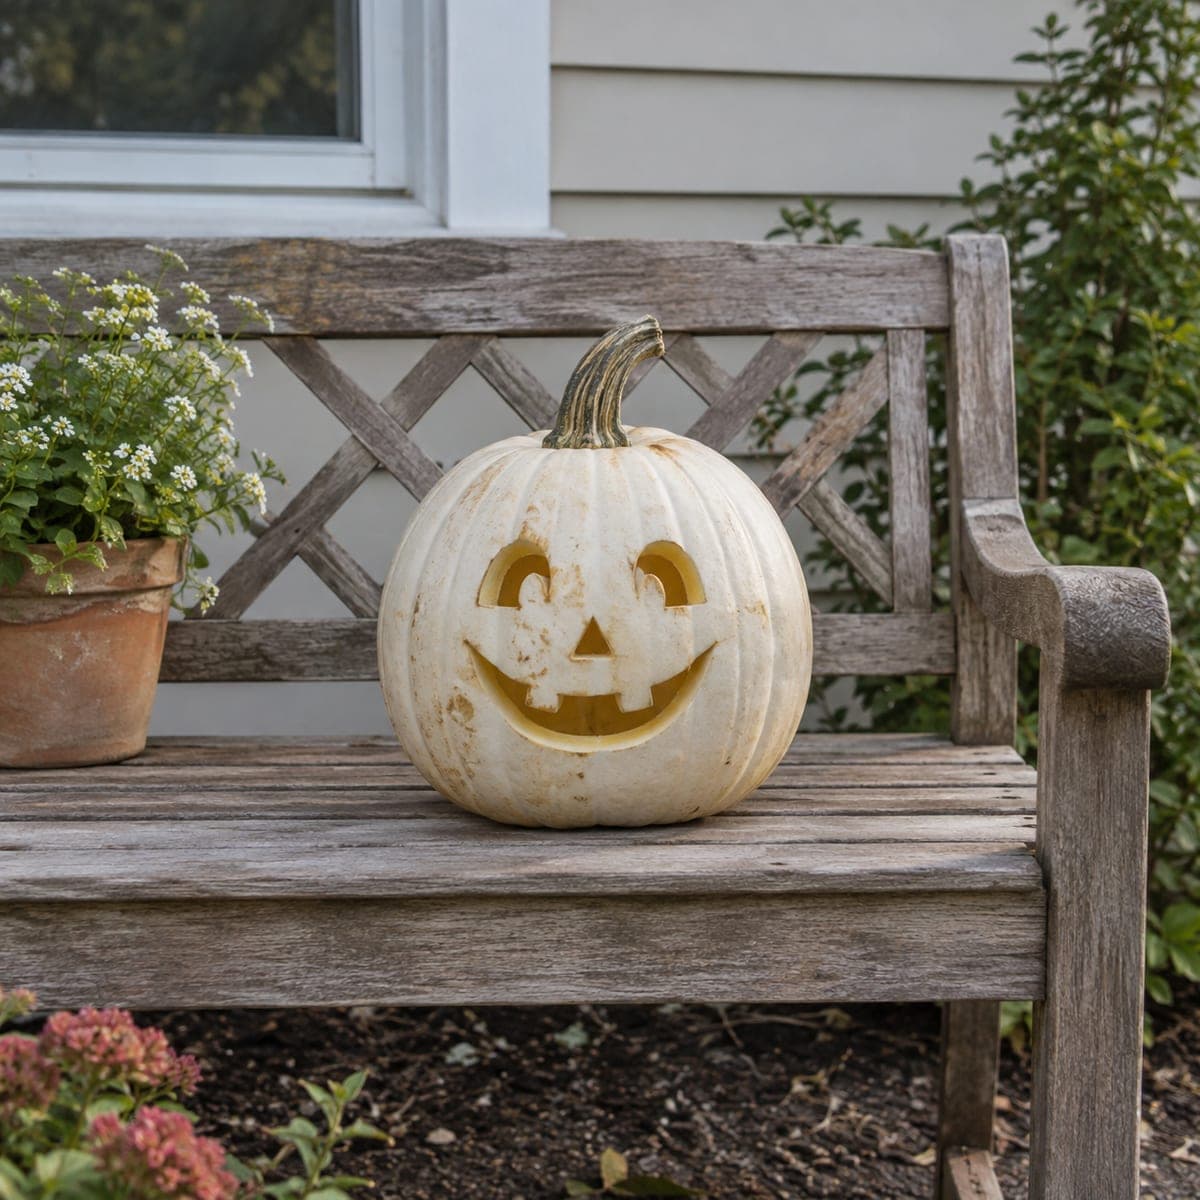
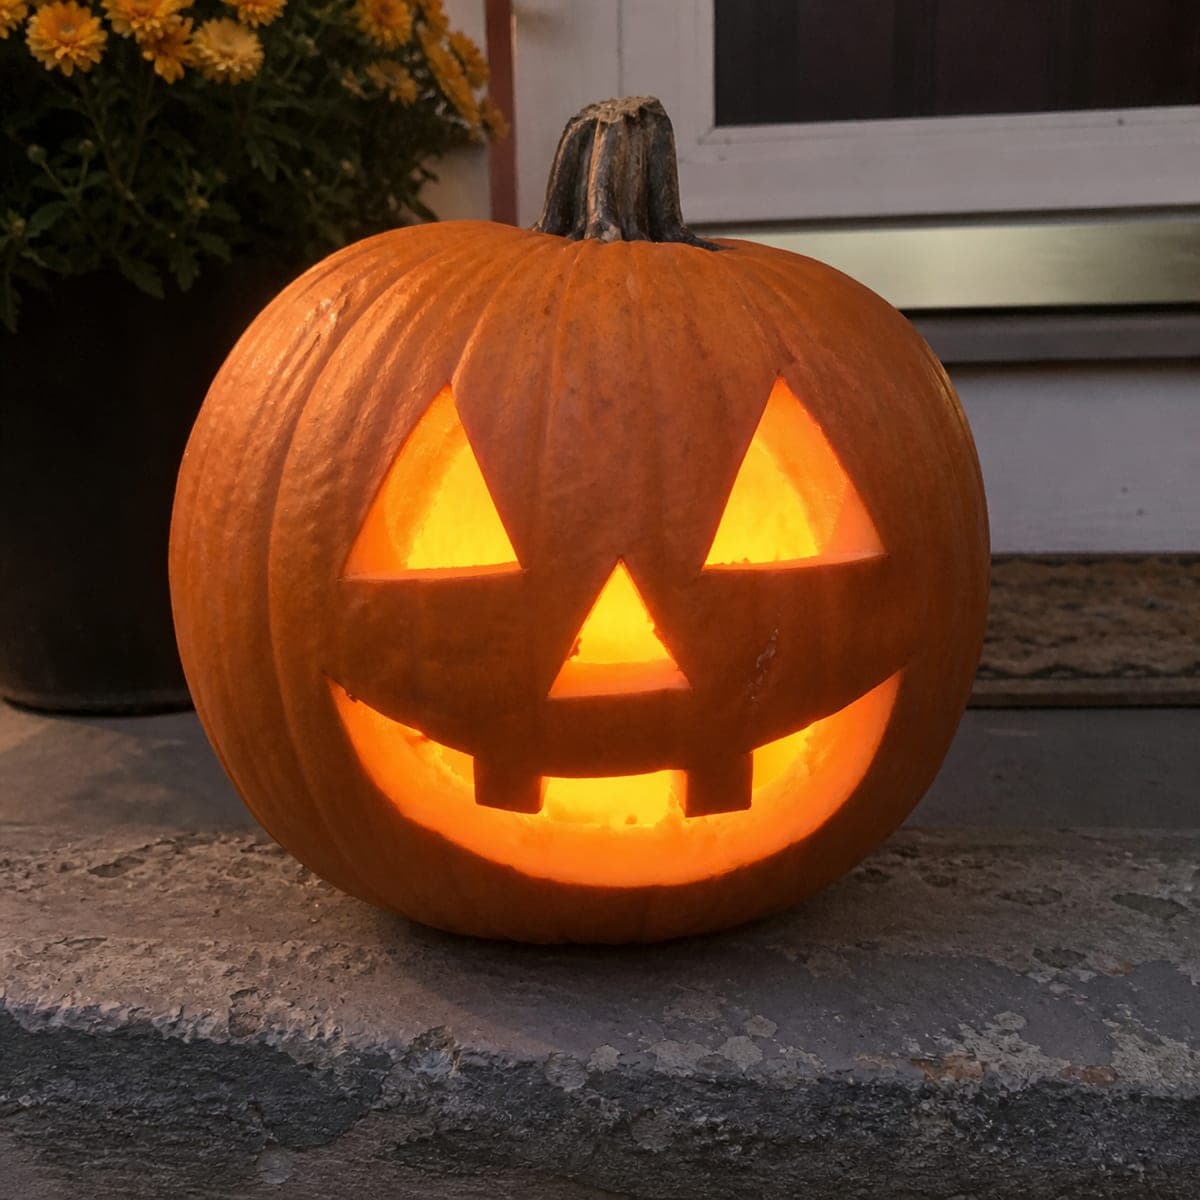
Classic Jack-O-Lantern Face on a White PumpkinAI
0

Classic Jack-O-Lantern Face on a White Pumpkin

A white pumpkin gives the traditional jack-o-lantern grin a fresh farmhouse look, with arched eyes, a triangle nose, and a wide single-tooth smile cut clean through the pale shell. White varieties like Lumina carve the same as orange ones but show every smudge, so wipe the surface as you work and cut with slow, straight strokes. It reads beautifully unlit by day and glows a soft gold by night.

This is an AI-generated concept image: a realistic, carvable design idea rather than a photo of a finished carve. AI concepts are always labeled and sit out the leaderboard and the contest.

No ratings yet · Sign in to rate
Comments (0)

  • No comments yet — be the first.

Save without an account. Sign in to like or comment.

Our tips for carving a similar design

The whole charm here is a clean, simple grin cut straight through a pale shell, so the gold interior glow pops against the white skin. Keep the shapes bold and few: two arched eyes, a small triangle nose, and one wide smile with a single square tooth left standing. Cut slowly and let the light do the work.

Written by PumpkinCarvingIdeas.com, inspired by the image above. These are our suggestions, not instructions from the uploader. This approach to the AI concept has not been tested on a real pumpkin.

From pumpkin to porch

  1. Pick and prep a pale pumpkin

    For this farmhouse look you would want a white variety like a Lumina, though the method is the same on an orange one. Wipe the surface clean and set it on a towel so it does not roll. Since a white shell shows every smudge and fingerprint, keep a dry cloth nearby and wipe as you go.

  2. Cut a lid or a back door

    An adult should cut the opening with a sturdy knife held at an angle so the piece rests on its own lip when replaced. A back or bottom door keeps the front face clean and makes it easy to set an LED inside later. Scoop out the seeds and pulp, then thin the inside wall of the face area to about one inch so it cuts easily.

  3. Trace the simple face

    Draw two arched eyes, a small triangle nose, and a wide smile with one square tooth left in the middle. Space the features generously and keep them large; simple shapes read best from the yard. Mark them lightly in pencil or with a poke tool so you can adjust before any cutting begins.

  4. Cut the small features first

    Start with the nose and eyes using a small saw tool and slow, straight strokes. Cutting the smaller openings first keeps the shell strong while you work. Push the tool gently and let it do the sawing rather than forcing it, then pop each piece out from the inside.

  5. Cut the smile and keep the tooth

    Save the widest opening, the mouth, for last so the front does not weaken early. Carve around the single tooth carefully, leaving it attached at the top and bottom so it stays put. Clean up any ragged edges with the tip of your tool for a crisp grin.

  6. Light it and photograph

    Set a warm white LED puck or battery tea light inside and replace the lid or door. The pale shell will glow a soft gold through the cutouts at night. For a photo, place it on a weathered bench or step at dusk and wipe off any last smudges first.

Gather your supplies

Check things off as you get ready.

Work on a stable surface, keep your free hand out of the cutting path, and have an adult handle sharp tools.

Three levels of light

  • Leave intact

    The broad pale skin of the pumpkin stays untouched and reads soft white by day and dark by night.

  • Peel & shade

    Optional: lightly shave a thin halo around the eyes or mouth if you want a faint glow outlining the features.

  • Cut through

    The two arched eyes, triangle nose, and wide single-tooth smile are cut clean through for the brightest gold light.

Learn the carving basics

Before you start cutting

Will a white pumpkin glow differently than an orange one?

The flesh inside is still pale gold, so lit cutouts throw a soft warm glow much like an orange pumpkin. The difference is the unlit skin, which stays creamy white and looks striking by day. Use a warm white LED to bring out that cozy gold tone at night.

How do I keep the single tooth from breaking off?

Leave the tooth attached to the shell at both its top and bottom so it is bridged on two sides. Cut the openings on either side of it slowly rather than prying. If your wall feels thick, thin the inside of the mouth area before carving so the saw glides.

Why does the white surface look smudged in the concept image?

Pale shells show every mark, oil, and speck of pulp far more than orange ones. Wipe the surface with a dry cloth as you carve and avoid touching it with pulpy hands. A final wipe before lighting keeps the farmhouse look clean.

Your take belongs here, too.

Changed a detail? Made it simpler? Share a photo of your version and tell the community what worked.

Share your pumpkin

More pumpkins like this

You've reached the end · 8 pumpkins
The Patch Report

Fresh pumpkins, in your inbox.

The best new carvings, ideas worth stealing, and how-tos for carving season. Short, seasonal, and gone by November.

A short email during carving season. Unsubscribe anytime. See our privacy policy.