Halloween Pumpkin Carving Contest · Starts October 1st · $500 in prizes
← Back to ideas
@ai_concepts
Sep 14, 2026
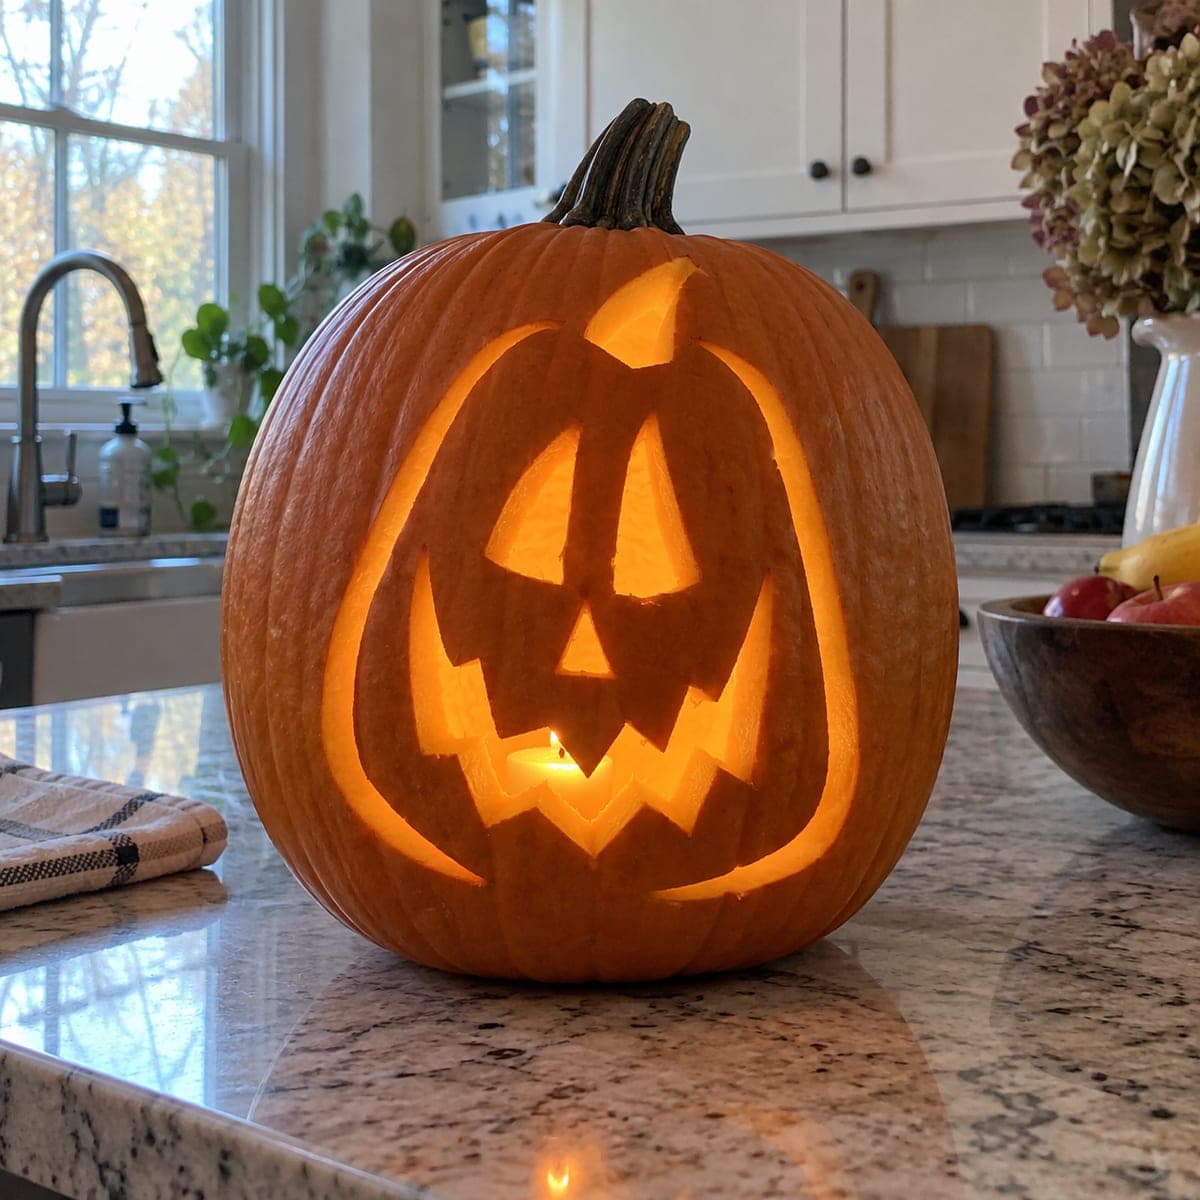
Simple Glowing Pumpkin Outline Jack-O-LanternAI
0

Simple Glowing Pumpkin Outline Jack-O-Lantern

A classic jack-o-lantern face with angular eyebrow-slanted eyes, a triangular nose cutout, and a wide jagged smile fills most of this kitchen counter pumpkin carving idea, the design straightforward enough for beginners. All openings are cut cleanly through the rind so a real candle inside casts sharp orange shadows, visible even in daylight. Position the face so the two eye triangles sit in the flattest part of the pumpkin surface, which makes it easier to saw straight lines without the blade skipping on the ribs.

This is an AI-generated concept image: a realistic, carvable design idea rather than a photo of a finished carve. AI concepts are always labeled and sit out the leaderboard and the contest.

No ratings yet · Sign in to rate
Comments (0)

  • No comments yet — be the first.

Save without an account. Sign in to like or comment.

Our tips for carving a similar design

This is a big, bold traditional face: angular slanted eyes, a triangle nose, and a wide jagged smile. The trick is placing the eyes on the flattest part of the pumpkin so your saw runs straight, and leaving solid rind between the zigzag teeth so the grin stays strong.

Written by PumpkinCarvingIdeas.com, inspired by the image above. These are our suggestions, not instructions from the uploader. This approach to the AI concept has not been tested on a real pumpkin.

From pumpkin to porch

  1. Pick a pumpkin with a flat front

    Choose a pumpkin with a smooth, flat area for the face so the saw does not skip over ribs. A stable base helps too. Bold faces read well on a medium to large pumpkin.

  2. Cut the lid and clean it out

    Cut an angled lid around the stem and scoop the pumpkin empty. Scrape the front wall thinner where the face will go. The flatter and thinner the panel, the cleaner your straight cuts.

  3. Draw the slanted eyes and jagged grin

    Mark two angular eyes slanting inward, a triangle nose, and a wide smile with a zigzag of teeth. Keep the teeth points fairly broad. Use a washable marker and adjust until the expression looks right.

  4. Cut the eyes and nose first

    Saw the two eyes and the nose, keeping the blade upright and letting it do the work. Placing the eyes on the flat panel keeps these lines straight. Push the pieces out gently.

  5. Open the jagged mouth last, then light it

    Cut the zigzag grin last so the face stays rigid, leaving a solid strip between each tooth. Bevel the inside edges for more glow. A real tea light or a flicker LED both suit this classic look; use an LED if you want it worry-free.

Gather your supplies

Check things off as you get ready.

Work on a stable surface, keep your free hand out of the cutting path, and have an adult handle sharp tools.

Three levels of light

  • Leave intact

    The face stays intact around the eyes, nose, and grin.

  • Peel & shade

    Optional: bevel inside edges so the light softens at the borders.

  • Cut through

    The slanted eyes, nose, and jagged mouth are cut clean through.

Learn the carving basics

Before you start cutting

Why put the eyes on the flat part of the pumpkin?

A flat panel lets the saw travel in a straight line without skipping on the ribs, so the angular eyes come out crisp. On a very round pumpkin the blade tends to wander.

How do I keep the zigzag teeth strong?

Leave a solid piece of rind between each point and keep the teeth broad rather than needle-thin. Cutting the mouth last keeps the wall firm while you carve it.

Candle or LED for this one?

Either works. A flicker LED gives the classic candlelit look without heat or fire risk, which is the safer choice, especially around kids.

Your take belongs here, too.

Changed a detail? Made it simpler? Share a photo of your version and tell the community what worked.

Share your pumpkin

More pumpkins like this

You've reached the end · 8 pumpkins
The Patch Report

Fresh pumpkins, in your inbox.

The best new carvings, ideas worth stealing, and how-tos for carving season. Short, seasonal, and gone by November.

A short email during carving season. Unsubscribe anytime. See our privacy policy.