Halloween Pumpkin Carving Contest · Starts October 1st · $500 in prizes
← Back to ideas
@ai_concepts
Sep 25, 2026
Triangle-Face Jack-O-Lantern With Two TeethAI
0

Report this carving

Tell us what is wrong. Reports are private.

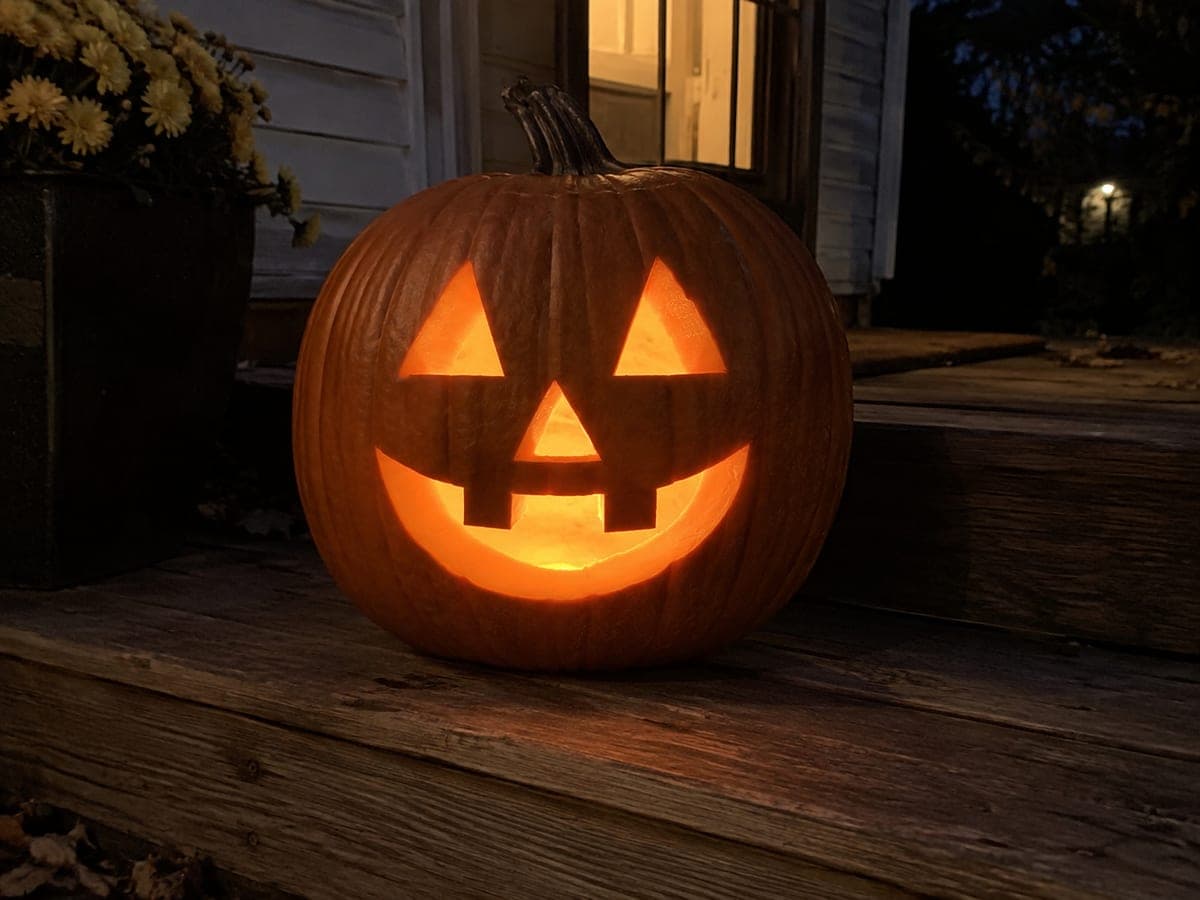
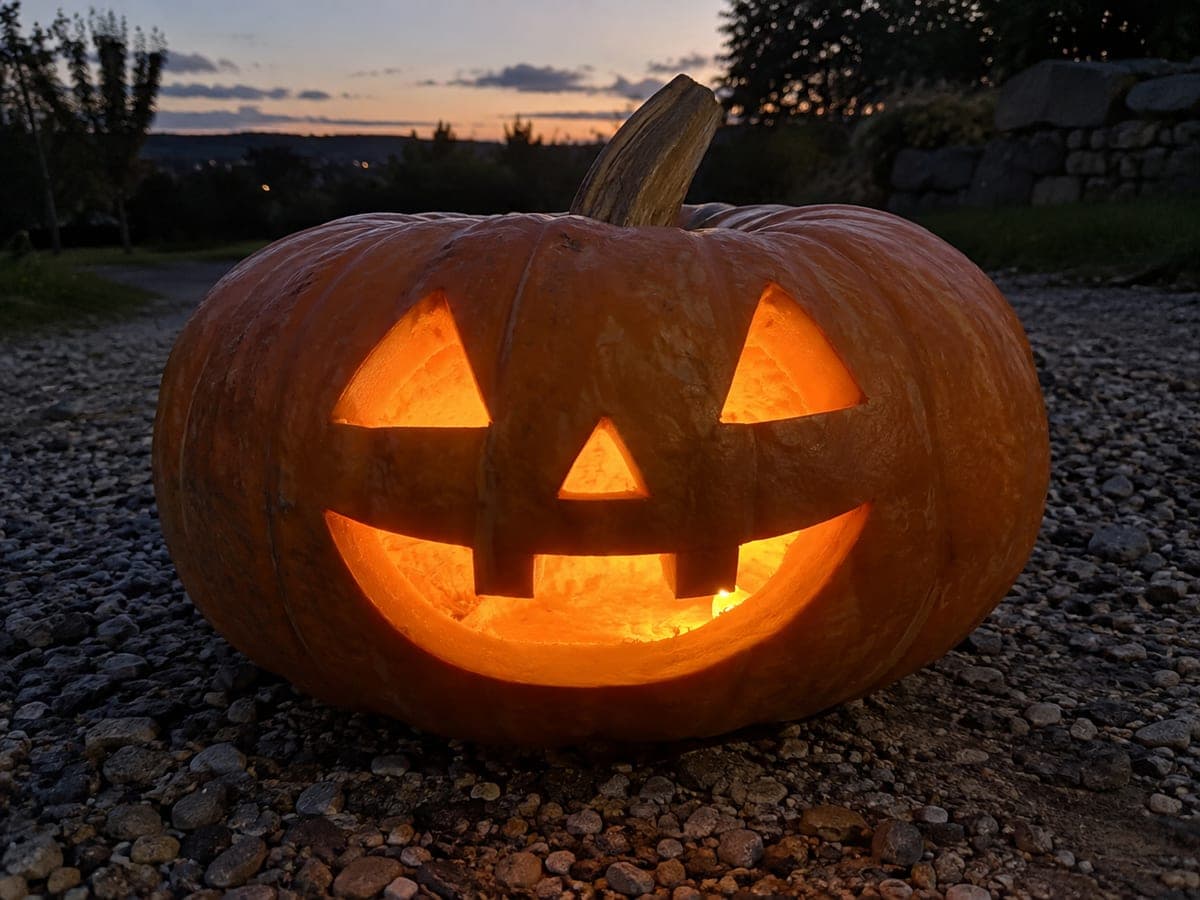
Triangle-Face Jack-O-Lantern With Two Teeth

Three clean triangles and a wide toothy mouth define this classic simple pumpkin carving idea that beginners can finish in under thirty minutes. Sketch the two eye triangles and nose triangle first, spacing them symmetrically, then outline a broad mouth with two lower teeth before cutting. Keeping the teeth connected to the lower rind as thick tabs prevents them from snapping off, and angling your knife slightly inward on each cut creates cleaner, sharper edges on the finished face.

No ratings yet · Sign in to rate

Comments (0)

  • No comments yet — be the first.

Save without an account. Sign in to like or comment.

Our tips for carving a similar design

Two eye triangles, a nose triangle, and a broad toothy mouth are the only cuts. Keeping the two teeth as thick tabs connected to the lower rind is the one structural detail that matters. Angling the blade inward on each cut produces cleaner edges and helps freed pieces fall out from inside rather than sticking in the wall.

From pumpkin to porch

  1. Prep and hollow

    Cut an angled lid, scoop out seeds and pulp, and scrape the front wall to about an inch thick. Drying the outside surface before drawing keeps marker lines sharp and prevents smearing.

  2. Draw the triangles

    Sketch two matching eye triangles in the upper third of the face, spaced a couple of inches apart. Draw a smaller nose triangle centered below them. Use a ruler for the straight sides if symmetry matters to you, though slight imperfections read as character.

  3. Draw the mouth

    Outline a broad rectangular mouth below the nose, then mark two rectangular tooth tabs hanging from the upper lip. Make each tooth at least three-quarters of an inch wide at its base. Outline the open sections of the mouth on either side of and below the teeth.

  4. Cut the eye and nose triangles

    Use a serrated pumpkin saw to cut all three triangles, angling the blade inward slightly on each straight cut. Push each freed triangle inward once the last side is cut. Three clean triangles make a huge difference to the finished face, so take slow precise strokes.

  5. Cut the mouth sections

    Cut the open sections of the mouth, stopping before each tooth tab. Work around the outside of each tooth without touching its base connection. Remove the freed mouth sections by pushing them inward. Check that each tooth still feels firmly attached after cutting.

  6. Light and admire

    Place a battery LED tea light inside and replace the lid. The warm glow through the triangles and toothy grin creates the classic welcoming jack-o-lantern look that has decorated doorsteps for generations.

Written with AI to match this design

Gather your supplies

Check things off as you get ready.

Work on a stable surface, keep your free hand out of the cutting path, and have an adult handle sharp tools.

Three levels of light

  • Leave intact

    All surrounding rind and the two tooth tabs stay solid and dark

  • Peel & shade

    None, this is a pure cutout design

  • Cut through

    Both eye triangles, the nose triangle, and the mouth sections on either side of the teeth

Learn the carving basics

Before you start cutting

How wide should I make the teeth to stop them from breaking?

Each tooth base should be at least three-quarters of an inch wide where it meets the upper lip. Tall narrow teeth snap easily. If your teeth look thin after cutting, leave them as is rather than widening the cuts, which would remove the supporting rind on either side.

Can a child do this carve with supervision?

An adult should handle all cutting. Children can help with scooping the seeds, drawing the face with a marker, and inserting the LED light. The pumpkin saw is sharp and requires a firm two-handed grip from a steady adult throughout the cutting steps.

How do I make both eye triangles the same size?

Draw one triangle first, then measure its height and base with a ruler and replicate those measurements for the second. Alternatively, cut a small cardboard triangle template and trace around it twice. Small differences between the eyes are barely noticeable once the pumpkin is lit.

Your take belongs here, too.

Changed a detail? Made it simpler? Share a photo of your version and tell the community what worked.

Share your pumpkin

More pumpkins like this

You've reached the end · 8 pumpkins
The Patch Report

Fresh pumpkins, in your inbox.

The best new carvings, ideas worth stealing, and how-tos for carving season. Short, seasonal, and gone by November.

A short email during carving season. Unsubscribe anytime. See our privacy policy.