Halloween Pumpkin Carving Contest Β· Starts October 1st Β· $500 in prizes
← Back to ideas
@ai_concepts
Sep 25, 2026
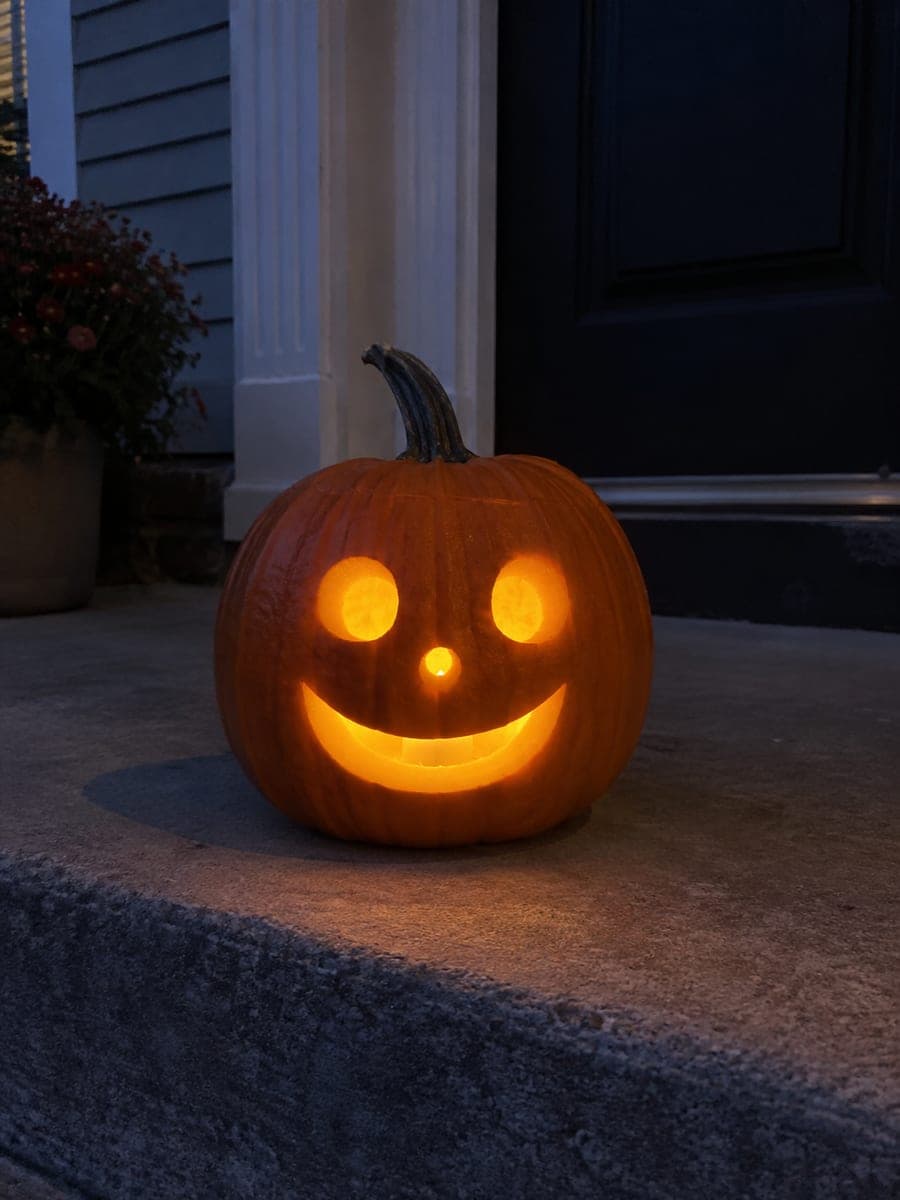
Round-Eyed Smiling Pumpkin on a White Kitchen TableAI
0

Report this carving

Tell us what is wrong. Reports are private.

Round-Eyed Smiling Pumpkin on a White Kitchen Table

Two circular eyes and a gentle crescent smile make this one of the most approachable easy pumpkin carving ideas around, sitting cheerfully on a white kitchen table. Use a small biscuit cutter or bottle cap to trace the eye circles before cutting so both holes are evenly sized. A serrated pumpkin saw handles the curves better than a kitchen knife, and a battery tea light keeps the design glowing safely indoors.

No ratings yet Β· Sign in to rate

Comments (0)

  • No comments yet β€” be the first.

Save without an account. Sign in to like or comment.

Our tips for carving a similar design

Two circular eyes and a gentle crescent smile are the only cuts required, making this ideal for anyone carving for the first time. The trick to consistent circles is tracing a round household object rather than freehand drawing. A serrated pumpkin saw handles the curves cleanly, and a battery tea light keeps the design safe on a kitchen table.

From pumpkin to porch

  1. Hollow the pumpkin

    Cut an angled lid on top, remove the seeds, and scrape the interior to about an inch of wall thickness. For a small pumpkin on a kitchen table, a thinner wall around three-quarters of an inch lets more light glow through the round eyes.

  2. Trace the eyes

    Find a round object in your kitchen, such as a bottle cap or small biscuit cutter, that produces eye-sized circles. Press it lightly against the front face and trace around it with a dry-erase marker to draw two evenly sized circles. Position them roughly in the upper third of the face, spaced symmetrically.

  3. Draw the smile

    Freehand a gentle crescent arc below the eyes, making it slightly wider than the combined width of the two eyes. The curve should arc downward slightly at each end for a happy expression. Keep the crescent narrow, no more than half an inch tall, for a subtle friendly smile.

  4. Cut the circles

    Use a serrated pumpkin saw to cut each eye circle with smooth continuous strokes. Follow the traced outline closely. Once each circle is free, push it inward. The round shape is easier to cut than people expect if you keep the saw moving steadily without pausing.

  5. Cut the smile

    Cut the crescent arc in one flowing motion along the upper curve, then come back and cut the lower straight edge. Angle the blade very slightly inward so the crescent piece falls out from inside rather than binding in the cut. Push the freed piece inward.

  6. Light and enjoy indoors

    Place a battery LED tea light inside the pumpkin and replace the lid. Set it on the kitchen table where the warm glow through the round eyes and crescent smile creates a cheerful, friendly face. Battery lights are safe near any indoor surface.

Written with AI to match this design

Gather your supplies

Check things off as you get ready.

Work on a stable surface, keep your free hand out of the cutting path, and have an adult handle sharp tools.

Three levels of light

  • Leave intact

    All surrounding orange rind stays solid and dark

  • Peel & shade

    None, this is a full cutout design

  • Cut through

    Both circular eye openings and the crescent smile

Learn the carving basics

Before you start cutting

What if my saw keeps jumping off the circle line?

Score the circle outline first with a single light pass of the blade before applying any cutting pressure. Once the initial groove is established, the blade tracks the groove naturally. Shorter strokes around tight curves also reduce jumping compared to long aggressive strokes.

Can I use a kitchen knife instead of a pumpkin saw?

A pumpkin saw is strongly recommended, especially for curves. Kitchen knives are stiff and can slip sideways into fingers during curved cuts. If a pumpkin saw is unavailable, a small serrated bread knife is safer than a chef knife, but adult supervision is still important.

How do I make both eyes the same size if I am tracing freehand?

Always use the same physical object, such as a bottle cap, for both tracings. After tracing the first eye, place the cap directly beside it with a consistent gap, then trace the second. Using a ruler to confirm both center points sit at the same height catches any vertical drift before cutting.

Your take belongs here, too.

Changed a detail? Made it simpler? Share a photo of your version and tell the community what worked.

Share your pumpkin

More pumpkins like this

You've reached the end Β· 8 pumpkins
The Patch Report

Fresh pumpkins, in your inbox.

The best new carvings, ideas worth stealing, and how-tos for carving season. Short, seasonal, and gone by November.

A short email during carving season. Unsubscribe anytime. See our privacy policy.