Halloween Pumpkin Carving Contest · Starts October 1st · $500 in prizes
← Back to ideas
@ai_concepts
Sep 5, 2026
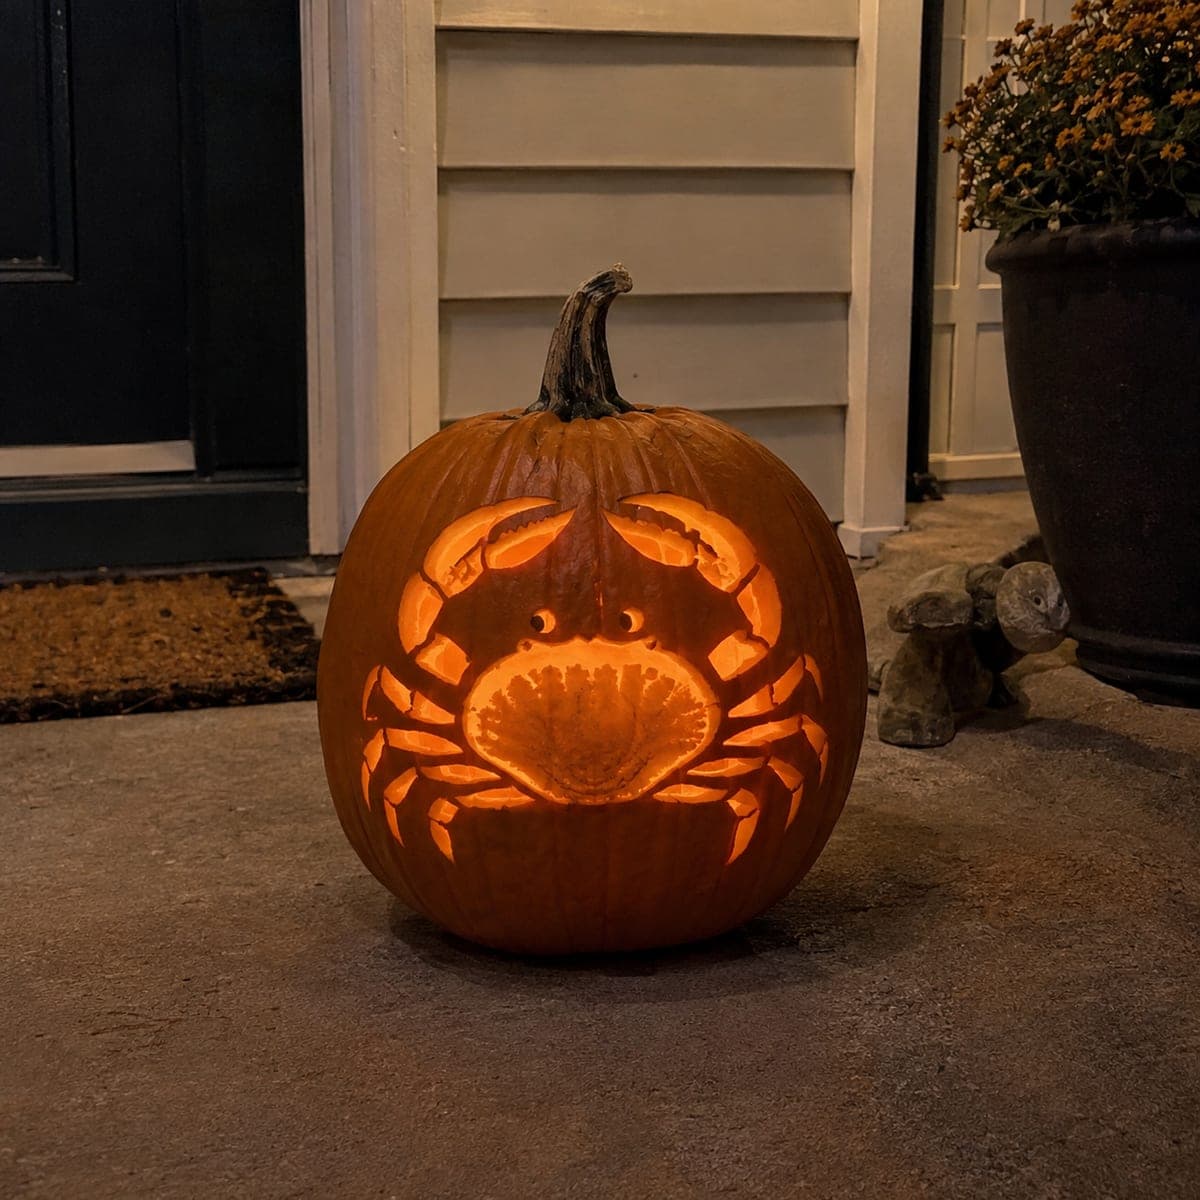
Coastal Crab Jack-O-Lantern With Glowing ClawsAI
0

Coastal Crab Jack-O-Lantern With Glowing Claws

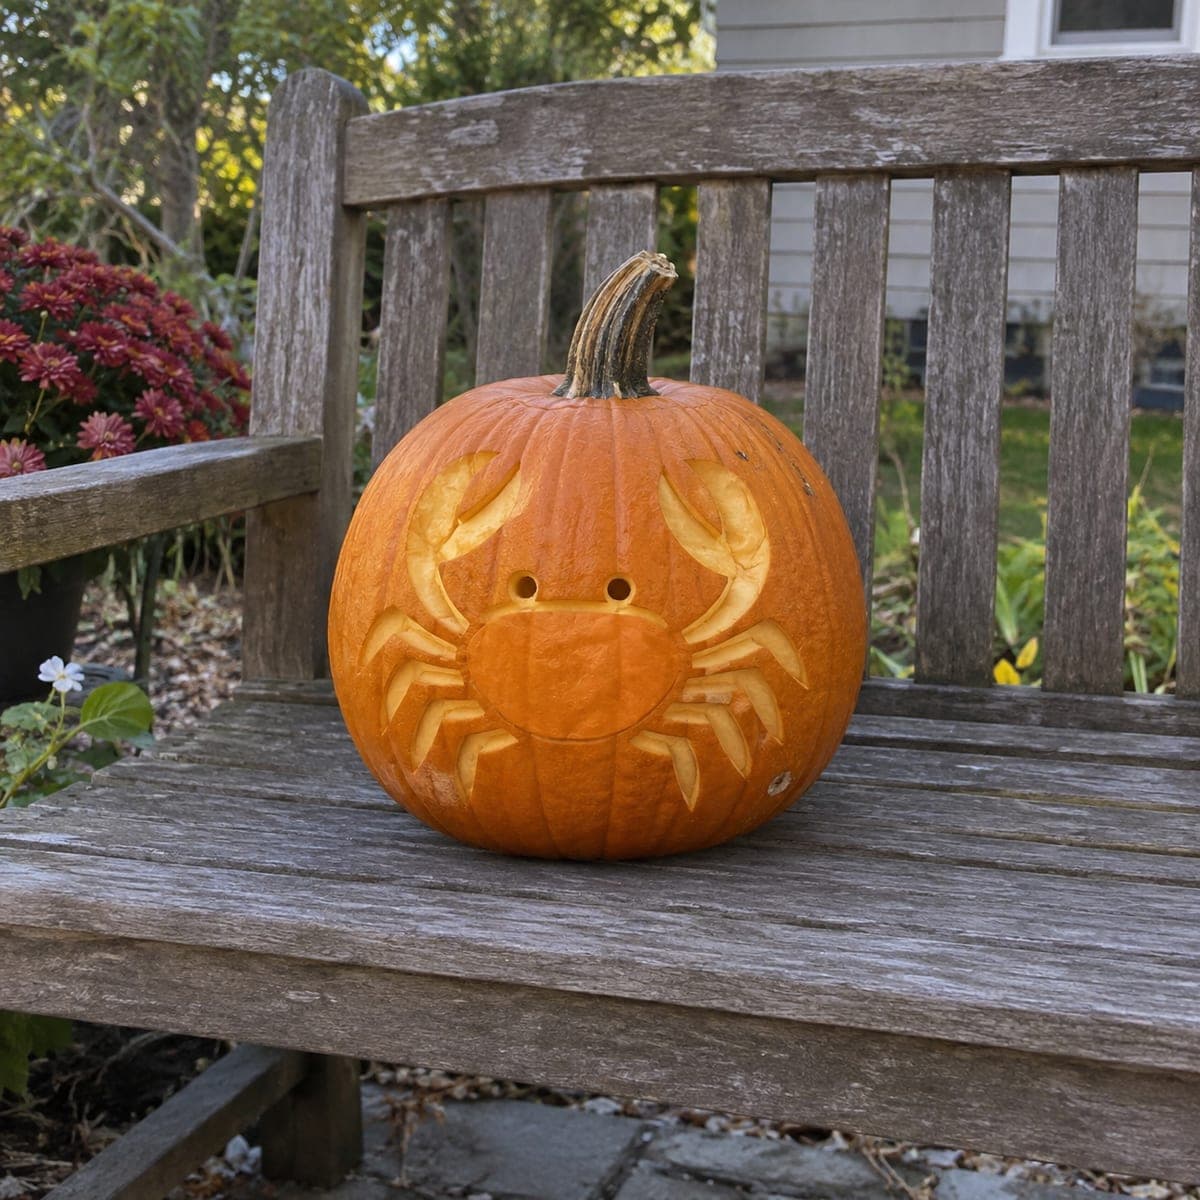
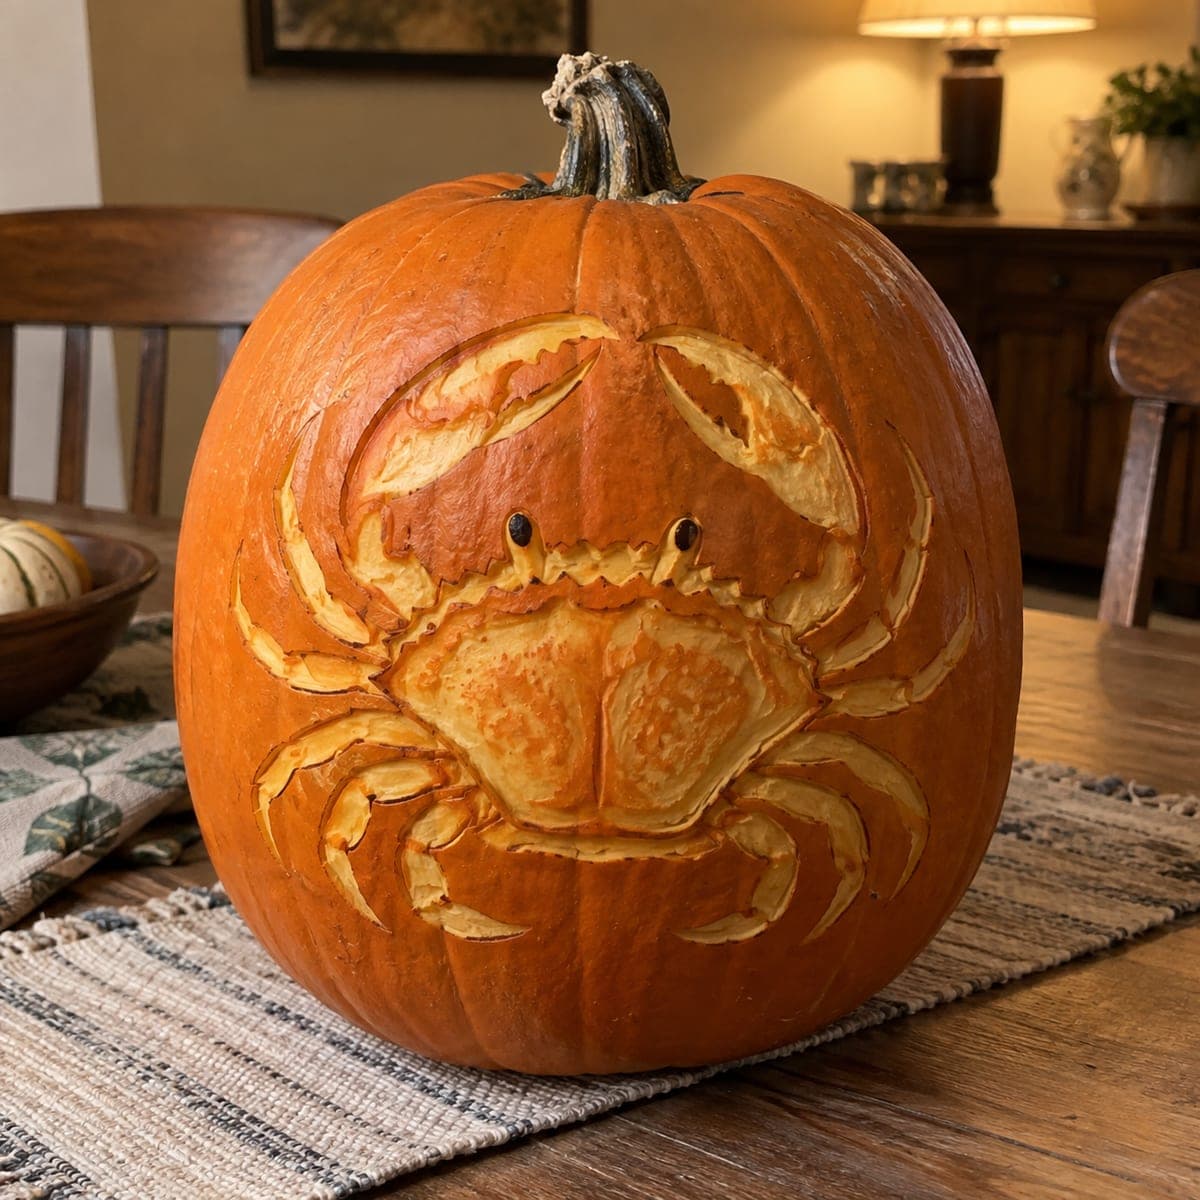
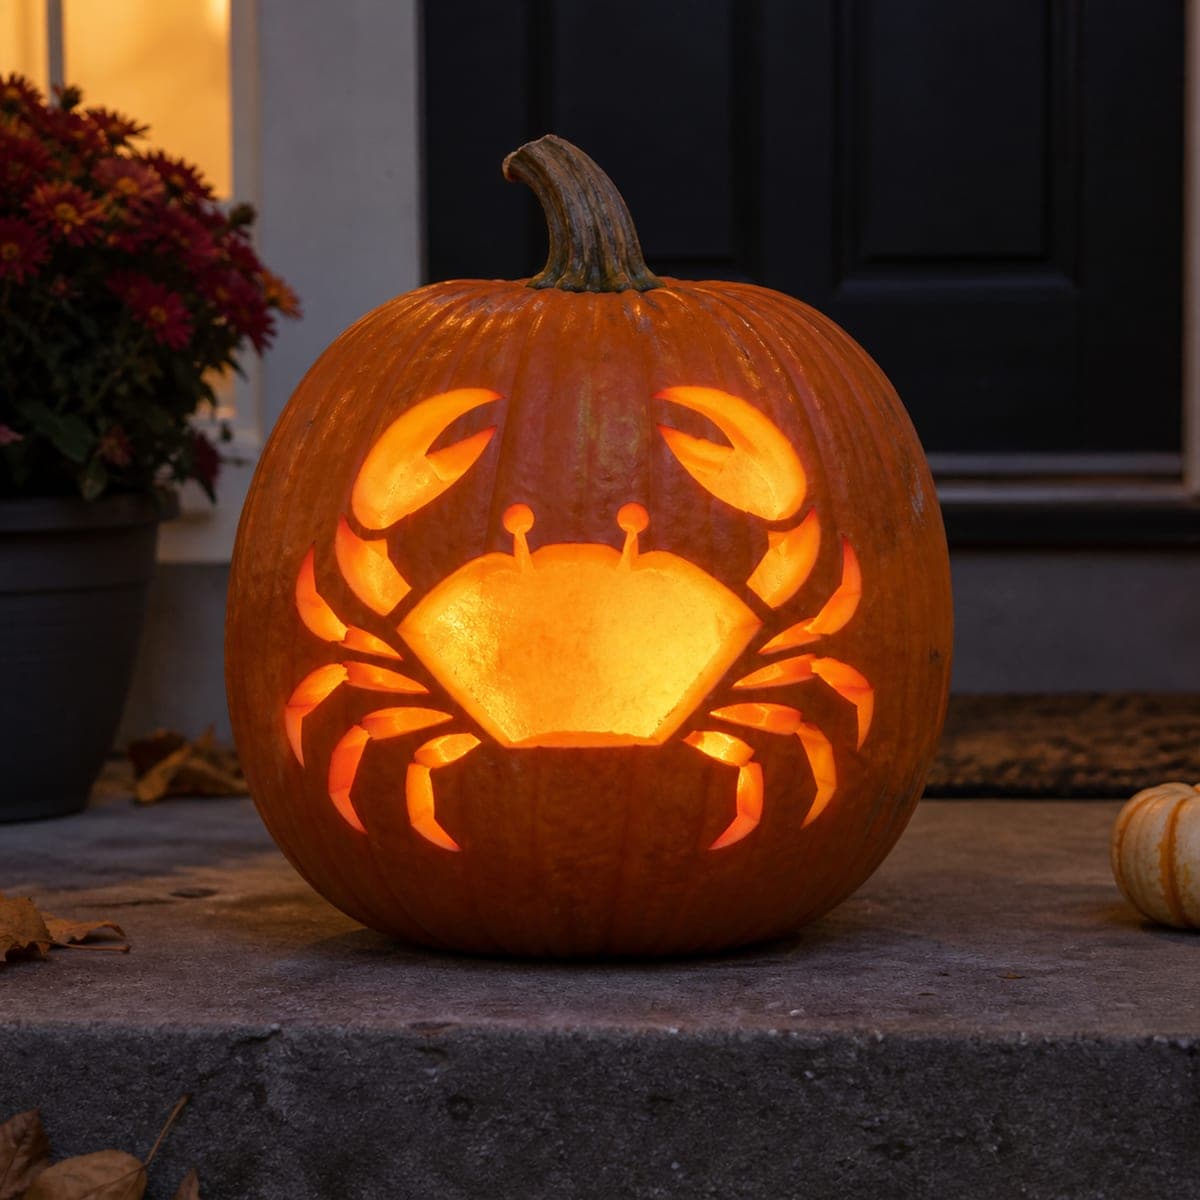
A big-clawed crab glows from this jack-o-lantern, its shell carved as one bright panel and its legs and pincers cut in bold symmetric strokes. It is a fun coastal twist on the usual spooky fare for a beach town porch. Carve the central shell opening first, then work outward one leg at a time, alternating sides to keep the wall from weakening unevenly, and finish with a warm light.

This is an AI-generated concept image: a realistic, carvable design idea rather than a photo of a finished carve. AI concepts are always labeled and sit out the leaderboard and the contest.

No ratings yet · Sign in to rate
Comments (0)

  • No comments yet — be the first.

Save without an account. Sign in to like or comment.

Our tips for carving a similar design

The core trick here is treating the crab's shell as one large bright panel, then radiating the legs and pincers outward in matching pairs so both sides mirror each other. Cutting from the center out lets you keep the pumpkin wall strong while you build symmetry step by step. Finish with a warm LED so the shell reads as the glowing heart of the design.

Written by PumpkinCarvingIdeas.com, inspired by the image above. These are our suggestions, not instructions from the uploader. This approach to the AI concept has not been tested on a real pumpkin.

From pumpkin to porch

  1. Prep the pumpkin and transfer the design

    Pick a tall pumpkin with a wide, fairly flat front face so the crab has room to spread. Cut a lid or a bottom access hole and scoop the front wall down to about an inch thick with a loop tool so cutting is easier. Tape your crab stencil flat over the front and poke the outlines with a pin or transfer tool. Step back and check that the claws and legs line up evenly on both sides before you cut anything.

  2. Cut the central shell panel first

    Start with the big shell body in the middle, since it is the largest opening and the anchor for everything else. Use a fine saw blade and make slow, steady passes, letting the blade do the work rather than forcing it. Cut this piece out cleanly and gently push the plug inward, then free it. With the biggest hole done first, you can judge how the rest of the light will balance.

  3. Add the eyes and pincer claws

    Cut the two small round eyes on their stalks above the shell, keeping the thin stalk lines connected to the shell so they stay supported. Move to the large front claws, carving the curved pincer shapes as bold openings. Leave a small bridge of skin where each claw meets the body so the arms do not detach. Take your time on the curves, as smooth arcs sell the crab shape more than sharp corners.

  4. Work the legs outward, alternating sides

    Carve the walking legs one at a time as narrow tapered slots, and switch from the left side to the right side after each leg. Alternating keeps the pumpkin wall from weakening unevenly and helps you match leg length and angle across the middle. Keep a little uncut skin between neighboring legs so the front does not collapse. Check symmetry often by eye or with a quick measurement.

  5. Clean up edges and test the light

    Go back over every cut and shave the inside edges at a slight bevel angled outward, which lets more light escape and brightens the openings. Wipe away loose pulp and dry the cut faces with a paper towel. Drop in a battery LED, ideally a warm amber one, and light it in a dark room. Adjust any edge that looks dim or ragged before you call it done.

  6. Stage it and take the final photo

    Set the finished crab on a step or porch ledge at dusk so the warm glow reads against the dark. A rub of petroleum jelly on the cut edges slows drying and keeps the openings crisp for a few extra days. Add a few mums or small gourds nearby for that coastal porch feel. Shoot your photo slightly low and straight on so the shell glows as the centerpiece.

Gather your supplies

Check things off as you get ready.

Work on a stable surface, keep your free hand out of the cutting path, and have an adult handle sharp tools.

Three levels of light

  • Leave intact

    The stalk and the natural pumpkin skin around the crab stay dark as the background.

  • Peel & shade

    Thin the leg tips and claw edges slightly for a softer mid glow that frames the shape.

  • Cut through

    The central shell panel, the eyes, the pincers, and the leg slots cut all the way through for the brightest light.

Learn the carving basics

Before you start cutting

How do I keep the legs and claws even on both sides?

Transfer the stencil carefully and check the dots line up before cutting. Then carve in matching pairs, doing one leg on the left and its twin on the right before moving on. Comparing each new cut to its mirror as you go keeps small errors from adding up.

Won't cutting so many openings weaken the front wall?

It can if you rush, which is why you leave small bridges of skin between the legs and where the claws meet the body. Cutting the large shell first and then alternating sides spreads the stress evenly. Keep the front wall around an inch thick so it stays sturdy.

This is a concept image, so is the design actually carvable?

Yes, the shape works on a real pumpkin as long as you keep the thin legs and claws connected to the shell with small bridges. Do not try to free-float the eye stalks or leg tips. Bold, slightly wider slots hold up far better than hair-thin lines.

Your take belongs here, too.

Changed a detail? Made it simpler? Share a photo of your version and tell the community what worked.

Share your pumpkin

More pumpkins like this

You've reached the end · 8 pumpkins
The Patch Report

Fresh pumpkins, in your inbox.

The best new carvings, ideas worth stealing, and how-tos for carving season. Short, seasonal, and gone by November.

A short email during carving season. Unsubscribe anytime. See our privacy policy.