Halloween Pumpkin Carving Contest · Starts October 1st · $500 in prizes
← Back to ideas
@ai_concepts
Aug 17, 2026
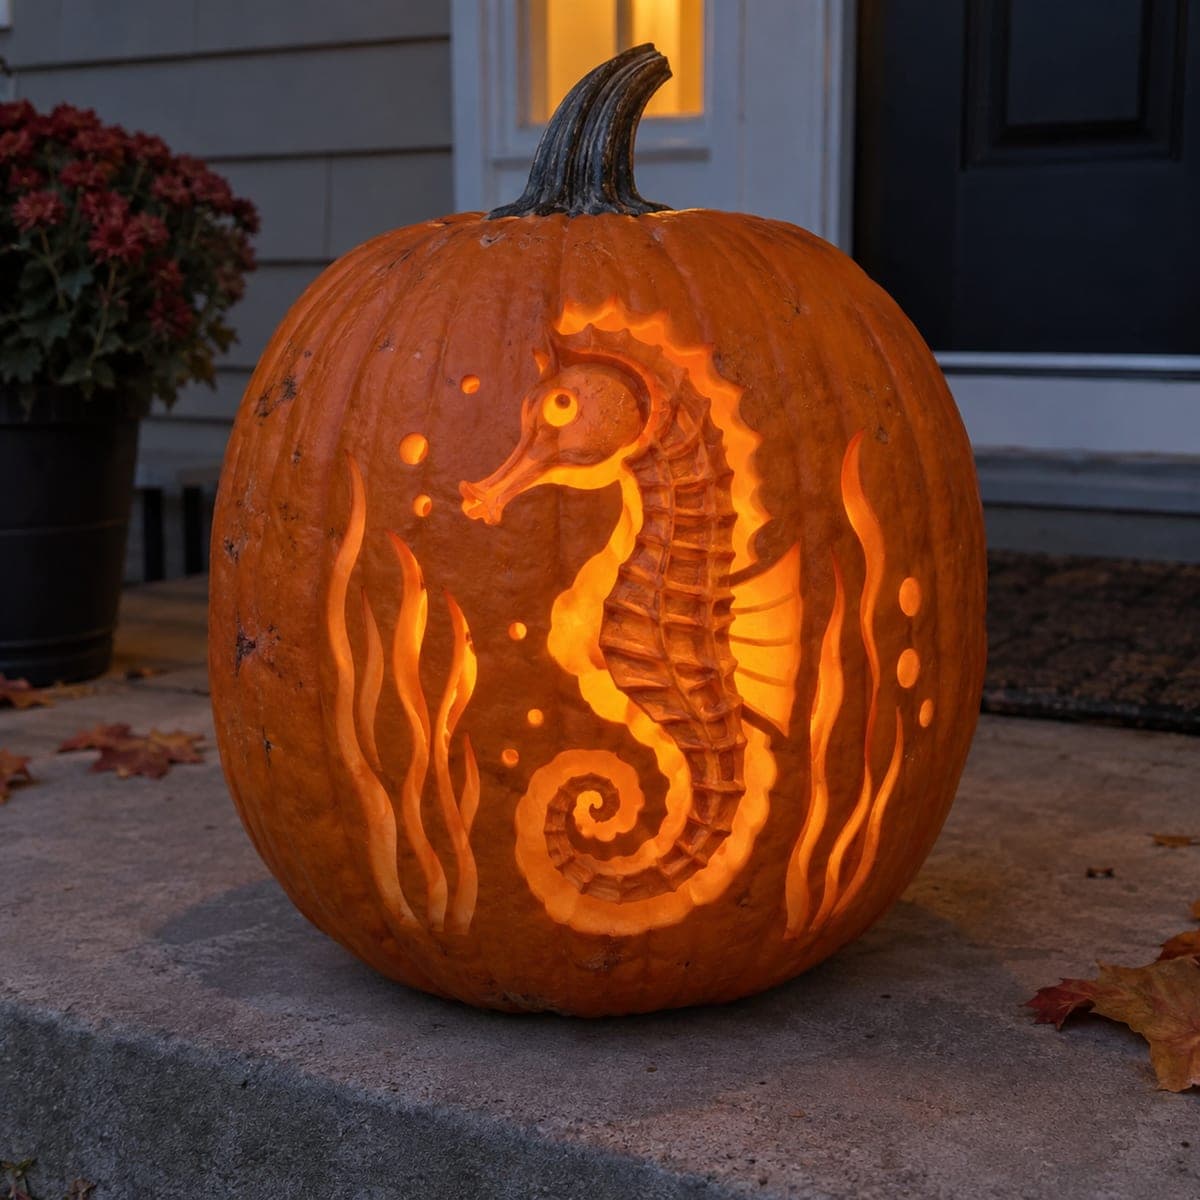
Elegant Seahorse Etched Pumpkin CarvingAI
0

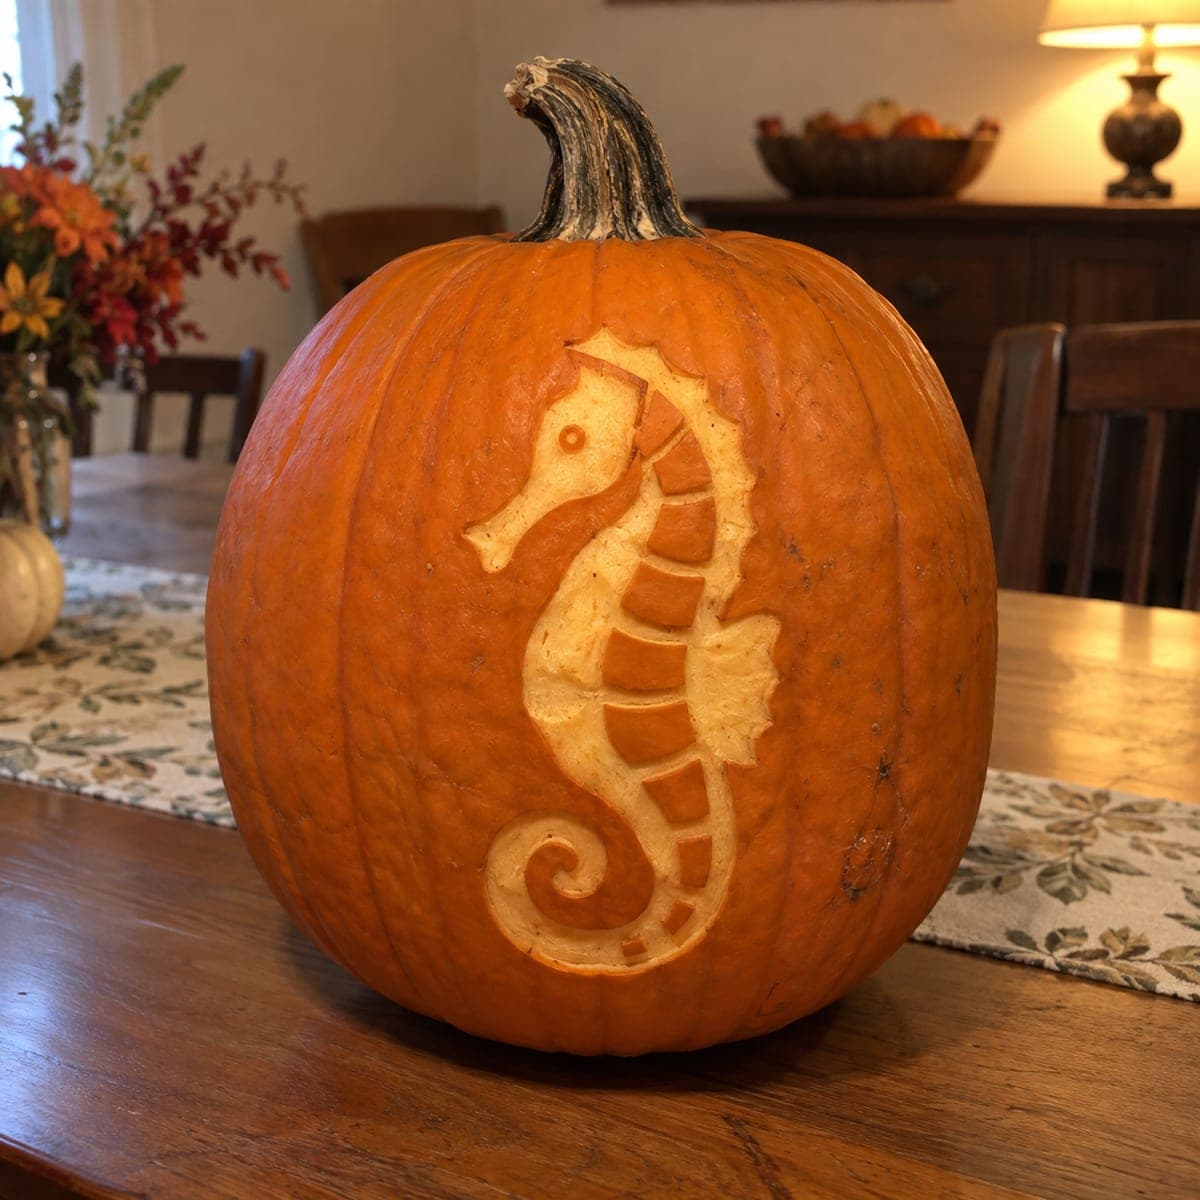
Elegant Seahorse Etched Pumpkin Carving

A curled seahorse with a segmented body and delicate crown is etched into this pumpkin, the pale exposed flesh standing out against the orange skin. Ocean designs are a refreshing pumpkin carving idea for coastal homes, and this one never pierces the shell, so it keeps well indoors. Trace the S-curve of the body first to get the proportions right, then peel each belly segment separately to preserve the ridged look.

This is an AI-generated concept image: a realistic, carvable design idea rather than a photo of a finished carve. AI concepts are always labeled and sit out the leaderboard and the contest.

No ratings yet · Sign in to rate
Comments (0)

  • No comments yet — be the first.

Save without an account. Sign in to like or comment.

Our tips for carving a similar design

The core trick here is that nothing pierces the pumpkin wall. The whole seahorse is created by peeling away only the orange skin so the pale flesh underneath catches the light, which keeps the pumpkin sealed and lasting longer indoors. Plan it as a shading project: map the S-curve first, then work each body segment as its own little peeled panel.

Written by PumpkinCarvingIdeas.com, inspired by the image above. These are our suggestions, not instructions from the uploader. This approach to the AI concept has not been tested on a real pumpkin.

From pumpkin to porch

  1. Pick a tall pumpkin and prep it

    Choose a smooth, upright pumpkin with a broad flat front so the seahorse has room for its curled tail. Since this is an etched design, you do not need to gut the whole pumpkin, but cutting a small lid or a hole in the back lets you drop in an LED later. Wipe the front clean and dry so your stencil sticks. Set it on a towel at a comfortable table height.

  2. Transfer the S-curve first

    Print or draw the seahorse and tape it flat to the front, easing out wrinkles over the curve of the pumpkin. Trace the long S-shape of the body first with a poking tool so your proportions land right, then dot in the crown, snout, eye, fin, and each belly segment. Step back and check the curl of the tail before you commit. Peel the paper and connect any faint dot lines with a washable marker.

  3. Score the outlines cleanly

    With a fine detail knife or a lino-style gouge, cut a shallow outline around the whole seahorse, just deep enough to break the skin. Score the divider lines between each body segment and around the fin, crown spikes, and snout too. These shallow cuts act as stop lines so your peeling stays crisp. Keep the blade shallow, and let an adult handle all sharp tools.

  4. Peel the body to expose the flesh

    Now remove only the orange skin inside your outlines, working one segment at a time to preserve the ridged look. A ribbon tool or the edge of a spoon works well for lifting the skin away in a thin layer. Peel a little deeper where you want more glow and leave a thinner layer where you want a softer tone. Keep the raised ridges between segments untouched so the body reads as banded.

  5. Refine the details and shading

    Deepen the eye, the snout, and the crown spikes slightly so they stand out from the paler body. Vary how much flesh you shave to create soft light and shadow, since this design is all about shading rather than open cutouts. Clean up any ragged edges with the tip of your knife. Brush away crumbs so the pale surface stays bright.

  6. Light it and photograph

    Slip a battery LED inside through your back hole, or set a small LED puck behind the pumpkin so light rakes across the etched flesh. Skip real candles, since the thin peeled areas can scorch and the sealed shell traps heat. Dim the room and take your photo at a slight angle to catch the ridges. Coat the exposed flesh with a little petroleum jelly to slow drying if you want it to last.

Gather your supplies

Check things off as you get ready.

Work on a stable surface, keep your free hand out of the cutting path, and have an adult handle sharp tools.

Three levels of light

  • Leave intact

    The orange skin surrounding the seahorse stays untouched and dark, framing the shape.

  • Peel & shade

    The entire seahorse body, crown, and curled tail are skin-peeled so they glow a soft dim orange, with each segment shaded a little differently.

  • Cut through

    Nothing is cut all the way through on this sealed design, though the eye and the deepest crevices can be shaved thinnest for the brightest points.

Learn the carving basics

Before you start cutting

Do I have to hollow out the whole pumpkin?

Not fully, since the design never pierces the front wall. A small hole or lid in the back is enough to slip in an LED and let a little heat escape. Leaving the front wall thick actually helps the etched flesh hold its shape longer.

How do I keep the body segments looking ridged?

Score the divider line between each segment before you peel, then remove the skin one panel at a time. Leave a narrow strip of untouched or barely shaved surface between segments so they read as raised bands. Working segment by segment stops you from accidentally flattening the whole belly.

Will an etched pumpkin last long enough to display?

Etched pumpkins often last longer than fully cut ones because the shell stays sealed and loses less moisture. Rubbing petroleum jelly over the exposed flesh slows drying and browning. Keep it out of direct heat and it should hold its glow for several days.

Your take belongs here, too.

Changed a detail? Made it simpler? Share a photo of your version and tell the community what worked.

Share your pumpkin

More pumpkins like this

You've reached the end · 8 pumpkins
The Patch Report

Fresh pumpkins, in your inbox.

The best new carvings, ideas worth stealing, and how-tos for carving season. Short, seasonal, and gone by November.

A short email during carving season. Unsubscribe anytime. See our privacy policy.