Halloween Pumpkin Carving Contest · Starts October 1st · $500 in prizes
← Back to ideas
@ai_concepts
Aug 6, 2026
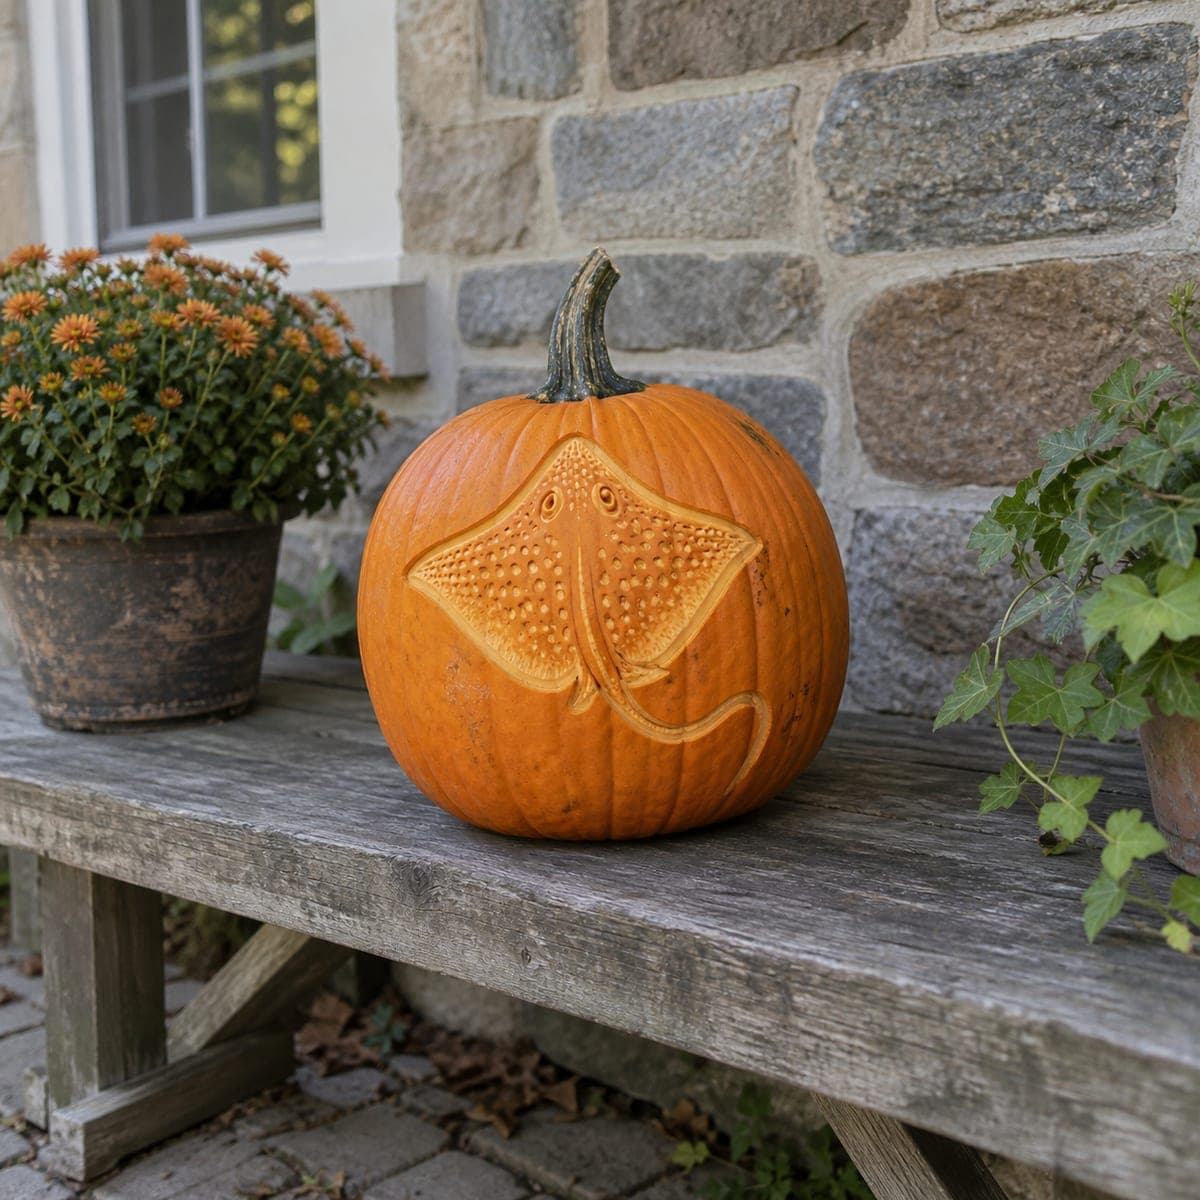
Jumping Dolphin Waves Shaded PumpkinAI
0

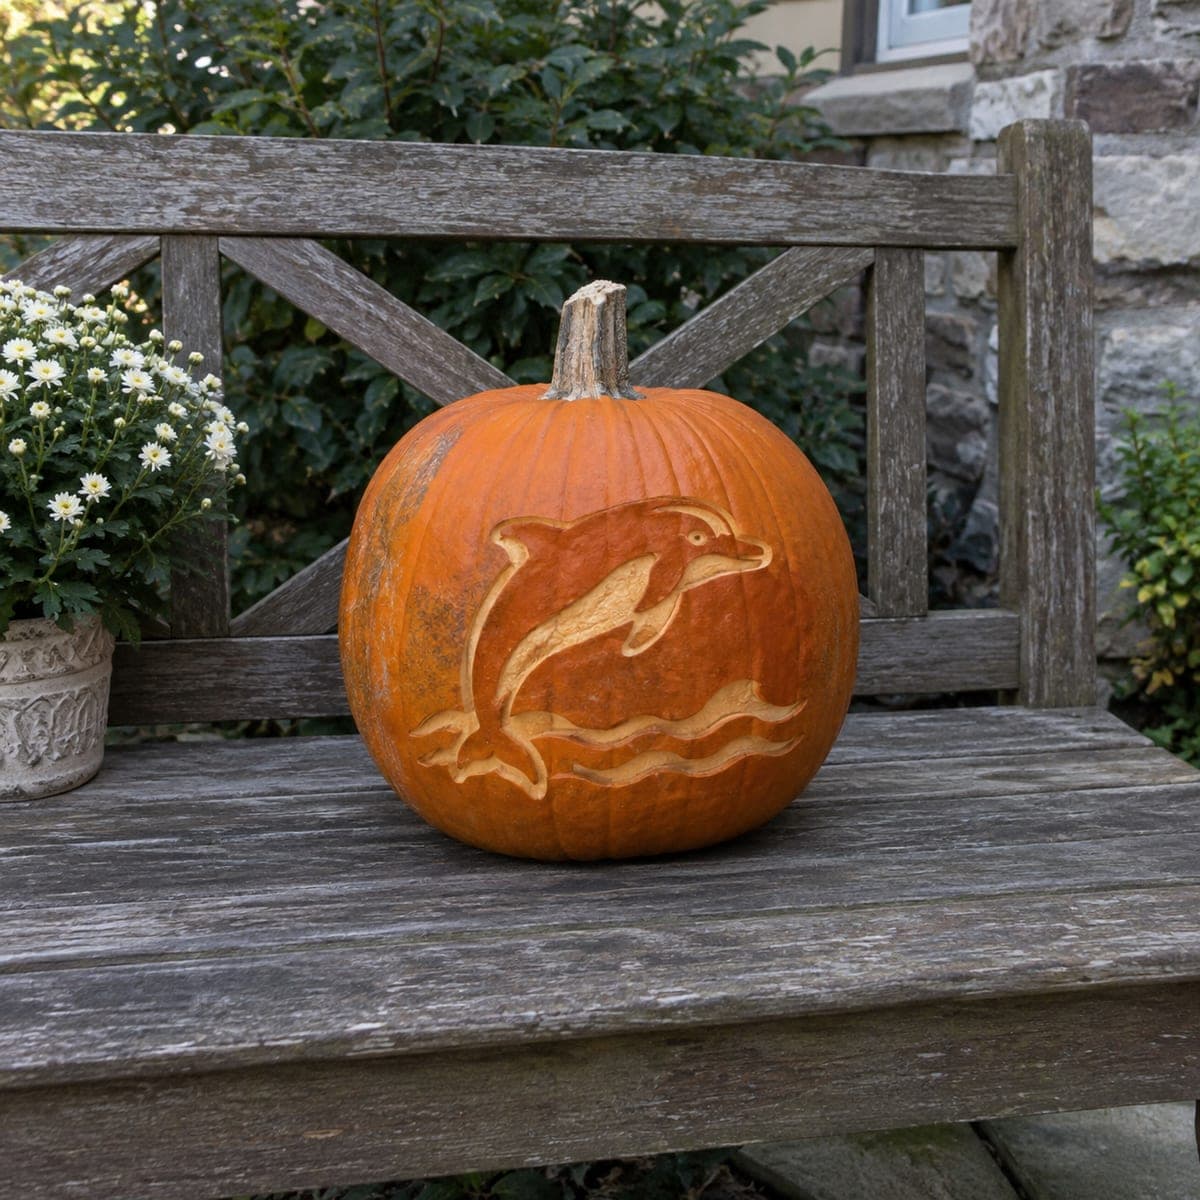
Jumping Dolphin Waves Shaded Pumpkin

A dolphin leaps above carved wave lines in a flowing nautical scene etched into the surface of this fall pumpkin, the skin peeled away in the wave crests and dolphin body to a lighter tone against the orange background. The clean composition and moderate detail level make this an approachable shading project for carvers who want to move beyond basic cutouts. Outline the dolphin and waves with a ballpoint pen first, then peel the skin with a spoon scoop or ribbon tool, working the largest wave areas before the finer dolphin details. A fresh coastal pumpkin carving idea that works without any candle inside.

This is an AI-generated concept image: a realistic, carvable design idea rather than a photo of a finished carve. AI concepts are always labeled and sit out the leaderboard and the contest.
No ratings yet · Sign in to rate

Comments (0)

  • No comments yet — be the first.

Save without an account. Sign in to like or comment.

Our tips for carving a similar design

The core trick here is surface shading, where you peel away only the outer skin so the dolphin and wave crests glow a soft, lighter orange against the darker untouched background. You keep every shape on the surface and never punch a hole through the wall, which is why this design reads clearly even in daylight. Plan the dolphin as your lightest, most detailed area and let the waves flow beneath it in simple curved bands.

Written by PumpkinCarvingIdeas.com, inspired by the image above. These are our suggestions, not instructions from the uploader. This approach to the AI concept has not been tested on a real pumpkin.

From pumpkin to porch

  1. Pick and prep the pumpkin

    Choose a pumpkin with a wide, smooth, slightly flat face so the whole scene sits in one plane. Wipe the skin clean and dry it. Since this is a shading project, you do not need to open the top or gut it fully, though scooping the inside wall a little thinner on the carving side helps light pass through later. Set it on a stable table at a comfortable height before you start.

  2. Transfer the design

    Tape your dolphin and wave stencil over the flat face, or sketch it freehand with a ballpoint pen. Press firmly along the dolphin outline, the fins, the eye, and each wave band so you leave a clear guide line. Step back and check the dolphin looks like it is leaping up and to the right, with the waves crossing below it. Redraw any lines that look crowded before you cut anything.

  3. Score the outlines

    With a small detail knife, an adult should lightly trace along all your pen lines, cutting only through the skin and a hair below it. Do not go deep, you are just creating clean borders that stop your shading from bleeding into the background. Take extra care around the eye and the narrow fin tips. These score lines are what make the finished shapes look crisp.

  4. Peel the large wave areas

    Switch to a spoon scoop or ribbon tool and start peeling the skin off the biggest wave crests first, since they are the most forgiving. Remove just the orange skin to expose the lighter flesh underneath, keeping the depth even so the glow is consistent. Work up to the border lines but not past them. Doing the large areas first lets you find your rhythm before the fine work.

  5. Shade the dolphin body

    Peel the dolphin's body and belly to the same light tone, then vary your pressure to suggest form. Go a touch deeper along the belly and underside of the tail for the brightest highlights, and leave the eye and a thin line along the back barely peeled so they stay darker for contrast. Keep the fin tips attached and solid rather than cutting them free. Blend the edges so the dolphin looks rounded, not flat.

  6. Clean up and light it

    Brush away crumbs, then hold the pumpkin toward a lamp to check that the peeled areas read brighter than the background. Deepen any spots that look too dark by scraping a little more flesh away. Drop in a battery LED puck, since this design shows off beautifully even with no light and glows softly with one. Rub the cut edges with a little petroleum jelly to slow drying, then photograph it in daylight and again after dusk.

Gather your supplies

Check things off as you get ready.

Work on a stable surface, keep your free hand out of the cutting path, and have an adult handle sharp tools.

Three levels of light

  • Leave intact

    The orange background water and the dolphin's eye and back line stay untouched and dark.

  • Peel & shade

    The dolphin's body, belly, fins, and the wave crests are skin-peeled for a soft mid glow.

  • Cut through

    No areas are cut through on this design, which keeps the scene readable in full daylight.

Learn the carving basics

Before you start cutting

Do I need to cut all the way through anywhere?

No, this is a pure shading design, so every shape is created by peeling skin rather than making openings. Keeping the wall intact is what gives you the smooth two-tone look. If you want a little extra pop, you could deepen the brightest belly area, but avoid piercing through.

How do I keep the thin fin tips from breaking?

Treat the fins as shaded shapes, not cutouts, so they stay backed by solid pumpkin wall. Peel them to the light tone but leave the flesh underneath in place. This keeps the delicate points structurally sound and far less likely to snap or dry out.

Since this is a concept image, will a real pumpkin look the same?

The picture is an AI concept, so no real pumpkin was carved, but the technique is completely doable in real life. Expect your peeled areas to look a little more textured and to darken slightly as the flesh dries. Seal the exposed areas and keep it cool to hold the contrast longer.

Your take belongs here, too.

Changed a detail? Made it simpler? Share a photo of your version and tell the community what worked.

Share your pumpkin

More pumpkins like this

You've reached the end · 8 pumpkins
The Patch Report

Fresh pumpkins, in your inbox.

The best new carvings, ideas worth stealing, and how-tos for carving season. Short, seasonal, and gone by November.

A short email during carving season. Unsubscribe anytime. See our privacy policy.