Halloween Pumpkin Carving Contest · Starts October 1st · $500 in prizes
← Back to ideas
@ai_concepts
Aug 17, 2026
Spotted Stingray Relief Carving on Autumn PumpkinAI
0

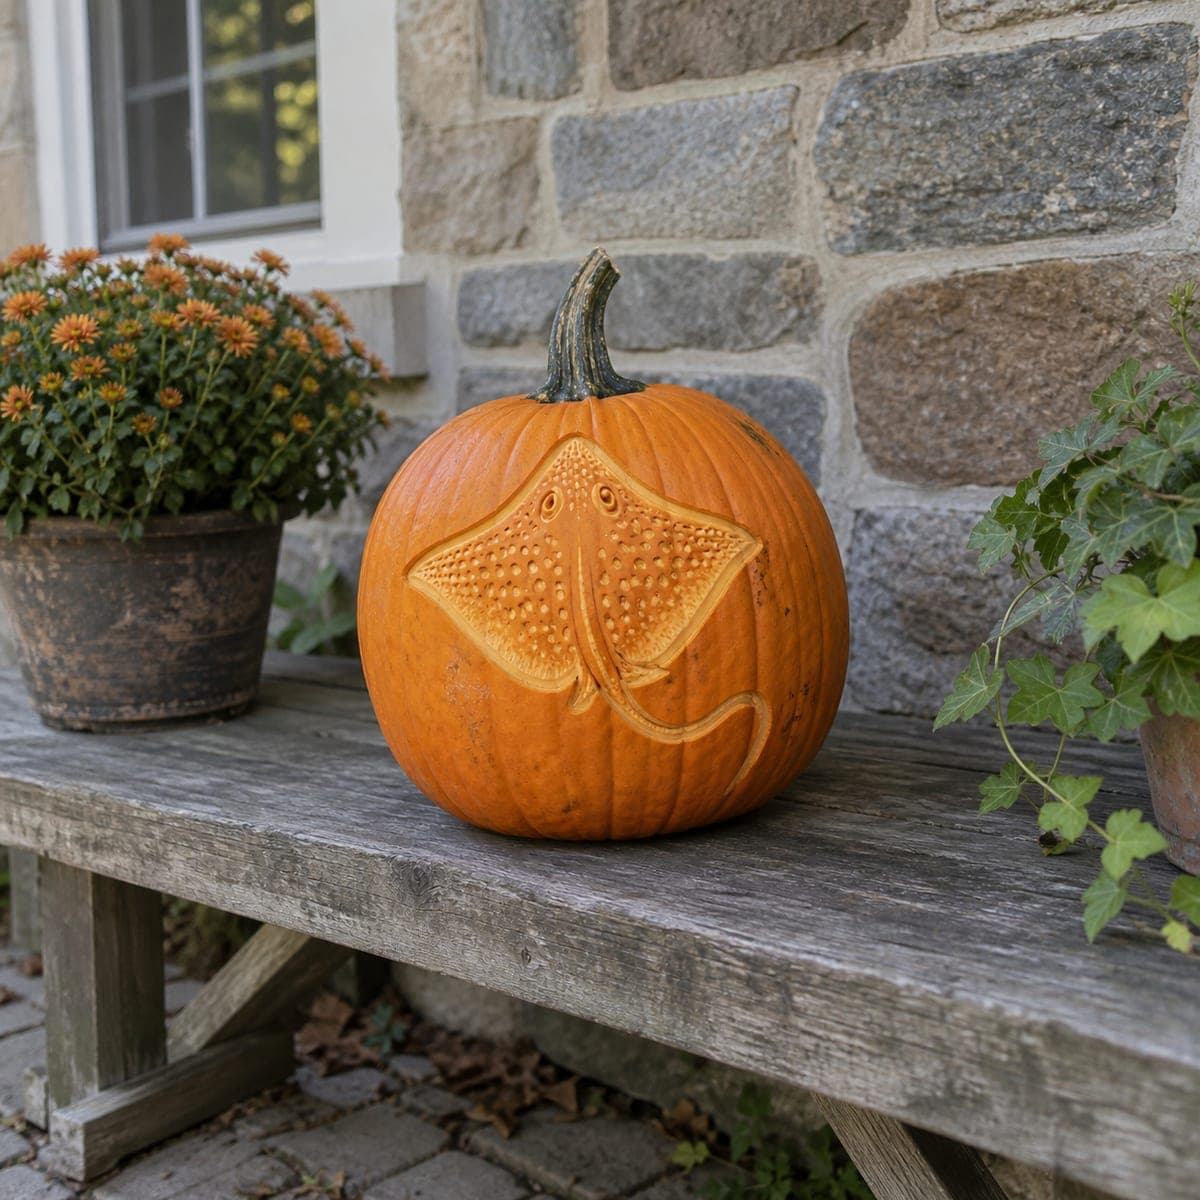
Spotted Stingray Relief Carving on Autumn Pumpkin

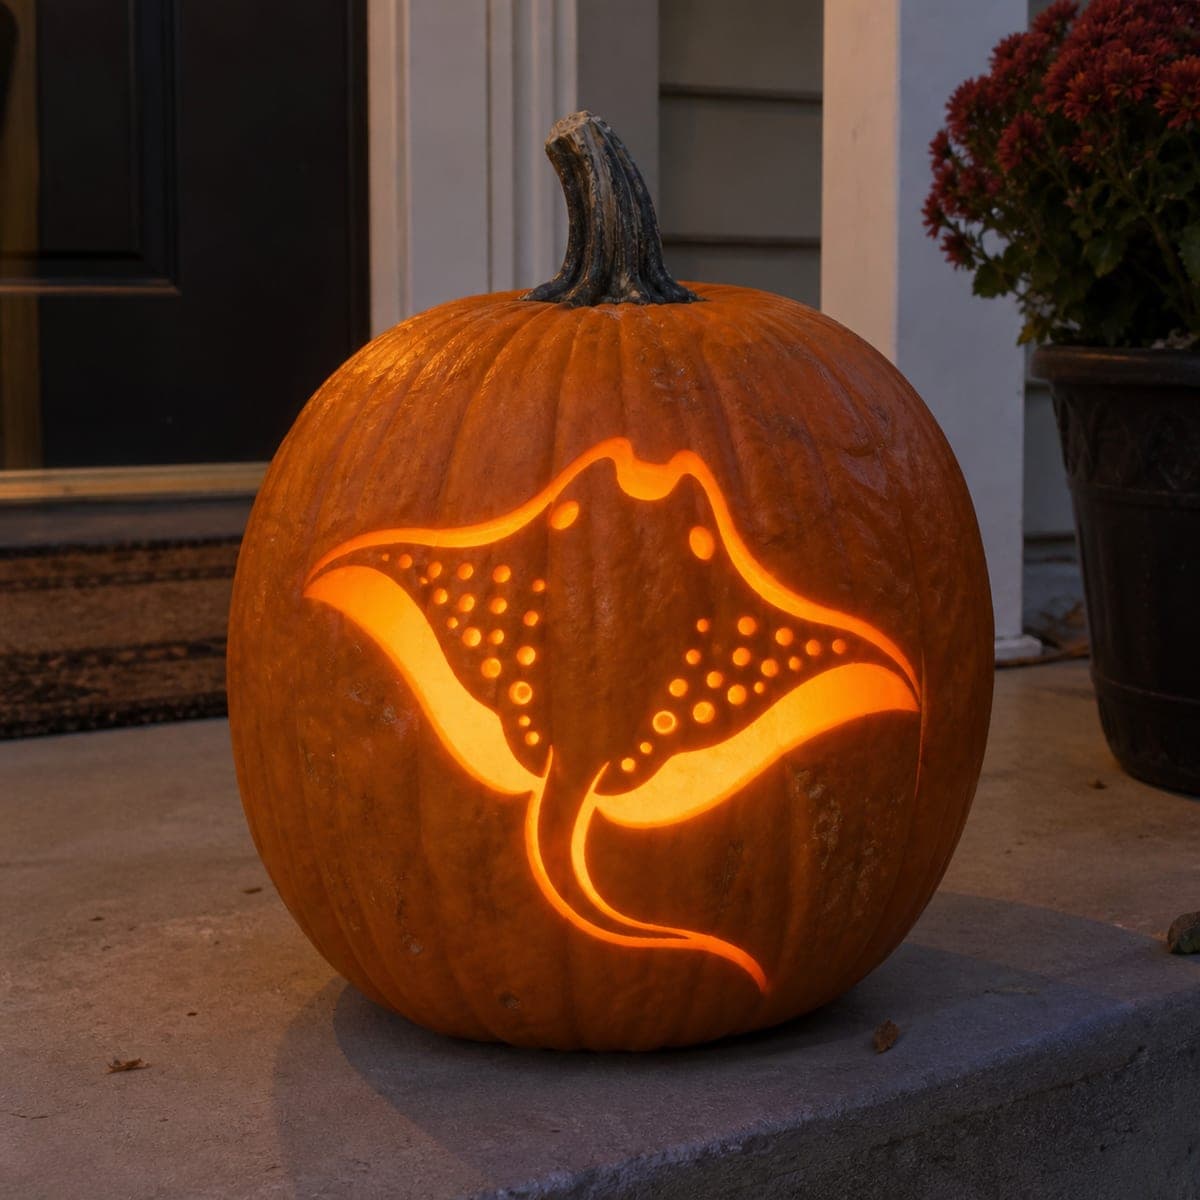
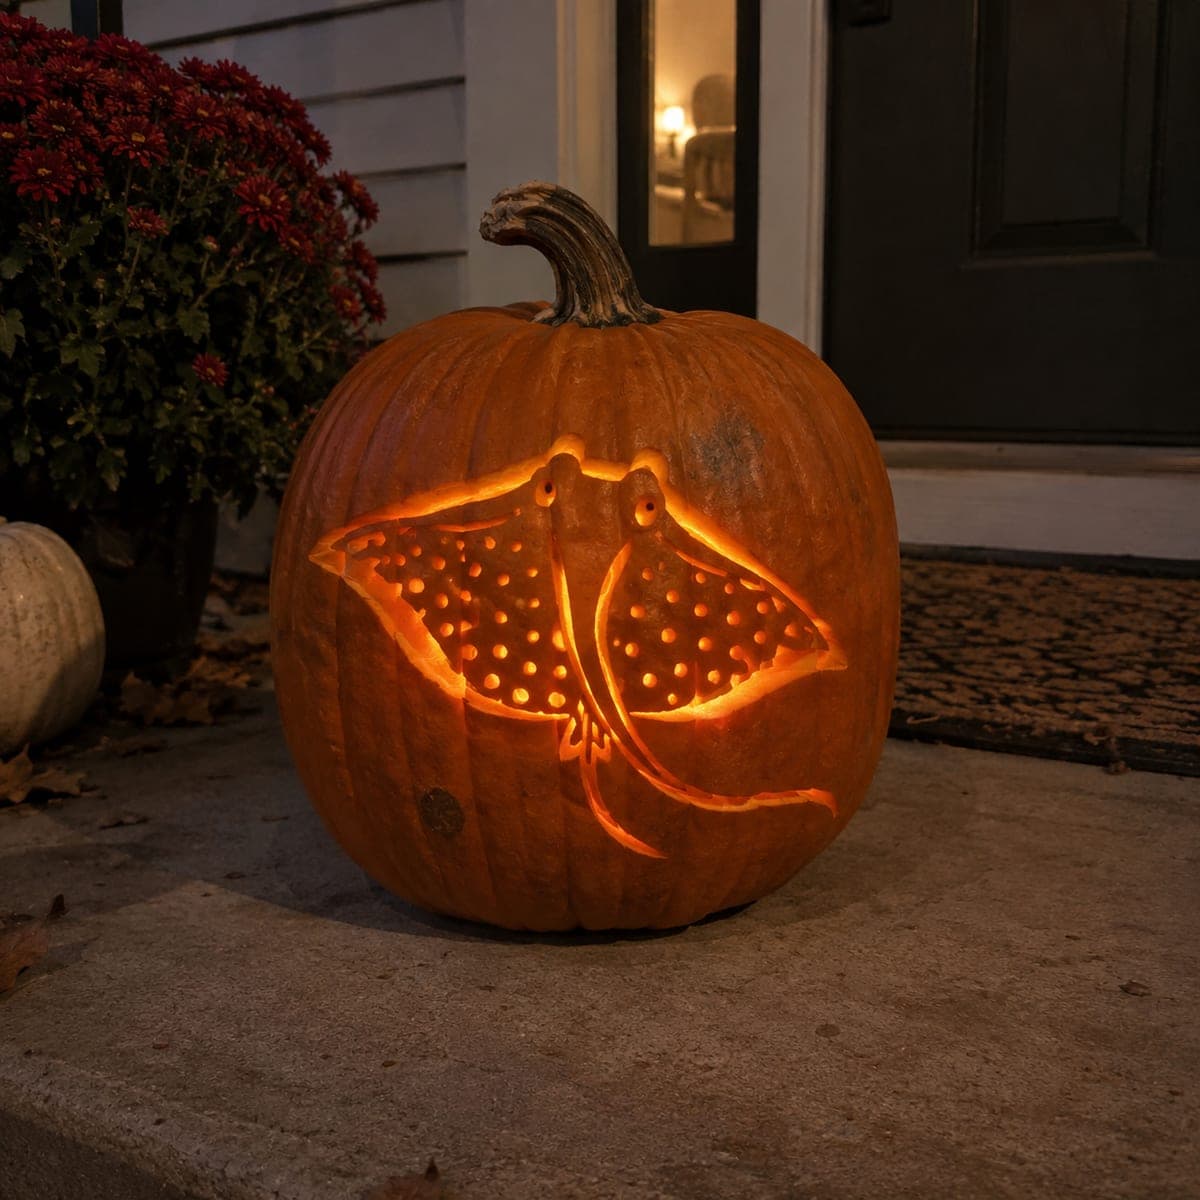
A stingray glides across this pumpkin with detailed surface etching that captures its wide, flat body, dotted skin texture, and curling tail. Relief carving with a linoleum cutter or detail knife creates the spotted pattern without piercing through, so the design shows beautifully in daylight. Place the pumpkin near a lantern or LED spotlight to cast subtle shadows that highlight the ray's dimensional texture.

This is an AI-generated concept image: a realistic, carvable design idea rather than a photo of a finished carve. AI concepts are always labeled and sit out the leaderboard and the contest.

No ratings yet · Sign in to rate
Comments (0)

  • No comments yet — be the first.

Save without an account. Sign in to like or comment.

Our tips for carving a similar design

The core trick here is relief carving, where you shave away only the skin and a thin layer of flesh so the design glows in daylight rather than piercing all the way through. You build the stingray's wide, flat body and its speckled skin with hundreds of small scooped dots, then let a single curling line suggest the tail. Keep the whole design shallow and let a light behind or beside the pumpkin bring out the shadows in the dimples.

Written by PumpkinCarvingIdeas.com, inspired by the image above. These are our suggestions, not instructions from the uploader. This approach to the AI concept has not been tested on a real pumpkin.

From pumpkin to porch

  1. Prep and transfer

    Pick a large pumpkin with a smooth, flat front and wipe it clean. Cut a lid or a base access hole and scoop the inside wall behind your design down to about one inch so light passes through the peeled areas later. Tape your stingray pattern on the front and poke or trace the main outline, the eyes, and a few guide dots. This gives you a map before any blade touches the skin.

  2. Score the ray's outline

    With a detail knife, lightly score the outer edge of the wide diamond body and the long tail, cutting just through the skin and no deeper. Do not cut all the way into the shell. This outline frames the whole design and keeps your shaded areas from bleeding into the surrounding pumpkin. Take your time on the tail's gentle curl so the line stays smooth.

  3. Peel the body for a mid glow

    Use a lino cutter or a loop tool to remove the orange skin inside the body outline, leaving a smooth, slightly recessed surface. Work in shallow passes so the flesh stays intact and even. This peeled zone will glow a soft orange when lit, setting the ray apart from the dark untouched background. Keep the depth consistent so the light reads evenly.

  4. Carve the spotted texture

    Switch to a small U-gouge or the smallest lino blade and scoop rows of round dots across the ray's back, following the pattern from dense near the head to sparser toward the edges. Each dot only needs to dig a little deeper than the peeled surface to catch shadow. Vary the size slightly so it looks organic rather than mechanical. This dotted layer is what gives the whole carving its realistic skin.

  5. Detail the face and tail

    Carve the two eyes as small raised bumps ringed by a scooped groove so they stand out, then define the gill-like curves near the head with shallow lines. Deepen the center spine line and the tail groove just enough to throw a shadow. Leave thin walls between details so nothing crumbles. Brush out all the loose shavings with a dry paintbrush to reveal the pattern crisply.

  6. Light and photograph

    Set a battery LED spotlight or lantern to the side of the pumpkin rather than straight inside, so the raking light rakes across the dots and casts tiny shadows. Never use a candle, since the heat and open flame are unsafe. Photograph in early evening to catch both the daylight relief and the glow. Rub the cut edges with a little petroleum jelly to slow drying and keep the detail sharp for days.

Gather your supplies

Check things off as you get ready.

Work on a stable surface, keep your free hand out of the cutting path, and have an adult handle sharp tools.

Three levels of light

  • Leave intact

    The background pumpkin skin around the ray and the raised eye bumps stay untouched and dark.

  • Peel & shade

    The ray's wide body and tail are skin-peeled to a smooth recess for a soft mid orange glow.

  • Cut through

    No full cut-throughs here; the deepest scooped dots and grooves read brightest under raking side light.

Learn the carving basics

Before you start cutting

Do I cut all the way through anywhere on this design?

No, this is a relief carving, so you only remove the skin and a thin layer of flesh. Keeping the wall intact is what lets the ray show up in daylight and glow softly when lit. If you cut through, you lose the dimensional texture that makes the stingray look real.

How do I keep the hundreds of dots looking natural?

Work the dots densest near the head and let them thin out toward the wing edges, just as real stingray skin patterns do. Vary the size a little and avoid perfectly straight rows. A small U-gouge held at the same shallow depth each time keeps them consistent without looking stamped.

Why light it from the side instead of inside?

Because the dots and grooves are shallow, a light placed inside washes them out. A side LED spotlight rakes across the surface and casts tiny shadows in each dimple, which is what makes the texture pop. It also lets the peeled body glow while the raised eyes stay defined.

Your take belongs here, too.

Changed a detail? Made it simpler? Share a photo of your version and tell the community what worked.

Share your pumpkin

More pumpkins like this

You've reached the end · 8 pumpkins
The Patch Report

Fresh pumpkins, in your inbox.

The best new carvings, ideas worth stealing, and how-tos for carving season. Short, seasonal, and gone by November.

A short email during carving season. Unsubscribe anytime. See our privacy policy.