Halloween Pumpkin Carving Contest · Starts October 1st · $500 in prizes
← Back to ideas
@ai_concepts
Jul 6, 2026
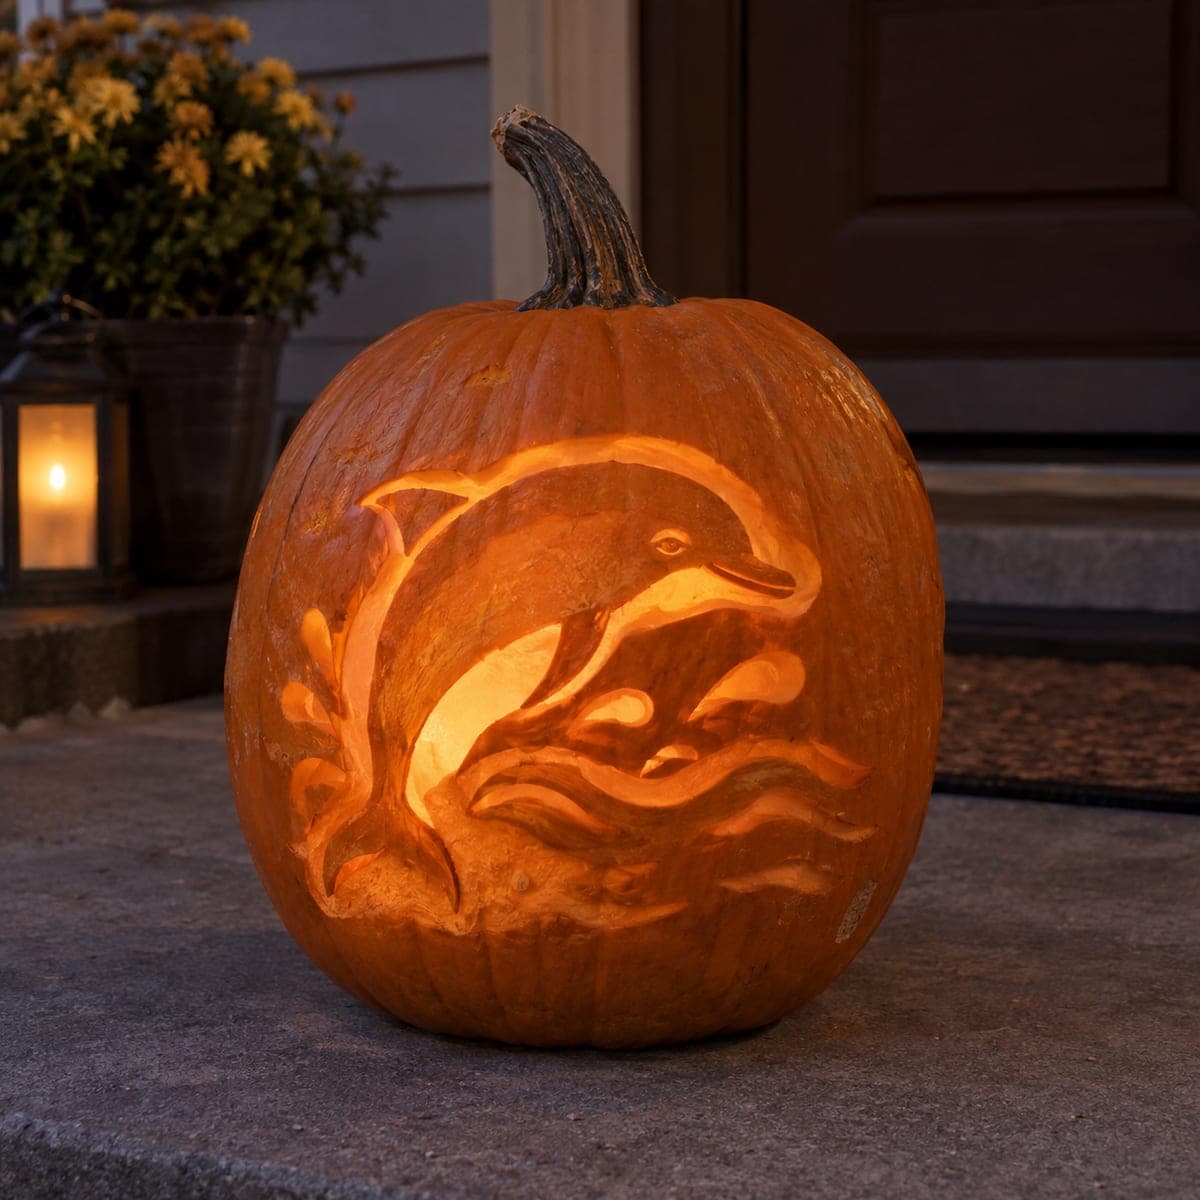
Dolphin Riding a Wave Etched PumpkinAI
0

Dolphin Riding a Wave Etched Pumpkin

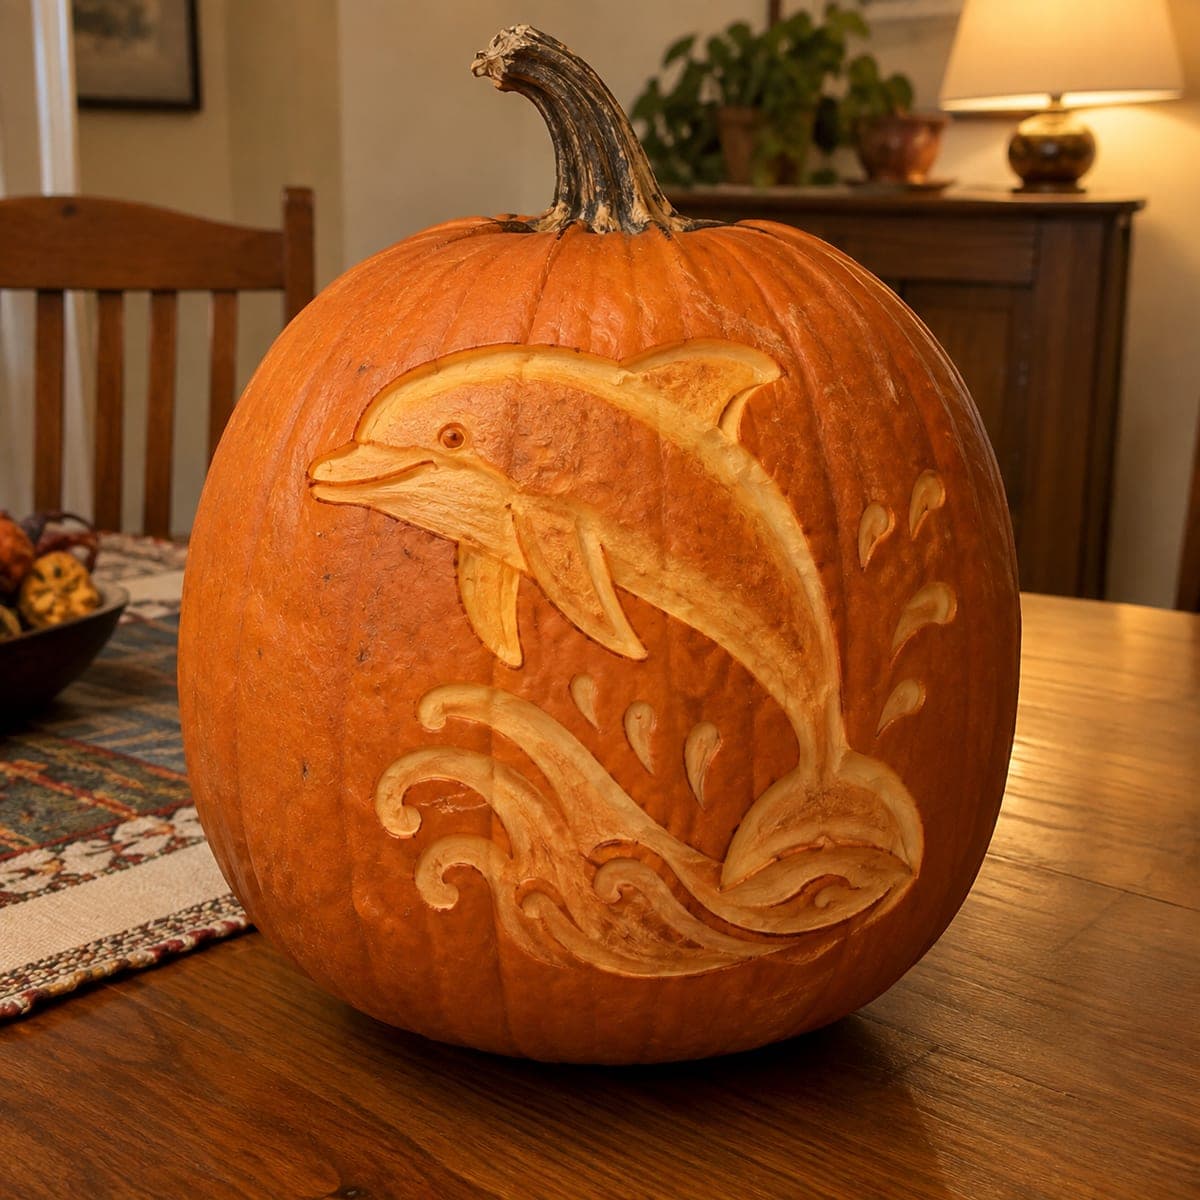
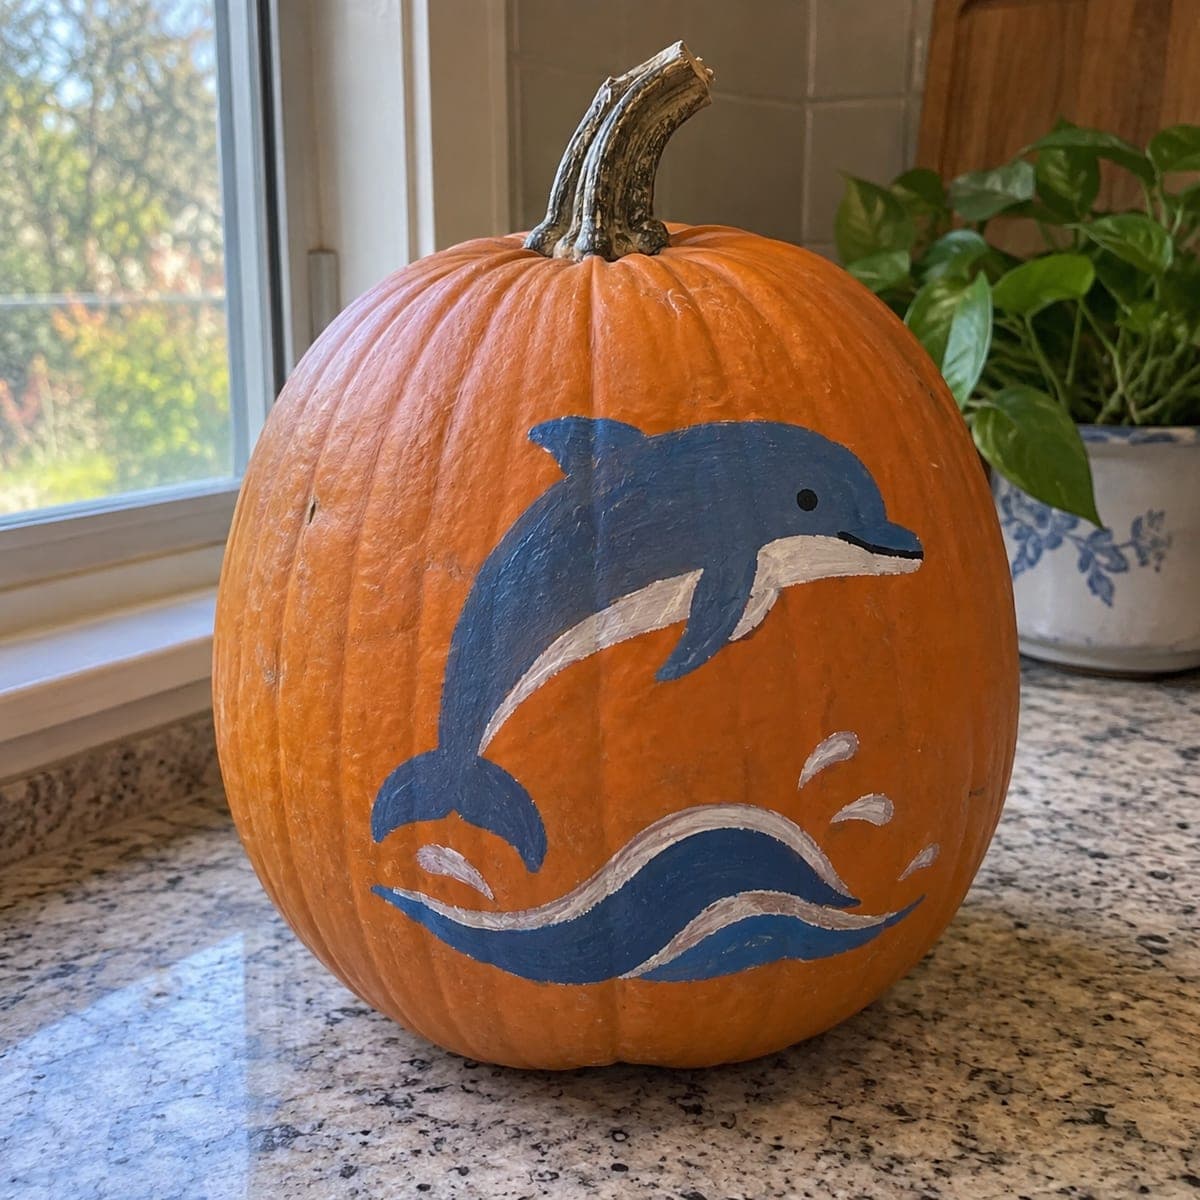
Riding a curling wave, a dolphin arcs across this etched pumpkin with droplets of spray peeled into the rind around its fins. Varied carving depth separates the bright belly from the shaded back, giving the scene real movement even unlit. Start with the big wave swirls to set the composition, then refine the dolphin's smile and eye with a detail knife. A tabletop spotlight from the side emphasizes the relief.

This is an AI-generated concept image: a realistic, carvable design idea rather than a photo of a finished carve. AI concepts are always labeled and sit out the leaderboard and the contest.

No ratings yet · Sign in to rate
Comments (0)

  • No comments yet — be the first.

Save without an account. Sign in to like or comment.

Our tips for carving a similar design

The core trick here is depth without cutting all the way through. You shave the rind to different depths so the bright belly and spray droplets pop while the back and background stay shaded. Set the big wave swirls first to anchor the composition, then refine the dolphin's face last so a side spotlight rakes across the relief and brings the whole scene to life.

Written by PumpkinCarvingIdeas.com, inspired by the image above. These are our suggestions, not instructions from the uploader. This approach to the AI concept has not been tested on a real pumpkin.

From pumpkin to porch

  1. Prep the pumpkin and pick your canvas

    Choose a tall pumpkin with a smooth, flat front panel and wipe it clean. Since this is a shading and etching design, you do not need to gut it fully, but cut a small vent hole in the back or bottom to release heat from your LED. Keep the front wall thick so you have room to carve at varying depths. Let the surface dry before you transfer your pattern.

  2. Transfer the dolphin and wave

    Tape your stencil flat against the front and poke the outlines with a transfer tool or pin. Mark the dolphin's body, fins, and smile, the curling wave swirls below, and the scattered spray droplets around the fins. Step back and check that the dolphin arcs across the center with the wave rolling underneath. Remove the paper and connect any faint dotted lines with a washable marker.

  3. Set the wave swirls first

    Start with the large curling wave at the bottom to lock in the composition. Use a ribbon or U-gouge to scoop shallow channels along each swirl, following the curl direction so the strokes look like moving water. Keep these cuts smooth and flowing rather than deep. This gives you a base to balance the dolphin against.

  4. Shade the dolphin body

    Peel the rind off the dolphin's belly and lower flank to expose the pale flesh for a bright glow. Leave the back and upper body darker by removing less skin, which creates the shaded top the design is known for. Vary your depth gradually so the transition from belly to back looks rounded, not flat. Work slowly and keep the fins attached to the surrounding surface.

  5. Refine the face and spray droplets

    Switch to a small detail knife for the smile line, the eye, and the crease of the beak. Keep the eye as a tiny shallow dot so it reads without weakening the flesh. Etch each spray droplet around the fins as a small teardrop peel so they catch a dim glow. Take your time here, since these fine marks give the scene its personality.

  6. Light it and photograph

    Set a small LED puck or string light inside and test the glow in a dark room. Because most of this design is etched rather than cut through, a side spotlight on the table dramatically emphasizes the relief and shadows. Adjust the interior light brightness so the belly reads clearly against the shaded back. Snap your photo slightly off to one side to catch the depth.

Gather your supplies

Check things off as you get ready.

Work on a stable surface, keep your free hand out of the cutting path, and have an adult handle sharp tools.

Three levels of light

  • Leave intact

    The dolphin's back and the open background stay untouched and dark

  • Peel & shade

    The dolphin's belly, fins, wave swirls, and spray droplets get skin-peeled for a mid glow

  • Cut through

    Optional tiny cutouts only if you want the eye or a droplet or two to shine brightest

Learn the carving basics

Before you start cutting

Do I need to hollow out the whole pumpkin for this design?

Not fully, since this is mostly an etched relief that glows through peeled skin rather than open cutouts. You do want to scrape the inside front wall a bit thinner so light passes through the shaded areas. Add a vent hole for LED heat and keep the wall even so your depth shading stays consistent.

How do I keep the belly bright but the back dark?

Control your carving depth. Peel more rind and flesh off the belly so it glows, and remove only a thin layer or none at all on the back so it stays shaded. Blend the transition gradually across the body so the dolphin looks rounded rather than split into two flat zones.

What if my spray droplets tear the surrounding surface?

Keep each droplet a small, shallow teardrop peel rather than a deep gouge, and leave plenty of solid skin between them. Etch them last with a detail knife so you are not stressing that area while carving nearby. If one chips, a pin or toothpick can tidy the edge.

Your take belongs here, too.

Changed a detail? Made it simpler? Share a photo of your version and tell the community what worked.

Share your pumpkin

More pumpkins like this

You've reached the end · 8 pumpkins
The Patch Report

Fresh pumpkins, in your inbox.

The best new carvings, ideas worth stealing, and how-tos for carving season. Short, seasonal, and gone by November.

A short email during carving season. Unsubscribe anytime. See our privacy policy.