Halloween Pumpkin Carving Contest · Starts October 1st · $500 in prizes
← Back to ideas
@ai_concepts
Sep 1, 2026
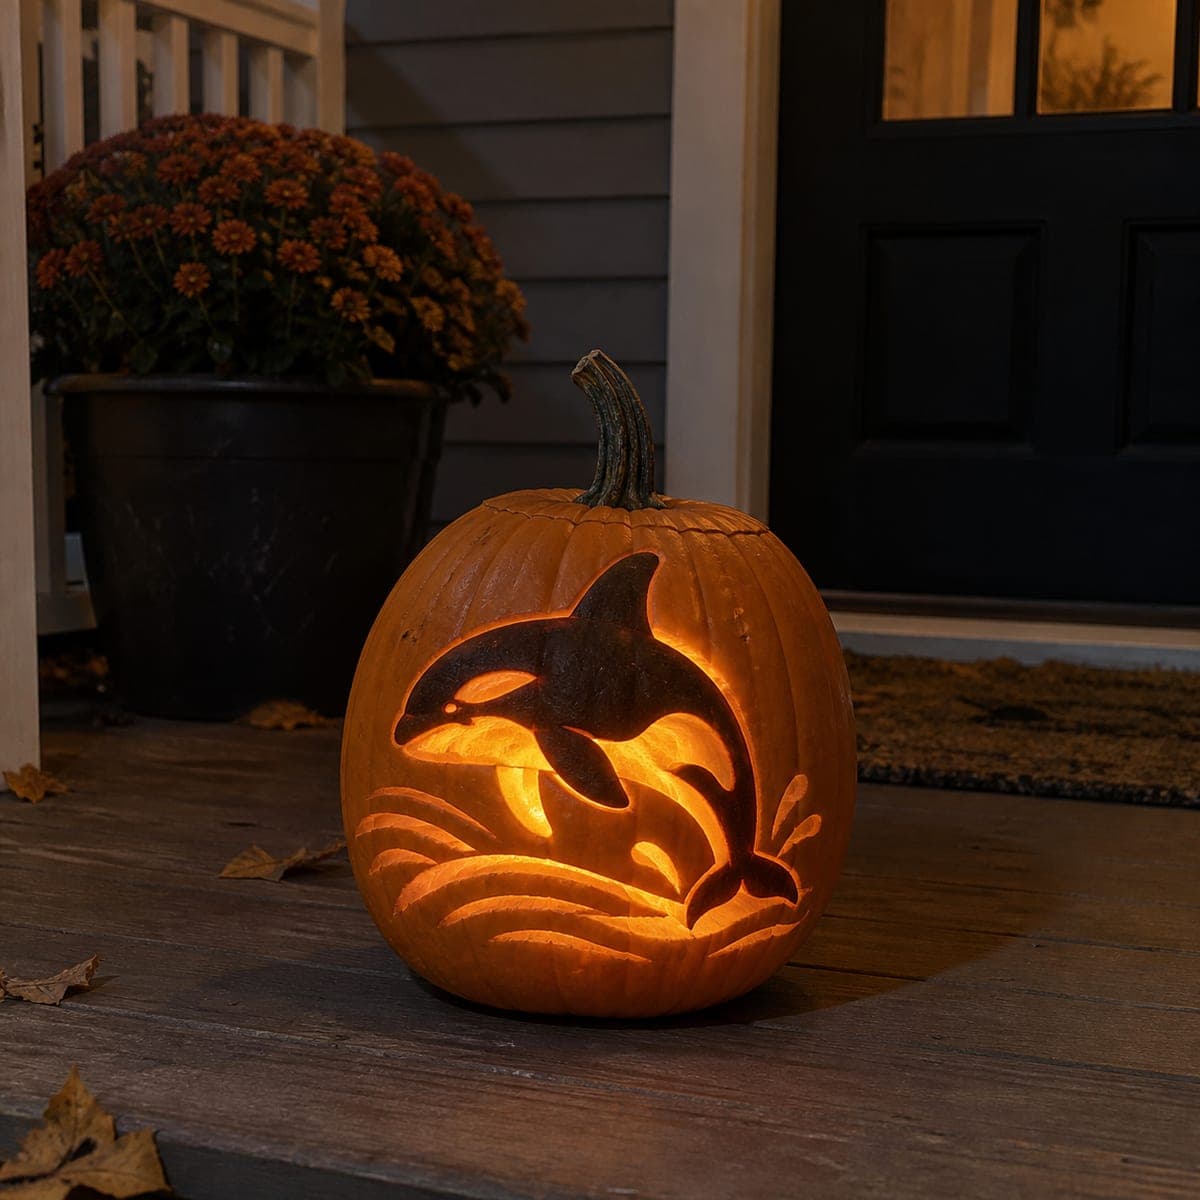
Leaping Orca Whale Pumpkin Carving With WavesAI
0

Leaping Orca Whale Pumpkin Carving With Waves

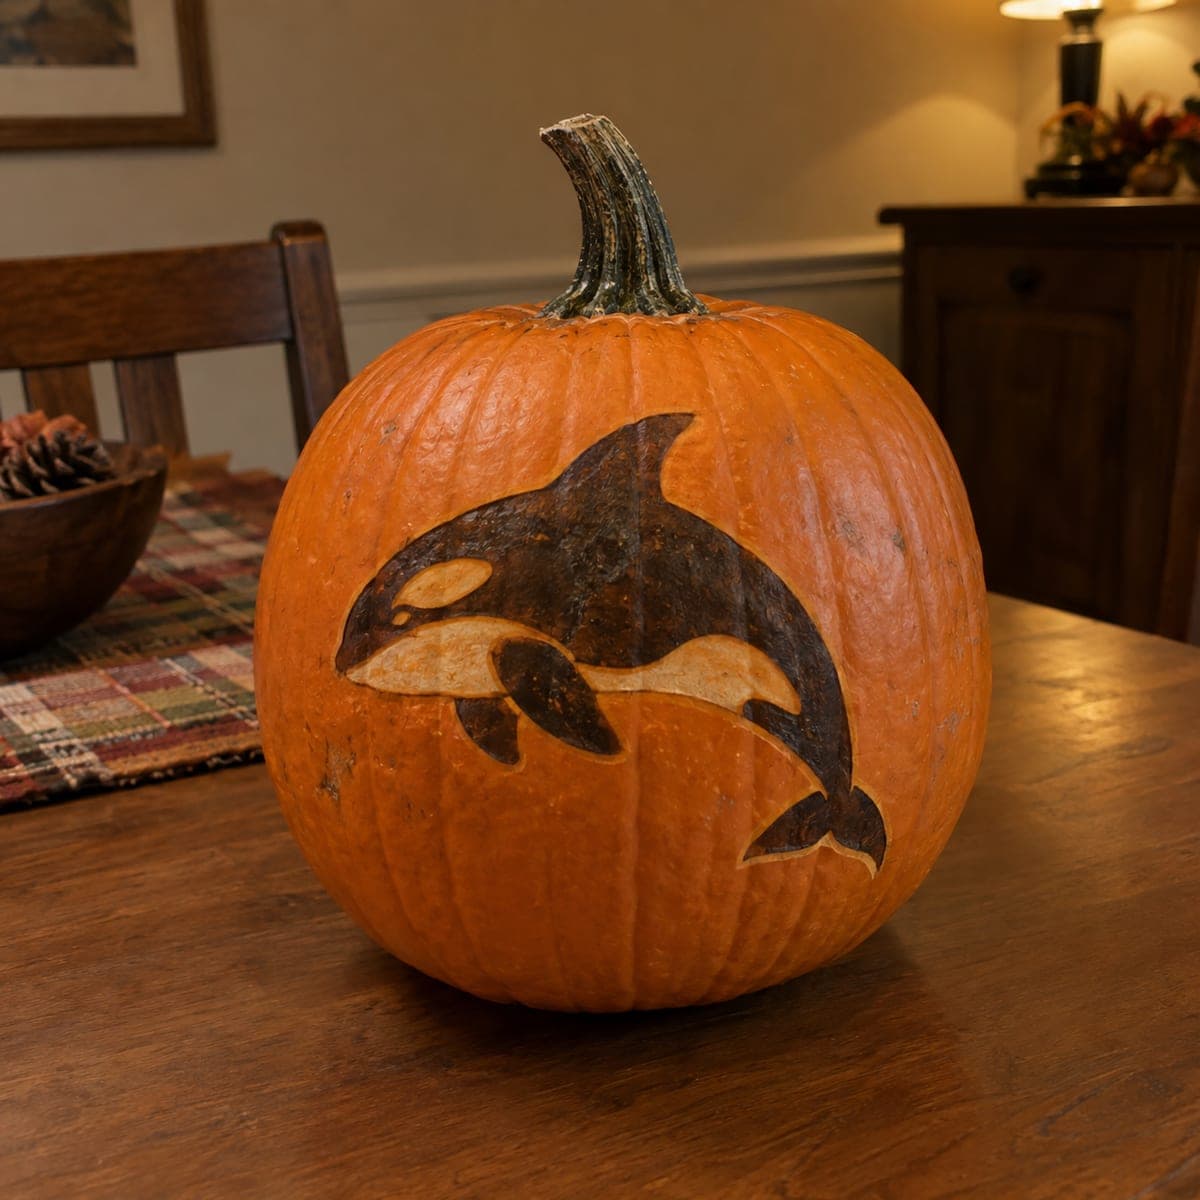
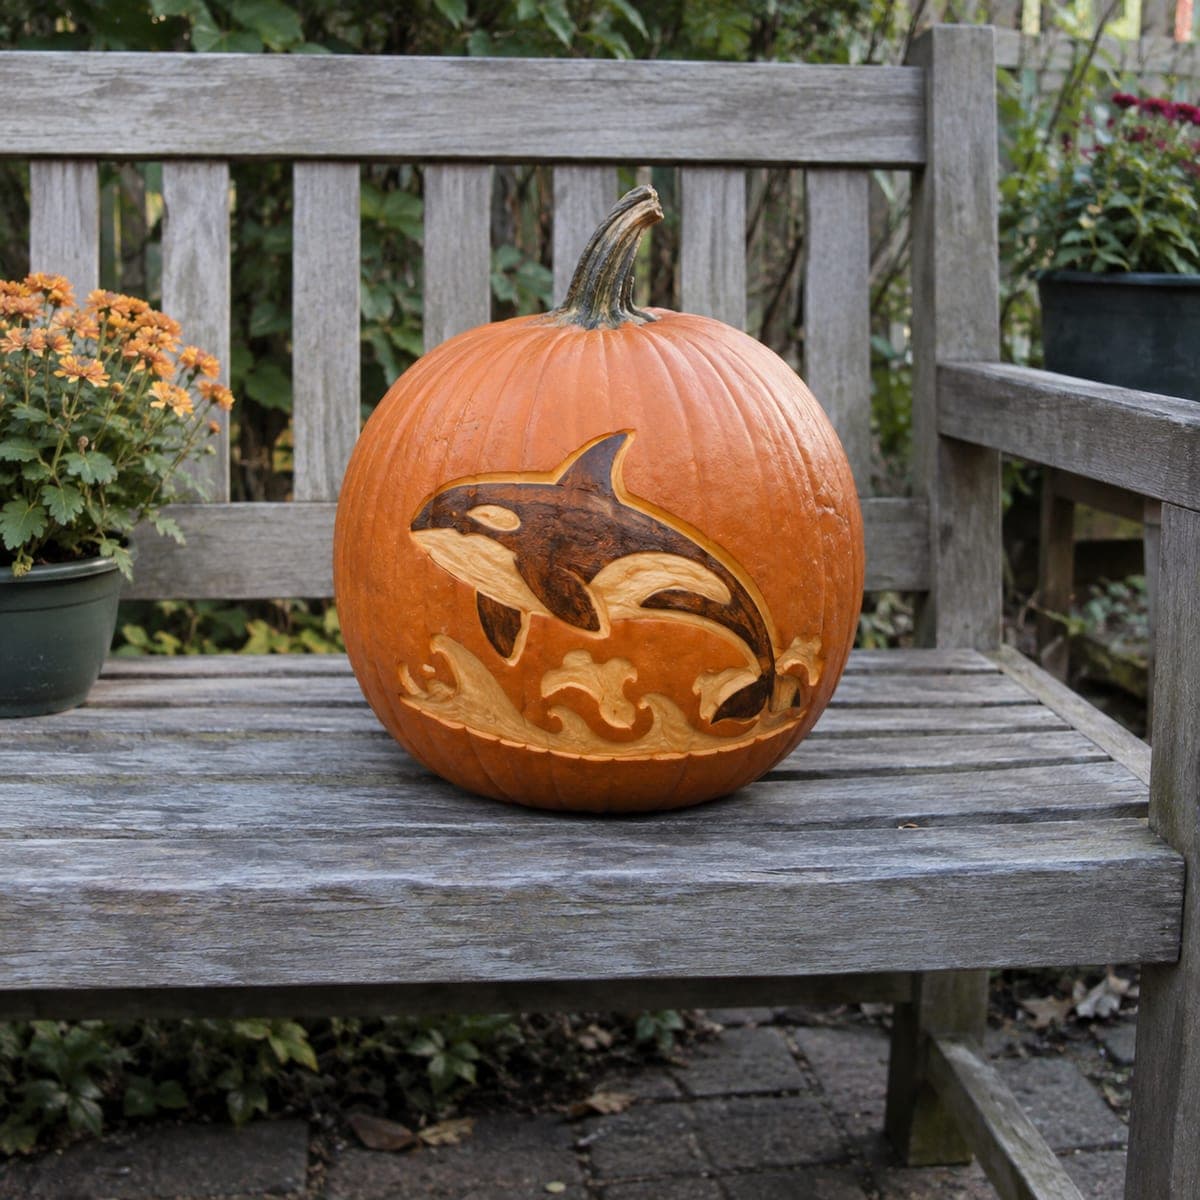
An orca arcs over a band of carved waves on this pumpkin, its black back darkened with the skin left on while the white eye patch and belly are peeled pale. Leaving skin in place to read as black is the key trick here, so plan which areas stay untouched before you cut anything. Scoop the curling waves last, then display it on a garden bench where daylight shows the two-tone contrast.

This is an AI-generated concept image: a realistic, carvable design idea rather than a photo of a finished carve. AI concepts are always labeled and sit out the leaderboard and the contest.

No ratings yet · Sign in to rate
Comments (0)

  • No comments yet — be the first.

Save without an account. Sign in to like or comment.

Our tips for carving a similar design

The core trick is reading skin left in place as the orca's black back, while peeled skin becomes the pale eye patch and belly. Plan every dark and light area before a single cut, then work in shallow relief so the two tones stay crisp. Save the curling waves for last so the lower rind keeps its strength while you carve the body.

Written by PumpkinCarvingIdeas.com, inspired by the image above. These are our suggestions, not instructions from the uploader. This approach to the AI concept has not been tested on a real pumpkin.

From pumpkin to porch

  1. Map the two tones first

    Since no real pumpkin exists in the concept, pick a smooth, tall pumpkin to carve one like it. Transfer your orca-and-waves stencil with a poker tool or washable marker. Before cutting, shade in which zones stay untouched black skin, which get peeled pale, and which cut all the way through. This planning is what makes the two-tone effect work.

  2. Open a back door and clean out

    Have an adult cut a lid or a round hole in the back, not the top, so the front stays intact for the art. Scoop the seeds and scrape the front inside wall down to about one inch thick. A thinner wall makes peeling and shading much easier to control. Keep the walls even so light and color read the same across the design.

  3. Leave the back and dorsal fin as black skin

    Do not touch the orca's back, dorsal fin, and dark flank patches. Leaving the natural skin here reads as glossy black against the peeled areas. Lightly trace the outline of these dark zones with a detail knife so their edges stay sharp. Everything you leave alone now becomes your darkest value.

  4. Peel the eye patch and belly pale

    Use a ribbon or lino tool to shave off just the orange skin on the eye patch, the underside, and the fin tips. Go shallow so the flesh underneath glows a soft pale tone in daylight. Vary the depth slightly to suggest the rounded body. Keep a thin ridge of skin between the black and pale areas so the shapes do not blur together.

  5. Scoop the curling waves last

    Carve the band of waves along the bottom by peeling the crests pale and leaving the troughs as skin for contrast. Add a few deeper gouges where you want brighter accents, but keep the rind mostly intact so the pumpkin does not weaken. Cutting the waves last protects the lower structure while you handle the heavier body work. Round every edge for a smooth, sculpted look.

  6. Light it and photograph

    Drop a battery LED puck inside through the back hole; skip candles so the shallow relief does not scorch. This design mainly shines in daylight, so set it on a garden bench where sun rakes across the two tones. Mist it and bag it in the fridge overnight between showings to slow browning. Shoot it in soft morning light to catch the contrast.

Gather your supplies

Check things off as you get ready.

Work on a stable surface, keep your free hand out of the cutting path, and have an adult handle sharp tools.

Three levels of light

  • Leave intact

    The orca's black back, dorsal fin, and dark flank stay as untouched skin.

  • Peel & shade

    The white eye patch, belly, fin tips, and wave crests are peeled to a pale glow.

  • Cut through

    Optional narrow gaps between the body and waves can be cut through for the brightest accents.

Learn the carving basics

Before you start cutting

How do I keep the black and white areas from blurring together?

Leave a thin ridge of skin as a border between each dark and peeled zone. Score the outline with a detail knife first so the edge is clean before you start shaving. That crisp line is what makes the orca read clearly at a glance.

Will this design show up if I light it at night?

It is built for daylight contrast, so the two tones pop best in the sun. At night an interior LED will make the peeled areas glow softly, but the skin-on black stays dark. For a nighttime version, cut a few thin gaps all the way through for extra brightness.

How deep should I peel the pale areas?

Just deep enough to remove the orange skin, roughly an eighth of an inch. Going too deep turns the flesh translucent and can look patchy. Test on a hidden spot and aim for an even, matte pale surface.

Your take belongs here, too.

Changed a detail? Made it simpler? Share a photo of your version and tell the community what worked.

Share your pumpkin

More pumpkins like this

You've reached the end · 8 pumpkins
The Patch Report

Fresh pumpkins, in your inbox.

The best new carvings, ideas worth stealing, and how-tos for carving season. Short, seasonal, and gone by November.

A short email during carving season. Unsubscribe anytime. See our privacy policy.