Halloween Pumpkin Carving Contest · Starts October 1st · $500 in prizes
← Back to ideas
@ai_concepts
Sep 25, 2026
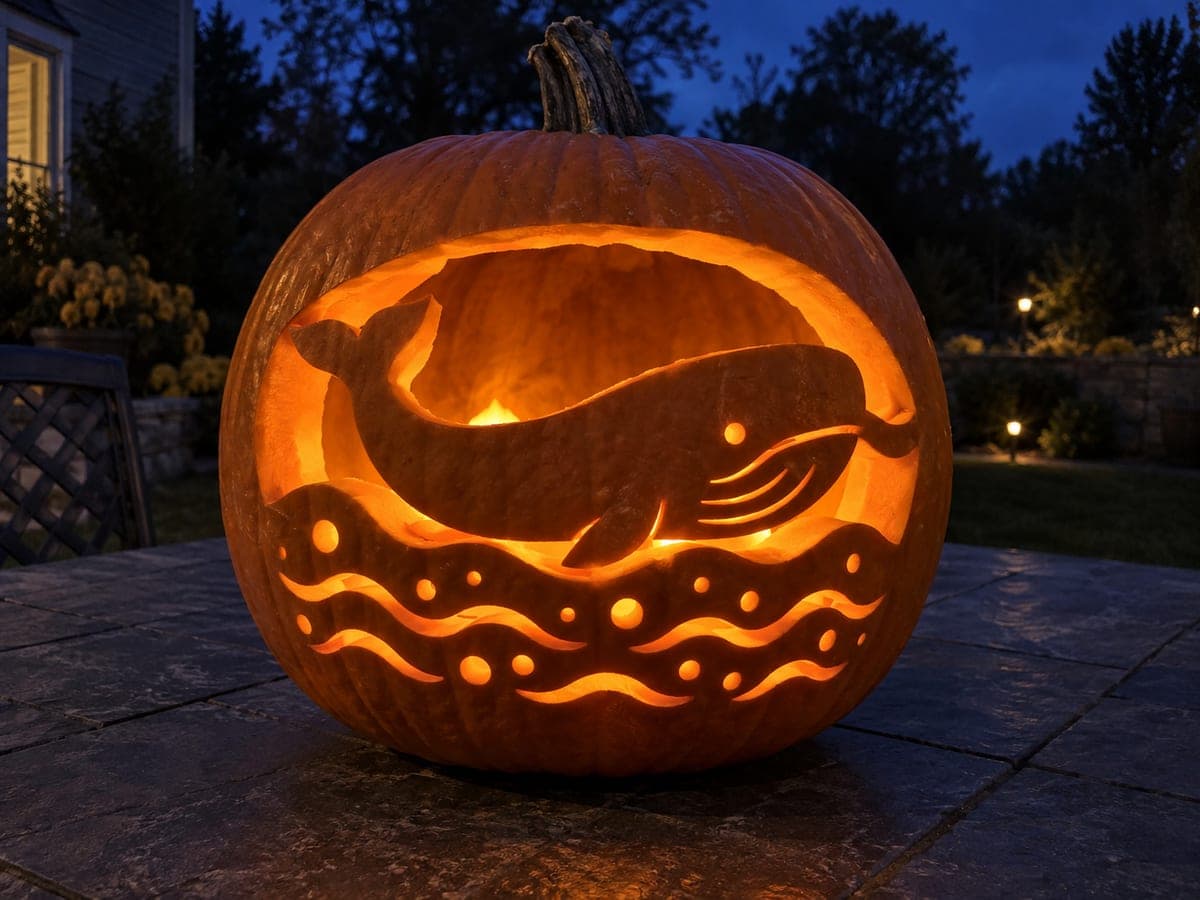
Retained Whale Pumpkin Carving Above Glowing Wave RowsAI
0

Report this carving

Tell us what is wrong. Reports are private.

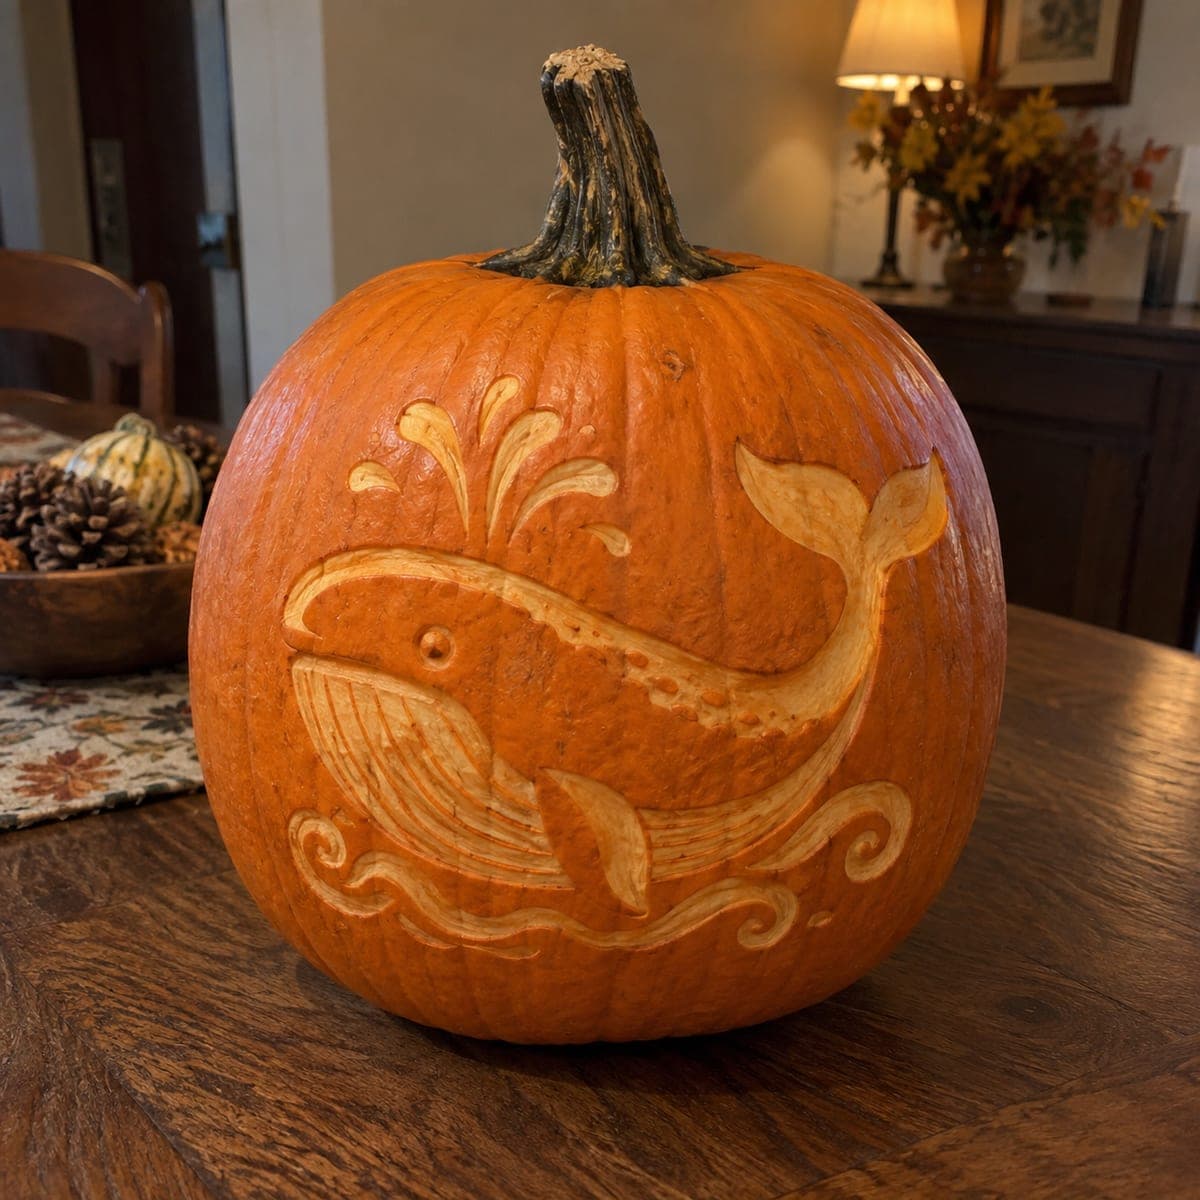
Retained Whale Pumpkin Carving Above Glowing Wave Rows

A retained whale with a broad tail connection at the left frame and a nose bridge at the right spans above rows of glowing waves on this expert ocean pumpkin carving. A small eye aperture and shallow belly grooves preserve the connected body without weakening the silhouette. Map both whale-to-frame connection points carefully before starting any cuts, as losing either bridge collapses the retained body. Rows of wave slots below the whale are cut through completely, so the warm light flooding up around the whale silhouette creates a dramatic theatrical effect.

No ratings yet · Sign in to rate

Save this design for carving night, then share a photo of your own jack-o'-lantern once it's glowing.

Comments (0)

  • No comments yet — be the first.

Save without an account. Sign in to like or comment.

Our tips for carving a similar design

The whale is retained as a solid rind body spanning the width of the face, with a broad tail bridge connecting to the left frame and a nose bridge connecting to the right frame. Rows of wave slots below the whale are cut fully through, so the warm light floods upward around the dark whale silhouette in a dramatic theatrical effect. A small eye aperture and shallow belly groove scoring preserve the connected body without weakening either span bridge. Both bridge connection points must be confirmed solid before any wave slot cutting begins.

From pumpkin to porch

  1. Map bridge connections before anything else

    The two whale-to-frame bridges are the entire structural foundation of this design. On a template sheet, confirm the tail bridge on the left is at least an inch and a half wide and the nose bridge on the right is at least an inch wide. Any narrower and the whale will detach after a few days of display. Adjust the template before transferring.

  2. Hollow to a consistent depth

    Cut the back lid and scrape interior walls to an inch and a half throughout. The whale belly area benefits from slightly thicker walls since shallow belly groove scoring will be done there later. Consistent depth throughout the lower wave zone ensures the wave slots glow uniformly.

  3. Transfer the full design

    Tape the template and trace all lines with a stylus. Use two marker colors: one for the retained whale body, bridge contacts, and surrounding rind, and one for all wave slot apertures and the small eye opening. Review the complete map carefully before any cutting begins.

  4. Cut the upper background sections

    Remove any open rind areas above the whale body that form the sky zone. The whale body divides the pumpkin face horizontally, so the sky zone above it and the wave zone below it are structurally separate. Confirm the nose and tail bridges are still solid after removing the sky sections.

  5. Cut the wave slot rows

    Working from the top wave row down toward the base, cut each wave slot as a slightly curved horizontal aperture. Keep at least three quarters of an inch of rind between adjacent slots. The wave slots below the whale are the primary light source of the design and must all be cut before the eye and belly details are added.

  6. Add eye aperture and belly scoring then display

    Punch the small circular eye hole through the whale body using a circular cutter. Use a linoleum tool to score the shallow belly groove lines into the whale surface without cutting through. Place a very bright battery LED inside centered below the whale body. The warm light flooding up through the wave slots around the dark whale silhouette creates the dramatic effect that defines this carving.

Written with AI to match this design

Gather your supplies

Check things off as you get ready.

Work on a stable surface, keep your free hand out of the cutting path, and have an adult handle sharp tools.

Three levels of light

  • Leave intact

    Retained whale body spanning both frame bridges stays dark as the design's central silhouette

  • Peel & shade

    Shallow belly groove scoring catches interior light for subtle surface texture on the whale body

  • Cut through

    Wave slot rows below the whale, small eye aperture, and any sky zone openings above cut fully through

Learn the carving basics

Before you start cutting

What happens if the nose bridge cracks after the wave slots are cut?

If the nose bridge cracks, the entire right side of the whale has no structural support and the body will eventually sag or detach. Immediately apply petroleum jelly along the crack and press a sturdy wooden toothpick into the crack with a drop of wood glue as a pin. Allow to cure for an hour. If the crack is severe, carefully cut the nose bridge section away and convert the design to a simple wave-row carving without the retained whale.

How many wave rows produce the best lighting effect under the whale?

Four to six rows fill the lower zone well and create a strong sense of ocean motion. Fewer than four rows look sparse against the full whale body above them. More than seven rows with minimal rind between them risk weakening the lower structure. Aim for rows that are roughly equal in height to the rind bands between them for a balanced, rhythmic composition.

Can I add a water spout above the whale to complete the illustration?

A water spout can be added as two or three small narrow slot apertures in the sky zone directly above the whale's back. Keep each slot at least a quarter inch wide and make sure generous rind surrounds them. Do not place a water spout slot directly above or adjacent to the whale's back ridge, which is the bridge connecting the whale body to the overall rind mass.

Your take belongs here, too.

Changed a detail? Made it simpler? Share a photo of your version and tell the community what worked.

Share your pumpkin

More pumpkins like this

You've reached the end · 8 pumpkins
The Patch Report

Fresh pumpkins, in your inbox.

The best new carvings, ideas worth stealing, and how-tos for carving season. Short, seasonal, and gone by November.

A short email during carving season. Unsubscribe anytime. See our privacy policy.