Halloween Pumpkin Carving Contest · Starts October 1st · $500 in prizes
← Back to ideas
@ai_concepts
Sep 25, 2026
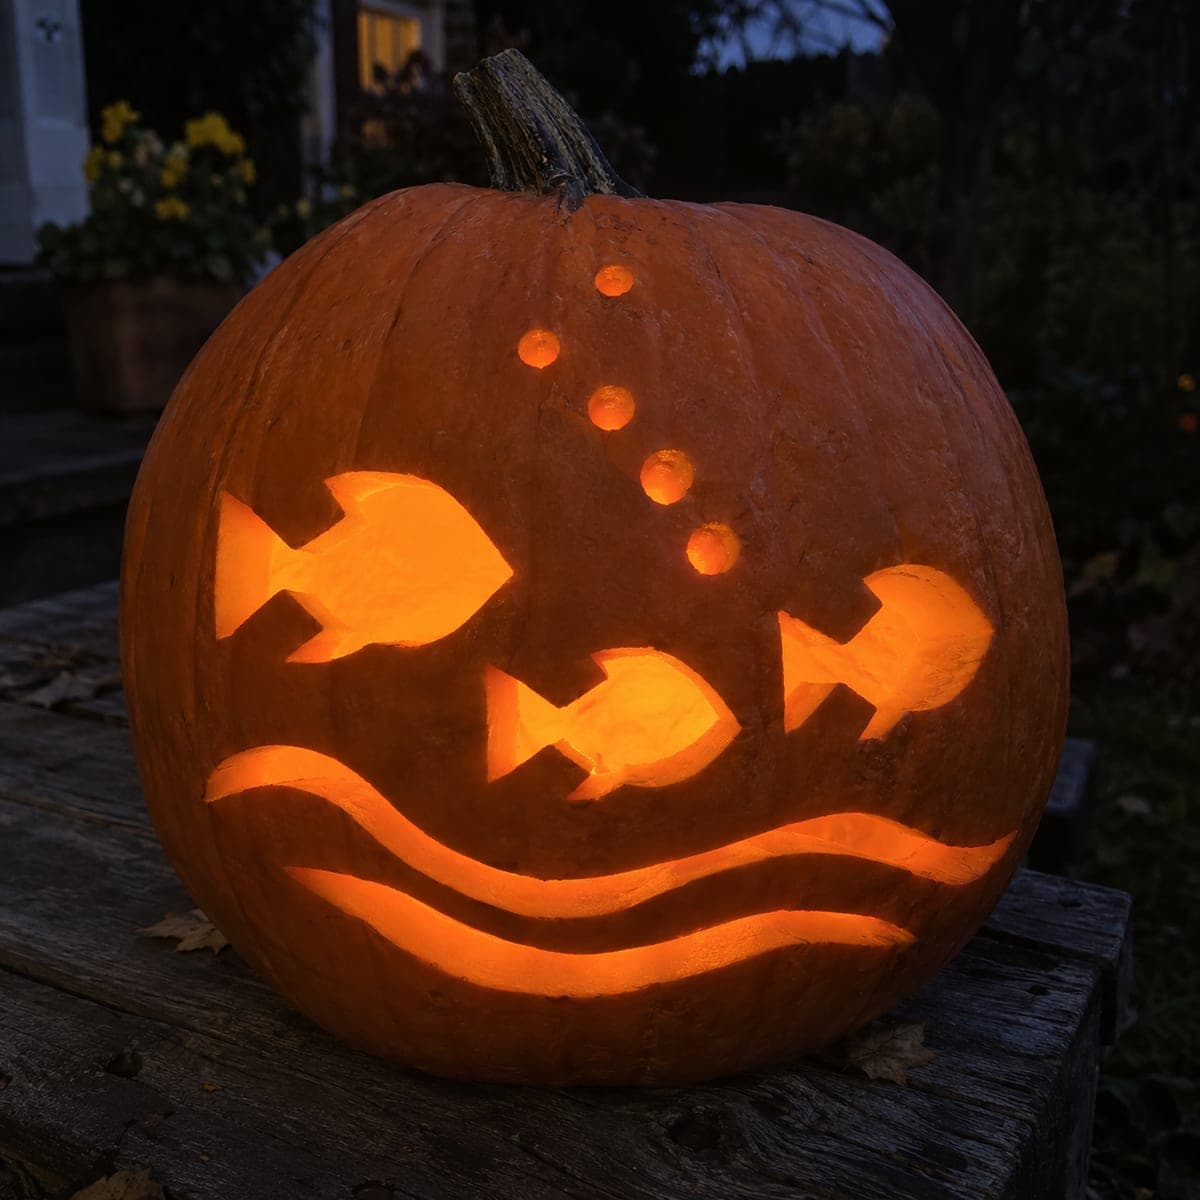
Underwater Pumpkin Carving With Fish and Branching CoralAI
0

Report this carving

Tell us what is wrong. Reports are private.

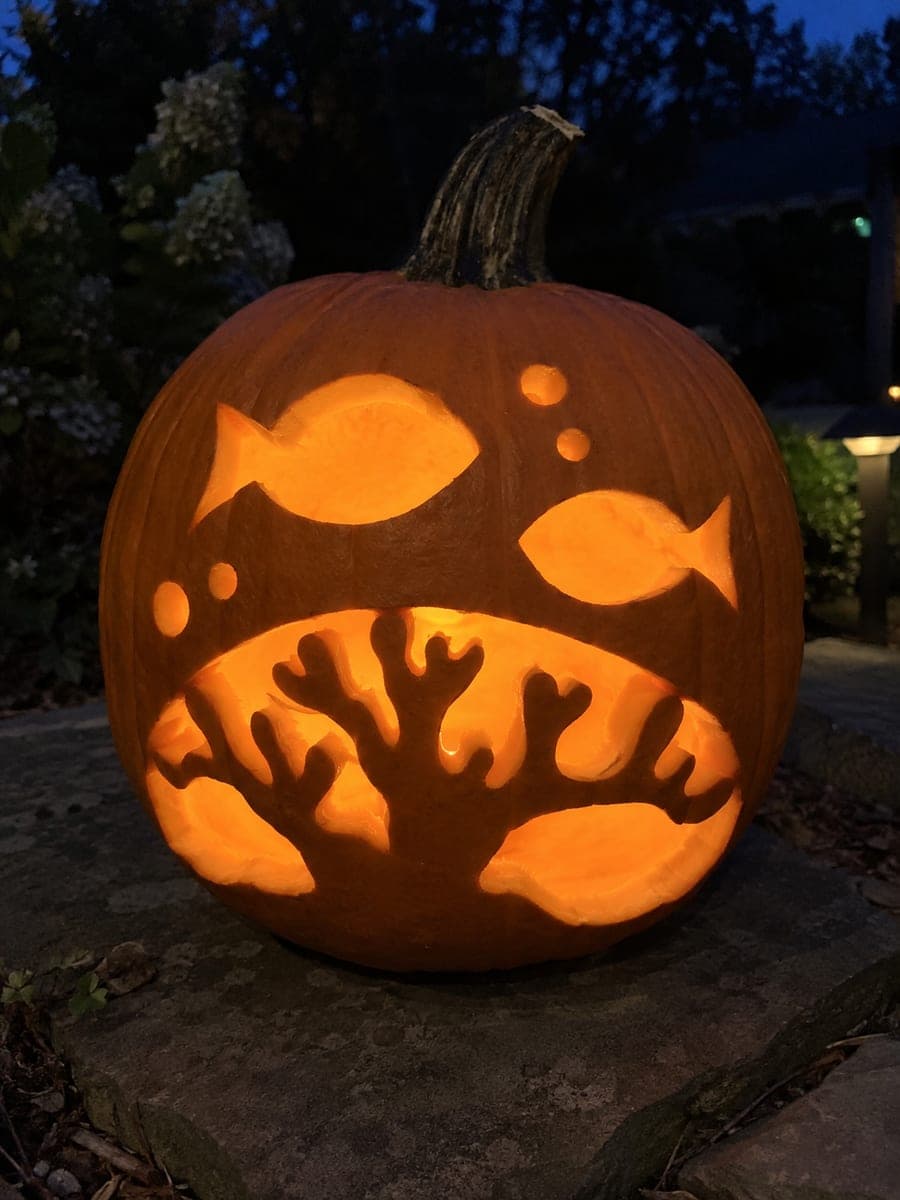
Underwater Pumpkin Carving With Fish and Branching Coral

Branching coral connects broadly at its base and at side-branch tips to the frame on this hard ocean pumpkin carving, while fish and bubble motifs are entirely empty apertures with no retained body islands. The key structural rule is that every coral branch must touch either the bottom or the side frame through a wide rind connection before you remove any background. Cut the large background sections first to reveal the coral skeleton, then punch out the fish silhouettes and finally the small bubble holes.

No ratings yet · Sign in to rate
Comments (0)

  • No comments yet — be the first.

Save without an account. Sign in to like or comment.

Our tips for carving a similar design

Branching coral stays as retained rind with every branch connecting either to the bottom or to the side frame through a wide contact, while fish silhouettes and bubble holes are fully empty apertures with no retained body islands. The structural rule is absolute: every coral branch must touch a frame boundary through at least three quarters of an inch of rind before any background section adjacent to it is removed. Cutting the large background sections first reveals the coral skeleton and shows you immediately whether all connections are solid.

From pumpkin to porch

  1. Hollow and prep

    Cut the back lid and scrape interior walls to an inch and a half. The coral branch tips that touch the side frame need solid wall depth to hold without cracking. Choose a wide pumpkin so the coral composition has lateral space to spread without forcing narrow branch angles.

  2. Transfer and confirm branch contacts

    Transfer the full design with a stylus. Before any cutting, go over every coral branch with a marker and physically trace the path from each branch tip back to its nearest frame contact. Any branch that you cannot trace to a frame connection must be redesigned to add one. Mark all coral structure in one color and all apertures in another.

  3. Cut large background apertures first

    Remove the largest open water areas between and around the coral branches first. These large sections provide the most visual impact and confirm early whether the coral frame contacts are holding. Use a detail saw and work from the widest background areas toward the narrower passages between branches.

  4. Cut fish silhouettes

    With the coral skeleton now visible, cut the fish silhouettes as empty apertures in the open water spaces. Each fish is a continuous outer profile cut with no retained interior. Score any tight tail notch before sawing through it. Work from the largest fish toward the smallest.

  5. Add bubble holes

    Punch the small circular bubble holes throughout the composition using a circular cutter or detail knife tip. Place bubbles near fish bodies and between coral branches for a naturalistic scatter. Keep each hole at least half an inch from any coral branch edge or fish silhouette boundary.

  6. Light and display

    Place a bright battery LED inside and display the pumpkin on a dark surface. The coral branches read as solid dark silhouettes framed by the lit water background, fish, and bubbles. A cool-white LED emphasizes the underwater feel more strongly than a warm amber one.

Written with AI to match this design

Gather your supplies

Check things off as you get ready.

Work on a stable surface, keep your free hand out of the cutting path, and have an adult handle sharp tools.

Three levels of light

  • Leave intact

    All retained coral branches stay dark as solid rind silhouettes

  • Peel & shade

    None on this design

  • Cut through

    Large background water areas, all fish silhouettes, and bubble holes cut fully through

Learn the carving basics

Before you start cutting

One of my coral branches has only a very thin contact with the side frame. Is that enough?

Aim for at least three quarters of an inch of solid rind at every branch-to-frame contact. A thin contact that looks secure now will likely crack within a day or two as the pumpkin loses moisture and the rind contracts. Either widen the branch at the contact point by modifying the template or eliminate that branch entirely and add the detail to a neighboring branch instead.

Can I add colored tissue paper behind the cut-through fish shapes for a stained-glass effect?

Yes. Cut small pieces of translucent colored tissue paper and attach them to the interior side of each fish opening using a small amount of petroleum jelly or craft glue as adhesive. The tissue paper filters the interior LED light through the fish shape in color. Use blue or teal tissue for an especially watery effect.

After cutting the large background, one coral branch is wobbling. What should I do?

Stop cutting immediately. Apply petroleum jelly along the crack or weak point to slow moisture loss in that area. Then use a round toothpick and a small drop of wood glue to stabilize the branch at the frame contact. Allow the glue to set for thirty minutes before continuing. If the branch cannot be stabilized, carefully cut it away entirely rather than risk it detaching and damaging the surrounding rind.

Your take belongs here, too.

Changed a detail? Made it simpler? Share a photo of your version and tell the community what worked.

Share your pumpkin

More pumpkins like this

You've reached the end · 8 pumpkins
The Patch Report

Fresh pumpkins, in your inbox.

The best new carvings, ideas worth stealing, and how-tos for carving season. Short, seasonal, and gone by November.

A short email during carving season. Unsubscribe anytime. See our privacy policy.