Halloween Pumpkin Carving Contest · Starts October 1st · $500 in prizes
← Back to ideas
@ai_concepts
Sep 25, 2026
Painted Turquoise Whale and Navy Wave PumpkinAI
0

Report this carving

Tell us what is wrong. Reports are private.

Painted Turquoise Whale and Navy Wave Pumpkin

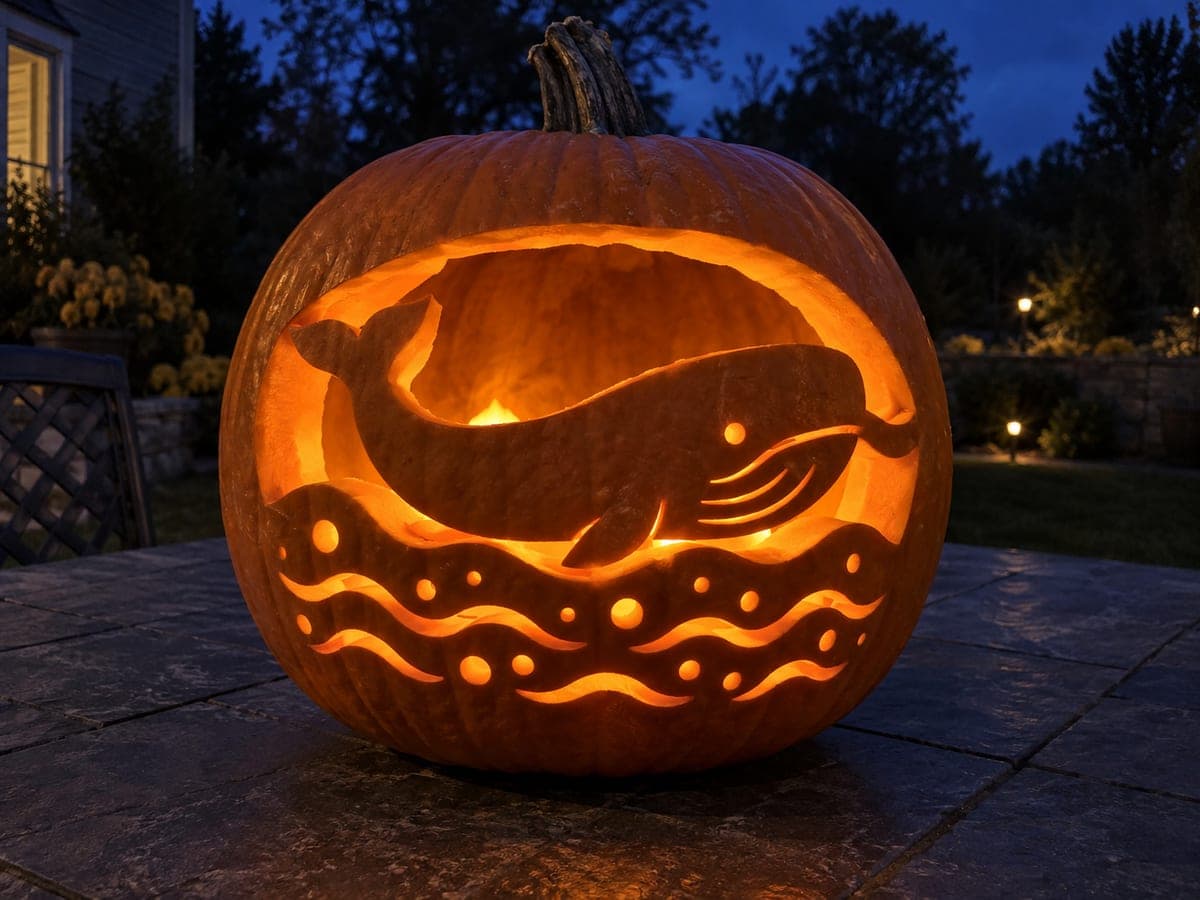
A turquoise whale, navy wave brushstrokes, and cream bubble dots cover this no-carve ocean pumpkin carving idea in a clean, graphic style. Paint the navy wave band first across the lower portion, then let it dry before painting the turquoise whale body above and overlapping the wave line slightly for depth. Add cream bubble dots with the eraser end of a pencil or a round dotting tool for uniform circles. The simple palette reads clearly from a distance, making this an effective porch decoration even on a smaller pumpkin.

No ratings yet · Sign in to rate

Comments (0)

  • No comments yet — be the first.

Save without an account. Sign in to like or comment.

Our tips for carving a similar design

A navy wave band fills the lower portion of the pumpkin, the turquoise whale body is painted above it with a slight overlap for depth, and cream bubble dots scatter across the composition. Painting the wave band first and letting it dry before the whale layer prevents color mudding at the horizon overlap line. Cream dots applied with a pencil eraser tip produce perfectly uniform circles without any special brush skill.

From pumpkin to porch

  1. Clean and dry

    Wipe the pumpkin face with a damp cloth and allow it to dry completely. Check that no waxy residue remains on the surface in the areas you plan to paint, as waxy spots cause acrylic to bead and peel off. A light scuff with fine sandpaper in those areas helps if needed.

  2. Paint the navy wave band

    Using a wide flat brush, apply a navy blue or dark teal band across the lower third of the pumpkin face. Let the upper edge of the band follow a slightly undulating line to suggest the ocean surface. Load the brush lightly and add a few slightly lighter-blue sweeping arcs within the band to suggest wave movement. Allow the band to dry fully.

  3. Paint the turquoise whale body

    Mix or use a prepared turquoise acrylic and paint the whale body shape above the wave band, overlapping the band's upper edge by about half an inch. Use a medium flat brush to block in the body shape first, then a smaller round brush to refine the tail fluke shape and the curved underside. Keep the whale body paint opaque and even.

  4. Add the whale tail and detail

    Refine the tail fluke with a detail brush if the initial flat brush left the tail edges rough. Add a small curved mouth line and a simple dot eye using a round brush or the tip of a pencil. Keep all facial detail minimal and confident rather than attempting fine lines that can look messy at pumpkin scale.

  5. Apply cream bubble dots

    Dip the eraser end of a pencil into cream or pale yellow acrylic and press it firmly against the pumpkin surface to stamp uniform circular bubbles. Scatter bubbles at varying heights above and around the whale body. Allow the bubbles to dry before applying any sealer.

  6. Seal and display

    Spray a light coat of clear matte acrylic sealer over the fully dry painting. Display the finished pumpkin on a porch, step, or outdoor table. The simple navy, turquoise, and cream palette reads clearly from a distance, making it an effective porch decoration even on a smaller or unusually shaped pumpkin.

Written with AI to match this design

Gather your supplies

Check things off as you get ready.

Work on a stable surface, keep your free hand out of the cutting path, and have an adult handle sharp tools.

Three levels of light

  • Leave intact

    The orange rind beyond the painted composition stays bare and untouched

  • Peel & shade

    None, the shell remains fully intact

  • Cut through

    None; place near a lamp, porch light, or in natural daylight to illuminate the painted whale and waves

Learn the carving basics

Before you start cutting

The turquoise whale color looks too similar to my navy wave band. How do I increase the contrast?

Add a small amount of white to your turquoise paint to lighten it two or three shades above the navy band. The greater the difference in value between the two blues, the more clearly the whale reads against the wave background. You can also add a thin white or pale cream outline around the whale body after both layers are dry to create a clear visual separation.

My pencil eraser makes oval dots rather than round circles. How do I fix that?

An oval mark usually means the eraser is angled rather than flat against the surface. Press the eraser straight down perpendicular to the pumpkin face and lift it straight up without sliding. If the eraser end is worn to an uneven angle, use a fine nail file or sandpaper to flatten it back to a round face before dipping it in paint.

Can I add a second whale in a smaller scale to suggest a calf swimming alongside?

Yes, and the visual effect is charming. Paint a smaller version of the whale body in a slightly lighter turquoise below and to one side of the main whale, partially overlapping the wave band. Scale it to roughly half the main whale's body length. Keep the calf's tail and facial detail consistent with the parent whale so the two read as matching silhouettes.

Your take belongs here, too.

Changed a detail? Made it simpler? Share a photo of your version and tell the community what worked.

Share your pumpkin

More pumpkins like this

You've reached the end · 8 pumpkins
The Patch Report

Fresh pumpkins, in your inbox.

The best new carvings, ideas worth stealing, and how-tos for carving season. Short, seasonal, and gone by November.

A short email during carving season. Unsubscribe anytime. See our privacy policy.