Halloween Pumpkin Carving Contest · Starts October 1st · $500 in prizes
← Back to ideas
@ai_concepts
Jul 23, 2026
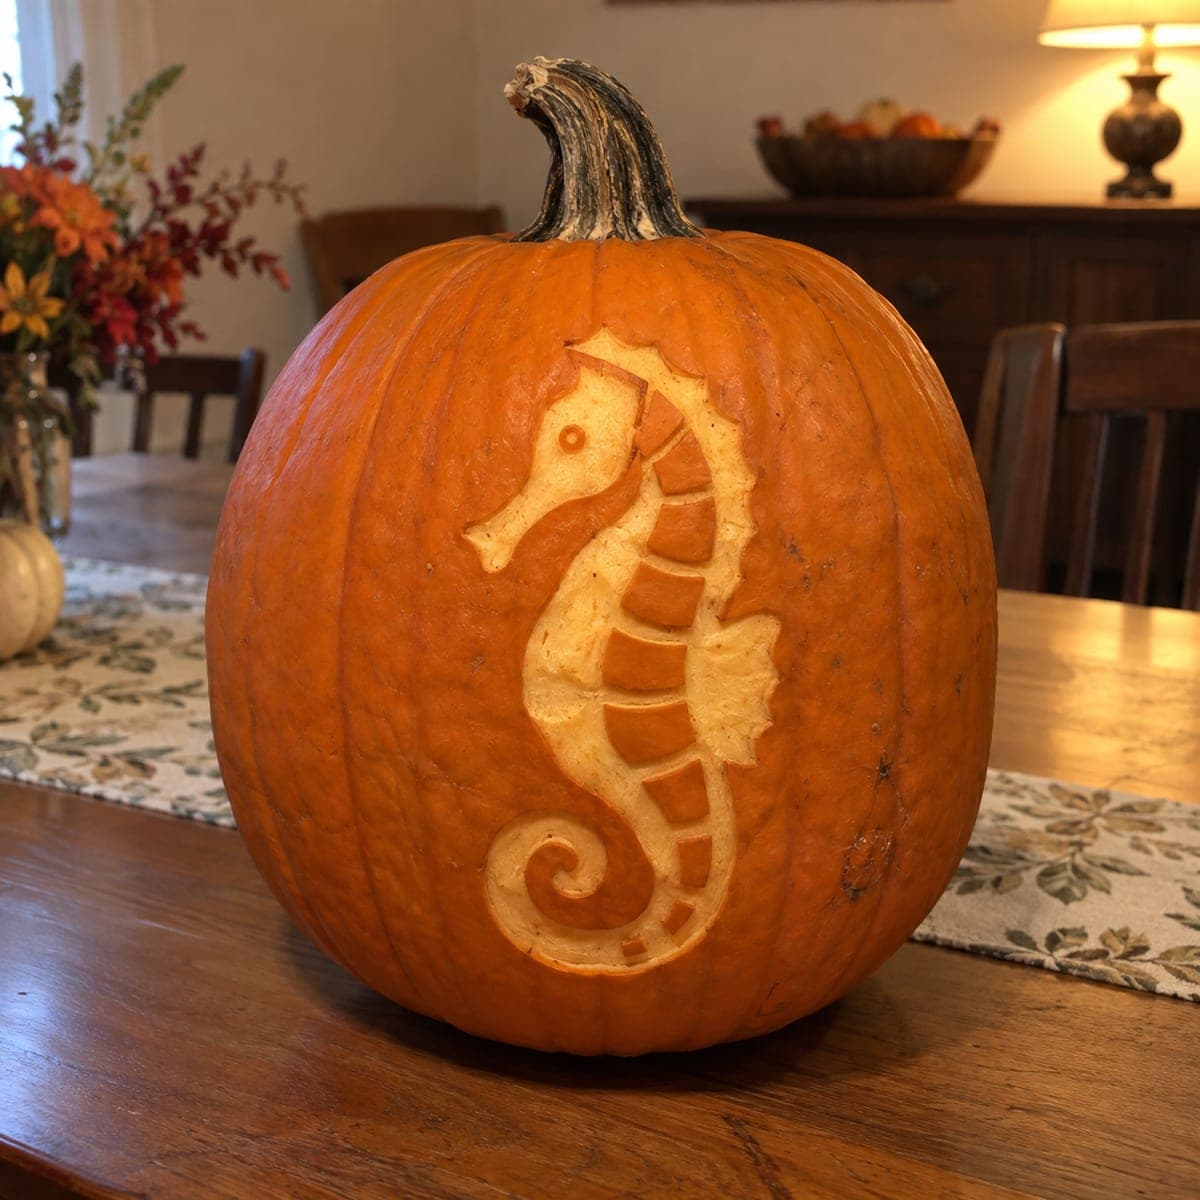
Seahorse Stencil Jack-O-Lantern for the PorchAI
0

Seahorse Stencil Jack-O-Lantern for the Porch

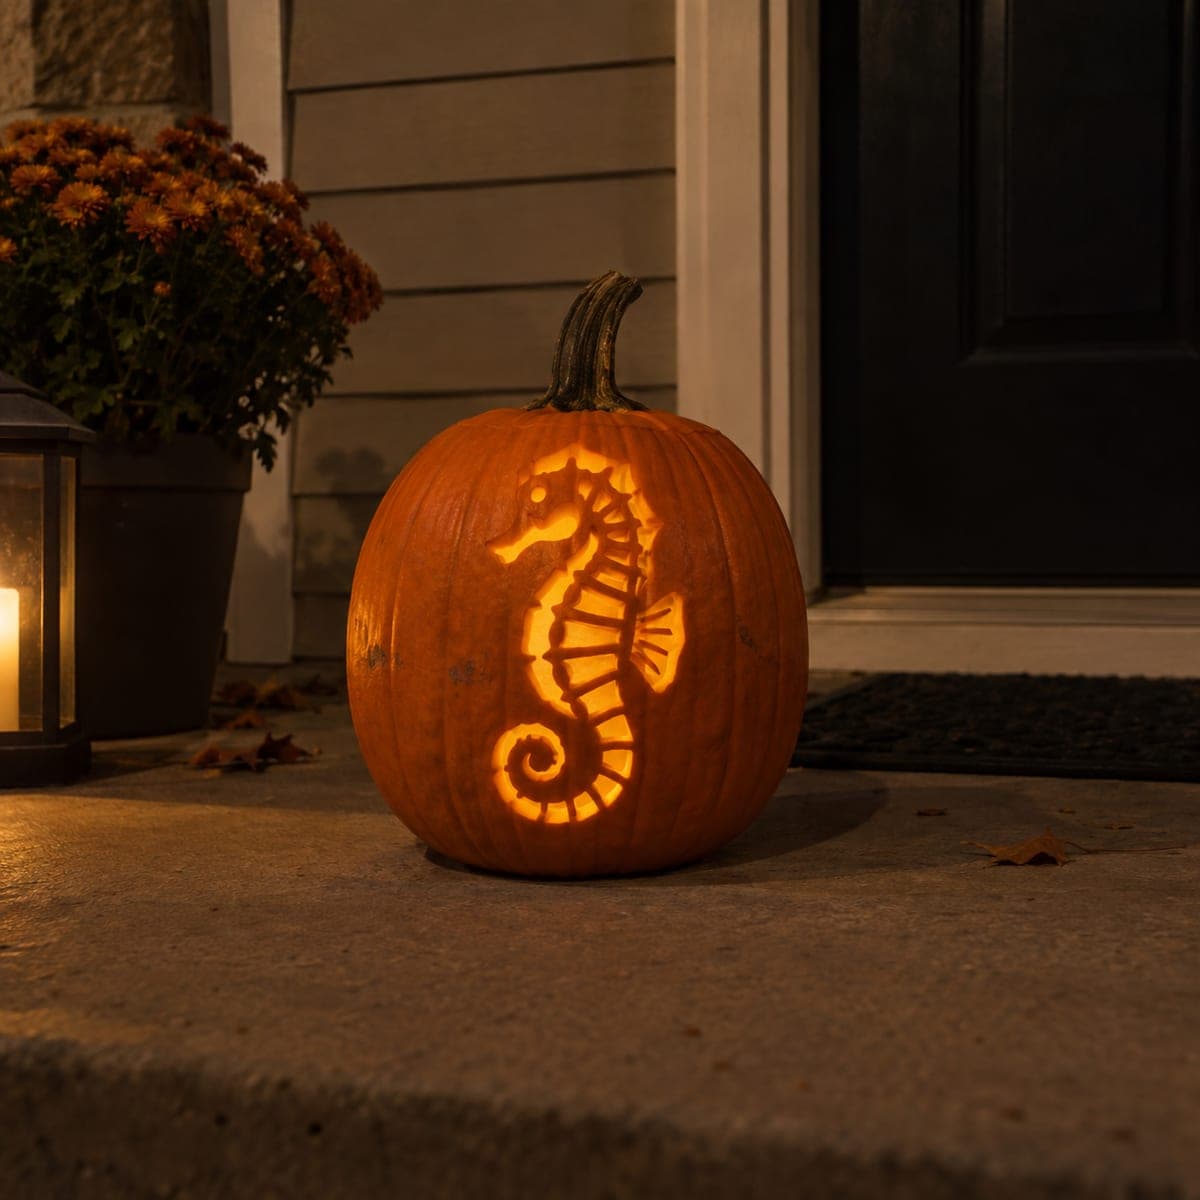
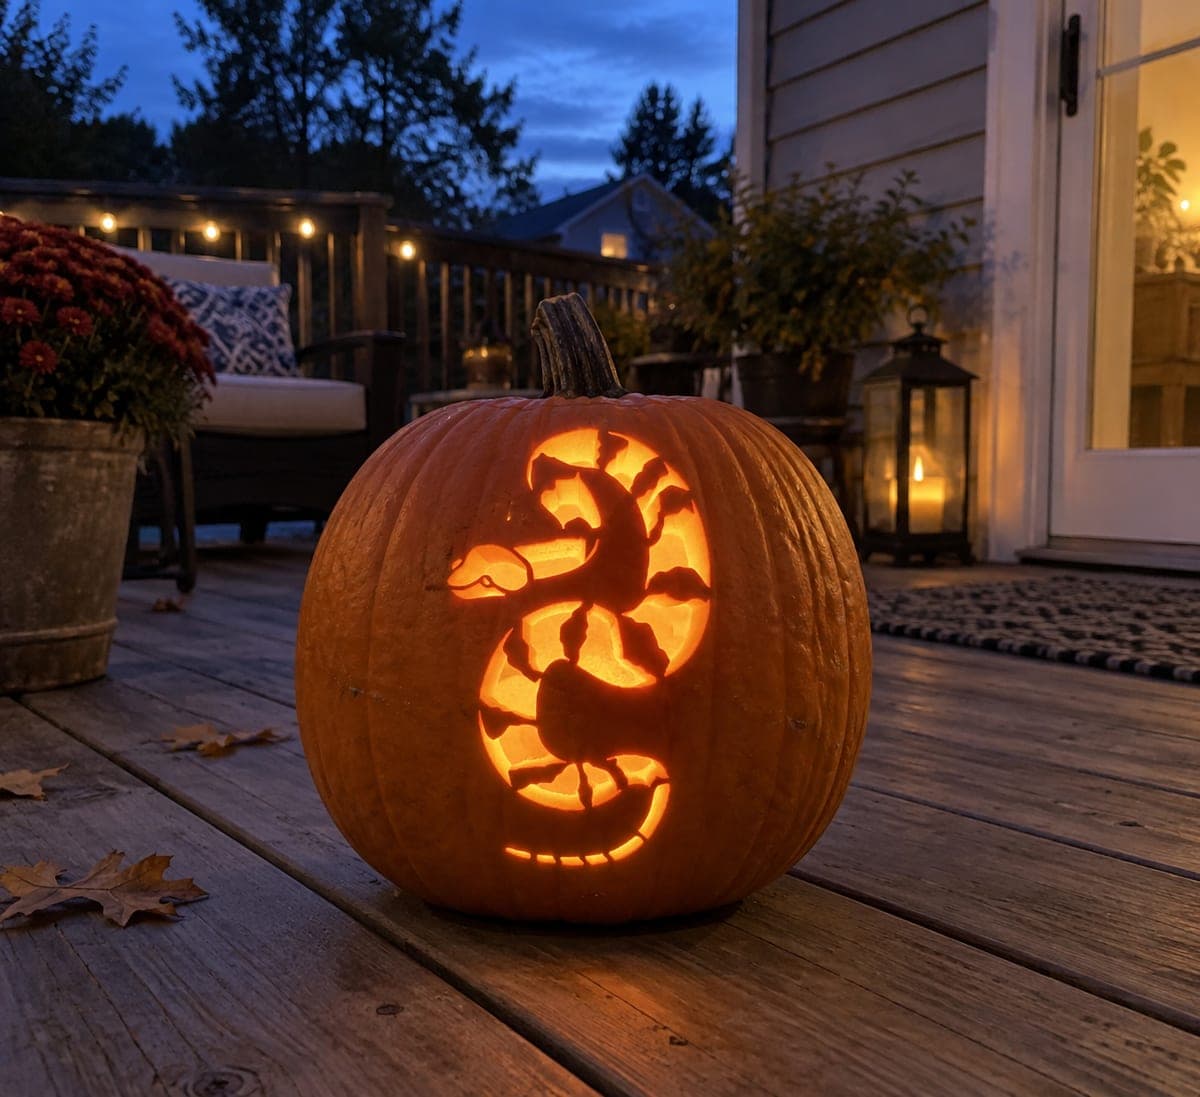
A curled seahorse glows from this small porch pumpkin, its ridged belly and coronet rendered in clean stencil-style cutouts. The segmented body is the trick here: leave thin bridges of rind between each band so the pieces stay anchored while light pours through the gaps. Tape a printed seahorse stencil to the pumpkin, poke the outline with a pin tool, and cut the smallest interior pieces before the large ones.

This is an AI-generated concept image: a realistic, carvable design idea rather than a photo of a finished carve. AI concepts are always labeled and sit out the leaderboard and the contest.

No ratings yet · Sign in to rate
Comments (0)

  • No comments yet — be the first.

Save without an account. Sign in to like or comment.

Our tips for carving a similar design

The whole shape is one glowing silhouette with a segmented belly and a curled tail. The trick is the thin bridges of rind between the belly segments and along the tail spiral: they keep the delicate pieces anchored while light pours through the gaps. Cut the smallest interior pieces before the big body opening.

Written by PumpkinCarvingIdeas.com, inspired by the image above. These are our suggestions, not instructions from the uploader. This approach to the AI concept has not been tested on a real pumpkin.

From pumpkin to porch

  1. Choose a small, even pumpkin and hollow it

    A smaller pumpkin suits this upright design and keeps the wall curvature gentle. Open it from the bottom so it sits flat on the porch, scoop it out, and thin the front wall. A flatter carving area makes the fine tail curl easier to follow.

  2. Tape on the seahorse stencil

    Print the seahorse at a size that fits your pumpkin with a little margin. Snip the paper edges so it lies flat against the curve, tape it firmly, and poke the outline through with a pin tool so a dotted guide transfers. Mark which pieces are gaps and which are bridges before you remove the paper.

  3. Cut the smallest details first

    Start with the eye, the snout line, and the tightest curl of the tail using your smallest saw or a craft knife. Doing the delicate cuts while the pumpkin wall is still mostly solid keeps everything stable. Take short strokes and clear waste often.

  4. Open the belly segments and fin

    Work down the row of belly bands, leaving a thin bridge of rind between each so they read as separate glowing stripes. Cut the fan-shaped dorsal fin lines the same way. Keep those bridges intact; they are what make the segmented look.

  5. Cut the body outline last, then light it

    Save the large outer silhouette for last so the pumpkin stays rigid while you do the fine work. Once it is open, bevel the inside edges slightly so light spreads. Set an LED inside and check that every segment and the tail curl glow evenly.

Gather your supplies

Check things off as you get ready.

Work on a stable surface, keep your free hand out of the cutting path, and have an adult handle sharp tools.

Three levels of light

  • Leave intact

    The dark rind outlines the body and forms the bridges between segments.

  • Peel & shade

    Optional: shave the snout or fin edges thin for a softer mid glow.

  • Cut through

    The belly bands, fin, tail curl, and body outline are cut through to glow.

Learn the carving basics

Before you start cutting

How do I keep the curled tail from snapping?

Leave small bridges of rind across the tightest part of the spiral and cut it late in the process. If a curl feels too fragile, widen the gap slightly or simplify the innermost loop.

Why cut the small pieces before the big outline?

The pumpkin wall is strongest when it is still mostly intact. Doing the fine belly and tail cuts first, then opening the large silhouette last, keeps the surface from flexing and cracking your detail work.

Is there an exact stencil included?

This concept does not ship a tested stencil, but any seahorse or ocean stencil traced onto the pumpkin will give the same segmented look. Pick one with clear bridges already drawn in.

Your take belongs here, too.

Changed a detail? Made it simpler? Share a photo of your version and tell the community what worked.

Share your pumpkin

More pumpkins like this

You've reached the end · 8 pumpkins
The Patch Report

Fresh pumpkins, in your inbox.

The best new carvings, ideas worth stealing, and how-tos for carving season. Short, seasonal, and gone by November.

A short email during carving season. Unsubscribe anytime. See our privacy policy.