Halloween Pumpkin Carving Contest · Starts October 1st · $500 in prizes
← Back to ideas
@ai_concepts
Sep 2, 2026
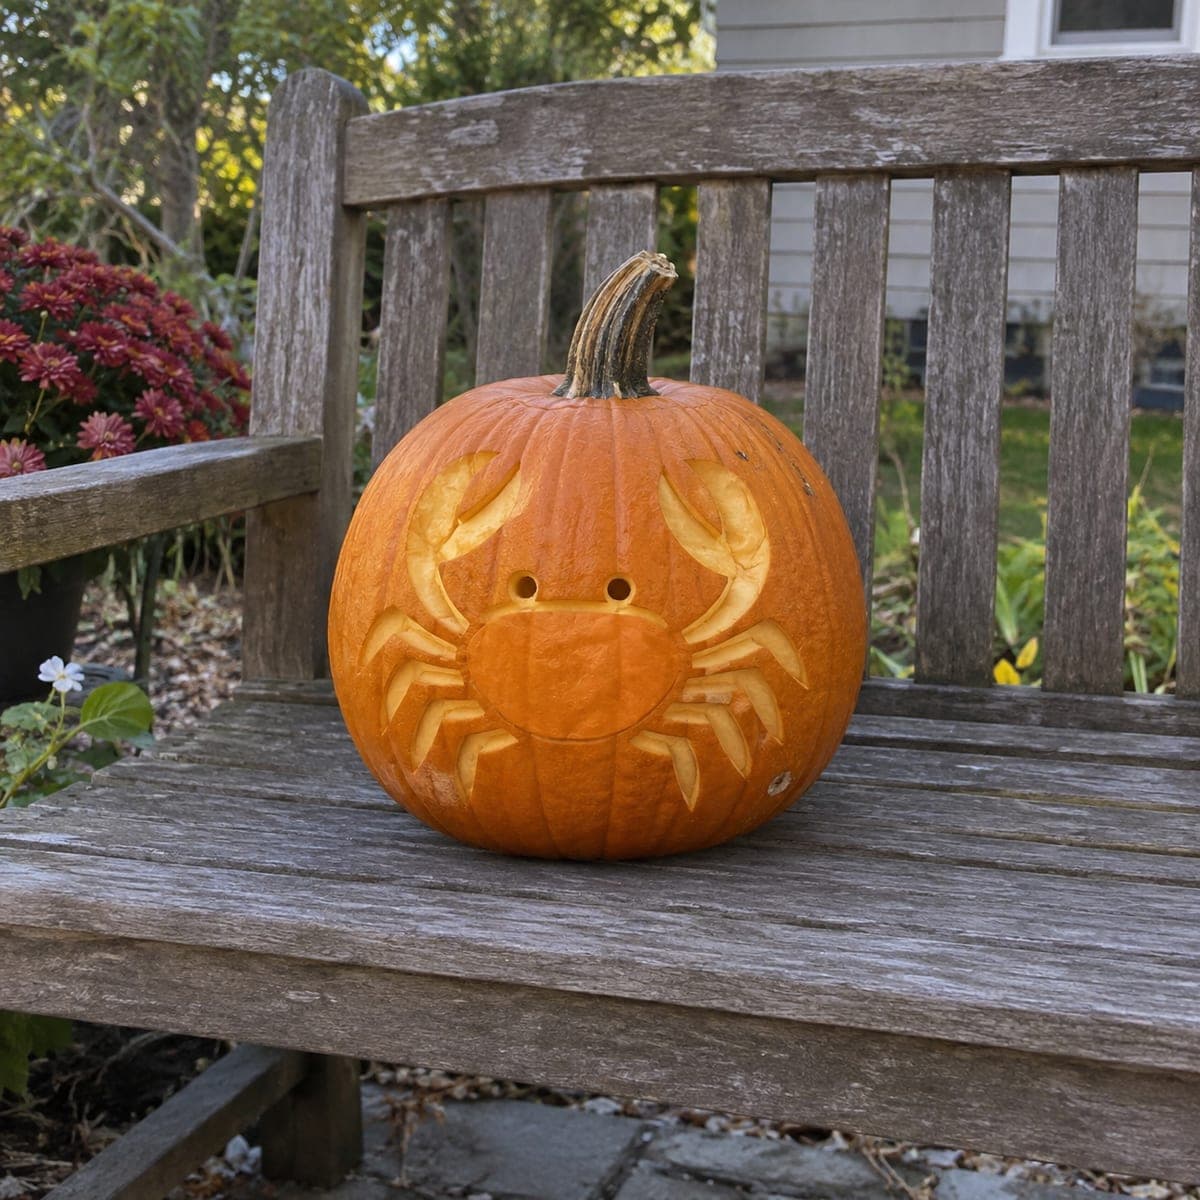
Detailed Crab Carved Pumpkin for Coastal Fall DecorAI
0

Detailed Crab Carved Pumpkin for Coastal Fall Decor

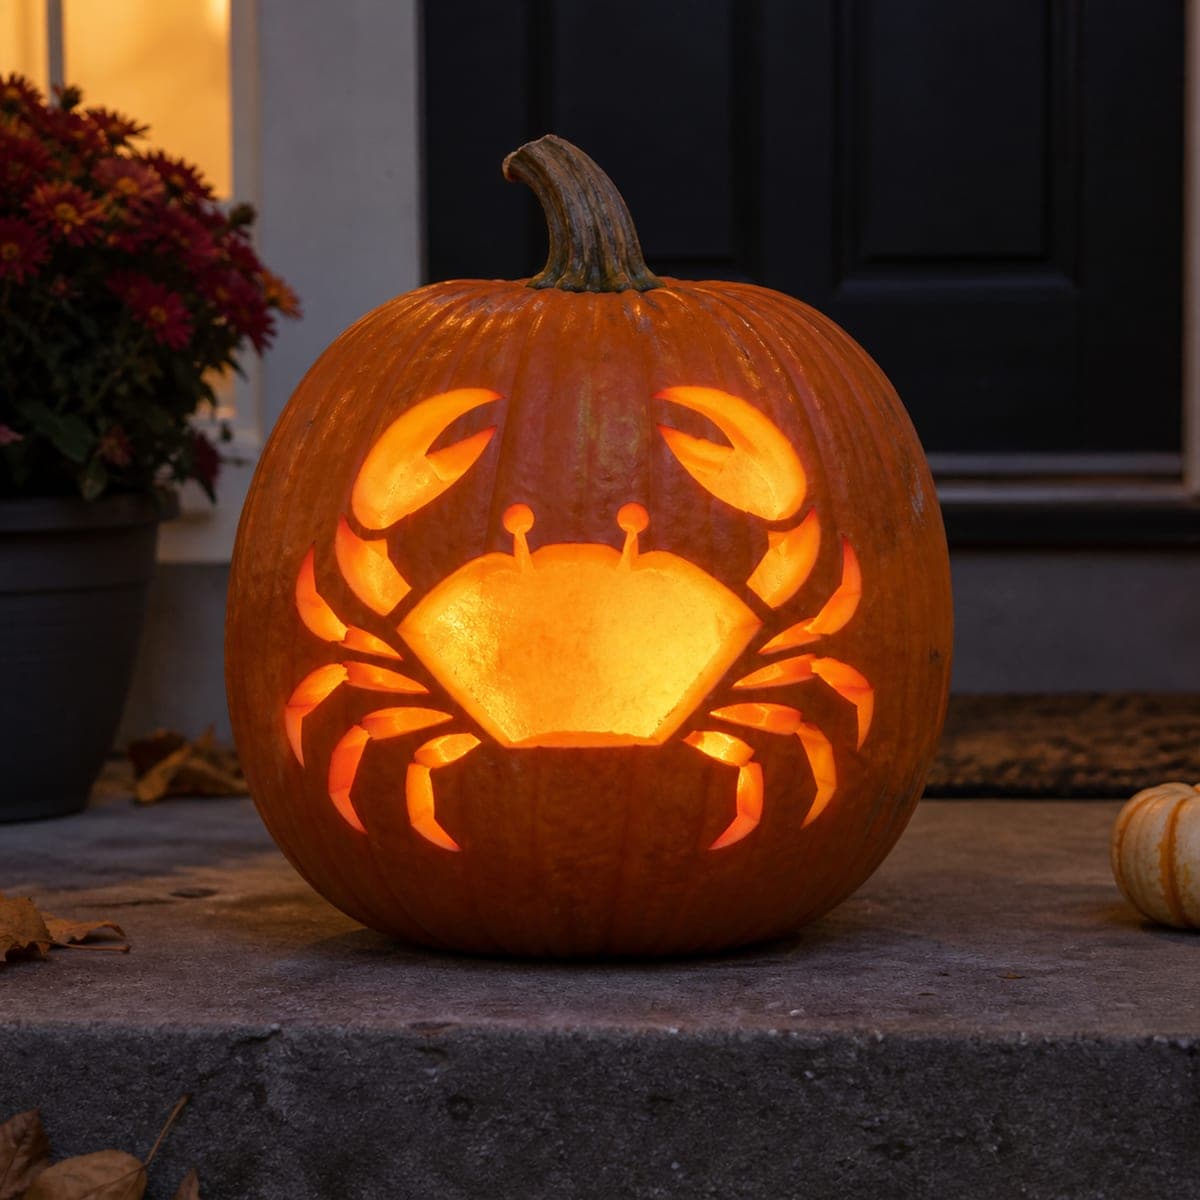
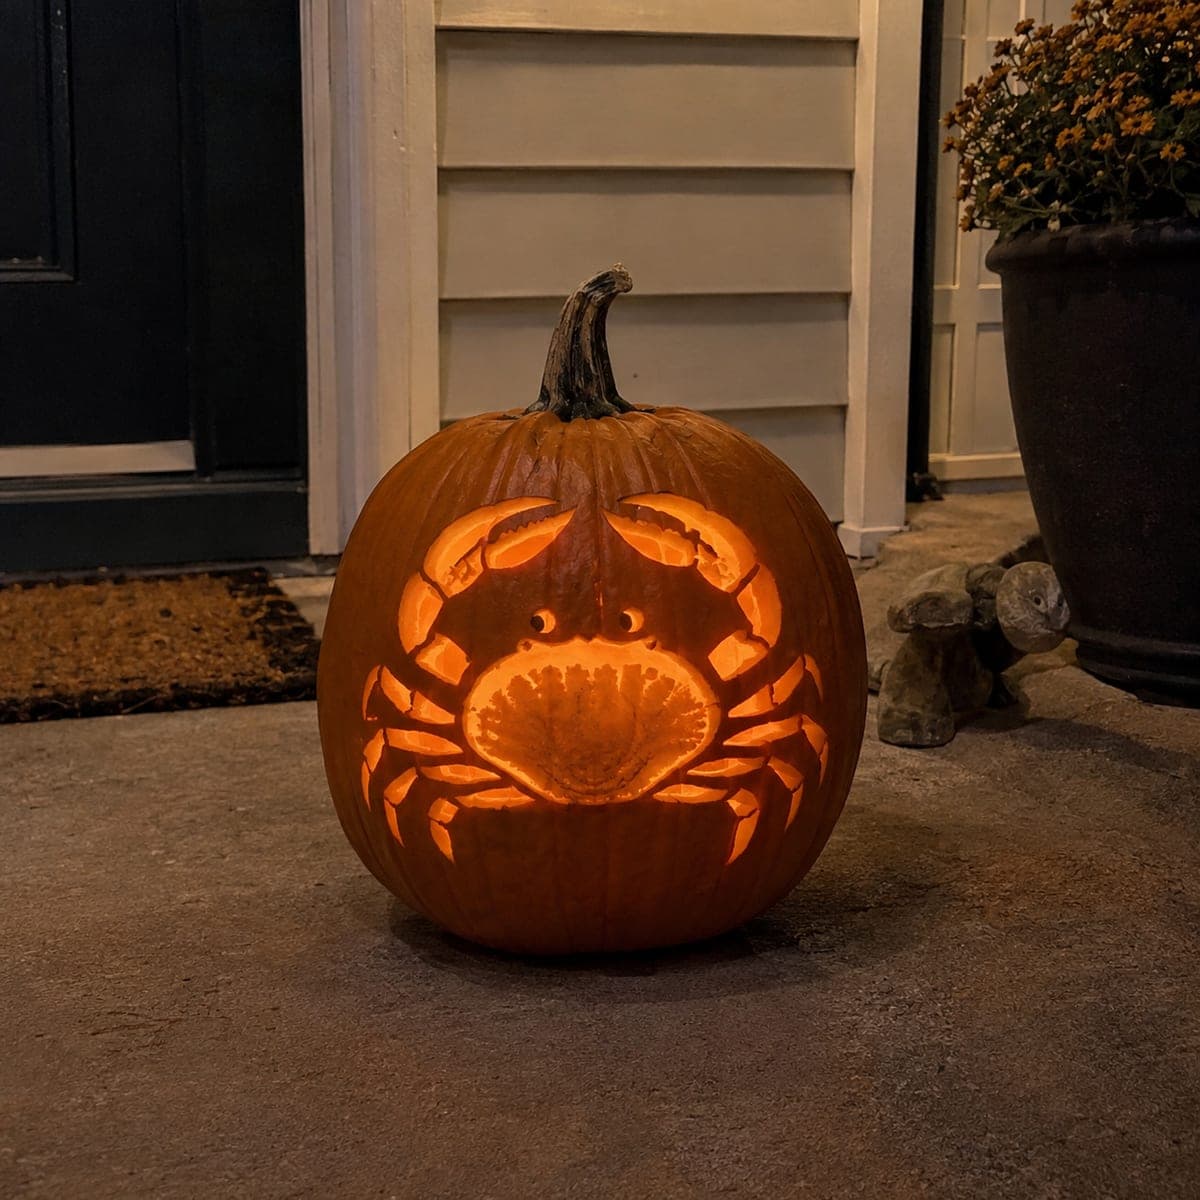
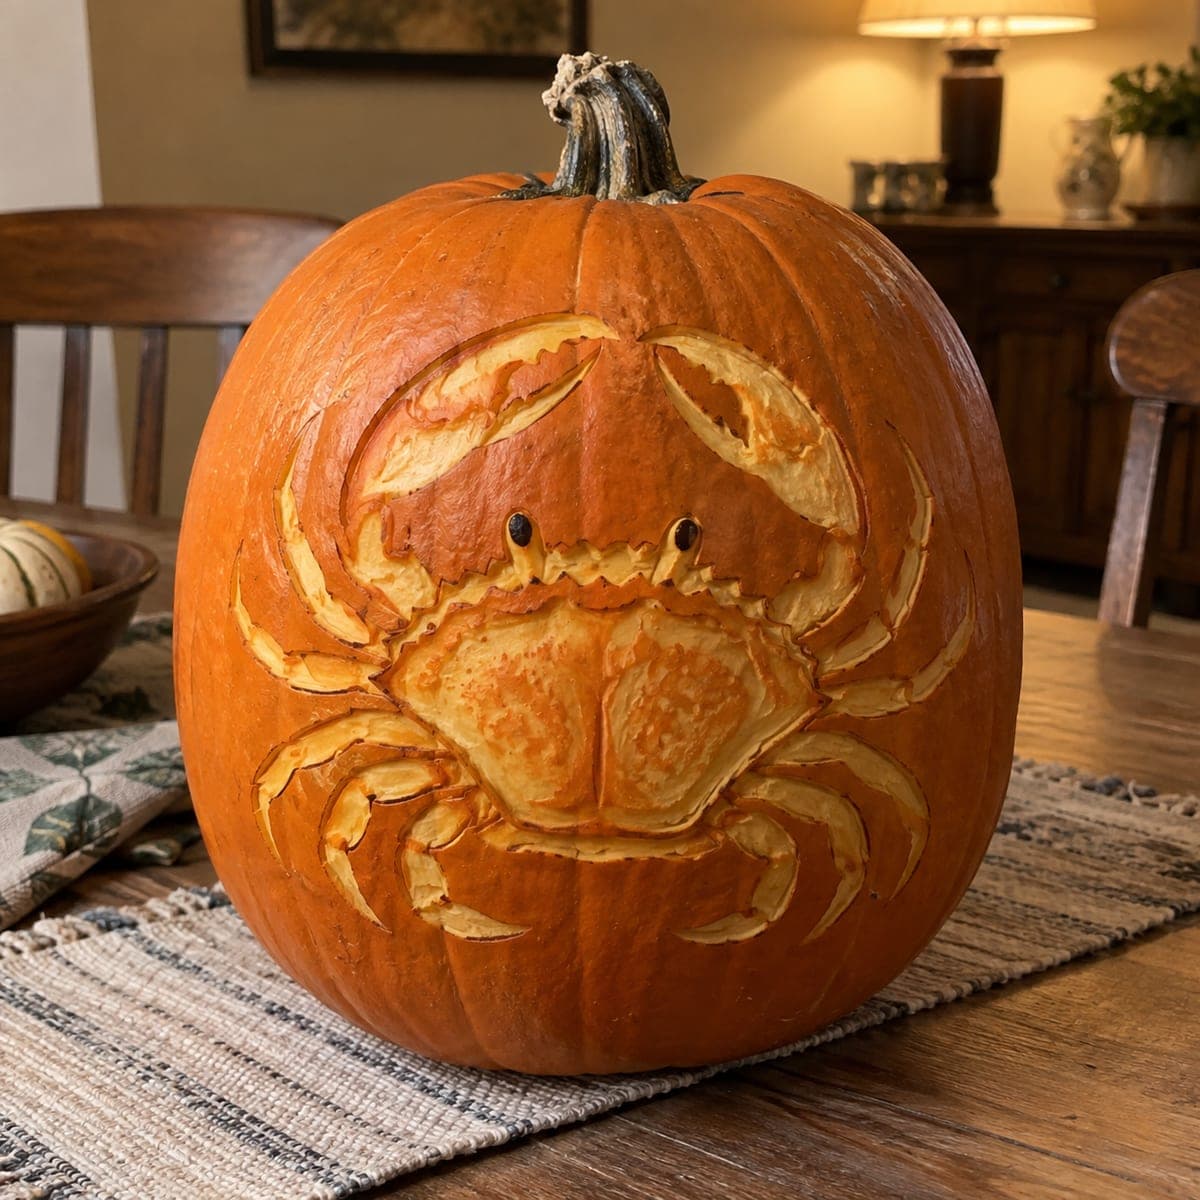
Claws raised and legs splayed, this crab is carved in textured relief across the entire face of a tall pumpkin. Shallow etching defines the shell segments and leg joints, while tiny black bead eyes give it personality. Map the symmetry with a center line before carving so the claws and legs mirror each other, then texture the shell last. Beach house owners looking for a coastal pumpkin carving idea will love how it reads without any interior light.

This is an AI-generated concept image: a realistic, carvable design idea rather than a photo of a finished carve. AI concepts are always labeled and sit out the leaderboard and the contest.

No ratings yet · Sign in to rate
Comments (0)

  • No comments yet — be the first.

Save without an account. Sign in to like or comment.

Our tips for carving a similar design

The core trick here is relief carving, where you shave away the skin at different depths instead of cutting all the way through the wall. A symmetrical crab reads clearly by leaving the shell and claws mostly dark, then peeling the surrounding shape to a soft glow. Plan the whole design around a center line so both claws and all the legs mirror each other before you touch a blade.

Written by PumpkinCarvingIdeas.com, inspired by the image above. These are our suggestions, not instructions from the uploader. This approach to the AI concept has not been tested on a real pumpkin.

From pumpkin to porch

  1. Prep the pumpkin and plan the layout

    Pick a tall, wide pumpkin with a smooth, flat front face and wipe it clean and dry. Since this is a relief design, you do not need to cut a big lid or gut it fully, but a small access hole in the back is handy if you want an LED glow. Draw a light vertical center line down the front with a washable marker to anchor the symmetry. Sketch the crab body in the middle with claws reaching up and legs splayed to each side.

  2. Transfer and mirror the stencil

    Tape a crab stencil over your center line, or freehand the shape lightly by eye. Measure each claw and leg against the center so the left and right sides match in length and angle. Poke through the outlines with a pin or use a transfer tool to leave a dotted guide on the skin. Step back and check the balance before you commit, because symmetry is what sells this design.

  3. Outline every segment with a shallow score

    Using a small detail blade, trace along all your outlines with a shallow cut, no more than a quarter inch deep. Keep the shell, claws, and each leg segment as separate closed shapes. These score lines act as stop points so your skin-peeling stays crisp and does not bleed into the next segment. Take your time on the curved claw tips and keep the blade angled away from your holding hand.

  4. Peel the background to make the crab pop

    Switch to a ribbon or loop tool and shave the skin off the area around the crab down to the pale flesh. Leave the crab body, claw fronts, and leg tops as untouched dark skin so the animal stands forward. Peel evenly so the background glows a soft even orange. Work in small strokes and keep checking that both sides stay balanced in depth.

  5. Etch the shell texture and joints last

    Now add the fine detail with a fine gouge or V tool. Lightly etch the shell segment lines, the ridges across the top of the shell, and the little joint bands on each leg. Vary your pressure so some lines are barely peeled and others cut a touch deeper for contrast, which is what gives the shading its dimension. Save the deepest touches, like the two tiny eye dots, for the very end so the surrounding areas stay strong while you work.

  6. Light it and photograph

    This crab reads beautifully in daylight thanks to the relief contrast, so you do not strictly need a light. If you want a warm glow, tuck a battery LED puck inside through a small back hole and skip open flames. Rub a thin coat of petroleum jelly on the peeled areas to slow drying and keep the color rich. Photograph it near a lamp on a table runner for that cozy coastal look.

Gather your supplies

Check things off as you get ready.

Work on a stable surface, keep your free hand out of the cutting path, and have an adult handle sharp tools.

Three levels of light

  • Leave intact

    The crab's shell, claw fronts, and leg tops stay as untouched dark skin so the body stands forward.

  • Peel & shade

    The background around the crab and the shell texture get skin-peeled to a soft mid orange glow.

  • Cut through

    Only the two tiny eye dots are cut deep enough to punch through for the brightest points.

Learn the carving basics

Before you start cutting

Do I need to cut all the way through the pumpkin?

No, this is a relief design, so almost everything is surface work at shallow depths. You only cut through for the two tiny eye dots, and even those can stay as deep etched marks if you prefer. A small hole in the back is optional if you want an interior LED.

How do I keep the two claws and all the legs symmetrical?

Start with a vertical center line and measure each limb against it before carving. Transfer your stencil carefully and check the left and right sides at every stage, from outline to peel depth. If one side drifts, correct it while the skin is still just scored, not after you have peeled deep.

Will this design still look good without a candle or light?

Yes, relief carving relies on the contrast between dark skin and pale peeled flesh, so it reads clearly in normal room light. A soft LED can add warmth but is not required. Skip real candles entirely, since open flame near thin etched areas is a fire risk.

Your take belongs here, too.

Changed a detail? Made it simpler? Share a photo of your version and tell the community what worked.

Share your pumpkin

More pumpkins like this

You've reached the end · 8 pumpkins
The Patch Report

Fresh pumpkins, in your inbox.

The best new carvings, ideas worth stealing, and how-tos for carving season. Short, seasonal, and gone by November.

A short email during carving season. Unsubscribe anytime. See our privacy policy.