Halloween Pumpkin Carving Contest Β· Starts October 1st Β· $500 in prizes
← Back to ideas
@ai_concepts
Jul 7, 2026
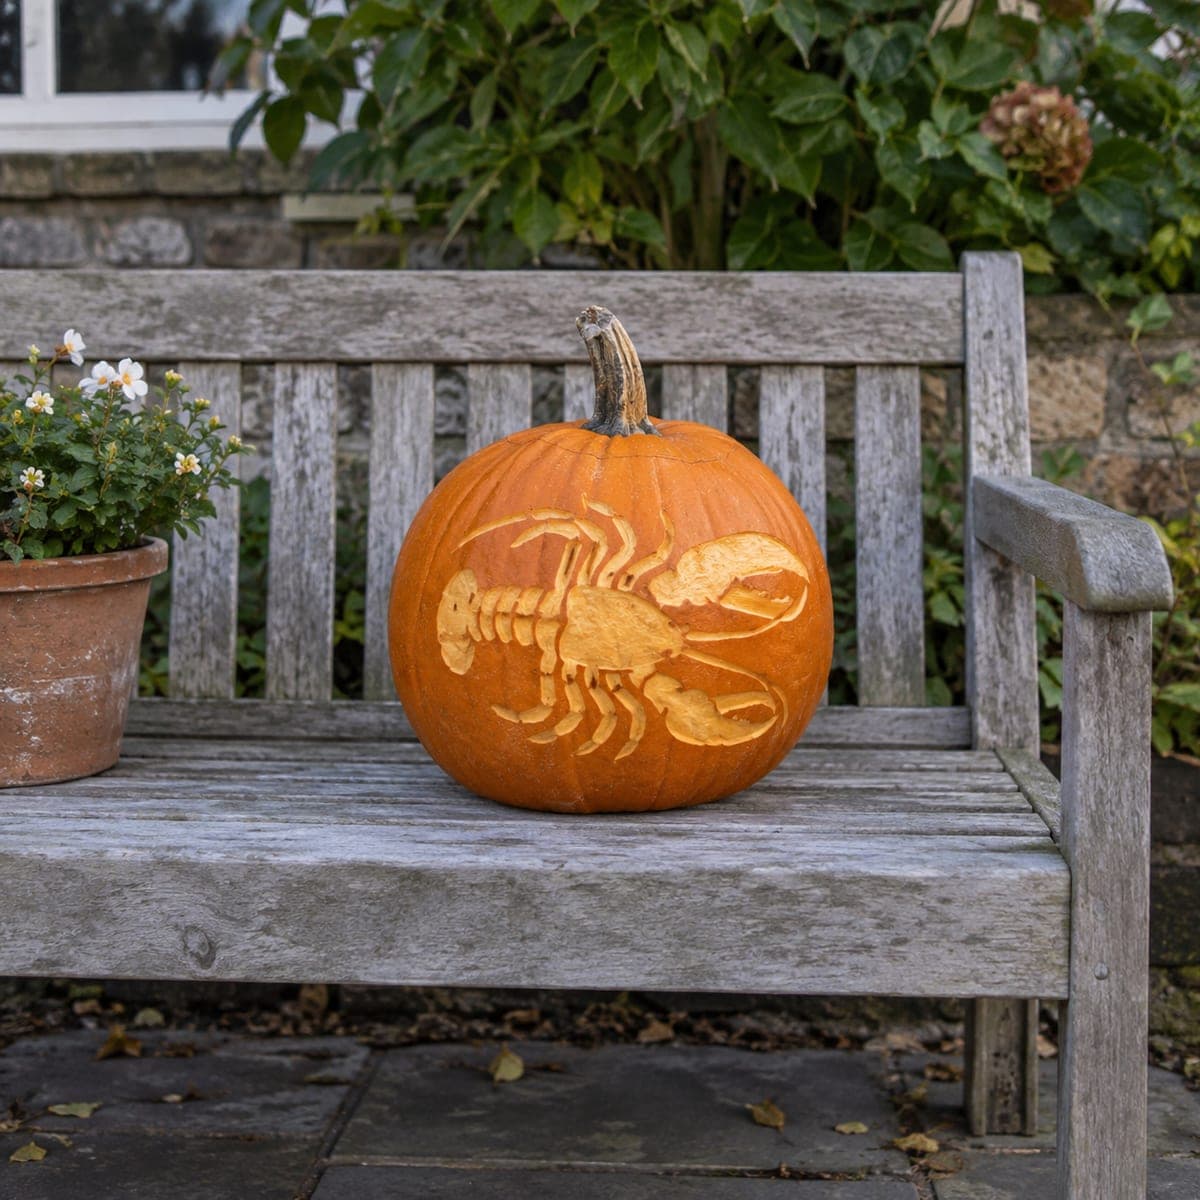
Coastal Lobster Etched Pumpkin DesignAI
0

Coastal Lobster Etched Pumpkin Design

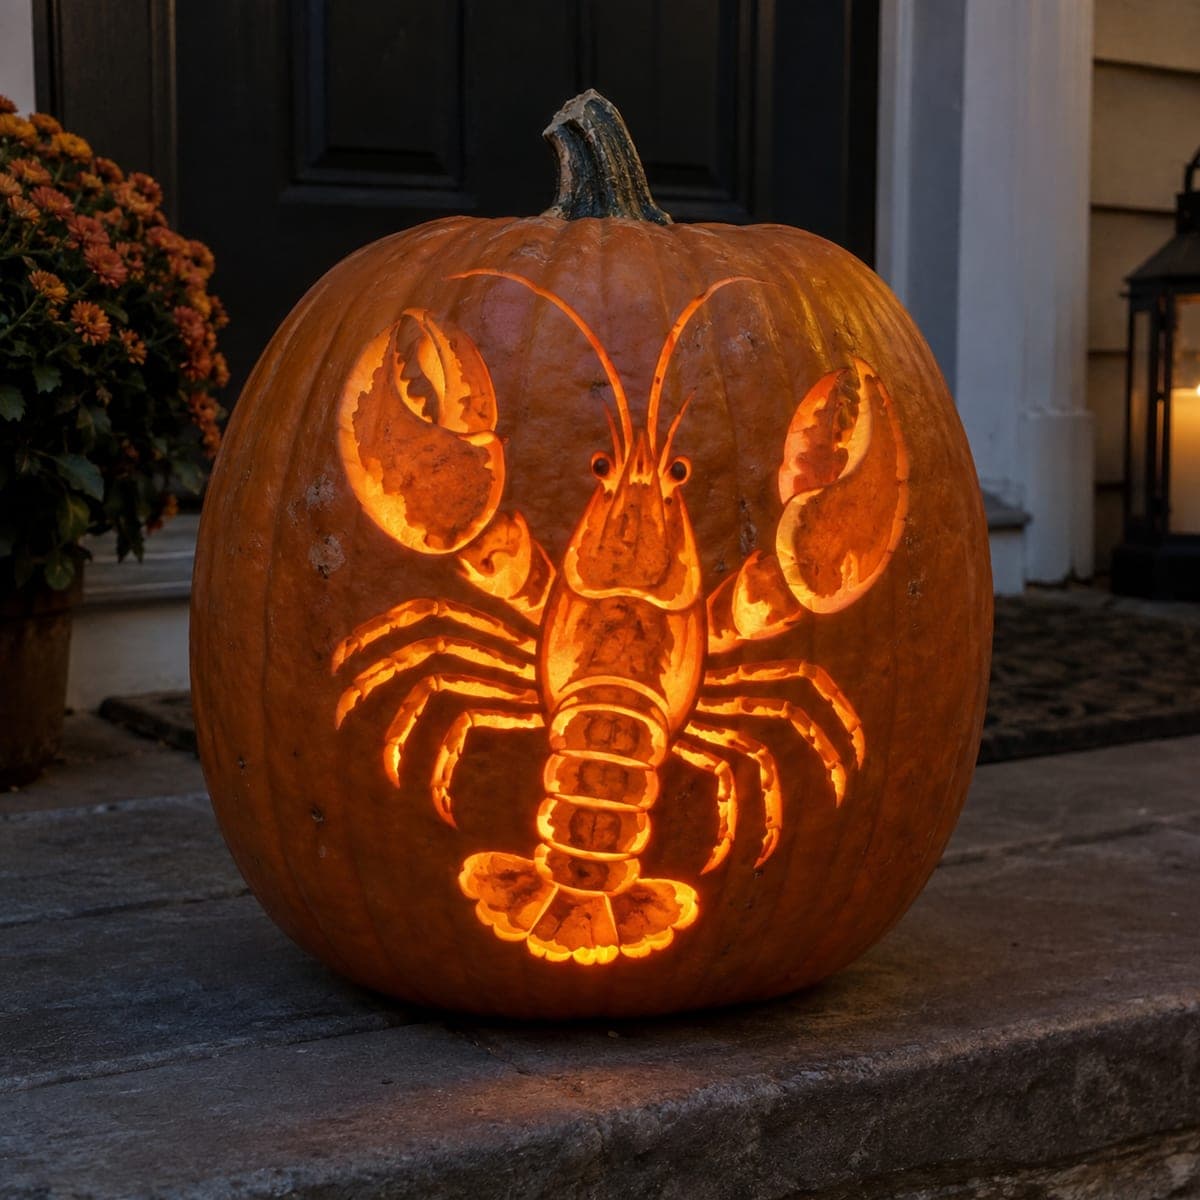
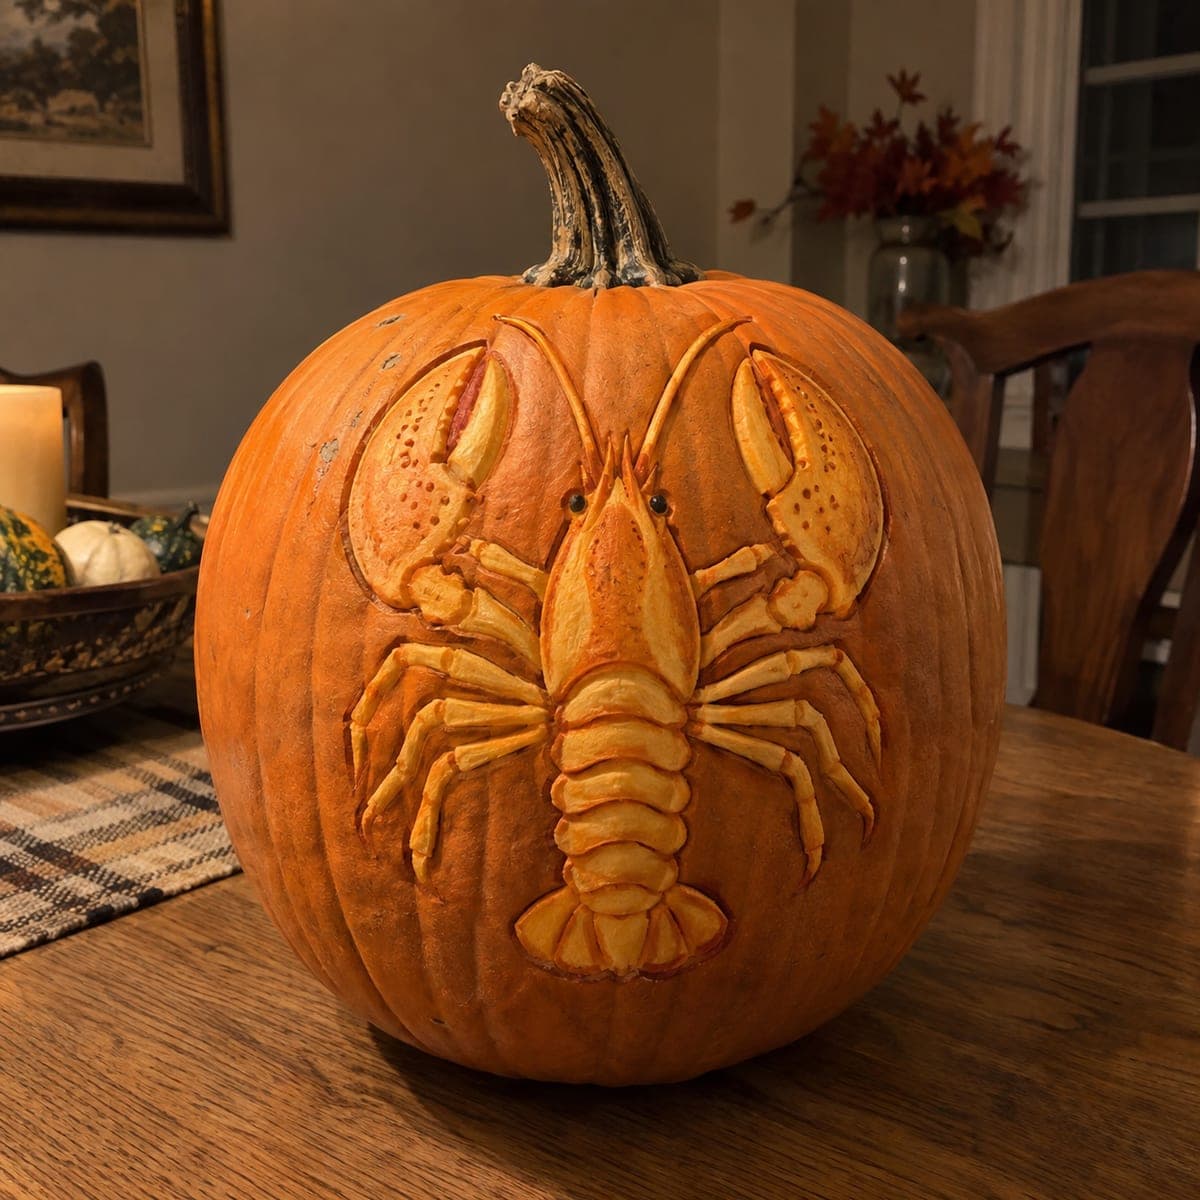
A big-clawed lobster stretches across this pumpkin in pale etched relief, its segmented tail and legs peeled just deep enough to contrast with the orange skin. The design is pure surface work, so a linoleum cutter or loop tool is all you need, and mistakes are rare because nothing goes through the wall. Etch the body and claws first, then add the thin antennae sweeping back over the shell. A natural pick for a New England porch or a seafood-loving household.

This is an AI-generated concept image: a realistic, carvable design idea rather than a photo of a finished carve. AI concepts are always labeled and sit out the leaderboard and the contest.

No ratings yet Β· Sign in to rate

Comments (0)

  • No comments yet β€” be the first.

Save without an account. Sign in to like or comment.

Our tips for carving a similar design

The whole trick here is depth of peel, not cutting through. You shave the skin away in shallow layers so the lobster reads as pale relief against the darker orange shell, keeping the body and claws bright while the antennae stay thin and delicate. Because nothing pierces the wall, the pumpkin stays strong and forgiving of small slips.

Written by PumpkinCarvingIdeas.com, inspired by the image above. These are our suggestions, not instructions from the uploader. This approach to the AI concept has not been tested on a real pumpkin.

From pumpkin to porch

  1. Plan and transfer the lobster

    Pick a smooth, flat-facing section of the pumpkin for the widest canvas. Tape your lobster stencil in place and poke the outline with a pin or transfer tool so you have a dotted map of the body, claws, tail, and antennae. Step back and check the claws reach toward the stem side and the tail curls down. Since this is a concept image, treat it as a target to aim for and adjust the layout to fit your real pumpkin's curve.

  2. Scrape a shallow base layer

    With a loop tool or ribbon tool, gently remove just the waxy outer skin inside the whole lobster outline. Work in thin passes rather than digging deep, since a light peel already glows dim orange. Keep your bracing hand behind the tool, never in its path. This first pass sets the overall silhouette before you add detail.

  3. Deepen the body, claws, and tail

    Go back over the big claws and the body core and scrape a little deeper so they turn pale and catch the most light. Leave the segment lines and leg joints slightly higher so shadows define each part. Vary your pressure to build contrast between the bright claws and the mid-tone tail. Wipe away pulp often so you can read the shading as you go.

  4. Carve the segmented tail and legs

    Use a small V-gouge or linoleum cutter to trace the tail bands and the thin walking legs. Keep these grooves narrow and consistent so the segments look repeated and clean. Leave thin ridges of unscraped skin between segments to act as natural bridges and dividers. Take your time here, as these lines carry most of the lobster's character.

  5. Add the antennae last

    Etch the two long antennae sweeping back over the shell with light, single strokes. Keep them shallow and unbroken so they stay attached and do not flake. If a line wanders, widen it slightly rather than forcing a correction. Save these delicate sweeps for last so earlier scraping does not smudge them.

  6. Light it and photograph

    Drop a battery LED puck or string inside through a small lid or base hole, never a candle. The peeled areas will warm to a soft orange while the deepest scrapes glow brightest. Rub a thin coat of petroleum jelly on the exposed relief to slow drying and keep the color rich. Shoot your photo at dusk on a porch or bench for that coastal evening mood.

Gather your supplies

Check things off as you get ready.

Work on a stable surface, keep your free hand out of the cutting path, and have an adult handle sharp tools.

Three levels of light

  • Leave intact

    The surrounding orange shell and the fine ridge lines between tail segments stay untouched and dark.

  • Peel & shade

    The tail bands, legs, and antennae get a light skin peel for a soft mid glow.

  • Cut through

    The big claws and body core are scraped deepest for the brightest pale relief, though nothing goes fully through the wall.

Learn the carving basics

Before you start cutting

Do I need to cut all the way through anywhere?

No, this is pure surface work. Every part of the lobster is scraped to different depths rather than opened up, which is why the pumpkin stays strong. If you want a touch more punch, you can deepen the claws slightly, but stop before you reach the hollow inside.

How do I keep the thin antennae from breaking?

Etch them shallow and in one smooth stroke each, leaving plenty of solid skin underneath. Because you are only removing the outer layer, there is nothing to snap off. Save them for the final step so no other scraping disturbs them.

Will an etched design still glow well at night?

Yes, though more softly than a cutout. The peeled skin lets a warm, diffused light through, so the lobster looks like it is glowing from within rather than shining out. Use a bright LED and place it close to the carved face for the best effect.

Your take belongs here, too.

Changed a detail? Made it simpler? Share a photo of your version and tell the community what worked.

Share your pumpkin

More pumpkins like this

You've reached the end Β· 8 pumpkins
The Patch Report

Fresh pumpkins, in your inbox.

The best new carvings, ideas worth stealing, and how-tos for carving season. Short, seasonal, and gone by November.

A short email during carving season. Unsubscribe anytime. See our privacy policy.