Halloween Pumpkin Carving Contest · Starts October 1st · $500 in prizes
← Back to ideas
@ai_concepts
Jul 26, 2026
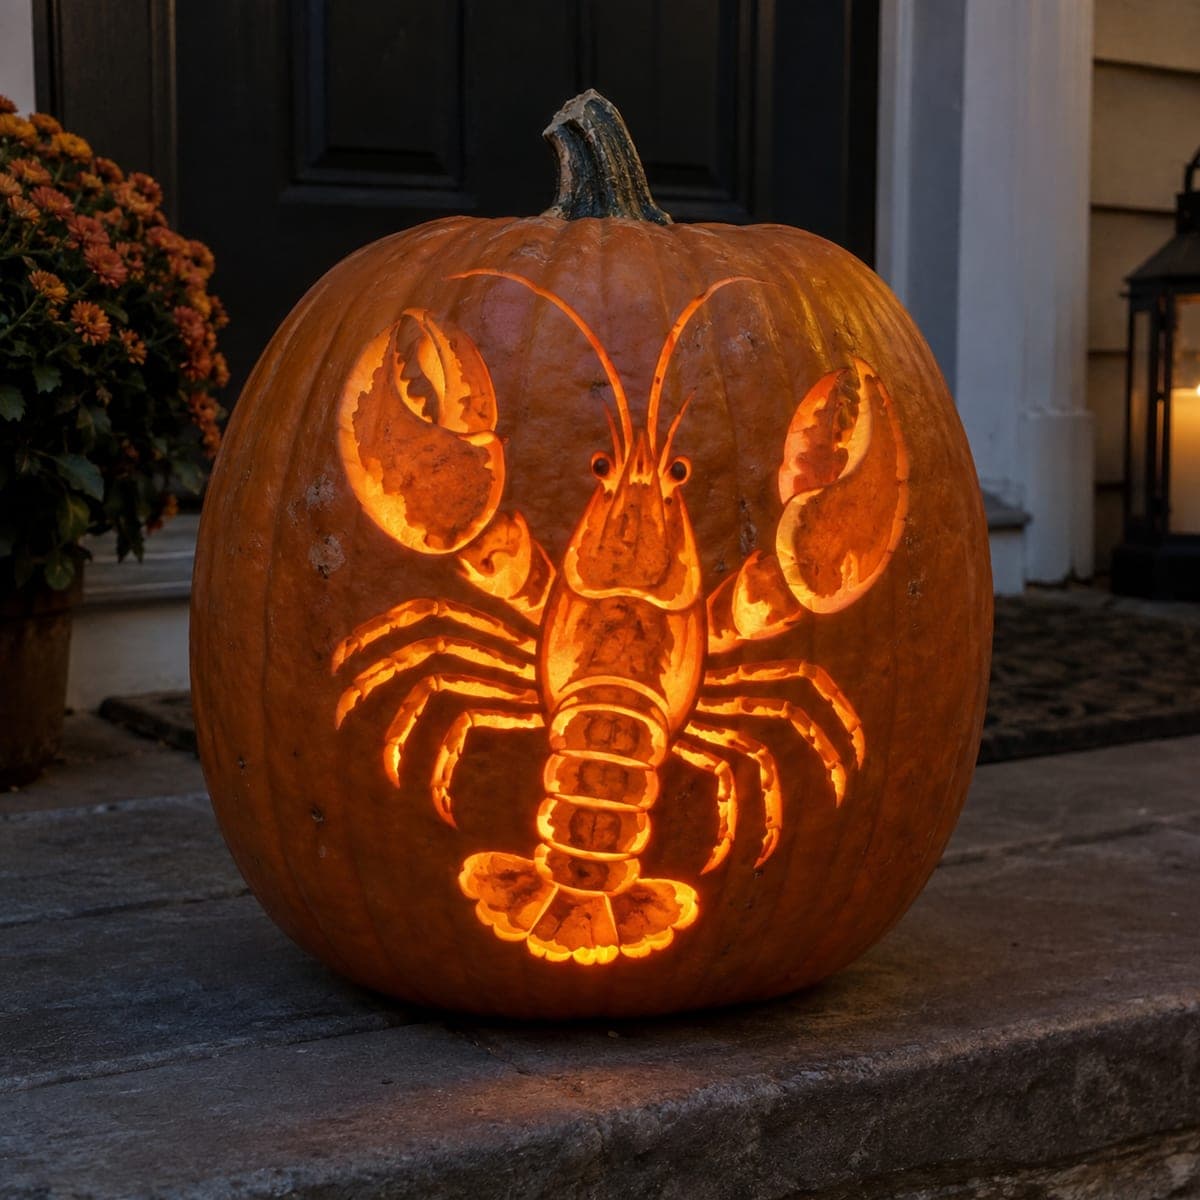
Red Lobster Painted No-Carve Nautical PumpkinAI
0

Red Lobster Painted No-Carve Nautical Pumpkin

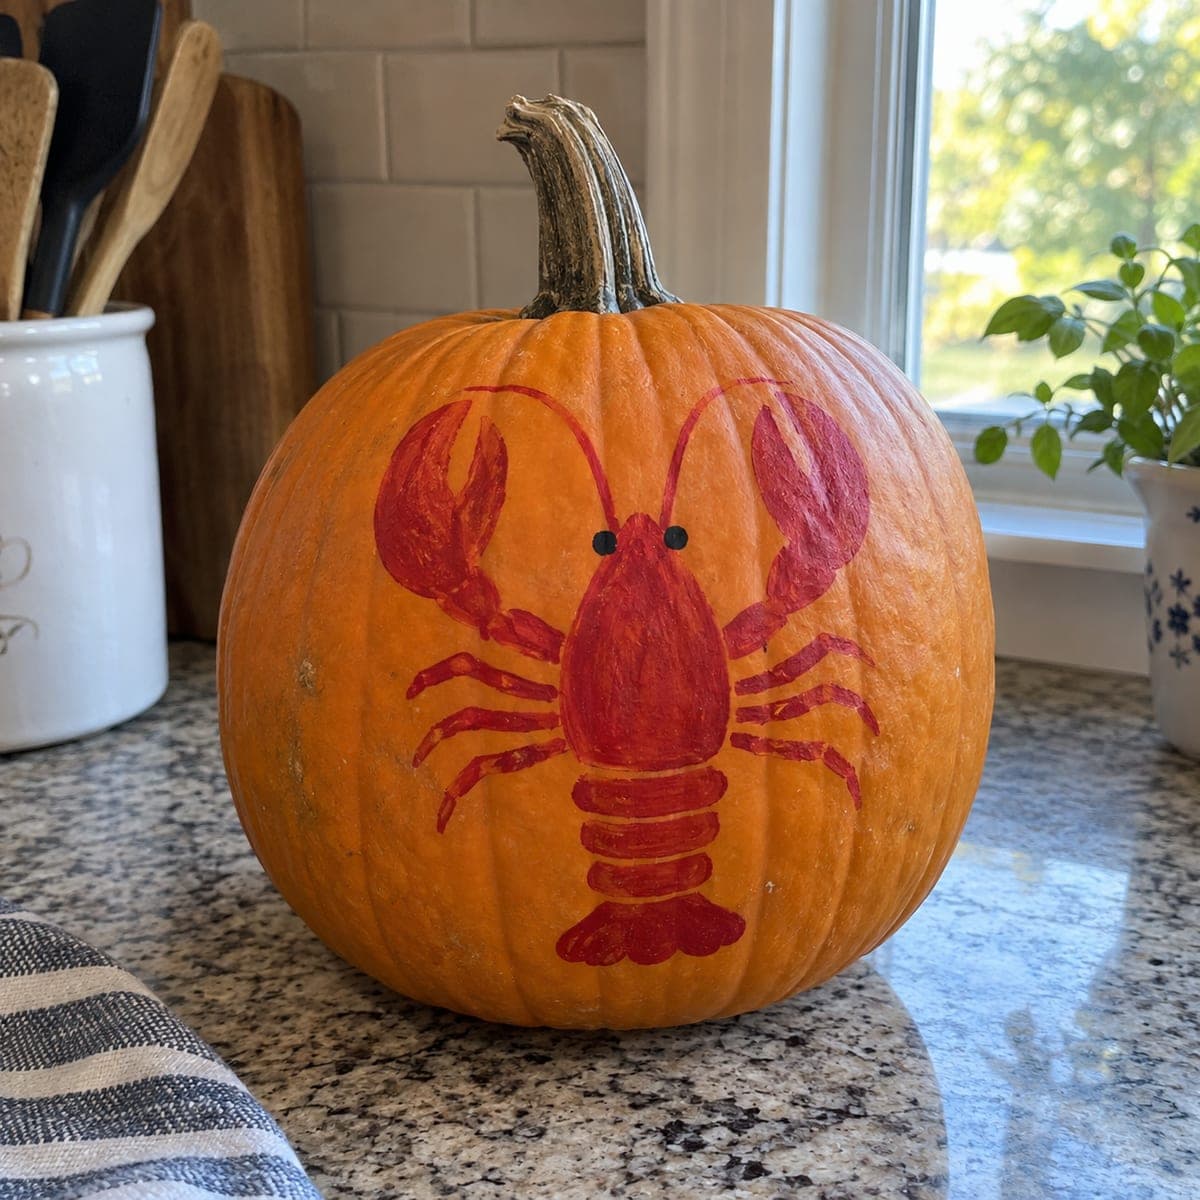
A bright red lobster with outstretched claws, segmented tail, and tiny black eyes is painted on this uncarved pumpkin, the bold red-on-orange color pop making it stand out on a kitchen counter or coastal-themed porch. The flat illustrative style uses clean black outlines filled with two shades of red acrylic for dimension. Paint the body and tail segments first, then add the claws and legs, finishing with the fine black outline using a liner brush to tie it all together. This easy no-carve pumpkin idea is a hit in New England households and seafood-loving families.

This is an AI-generated concept image: a realistic, carvable design idea rather than a photo of a finished carve. AI concepts are always labeled and sit out the leaderboard and the contest.
No ratings yet · Sign in to rate

Comments (0)

  • No comments yet — be the first.

Save without an account. Sign in to like or comment.

Our tips for carving a similar design

This is a no-carve pumpkin, so the whole trick is painting a flat, illustrative lobster in two shades of red against the natural orange skin. Since this is an AI concept image, no real pumpkin exists, but you can copy the look by blocking in the body and tail first, layering a darker red for shadow, and finishing with clean black outlines. Keeping the design centered on the widest part of the pumpkin lets the claws and legs spread out symmetrically.

Written by PumpkinCarvingIdeas.com, inspired by the image above. These are our suggestions, not instructions from the uploader. This approach to the AI concept has not been tested on a real pumpkin.

From pumpkin to porch

  1. Clean and sketch the layout

    Wipe the pumpkin with a damp cloth and let it dry so paint grips well. Choose the smoothest, flattest face and lightly sketch the lobster with a pencil or washable marker. Start with the teardrop body in the center, then the segmented tail below and the two big claws reaching up and out. Check that both sides are balanced before you commit to paint.

  2. Block in the base red

    Using a medium round brush and your brighter red acrylic, fill in the body, tail segments, claws, and thin legs. Work in smooth even strokes and let the natural orange show at the edges for now. Acrylic goes on thin, so plan on two coats, letting the first dry fully before the second. Keep the tail segments slightly separated so they read as distinct plates.

  3. Add the darker red for dimension

    Switch to a deeper red and glaze the lower body, the insides of the claws, and one edge of each tail segment. This shading gives the flat illustration a sense of depth without any carving. Blend while the base coat is dry so the two reds stay crisp rather than muddy. Keep the darker tone to about a third of each shape.

  4. Paint the fine outlines

    Load a liner brush with black acrylic and trace clean outlines around the body, claws, legs, and every tail segment. Steady your hand by resting your pinky against the pumpkin as you pull each line. Add the two tiny black dot eyes and the long thin antennae sweeping up toward the stem. Thin the black slightly with water if it drags.

  5. Seal and display

    Once everything is bone dry, brush on a thin coat of clear matte acrylic sealer to protect against smudges and light rain. Set the finished pumpkin on a kitchen counter or covered porch where the red really pops against the orange. If you want a soft nighttime glow, tuck a battery LED puck beside it rather than cutting into the shell. Snap your photo in daylight to catch the two-tone red at its brightest.

Gather your supplies

Check things off as you get ready.

Work on a stable surface, keep your free hand out of the cutting path, and have an adult handle sharp tools.

Three levels of light

  • Leave intact

    The natural orange skin all around the lobster stays untouched as the background color.

  • Peel & shade

    No peeling is needed on this painted design, but you could lightly scuff the belly area if you wanted a faint texture under the lighter red.

  • Cut through

    Nothing is cut on this no-carve pumpkin; keep the shell fully intact and add an LED beside it for glow instead.

Learn the carving basics

Before you start cutting

Why two shades of red instead of one?

The darker red acts as shadow along the lower body, claw insides, and tail edges, which gives the flat painting a sense of roundness. A single flat red would still look fine but a bit cartoonish. Keep the darker tone to a small portion of each shape so the bright red stays dominant.

How do I keep the thin legs and antennae from looking sloppy?

Use a liner brush loaded with slightly watered-down paint so it flows in one smooth pull rather than dragging. Rest your painting hand against the pumpkin to steady it and paint each leg in a single confident stroke. If a line wobbles, let it dry and clean it up with a tiny bit of the orange or a fresh red pass.

Can I actually carve this design instead of painting it?

You could, but the thin legs, antennae, and segment lines are fragile and would need bridges to stay attached. For most people the painted version is far sturdier and shows the color contrast better. If you do carve, use a surface scraping technique for the body and save any full cutouts for the larger claw shapes.

Your take belongs here, too.

Changed a detail? Made it simpler? Share a photo of your version and tell the community what worked.

Share your pumpkin

More pumpkins like this

You've reached the end · 8 pumpkins
The Patch Report

Fresh pumpkins, in your inbox.

The best new carvings, ideas worth stealing, and how-tos for carving season. Short, seasonal, and gone by November.

A short email during carving season. Unsubscribe anytime. See our privacy policy.