Halloween Pumpkin Carving Contest · Starts October 1st · $500 in prizes
← Back to ideas
@ai_concepts
Sep 10, 2026
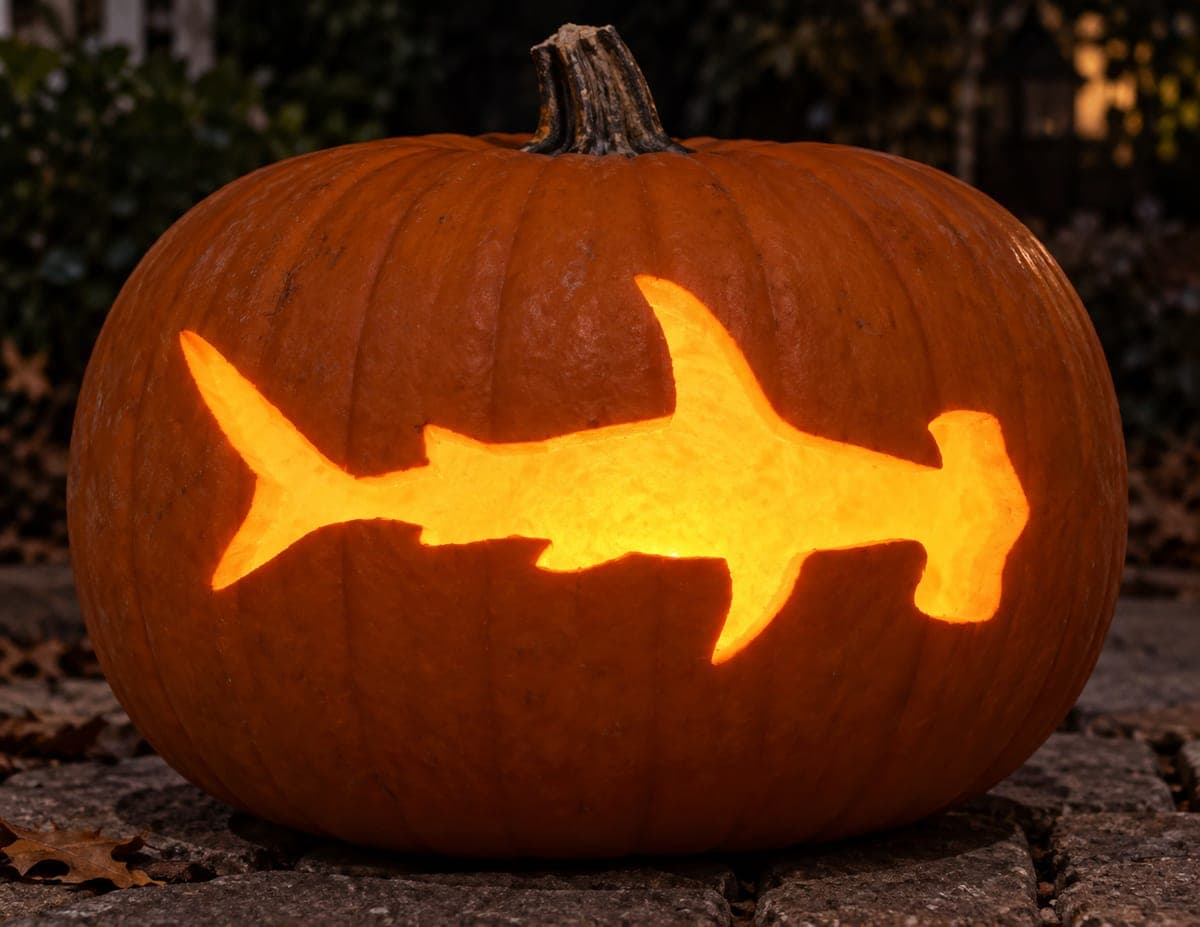
Hammerhead Shark Painted Pumpkin for Ocean FansAI
0

Hammerhead Shark Painted Pumpkin for Ocean Fans

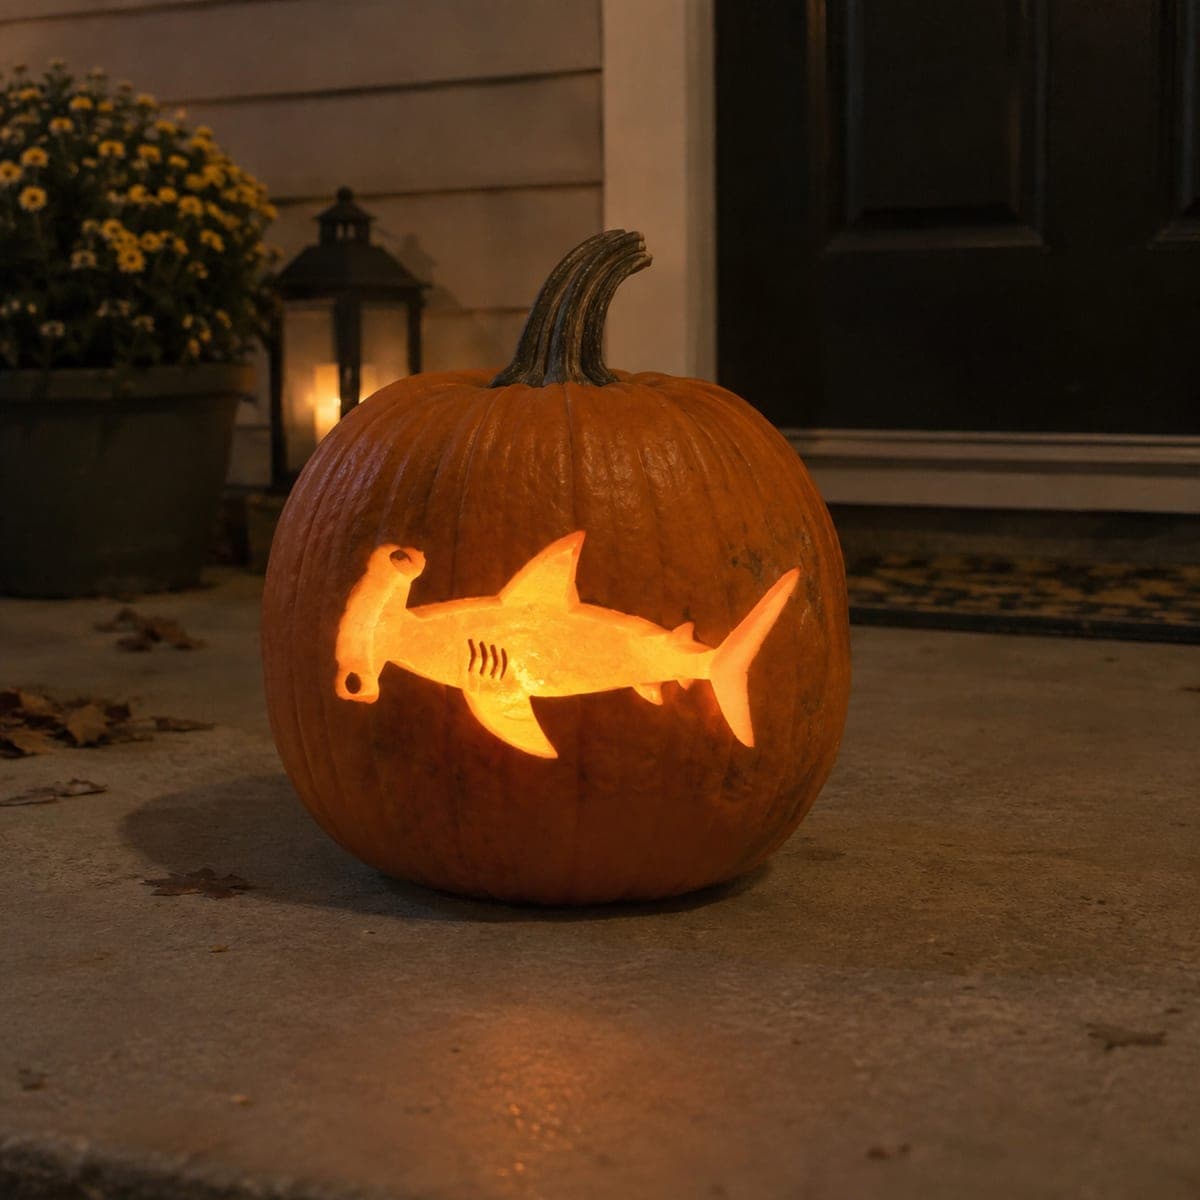
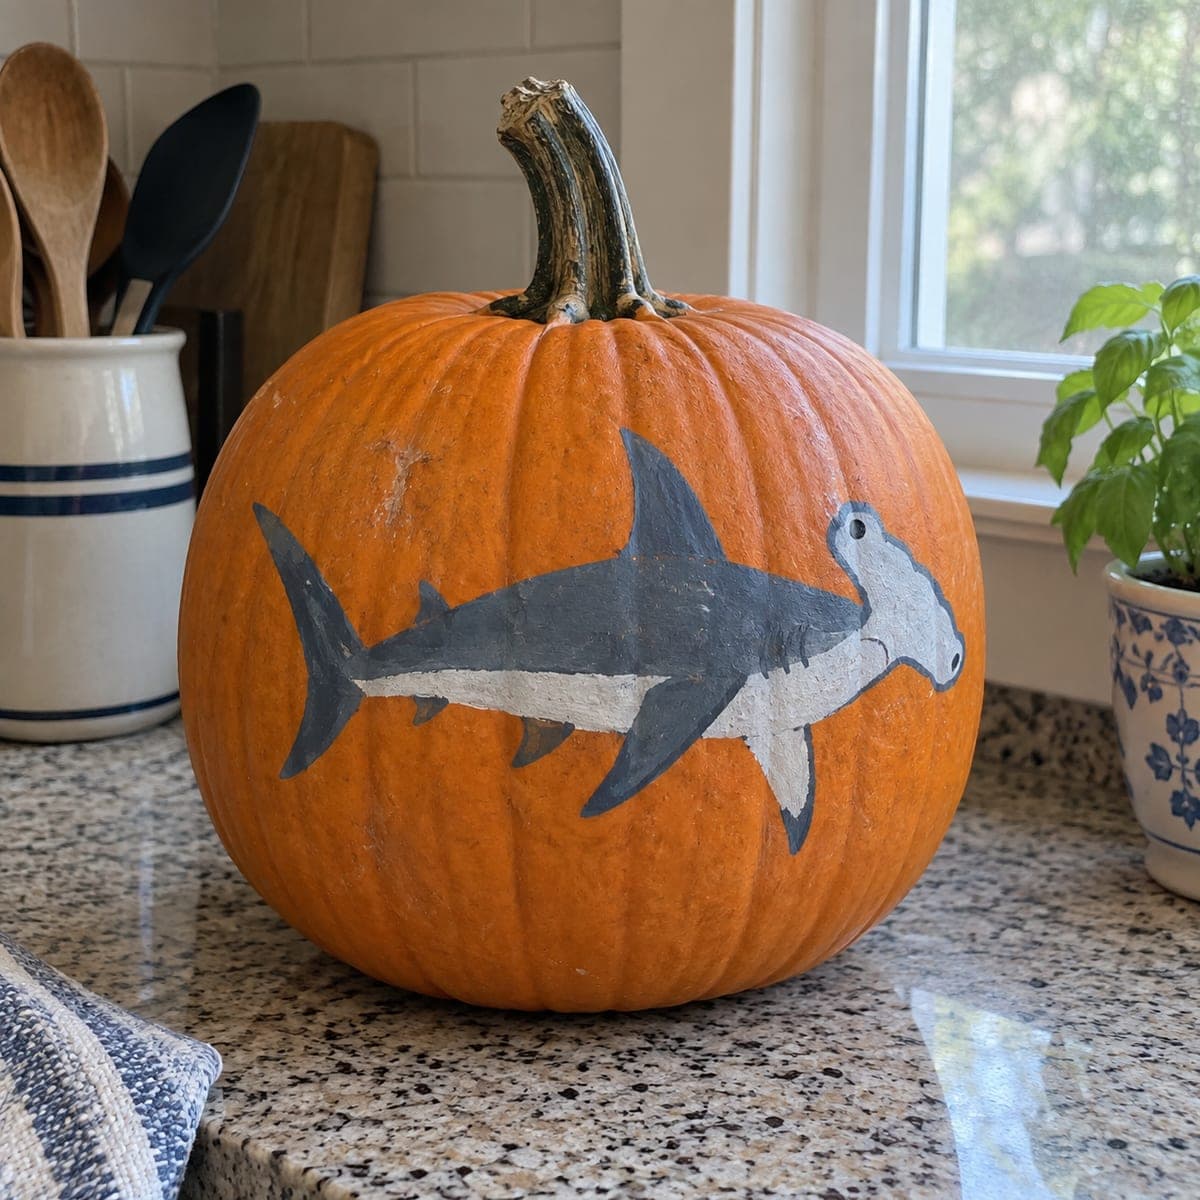
A gray hammerhead shark swims across this no-carve pumpkin, its wide mallet head and white belly picked out in flat, poster-style paint. Shark lovers can knock this out in an afternoon: chalk the outline, block the gray body, then add the belly stripe and the small eye at the tip of the hammer. Because the shell stays intact, it doubles as a kitchen-counter decoration long after Halloween candy is gone.

This is an AI-generated concept image: a realistic, carvable design idea rather than a photo of a finished carve. AI concepts are always labeled and sit out the leaderboard and the contest.

No ratings yet · Sign in to rate
Comments (0)

  • No comments yet — be the first.

Save without an account. Sign in to like or comment.

Our tips for carving a similar design

The whole design rides on a simple two-tone paint job: a flat gray body with a crisp white belly stripe and that unmistakable wide mallet head. Keep the shell whole and treat the pumpkin like a curved canvas, blocking large shapes first and saving the tiny eye and edge details for last. Because nothing is cut, this reads as a clean silhouette rather than a glow, so tidy outlines matter more than lighting.

Written by PumpkinCarvingIdeas.com, inspired by the image above. These are our suggestions, not instructions from the uploader. This approach to the AI concept has not been tested on a real pumpkin.

From pumpkin to porch

  1. Clean and dry the surface

    Wipe the pumpkin down with a damp cloth and let it dry completely so paint grabs the shell. Pick the flattest, widest face for the shark, turning the stem so it sits out of the way. A smooth panel between the ribs gives you the longest run for the body. Set the pumpkin on a towel so it will not roll while you work.

  2. Chalk the outline

    Sketch the hammerhead in chalk or a washable pencil, starting with the long body and the wide head at one end. Keep the head as a rounded mallet shape with the eye placed near the outer tip. Add the tall top fin, the tail, and the lower fins, then step back and adjust before any paint goes down. Chalk wipes off easily, so redraw as many times as you need.

  3. Block the gray body

    Fill the whole shark shape with a flat gray using a medium round brush, working inside your chalk lines. Two thin coats look better than one thick one, so let the first dry before adding the second. Keep the edges clean by pulling the brush along the outline rather than pushing into it. Let this base coat dry fully before moving on.

  4. Add the white belly and darker fin tips

    Paint the pale belly stripe along the lower body with white or off white, tapering it toward the tail. While that dries, deepen the top fin, tail edges, and fin tips with a slightly darker gray for contrast. Use a smaller brush here so the color changes stay controlled. Keep the transitions simple and poster flat rather than blended.

  5. Set the eye and clean the edges

    Dot a small dark eye at the outer tip of the hammer with the very end of a fine brush. Tidy any wobbly outlines with a thin line of gray, and touch up spots where orange peeks through. Let everything cure before handling. A quick coat of matte sealer helps it survive kitchen humidity.

  6. Stage and photograph

    Set the finished pumpkin on a counter or shelf with the shark facing your main sightline. Soft daylight from a nearby window shows off the flat gray and white best. Snap a photo from straight on so the long silhouette reads clearly. Since the shell stays intact, it keeps well as decor for weeks.

Gather your supplies

Check things off as you get ready.

Work on a stable surface, keep your free hand out of the cutting path, and have an adult handle sharp tools.

Three levels of light

  • Leave intact

    The orange shell around the shark stays bare for a bright background contrast.

  • Peel & shade

    If you later want a glow version, peel the gray body areas to a dim orange sheen.

  • Cut through

    Save any full cutouts for the white belly stripe and the small eye, where the brightest light would read.

Learn the carving basics

Before you start cutting

Do I need to carve anything for this design?

No, this is a paint-only project, so the shell stays whole. That makes it a good choice for younger helpers and for a pumpkin you want to keep on the counter longer. If you want a lit version, you could carve the belly stripe and eye later, but it is not required.

How do I keep the long body from looking crooked on a curved pumpkin?

Chalk the full outline first and view it from several angles before painting. Center the shark on the flattest panel so the ribs do not distort the shape. Redraw as needed, since chalk wipes right off.

Will the paint last on the pumpkin?

Acrylic craft paint holds up well on a clean, dry shell, especially with two thin coats. A light matte sealer adds protection against kitchen humidity. Keep the pumpkin out of direct heat and it can stay looking sharp for weeks.

Your take belongs here, too.

Changed a detail? Made it simpler? Share a photo of your version and tell the community what worked.

Share your pumpkin

More pumpkins like this

You've reached the end · 8 pumpkins
The Patch Report

Fresh pumpkins, in your inbox.

The best new carvings, ideas worth stealing, and how-tos for carving season. Short, seasonal, and gone by November.

A short email during carving season. Unsubscribe anytime. See our privacy policy.