Halloween Pumpkin Carving Contest · Starts October 1st · $500 in prizes
← Back to ideas
@ai_concepts
Sep 14, 2026
Simple Hammerhead Shark PumpkinAI
0

Simple Hammerhead Shark Pumpkin

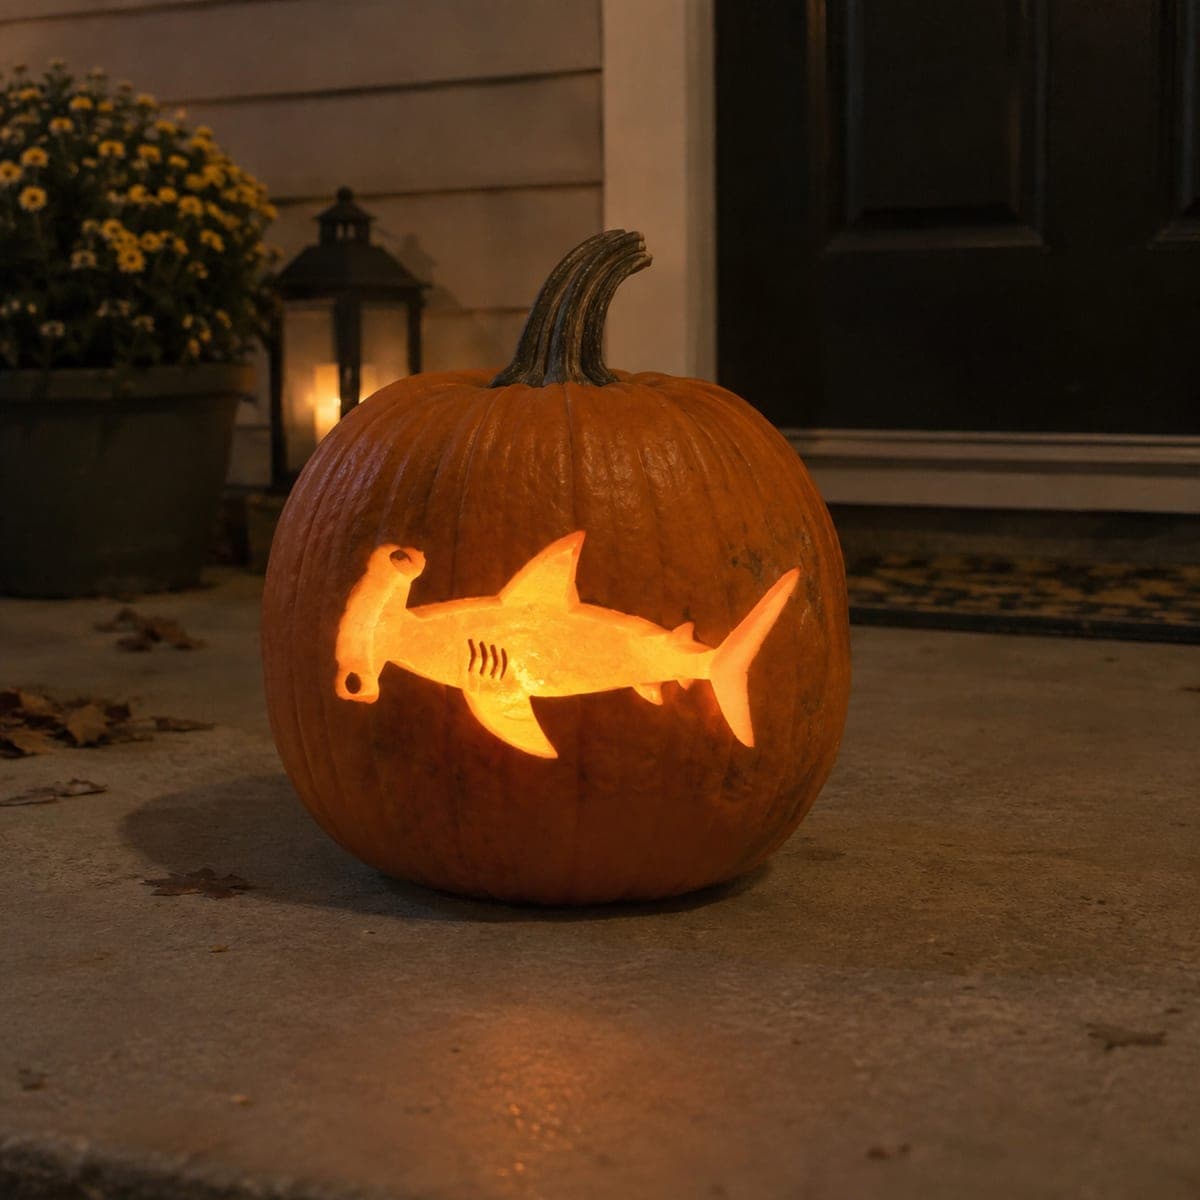
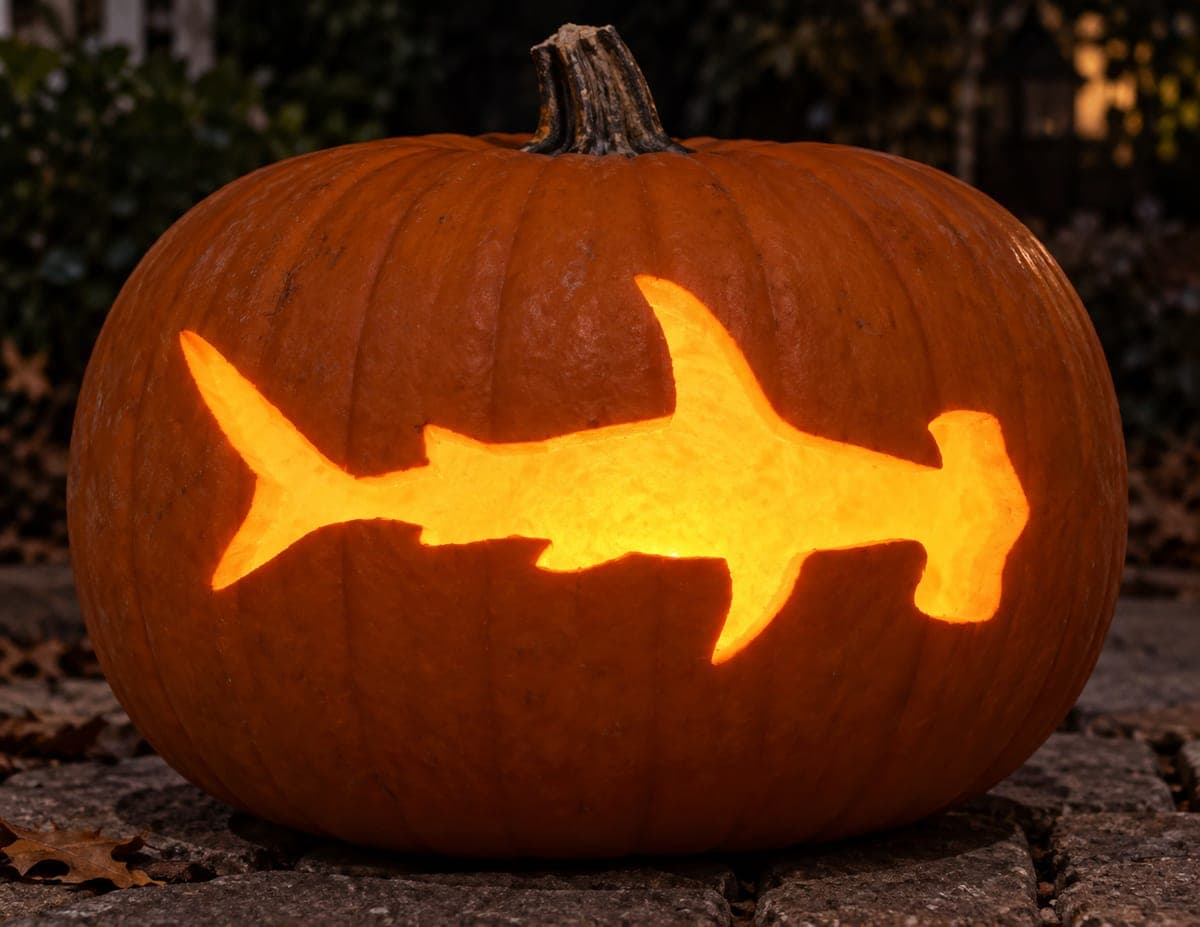
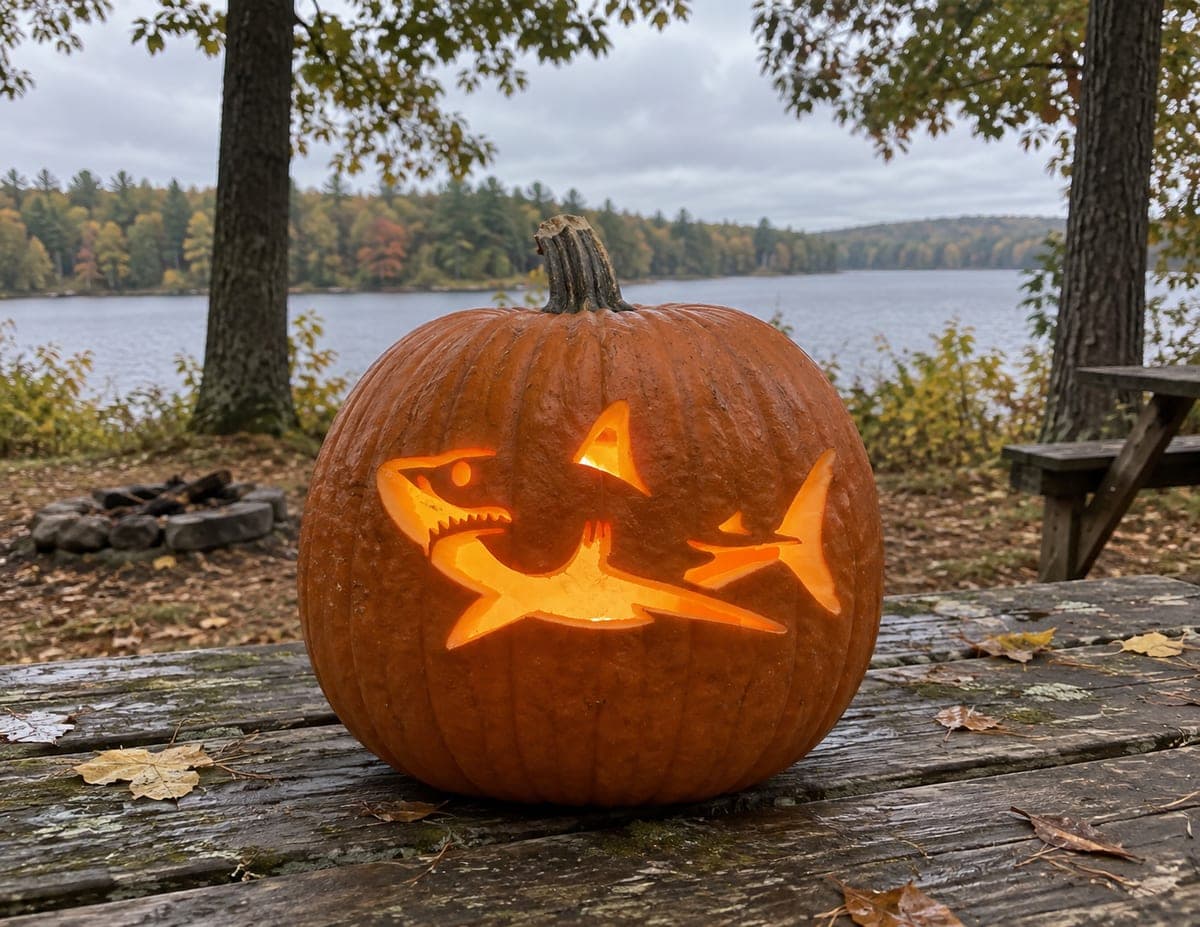
A hammerhead shark cut as a solid glowing silhouette spans nearly the full width of this pumpkin, its T-shaped head pointing right and a small dorsal fin rising above the body. The entire shark shape is pierced through, leaving the surrounding rind as the dark frame for this striking pumpkin carving idea. Because the hammerhead extension on the right is a narrow unsupported tip, carve toward it from the body rather than starting at the tip, which prevents the vulnerable end from cracking before the rest of the shape is secured.

This is an AI-generated concept image: a realistic, carvable design idea rather than a photo of a finished carve. AI concepts are always labeled and sit out the leaderboard and the contest.

No ratings yet · Sign in to rate
Comments (0)

  • No comments yet — be the first.

Save without an account. Sign in to like or comment.

Our tips for carving a similar design

The whole design is one solid silhouette: the hammerhead shark shape is cut clean through so light pours out, while the rest of the rind stays dark to frame it. The core trick is treating the shark as a single connected opening rather than a face with many pieces, which keeps the work simple. Plan your cutting order so the narrow head tip on the right is carved last, after the main body is already open and stable.

Written by PumpkinCarvingIdeas.com, inspired by the image above. These are our suggestions, not instructions from the uploader. This approach to the AI concept has not been tested on a real pumpkin.

From pumpkin to porch

  1. Pick a wide pumpkin and open the back

    Choose a pumpkin that is broad across the front so the shark can stretch nearly full width. Cut a lid or an access hole in the back, not the top, so the front stays a smooth clean canvas. Scoop the insides and scrape the front wall down to about an inch thick where the shark will sit. A thinner wall is much easier to cut through cleanly.

  2. Transfer the shark silhouette

    Print or draw the hammerhead so the T-shaped head points right and a small dorsal fin rises off the top of the body. Tape the stencil flat and poke closely spaced dots along the entire outline with a pin or awl. Remove the paper and connect the dots lightly with a marker so you can see the full shape. Double check that the tail, fin, and head tip all read clearly before you cut.

  3. Cut the main body first

    Using a small serrated carving saw, start in the thick central body of the shark and cut along the outline there. Keep the blade straight up and down and let it do the work with gentle pressure. Work outward from the body toward the tail and the dorsal fin, popping the waste piece out once the belly and back lines are joined. Having the body open first gives the shape strength before you reach the delicate ends.

  4. Carve toward the fragile ends

    Now cut toward the narrow tail on the left and the hammerhead extension on the right, always moving from the secured body outward to the tip rather than starting at the tip. This keeps the vulnerable ends supported until the last moment so they will not crack. Go slow around the T-shaped head where the shape turns sharply. Ease each waste chunk out gently instead of forcing it.

  5. Clean the edges and test the glow

    Trace back around the whole opening with your saw or a detail blade to smooth any ragged edges. Bevel the inside edge of the cut slightly outward so more light escapes and the silhouette looks crisp. Drop in an LED tea light or a small battery puck and check the shape in a dark room. Trim any spots that block light unevenly.

  6. Set it out and photograph

    Place the pumpkin on a flat surface with the back opening facing away from viewers. Use one or two bright LED lights for an even fill so the shark reads as a solid glowing shape. Photograph it at dusk against a dark background so the lit silhouette stands out. A light coat of petroleum jelly on the cut edges slows drying and keeps the shape sharp for a few extra days.

Gather your supplies

Check things off as you get ready.

Work on a stable surface, keep your free hand out of the cutting path, and have an adult handle sharp tools.

Three levels of light

  • Leave intact

    All the surrounding rind stays untouched and dark, forming the frame around the shark.

  • Peel & shade

    Optional: lightly skin a thin halo just outside the outline for a soft dim glow that lifts the shape off the pumpkin.

  • Cut through

    The entire hammerhead shark shape is cut through for the brightest solid glow, including the head, body, fin, and tail.

Learn the carving basics

Before you start cutting

How do I keep the narrow hammerhead tip from breaking off?

Never start your cut at the tip. Open the thick body of the shark first, then carve outward from the body toward the head extension so the fragile end stays supported until the very end. Cutting this direction lets the surrounding structure hold everything steady until the shape is nearly finished.

Do I need to carve any details inside the shark?

No, that is what makes this design easy. The whole shark is one solid opening, so there are no interior eyes, gills, or lines to worca about. Keeping it a clean silhouette is what gives the striking glowing effect.

Why cut the access hole in the back instead of the top?

An opening in the back keeps the front face smooth and uninterrupted so the full shark shape can span the widest part of the pumpkin. It also hides your LED light and wiring from view. A top lid would shorten the space and can let in rain.

Your take belongs here, too.

Changed a detail? Made it simpler? Share a photo of your version and tell the community what worked.

Share your pumpkin

More pumpkins like this

You've reached the end · 8 pumpkins
The Patch Report

Fresh pumpkins, in your inbox.

The best new carvings, ideas worth stealing, and how-tos for carving season. Short, seasonal, and gone by November.

A short email during carving season. Unsubscribe anytime. See our privacy policy.