Halloween Pumpkin Carving Contest · Starts October 1st · $500 in prizes
← Back to ideas
@ai_concepts
Jul 18, 2026
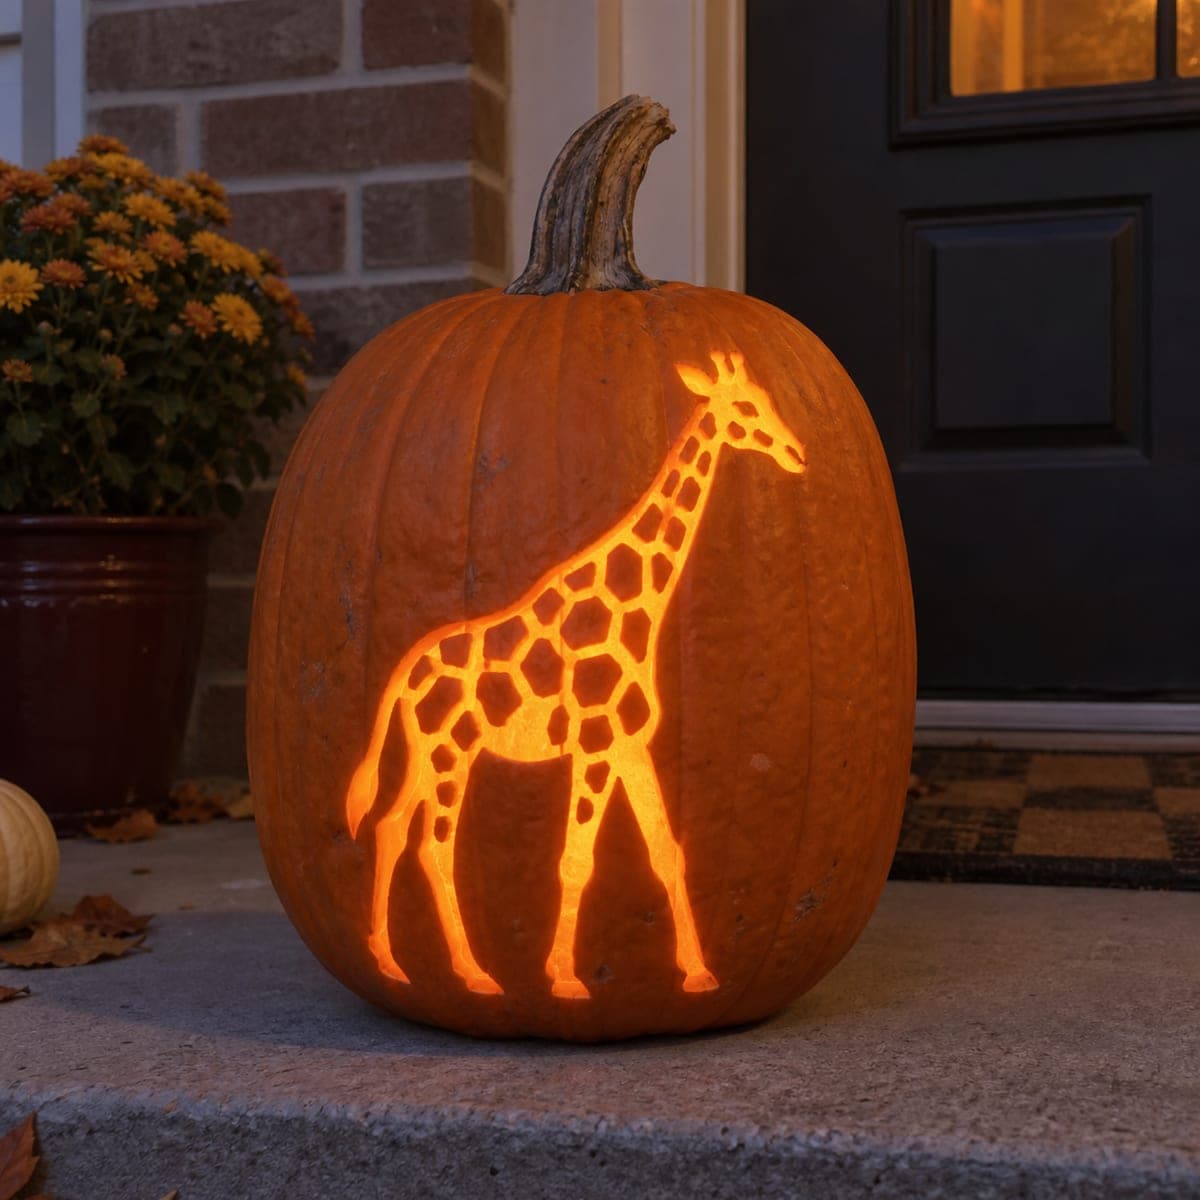
Glowing Lobster Cutout Pumpkin Carving IdeaAI
0

Glowing Lobster Cutout Pumpkin Carving Idea

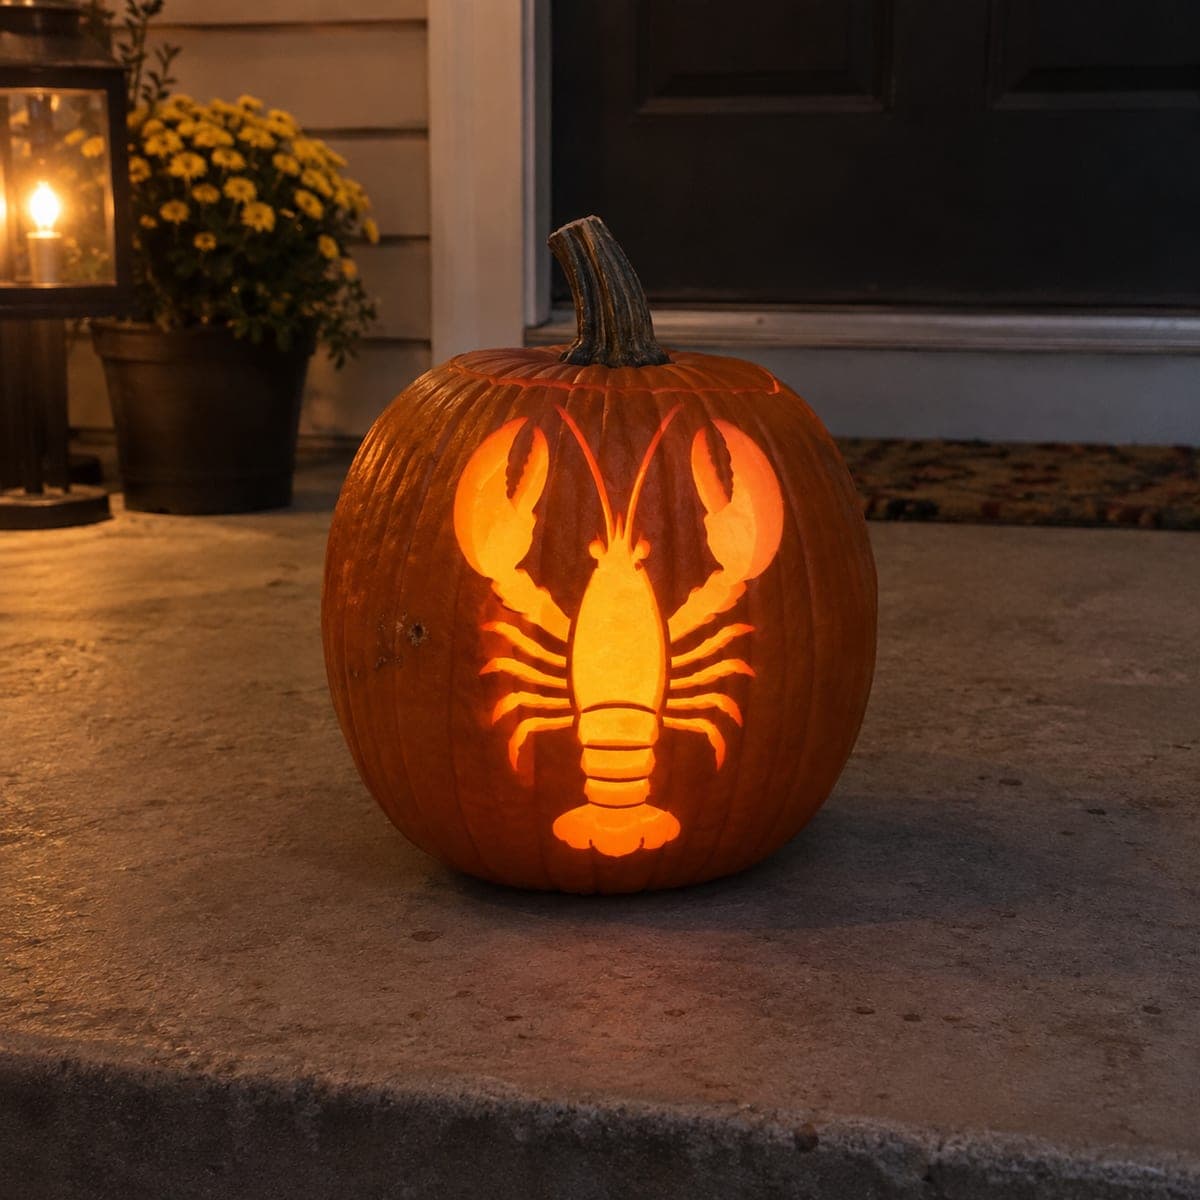
A full-body lobster with claws raised and tail spread is carved clean through this pumpkin, creating a warm glowing crustacean shape against the night. All the major body segments and claws are pierced as connected cutouts, so the light radiates through the narrow gaps between them for a clean, graphic result. Use a drill with a small bit to create the tiny circular details on the shell before making the larger saw cuts. A unique coastal-themed pumpkin carving idea that stands out from the typical Halloween designs.

This is an AI-generated concept image: a realistic, carvable design idea rather than a photo of a finished carve. AI concepts are always labeled and sit out the leaderboard and the contest.

No ratings yet · Sign in to rate
Comments (0)

  • No comments yet — be the first.

Save without an account. Sign in to like or comment.

Our tips for carving a similar design

The core trick here is treating the whole lobster as one connected cutout, where narrow strips of skin left between the body segments and claws hold everything together while the light pours through the gaps. Plan the design as a symmetrical silhouette centered on the flattest face of the pumpkin, then map out where each bridge of shell needs to stay to keep the claws and tail attached. Cut the large openings last so the pumpkin stays rigid while you work the finer details.

Written by PumpkinCarvingIdeas.com, inspired by the image above. These are our suggestions, not instructions from the uploader. This approach to the AI concept has not been tested on a real pumpkin.

From pumpkin to porch

  1. Pick your pumpkin and open it up

    Choose a tall, round pumpkin with a smooth, flat front face so the lobster reads clearly. Have an adult cut a lid from the bottom rather than the top, which lets the pumpkin sit flat over an LED light later. Scoop the insides thoroughly and thin the carving wall on the front to about one inch so cutting is easier. A thinner wall also lets light glow more evenly through the design.

  2. Transfer the lobster stencil

    Tape a lobster silhouette stencil onto the flat front, centering the body vertically with the claws raised and tail spread. Poke through the outline with a pin or transfer tool so you have a dotted guide on the skin. Mark clearly which areas are solid shell bridges to leave in place and which are the open gaps to cut. Step back and check that the whole shape sits level before you make any cuts.

  3. Drill the small shell details first

    Use a small drill bit to create the tiny circular dots along the shell and claws while the pumpkin is still fully solid and strong. Drilling before any large cuts keeps the surface stable so the bit does not wander or crack the wall. Go slow and keep the pumpkin braced against your body or a towel. These little holes add texture and a scattering of pinpoint light around the main shape.

  4. Peel the shell highlights for a dim glow

    With a lino or clay ribbon tool, gently scrape away just the orange skin on the raised parts of the body and claws where you want a softer mid glow. Leave the skin about a quarter inch thick so light barely passes through for a warm amber tone. This adds depth between the fully dark background and the bright cutouts. Keep your strokes even so the glow looks smooth.

  5. Cut the main openings last

    Now saw through the large sections of the lobster: the claws, body segments, legs, and fanned tail. Cut the smaller interior gaps first, then the bigger open areas, always leaving the marked bridges intact so the antennae and thin legs stay supported. Push gently and let the saw do the work to avoid snapping delicate strips. Remove each cut piece by pushing it inward to protect the edges.

  6. Light it and photograph

    Set a battery LED puck or string inside and lower the pumpkin over it, or slide it in through the bottom opening. Never use a candle near the thin cut strips and antennae. Test the glow in a dark room and adjust the light position so the whole lobster lights evenly. Photograph it on a step at dusk for that warm coastal porch feel.

Gather your supplies

Check things off as you get ready.

Work on a stable surface, keep your free hand out of the cutting path, and have an adult handle sharp tools.

Three levels of light

  • Leave intact

    The background around the lobster stays untouched dark orange skin.

  • Peel & shade

    The raised shell of the body and claws is skin-peeled for a soft amber glow.

  • Cut through

    The gaps between body segments, claws, legs, and tail fan are cut clean through for the brightest light.

Learn the carving basics

Before you start cutting

How do I keep the thin antennae and legs from breaking?

Leave small bridges of skin connecting each thin part to the solid body so nothing floats free. Cut the delicate strips before the large openings while the pumpkin is still firm. Work slowly with a fine saw and push cut pieces inward rather than prying them out.

Should I really drill the dots before the big cuts?

Yes, drilling first is much safer because the pumpkin wall is still solid and stable. Once you saw out the large claw and body openings, the surface flexes and a drill bit can crack thin sections. Get all your small circular details done while everything is intact.

This is a concept image, so how do I make it work on a real pumpkin?

The pictured design is an AI concept, but the same look is achievable on a real pumpkin by keeping the lobster as one connected silhouette. Keep bridges between segments wide enough to survive handling, and do not make the antennae paper thin. Thinning the front wall helps the light glow evenly through the finished shape.

Your take belongs here, too.

Changed a detail? Made it simpler? Share a photo of your version and tell the community what worked.

Share your pumpkin

More pumpkins like this

You've reached the end · 8 pumpkins
The Patch Report

Fresh pumpkins, in your inbox.

The best new carvings, ideas worth stealing, and how-tos for carving season. Short, seasonal, and gone by November.

A short email during carving season. Unsubscribe anytime. See our privacy policy.