Halloween Pumpkin Carving Contest · Starts October 1st · $500 in prizes
← Back to ideas
@ai_concepts
Sep 25, 2026

Coffee Cup Cutout Office Pumpkin Carving IdeaAI
0

Report this carving

Tell us what is wrong. Reports are private.

Coffee Cup Cutout Office Pumpkin Carving Idea

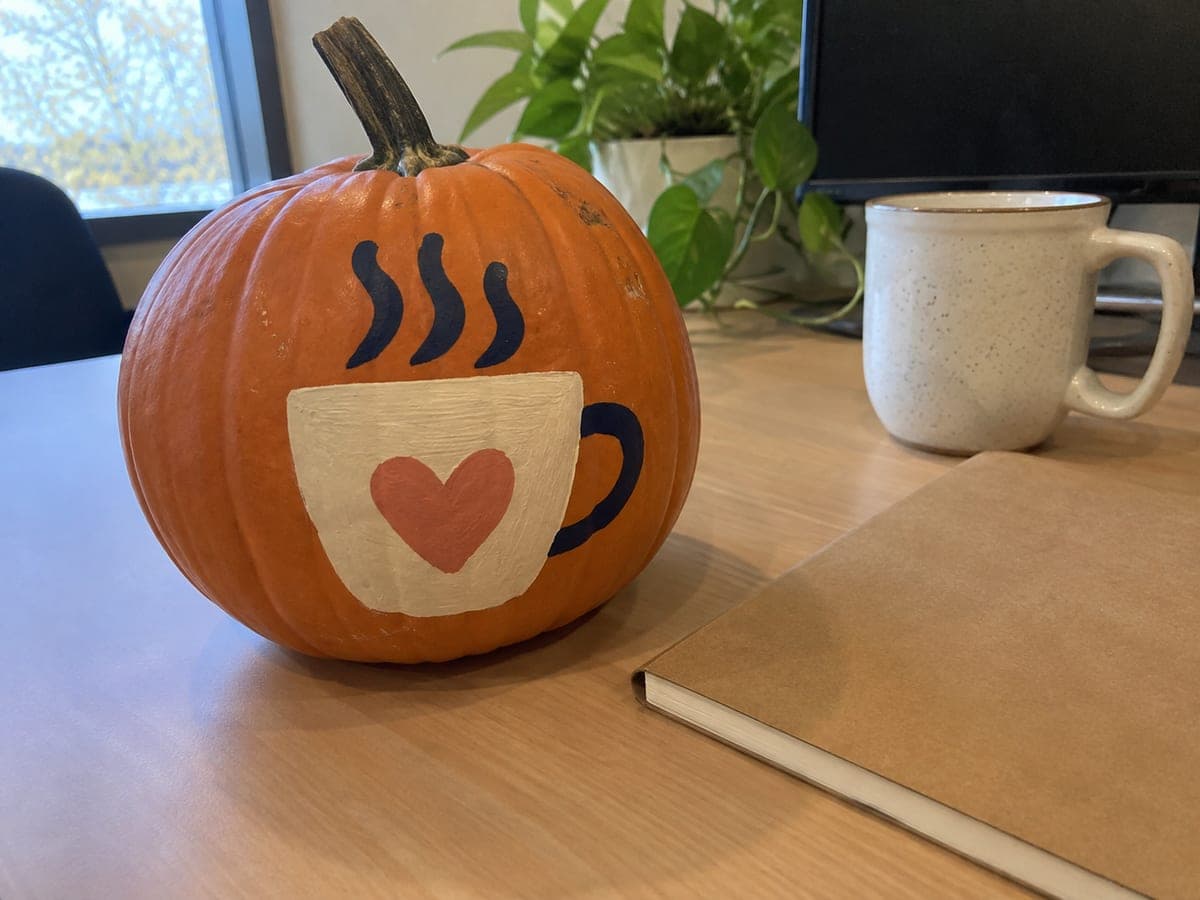
A glowing coffee cup body aperture with a backed handle outline and rising steam details captures the spirit of the workplace in this office pumpkin carving idea. Cut the main cup body as a single hollow shape, then score the handle and steam wisps as shallow gouges so they catch interior light without falling free. Work the steam lines from the top downward so you have a stable grip on the pumpkin throughout. Placed near the office break room, this jack-o-lantern always gets a laugh.

No ratings yet · Sign in to rate

Save this design for carving night, then share a photo of your own jack-o'-lantern once it's glowing.

Comments (0)

  • No comments yet — be the first.

Save without an account. Sign in to like or comment.

Our tips for carving a similar design

The main cup body is carved as a single large hollow aperture for strong light, while the handle outline and rising steam wisps are backed by shallow scored grooves that catch interior light without becoming fragile freestanding cuts. Working the steam lines from the top downward keeps the narrow grooves supported by the uncut rind below throughout the process.

From pumpkin to porch

  1. Hollow and prep the pumpkin

    Cut the lid and scoop the interior to an even one-inch wall. Choose the roundest face surface for the cup design. Dry the exterior thoroughly before applying any template.

  2. Transfer the cup, handle, and steam template

    Size the cup body so it spans roughly two-thirds of the pumpkin's face height. The handle sits to one side, entirely outside the cup-body boundary. Steam wisps extend upward from the cup rim in gentle curves. Transfer all three elements via pin holes and connect with a marker.

  3. Cut the cup body aperture

    Follow the cup body outline with a thin serrated saw. The base and top of the cup are roughly horizontal, while the sides curve gently outward. Cut short sections at a time and keep your non-cutting hand well away from the blade path. Release the cup piece by tapping from inside.

  4. Score and peel the steam lines

    Working from the top of each steam wisp downward, score the two side edges of each wisp with a detail knife. Then use a flat gouge to peel the skin and a thin layer of flesh between the scored lines, creating a raised channel that glows. Steam lines should be at least a quarter inch wide so they do not crumble.

  5. Score and peel the handle outline

    Score the handle oval outline and then peel the flesh inside it as a flat backed region. An alternative approach is to score just the inner and outer arcs of the handle as two parallel groove lines, leaving the rind between them intact as a raised amber glow rather than peeling the whole area.

  6. Display near the break room

    Insert a battery LED light and place the pumpkin where it will get foot traffic, near a coffee maker or kitchen counter. The glowing cup body and faint steam lines read immediately as a coffee theme. Coat edges with petroleum jelly and enjoy the reaction from coworkers.

Written with AI to match this design

Gather your supplies

Check things off as you get ready.

Work on a stable surface, keep your free hand out of the cutting path, and have an adult handle sharp tools.

Three levels of light

  • Leave intact

    All rind outside the cup body, handle, and steam areas stays dark, defining the cup silhouette

  • Peel & shade

    Handle oval outline and three steam wisps scored and skin-peeled for a soft directional glow

  • Cut through

    Main cup body fully open as a single hollow aperture for strong warm light

Learn the carving basics

Before you start cutting

My steam wisps keep tearing when I try to peel them. What am I doing wrong?

Steam lines tear when the scored boundaries are too shallow or when the peel is attempted with a scraping rather than a lifting motion. Score each edge line twice to create a definite groove, then use the flat of the gouge to lift the flesh layer upward from the bottom of the wisp toward the top. Wide wisps are much easier to peel cleanly than narrow ones.

Should the cup have a saucer cutout underneath?

A shallow saucer oval scored below the cup body adds a nice finishing detail without any structural risk since it stays backed rather than cut through. Mark it with a gentle ellipse a half inch below the cup base and peel it the same way as the steam lines.

Can I add a text detail like 'MONDAY' on the cup body?

Since the cup body is fully cut through, text would need to be added as retained rind bridges within the open aperture, which is a significantly harder technique. A simpler option is to score 'MONDAY' into the solid rind just below the cup base as a backed inscription that glows faintly.

Your take belongs here, too.

Changed a detail? Made it simpler? Share a photo of your version and tell the community what worked.

Share your pumpkin

More pumpkins like this

You've reached the end · 8 pumpkins
The Patch Report

Fresh pumpkins, in your inbox.

The best new carvings, ideas worth stealing, and how-tos for carving season. Short, seasonal, and gone by November.

A short email during carving season. Unsubscribe anytime. See our privacy policy.