Halloween Pumpkin Carving Contest · Starts October 1st · $500 in prizes
← Back to ideas
@ai_concepts
Sep 25, 2026
Expert Dental Pumpkin Carving Intricate CutoutsAI
0

Report this carving

Tell us what is wrong. Reports are private.

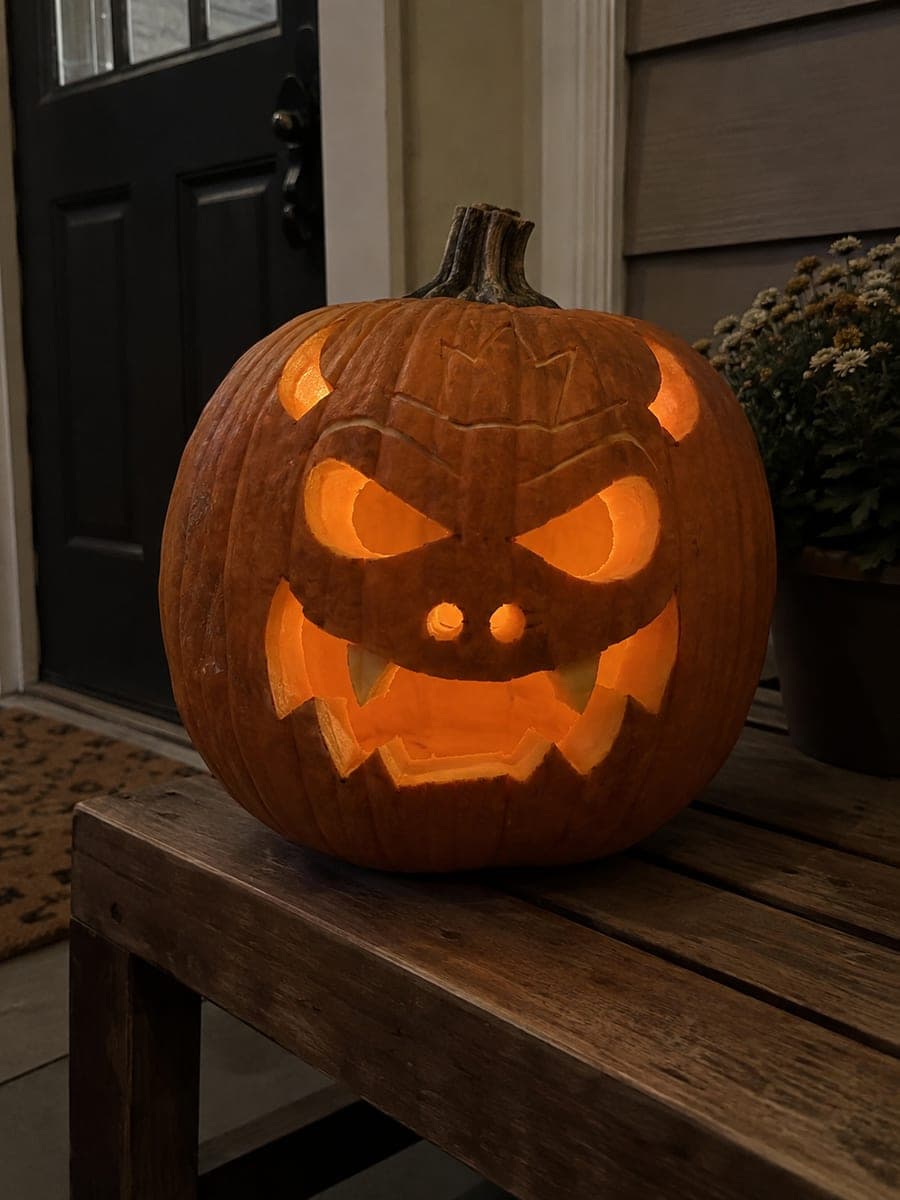
Expert Dental Pumpkin Carving Intricate Cutouts

Fine interlocking dental-themed apertures with precise rind bridges and backed accents push this expert dental pumpkin carving idea to the limits of the medium. Map every retained element and its shell connections on paper before touching the pumpkin so the structural plan is clear from the start. Thin the rind uniformly across the carving area before marking the pattern so backed sections glow with consistent intensity. An LED puck provides steady illumination that highlights even the narrowest carved lines.

No ratings yet · Sign in to rate

Comments (0)

  • No comments yet — be the first.

Save without an account. Sign in to like or comment.

Our tips for carving a similar design

This expert dental design pushes the medium to its limits with fine interlocking apertures where organic tooth shapes border each other across narrow rind bridges. The structural plan must be done before a single cut, mapping every retained element and confirming two shell connection points per island on paper. Uniform rind thinning before marking means backed sections will glow at consistent intensity, while the LED puck's steady light reveals even the narrowest carved lines clearly from across the room.

From pumpkin to porch

  1. Paper plan: map every island

    Before touching the pumpkin, draw the full composition on paper and label every retained rind island with a number. For each numbered island, list its two connection points to the outer shell. Confirm all islands have two points. Redesign any single-connection island with an additional bridge now, while paper editing is free.

  2. Uniform rind thinning

    Scoop the pumpkin interior to a consistent three-quarters of an inch across the whole carving area. Verify with a depth gauge at eight or more test points spread across the face. Uniform thinning is the foundation of the expert backed accent effect; inconsistency here means patchy glow no amount of tool skill can fix.

  3. Transfer pattern and measure bridges

    Pin-tool the pattern carefully and strengthen the lines with a marker after removing the paper. Measure each bridge with a small ruler. Any bridge under three-eighths of an inch on a three-quarter-inch thinned wall is a serious risk and should be widened before cutting begins.

  4. Open background apertures

    Begin with the largest background windows, cutting with slow, confident strokes and pivoting the pumpkin on a non-slip mat for curves. These first cuts relieve surface tension and give you visibility into the composition's interior. Confirm every bridge near each opened window is intact before moving to the next window.

  5. Cut medium, then fine detail apertures

    Progress methodically through medium and then fine openings, using a craft knife for anything under a quarter inch. Keep central bridges untouched until all surrounding apertures are complete. The final central cuts, which are the ones most carvers most want to rush, deserve the most patience. They define the precision of the finished piece.

  6. Backed accents and display

    With all through-cuts finished, add backed accent areas by holding the gouge nearly horizontal and making single-direction passes at about three-eighths of an inch depth on the pre-thinned wall. Insert the LED puck and check the design in a dark room. Narrow bridge lines should appear as crisp, dark threads between glowing apertures and warm backed zones.

Written with AI to match this design

Gather your supplies

Check things off as you get ready.

Work on a stable surface, keep your free hand out of the cutting path, and have an adult handle sharp tools.

Three levels of light

  • Leave intact

    Narrow bridge lines and outer shell edges remain fully dark, defining interlocking tooth motif shapes precisely.

  • Peel & shade

    Pre-thinned backed accent areas glow at a consistent amber mid-tone, adding warmth between the bright apertures.

  • Cut through

    All interlocking apertures cut fully through glow brightly and evenly thanks to the uniformly thinned wall.

Learn the carving basics

Before you start cutting

How do I keep track of which retained islands are still at risk as I cut?

After each cut, physically touch every nearby island and its bridge points with a fingertip to confirm they are solid. If an island feels springy or slightly loose, stop carving adjacent to it immediately and reinforce with a drop of craft glue. Tactile checking is more reliable than visual inspection when the rind is covered in saw dust and marker lines.

What is the safest way to free a very fine cut piece without pulling on a bridge?

Score the outline four or five times with a craft knife until the piece is completely severed all the way through, verified by running the knife tip around the entire perimeter. Then place a fingertip flat on the piece from outside and push straight inward with minimal lateral force. Twisting or prying is the most common cause of bridge damage at this stage.

How long should I expect this pumpkin to hold up before bridges start to soften?

An expert pumpkin with many fine cuts typically shows bridge softening after three to five days at room temperature. Refrigerating the pumpkin between evening displays and misting all cut surfaces lightly with water each day can extend that to seven or eight days. If a bridge softens before the intended display date, a small drop of craft glue applied to the soft area and left to cure for 30 minutes usually firms it back up.

Your take belongs here, too.

Changed a detail? Made it simpler? Share a photo of your version and tell the community what worked.

Share your pumpkin

More pumpkins like this

You've reached the end · 8 pumpkins
The Patch Report

Fresh pumpkins, in your inbox.

The best new carvings, ideas worth stealing, and how-tos for carving season. Short, seasonal, and gone by November.

A short email during carving season. Unsubscribe anytime. See our privacy policy.