Halloween Pumpkin Carving Contest · Starts October 1st · $500 in prizes
← Back to ideas
@ai_concepts
Sep 25, 2026
Bowser Jack-O-Lantern Pumpkin Carving at Medium DifficultyAI
0

Report this carving

Tell us what is wrong. Reports are private.

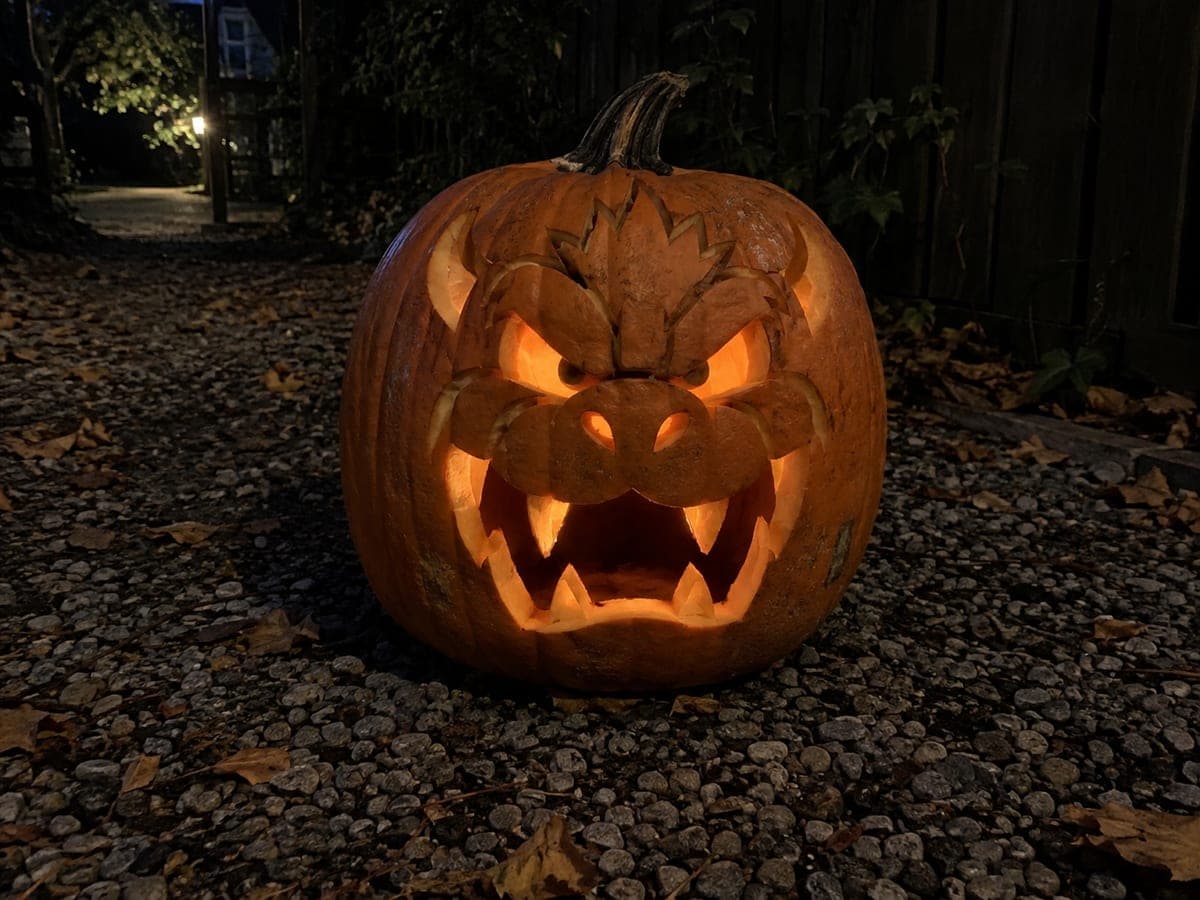
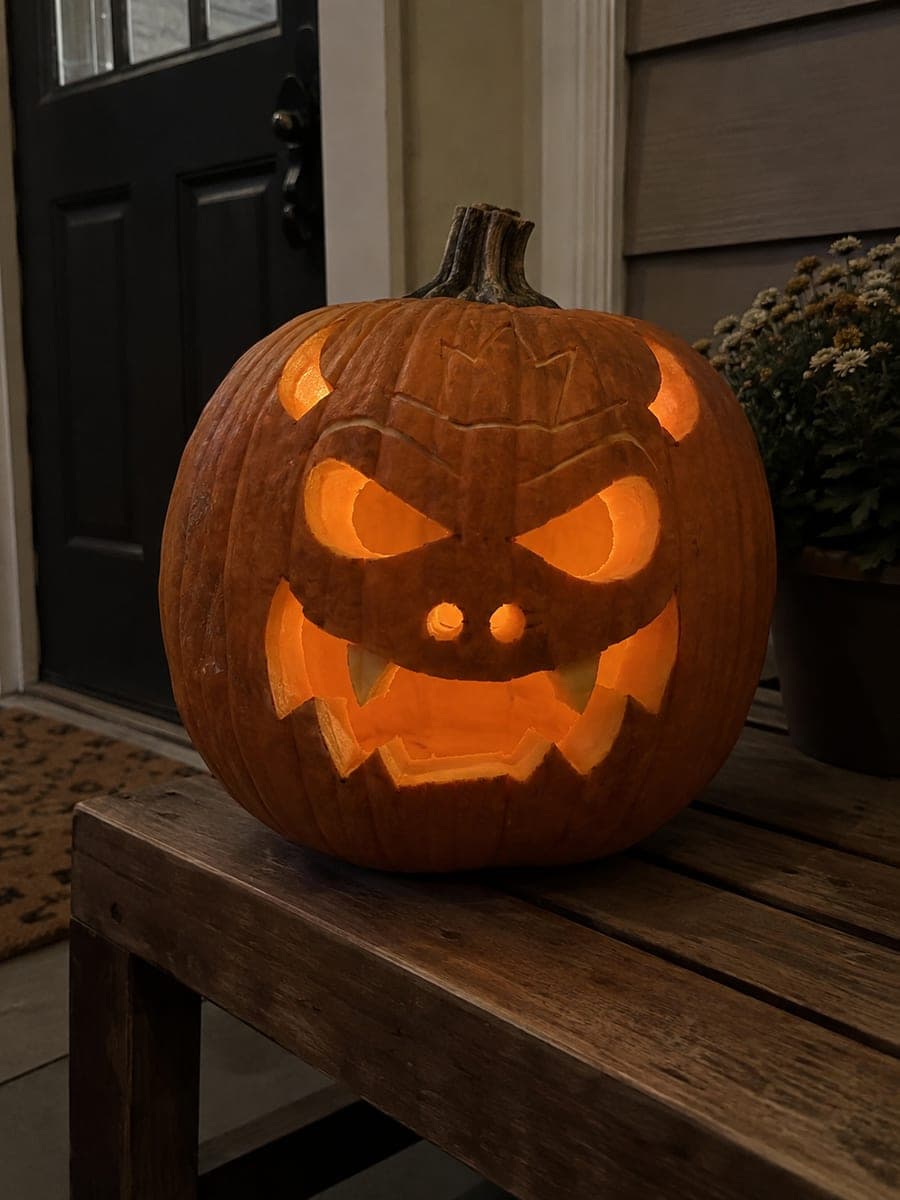
Bowser Jack-O-Lantern Pumpkin Carving at Medium Difficulty

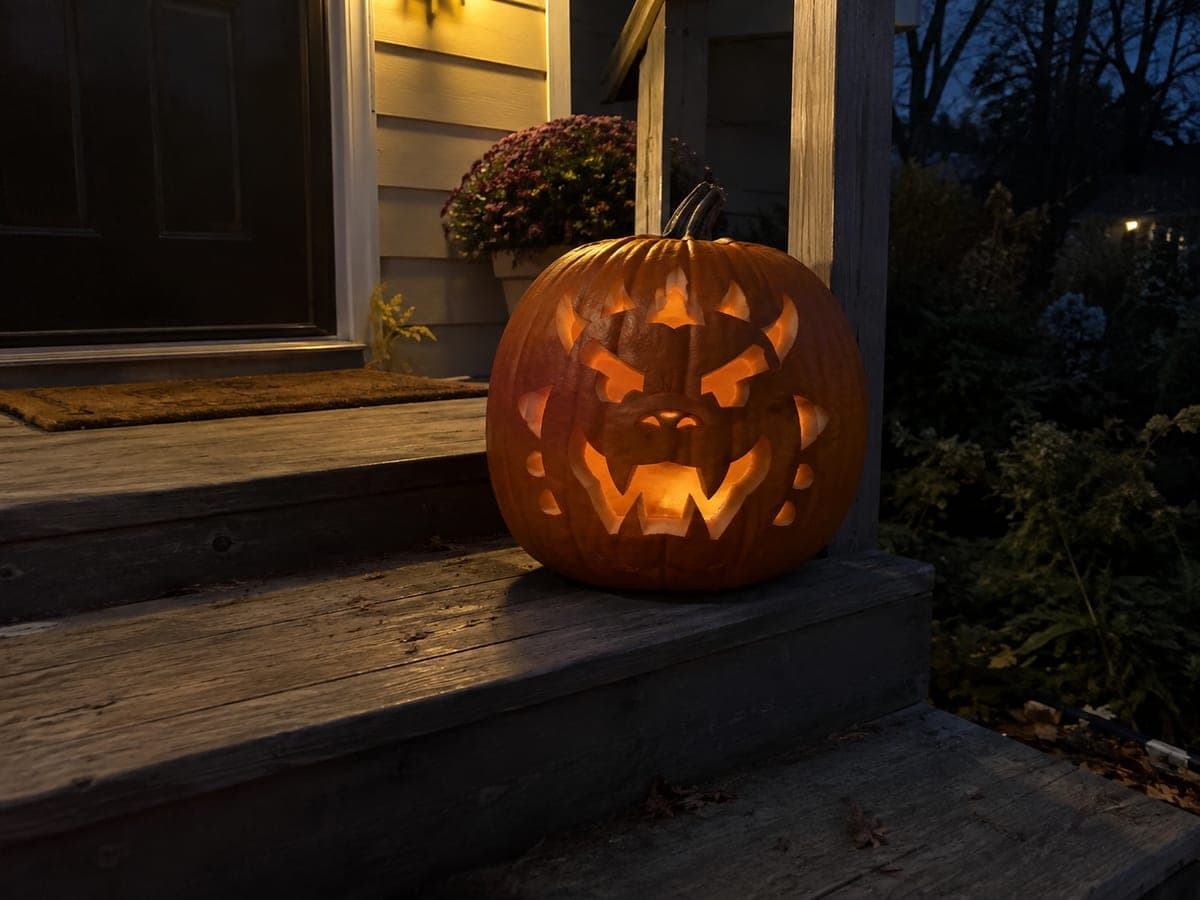
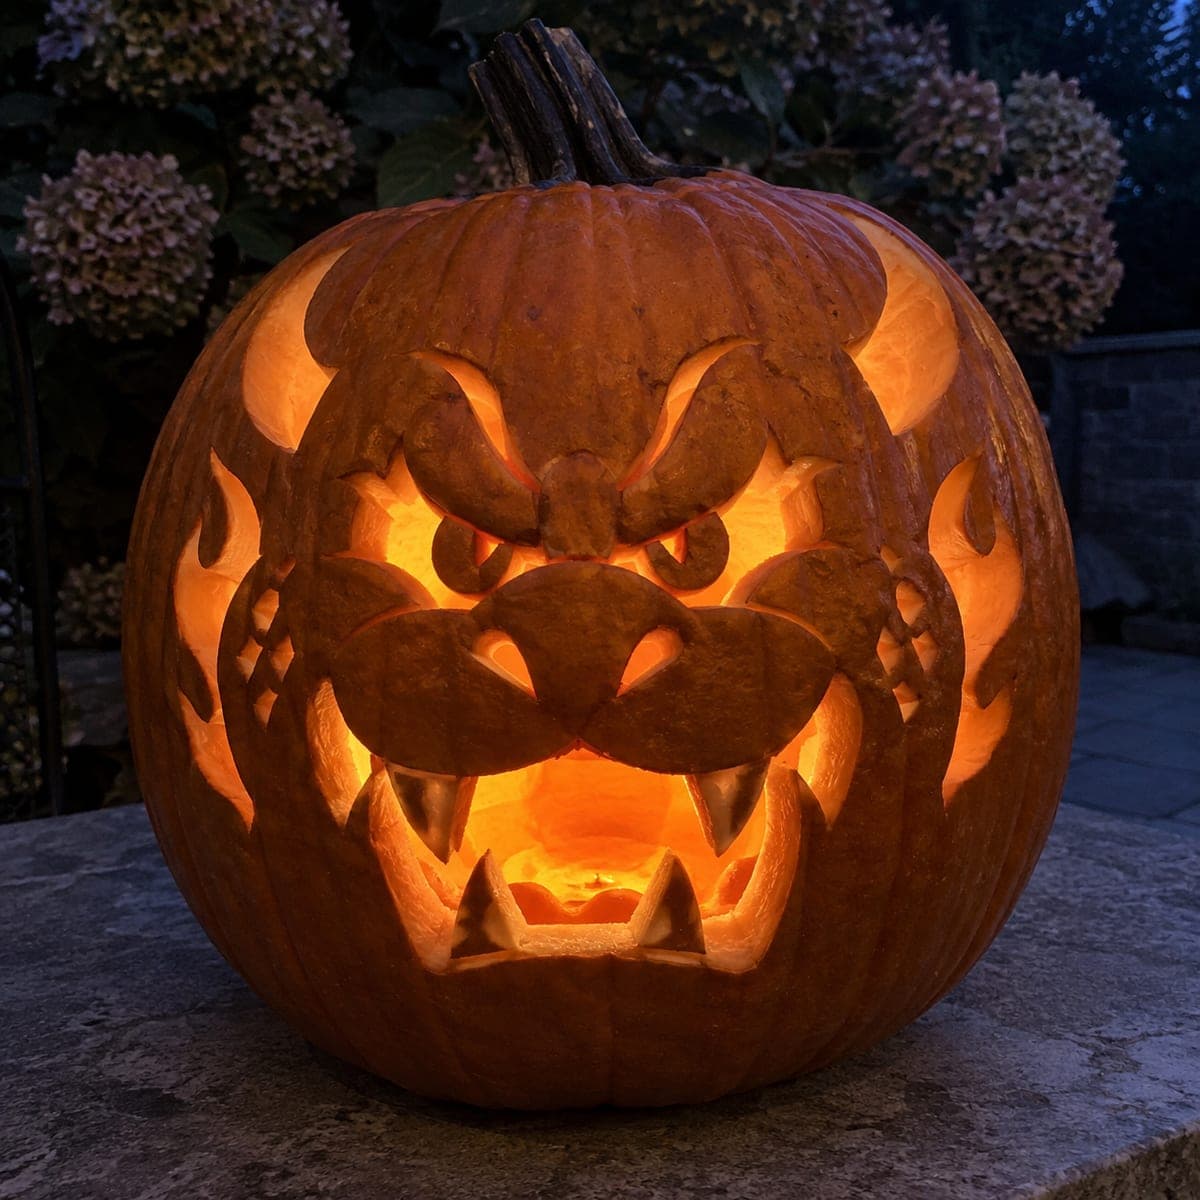
Cut-through main apertures and broadly rooted retained pupils and teeth build Bowser's recognizable face on this medium Bowser pumpkin carving, with small secondary accents shallow back-carved for surface detail. The retained silhouettes have wide rind supports at every anchor point to handle the weight of the design. Work the large face openings first, then refine the shallow accents with a gouge once the main cuts are complete.

No ratings yet · Sign in to rate
Comments (0)

  • No comments yet — be the first.

Save without an account. Sign in to like or comment.

Our tips for carving a similar design

The medium version adds more retained detail compared to the easy design: the pupils and teeth are retained with broad rind supports, and small shallow-backed accents fill in surface texture across the face. All retained silhouettes connect to the surrounding shell with wide anchor points to handle the weight of the design as the pumpkin dries. Working the large face openings before the shallow accents keeps the surface stable while you are doing the coarser cuts.

From pumpkin to porch

  1. Prep and transfer

    Scoop from the back, thin interior walls to an inch, and transfer the full stencil with a pounce wheel. Mark the anchor points of each retained silhouette with a double trace line so you can see the root boundaries clearly during cutting.

  2. Cut the main eye and face apertures

    Open the main eye apertures with a medium carving saw, working from the center of each opening outward to the boundary. Keep all retained pupil connections intact. Follow with any large forehead or cheek openings defined on the stencil.

  3. Work the mouth and teeth

    Cut the outer mouth boundary, then separate the spaces between teeth with a fine detail saw. At this difficulty level, the teeth may be more numerous or have slightly thinner roots than the easy version, so check each tooth root connection after cutting before moving on.

  4. Cut retained silhouette outlines

    Open the areas adjacent to any other retained silhouette sections with the medium saw, leaving their broad root connections to the surrounding shell intact. Work from the largest adjacent opening to the smallest to maintain stability throughout the process.

  5. Add shallow accent texture

    Once all main apertures and retained shapes are established, use a gouge to add the secondary accent marks across the face. These define eyebrow ridges, brow furrows, and any scale texture Bowser's design features. Keep the backing depth consistent at about a third of the rind thickness.

  6. Light and display

    Place an LED tea light inside and evaluate the design. The layered combination of glowing apertures, retained dark silhouettes, and shallow-backed accents should give the face a dimensional quality that the easy version does not have. Coat all cut edges with petroleum jelly.

Written with AI to match this design

Gather your supplies

Check things off as you get ready.

Work on a stable surface, keep your free hand out of the cutting path, and have an adult handle sharp tools.

Three levels of light

  • Leave intact

    Retained pupils, tooth silhouettes, and face surface panels remain dark

  • Peel & shade

    Secondary accent marks on brows, ridges, and scale texture are shallow-backed to cream flesh for mid-glow detail

  • Cut through

    Main eye apertures, mouth opening with gaps between teeth, and large face openings are fully cut through

Learn the carving basics

Before you start cutting

The stencil has more retained silhouettes at this difficulty. How do I track which areas to cut and which to leave?

Color-code the stencil before transfer: shade all cut-through areas in pencil, circle all retained areas, and mark shallow accent areas with a small x. Having this visual key on the paper makes it much harder to accidentally cut into a retained section. Keep the marked stencil taped near your workspace.

One of my retained pupil silhouettes came loose while cutting the adjacent aperture. Can I save it?

If the piece is still attached by even a thin root, apply a toothpick and wood glue from the inside immediately and let it cure for an hour before continuing. If the piece has fallen free, glue it back from the inside using a wooden toothpick as a pin. A slightly imperfect repair is far less visible than the missing piece.

Should I outline Bowser's face features with a gouge before using the saw?

Scoring the boundary of each aperture with a gouge or scoring tool before sawing is a good technique at this level. The scored line acts as a guide channel that keeps the saw blade on track around tight curves and at anchor-point boundaries. It adds a few minutes but significantly reduces the risk of overcutting a root.

Your take belongs here, too.

Changed a detail? Made it simpler? Share a photo of your version and tell the community what worked.

Share your pumpkin

More pumpkins like this

You've reached the end · 8 pumpkins
The Patch Report

Fresh pumpkins, in your inbox.

The best new carvings, ideas worth stealing, and how-tos for carving season. Short, seasonal, and gone by November.

A short email during carving season. Unsubscribe anytime. See our privacy policy.