Halloween Pumpkin Carving Contest · Starts October 1st · $500 in prizes
← Back to ideas
@ai_concepts
Sep 25, 2026
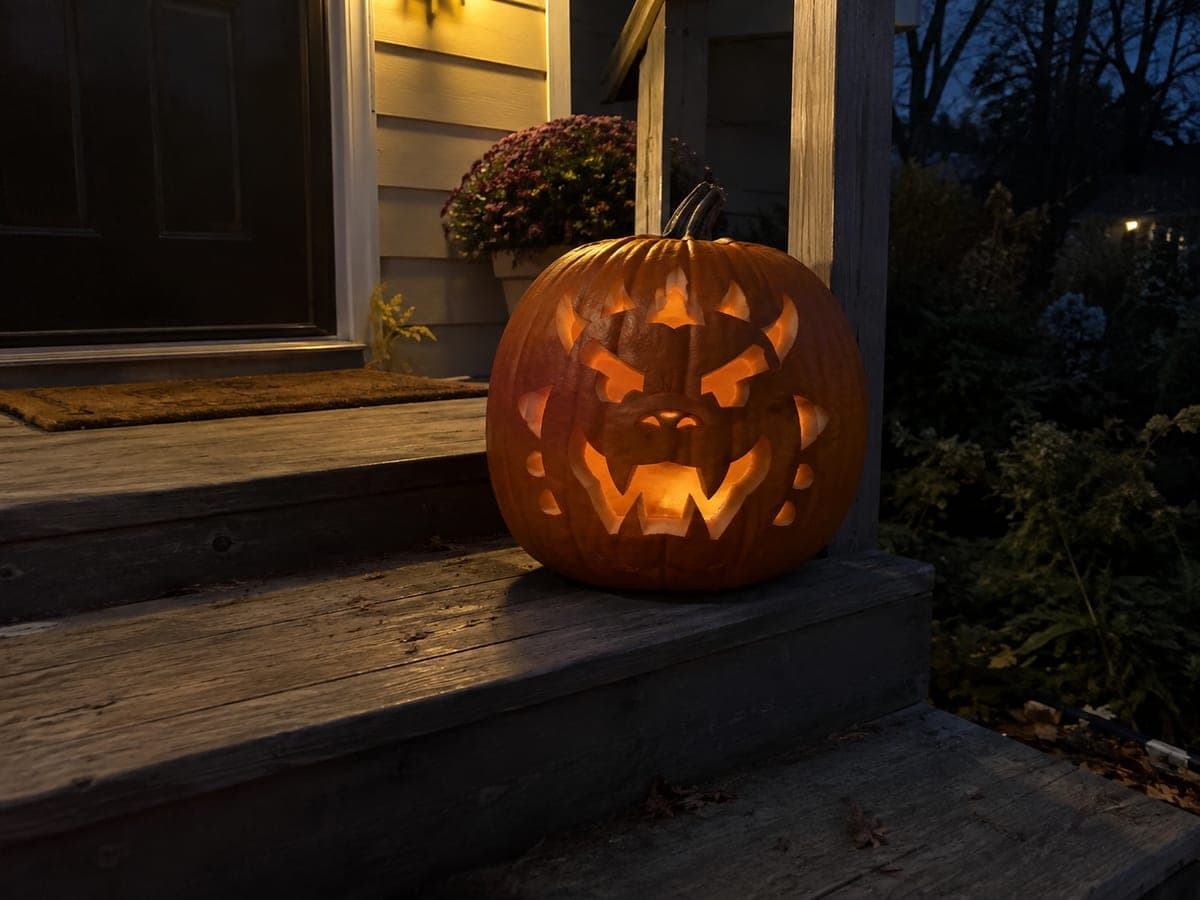
Expert Bowser Pumpkin Carving with Full Face DetailAI
0

Report this carving

Tell us what is wrong. Reports are private.

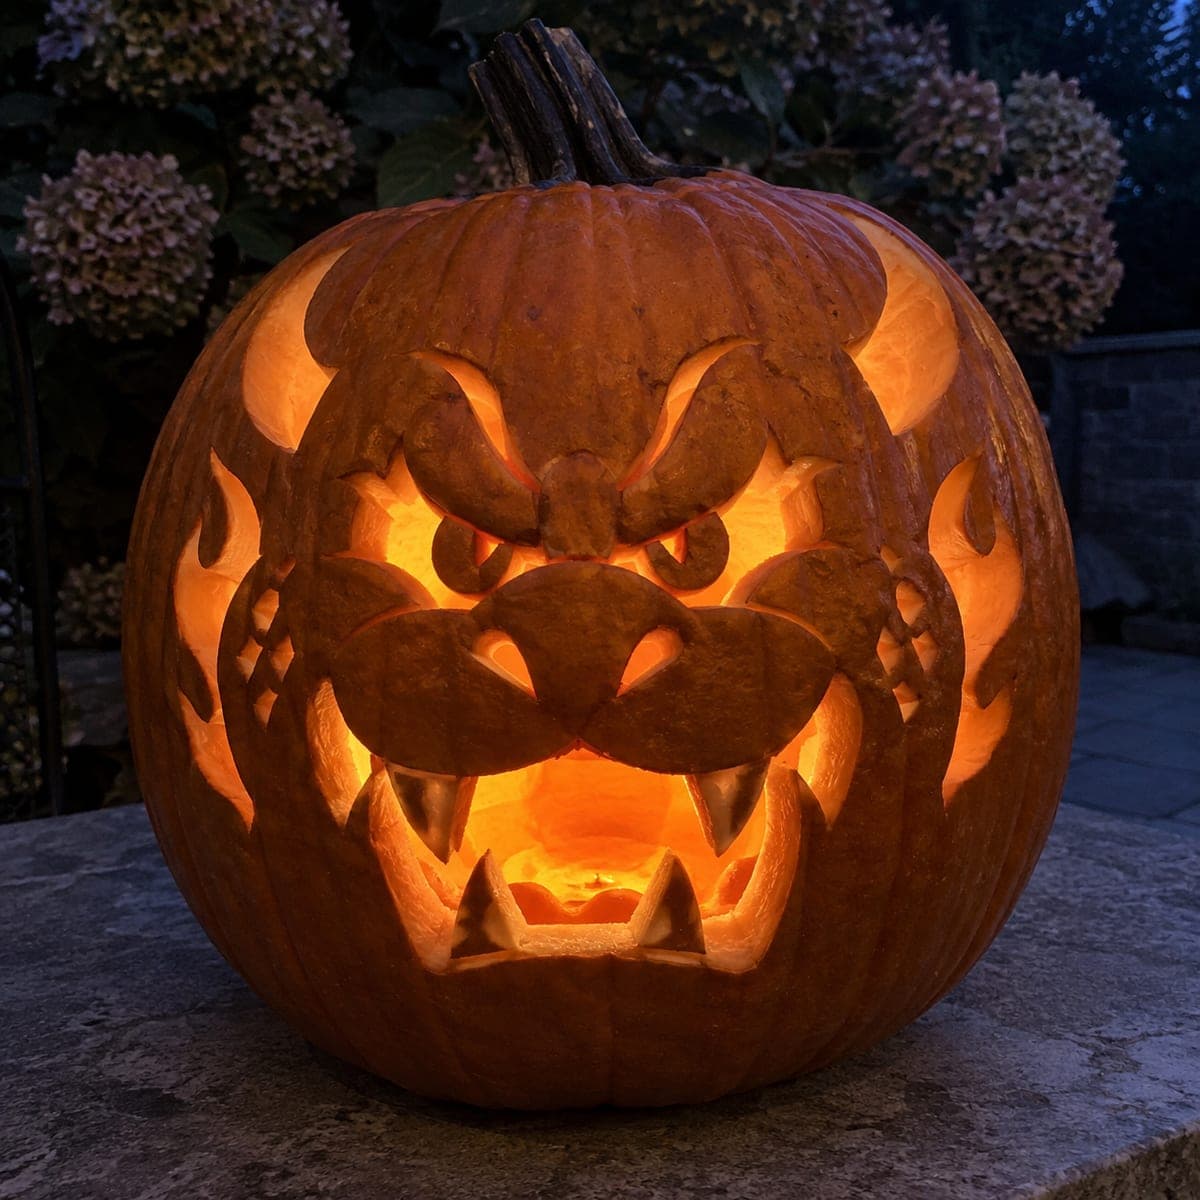
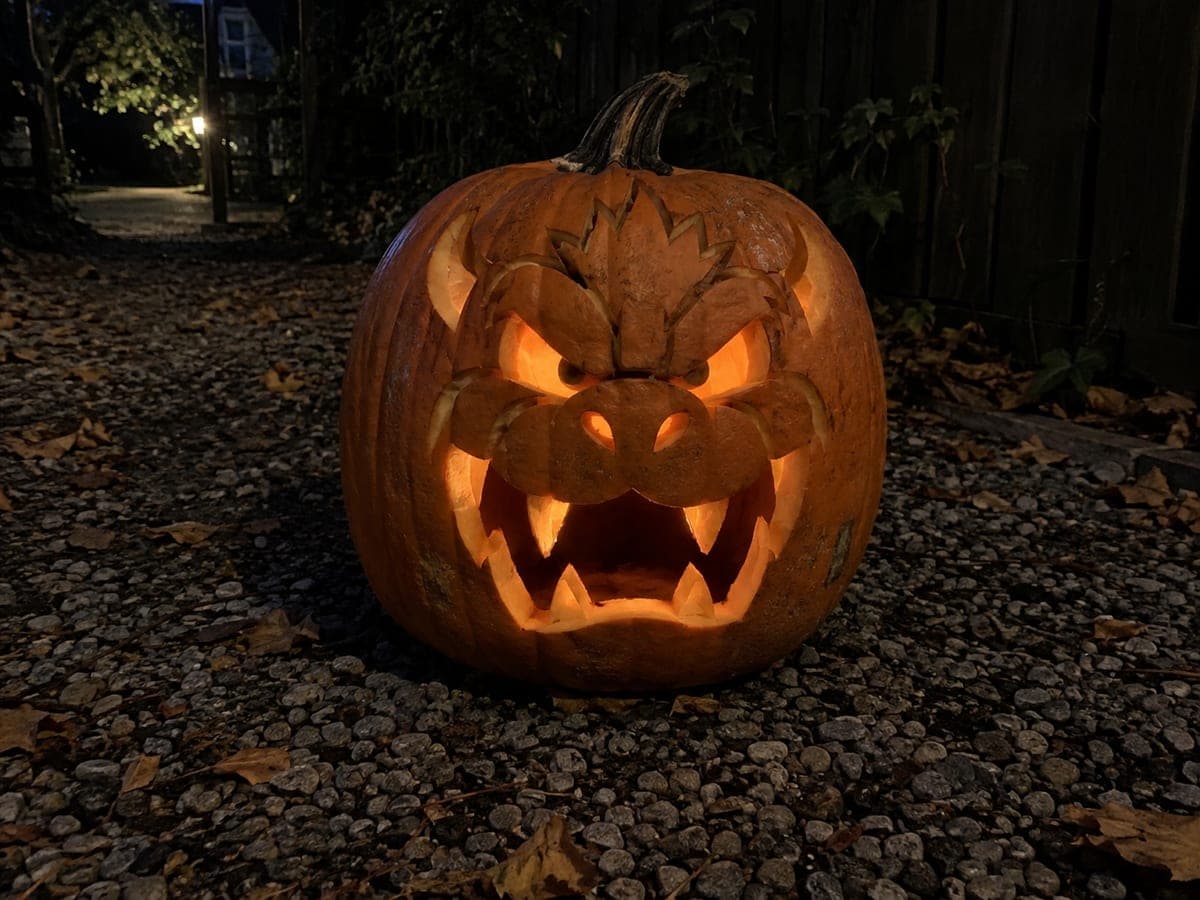
Expert Bowser Pumpkin Carving with Full Face Detail

This expert Bowser pumpkin carving idea features cut-through main apertures with retained pupils, teeth, and silhouette details all broadly supported by wide rind bridges, giving the design the intricate look of a detailed portrait. Shallow back-carved secondary accents fill the remaining surface with texture without weakening the rind. Plan the bridge locations before starting so every retained piece has at least two contact points with the surrounding shell.

No ratings yet · Sign in to rate
Comments (0)

  • No comments yet — be the first.

Save without an account. Sign in to like or comment.

Our tips for carving a similar design

Every retained piece in this design, pupils, teeth, body silhouettes, and shell details, connects to the surrounding shell via at least two broad rind bridges, giving the intricate layout structural redundancy. The shallow-backed secondary accents fill every remaining surface with texture without weakening the overall rind. Planning the bridge locations before making the first cut is not optional at this difficulty level; it is the single action that determines whether the finished carving holds together for days or falls apart within hours.

From pumpkin to porch

  1. Plan and map every bridge

    Before transferring the stencil, identify every retained piece on the design and mark at least two bridge connections for each on the stencil printout. Use a pen to annotate the paper stencil clearly. Transfer the full design with a pounce wheel, then redraw the bridge boundaries on the pumpkin surface with a fine felt-tip marker so they are clearly visible during cutting.

  2. Work the largest apertures first

    Cut the largest background and face apertures first with a medium carving saw, removing the most rind mass in a single sequence. This establishes the overall composition and reveals how much rind remains for the subsequent detail cuts. Confirm all bridge connections are intact after each large cut.

  3. Refine retained pupils and silhouettes

    Use a fine detail saw to cut adjacent apertures that define the edges of retained pupils and silhouette sections. Work from the outside of each retained piece toward its bridge connections, never past them. Keep every pass slow and deliberate near root zones.

  4. Work the grin teeth

    Cut the tooth-gap openings in the grin with a fine detail saw, confirming every tooth has two connection points: one to the upper lip and one to the lower. At expert level the teeth may be narrower, so keep saw passes perpendicular to minimize the sideways pressure that snaps narrow retained pieces.

  5. Add shallow accent texture

    Use a V-gouge and round gouge to work all secondary accent marks across the retained silhouette surfaces. This step requires the most patience since there may be dozens of marks. Work in sections, completing all texture in one facial zone before moving to the next so the depth stays consistent.

  6. Final light check and display

    Place an LED tea light inside and evaluate from across a darkened room. The fully detailed portrait should glow with multiple layers of light, dark, and mid-tone texture. Apply petroleum jelly to all cut and grooved surfaces, store cold during the day, and display for no more than four hours per evening to maximize the carving's lifespan.

Written with AI to match this design

Gather your supplies

Check things off as you get ready.

Work on a stable surface, keep your free hand out of the cutting path, and have an adult handle sharp tools.

Three levels of light

  • Leave intact

    All retained pupils, teeth, and silhouette sections remain dark, reading as the portrait detail

  • Peel & shade

    Secondary accent marks across all retained surfaces are shallow-backed to cream flesh for full-face mid-glow texture

  • Cut through

    Main apertures, tooth-gap openings, and all other through-cut areas produce bright light from the interior

Learn the carving basics

Before you start cutting

How do I decide how wide to make each bridge connection at expert level?

A useful rule is to match the bridge width to the weight and leverage of the retained piece it anchors. A heavy shoulder silhouette needs a wide connection. A small pupil needs only a half-inch root. When in doubt, make the bridge wider than the stencil suggests and refine it after the adjacent cuts confirm the piece is stable.

My shallow accent work is inconsistent in depth across the face. Does that matter?

Some variation in depth actually reads as natural surface texture when lit, since the differing flesh depth creates different glow intensities. The problem is when an accent accidentally cuts through the rind. Keep your gouge depth regular by using the same wrist angle and pressure for each mark and testing on a scrap piece first.

Is there any way to rescue a bridge that snapped mid-carve at expert level?

If the piece is still in position, apply a toothpick plus wood glue from the inside immediately. If it has fallen out, glue it back with toothpick pins and let it cure for an hour before resuming. Expert carvings with repaired bridges still display beautifully since the interior light hides the repair completely.

Your take belongs here, too.

Changed a detail? Made it simpler? Share a photo of your version and tell the community what worked.

Share your pumpkin

More pumpkins like this

You've reached the end · 8 pumpkins
The Patch Report

Fresh pumpkins, in your inbox.

The best new carvings, ideas worth stealing, and how-tos for carving season. Short, seasonal, and gone by November.

A short email during carving season. Unsubscribe anytime. See our privacy policy.