Halloween Pumpkin Carving Contest · Starts October 1st · $500 in prizes
← Back to ideas
@ai_concepts
Sep 25, 2026
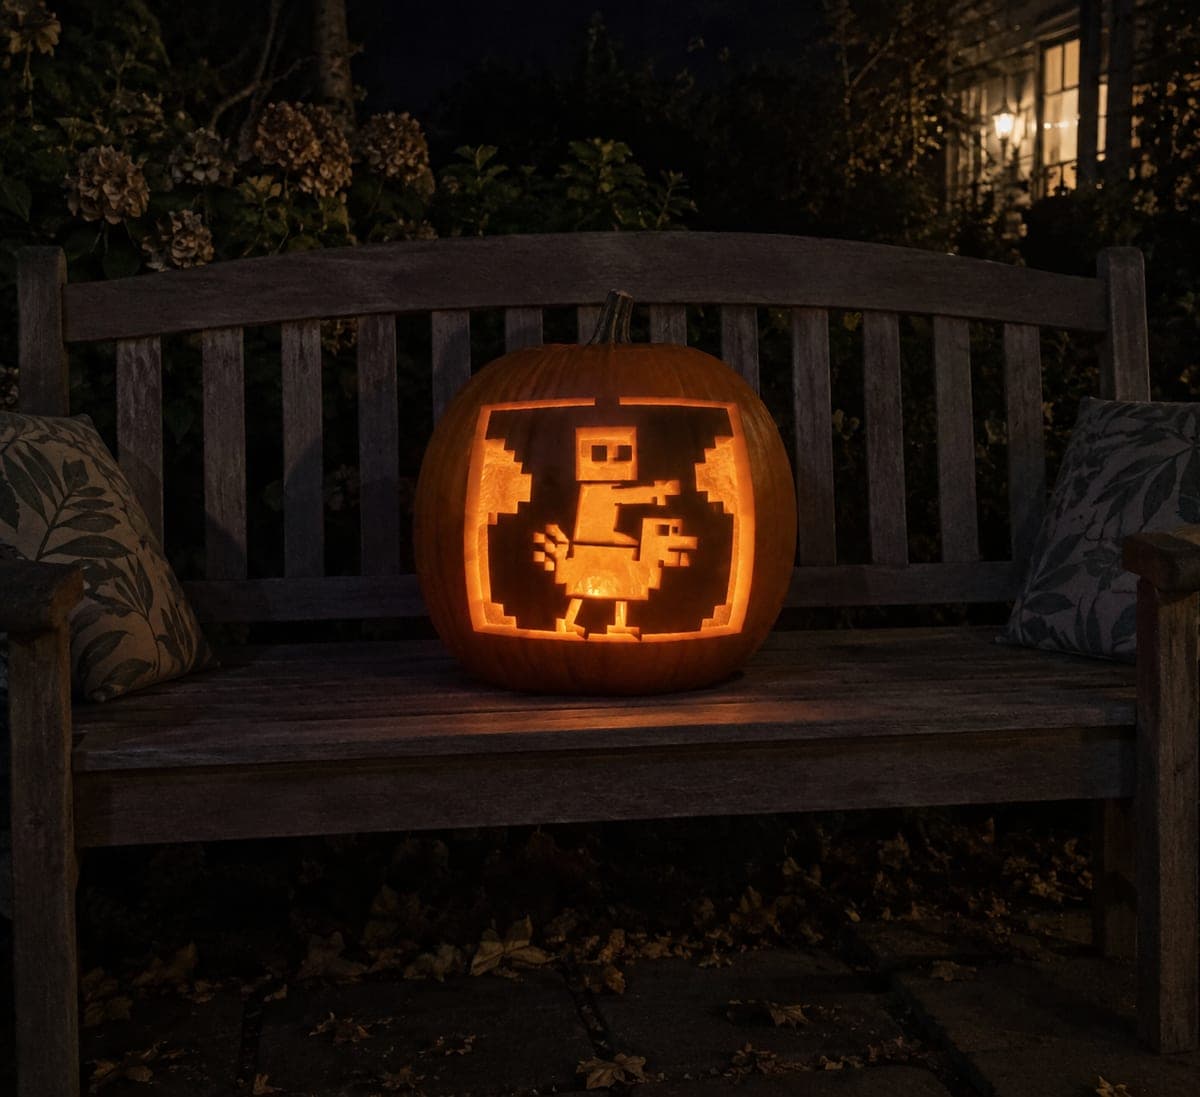
Chicken Jockey Silhouette Pumpkin with Shallow DetailAI
0

Report this carving

Tell us what is wrong. Reports are private.

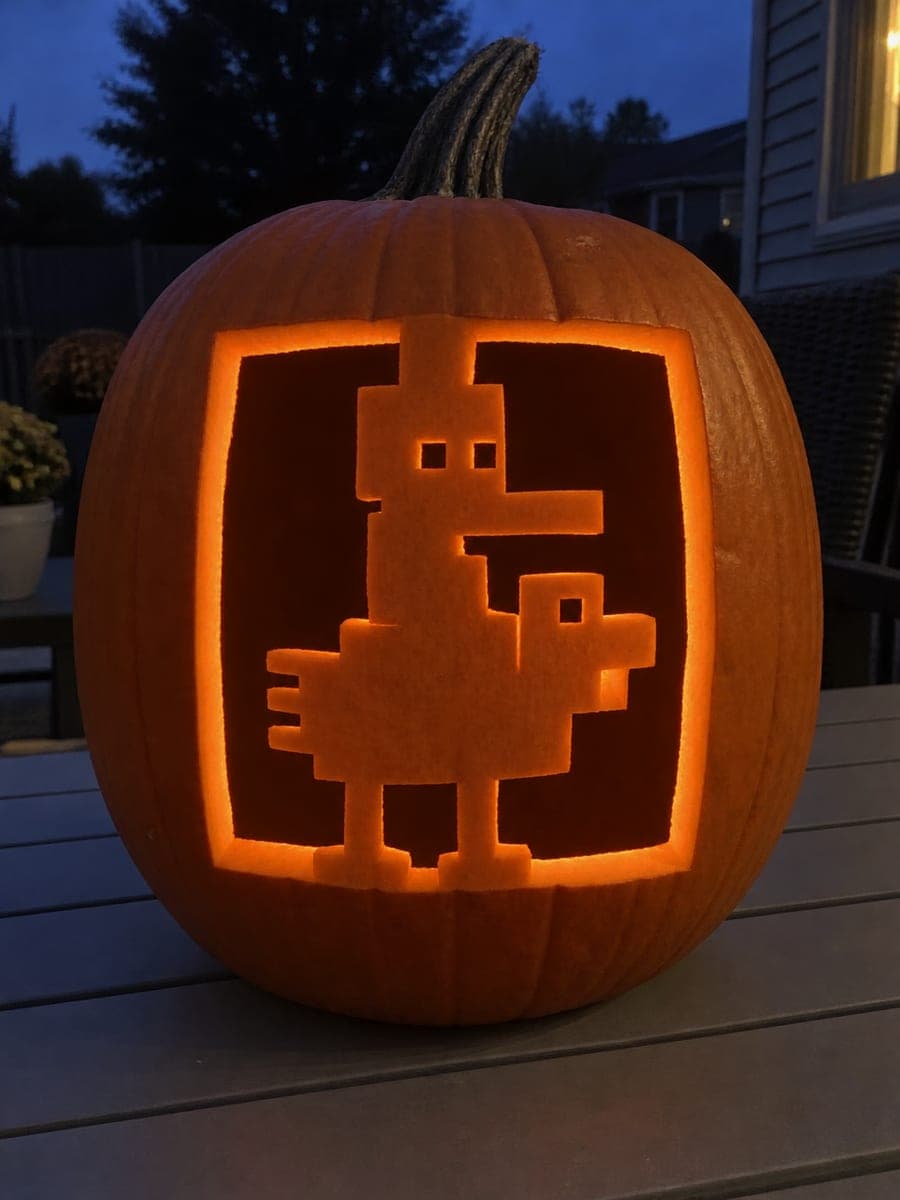
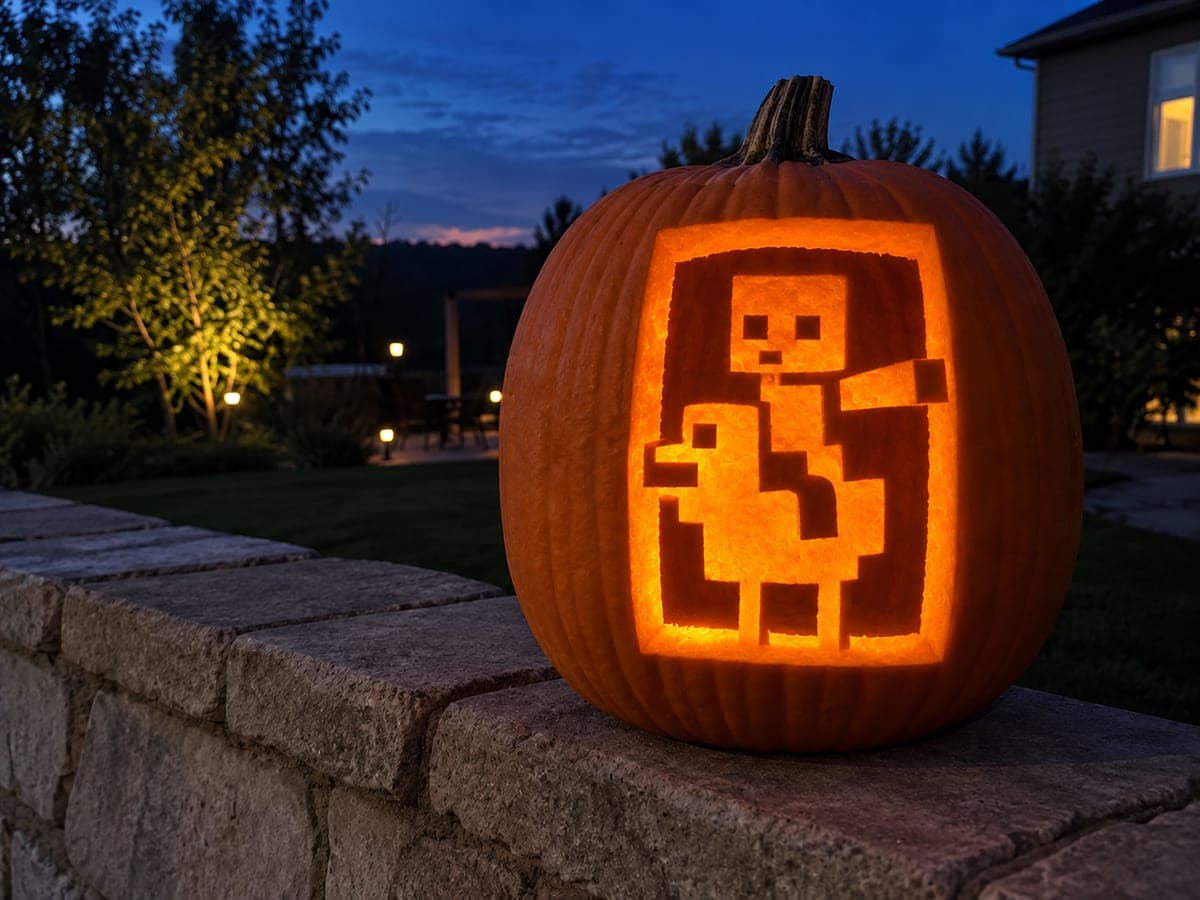
Chicken Jockey Silhouette Pumpkin with Shallow Detail

This intermediate chicken jockey pumpkin carving idea uses a flat rider-and-chicken silhouette retained on an open background, with the legs and a rider arm rooted to the frame for stability. Shallow-backed scoring adds face and feather details without compromising the structural connections. Cut the open background sections first, then carefully score the secondary details. Backlighting shows off the contrast between the solid silhouette and the glowing open areas.

No ratings yet · Sign in to rate
Comments (0)

  • No comments yet — be the first.

Save without an account. Sign in to like or comment.

Our tips for carving a similar design

Unlike the easy version where the silhouette is the opening, here the rider-and-chicken shape is retained on an intact orange rind while the surrounding background is cut away. The legs and a rider arm root to the frame for stability, and shallow scoring adds face and feather detail without cutting all the way through. The contrast between the solid silhouette and the glowing open surround is the visual payoff.

From pumpkin to porch

  1. Prepare and transfer

    Gut the pumpkin from the back and thin the front wall to about three-quarters of an inch. Transfer the full design including the outer frame border, the retained silhouette edges, and the score-only areas in different marker colors so you do not accidentally cut where you should only be scoring.

  2. Cut the outer frame first

    Define the border of the carved area by cutting the outer frame edges. This tells you exactly how much rind will be removed as background and gives you a clean edge to work toward from the inside.

  3. Remove the background sections

    Clear the open background area on both sides of the retained silhouette. Cut up to but not through the leg and arm connection points. Work in small sections rather than trying to remove large pieces at once to keep the rind from flexing.

  4. Refine the silhouette edges

    With the background open, use a fine detail blade to tighten the chicken body contour, the rider's block outline, and the connection legs. Each edge should be clean and blocky. Take care not to undercut the leg roots that connect to the lower frame.

  5. Score face and feather details

    Switch to a linoleum gouge for the shallow-backed face details on the rider and the feather texture on the chicken body. Score just deep enough to thin the rind by about half. These marks will glow as a soft mid-tone against the fully lit open background.

  6. Light and check both sides

    Insert an LED, step back six feet, and assess whether the silhouette reads clearly. The retained orange rind silhouette against the glowing open area should look striking from a distance. Adjust LED position if any background area is noticeably darker than the rest.

Written with AI to match this design

Gather your supplies

Check things off as you get ready.

Work on a stable surface, keep your free hand out of the cutting path, and have an adult handle sharp tools.

Three levels of light

  • Leave intact

    The retained Chicken Jockey silhouette and the outer frame border stay as solid dark orange rind.

  • Peel & shade

    Shallow-scored face and feather details glow as a soft mid-tone within the retained silhouette.

  • Cut through

    The open background surrounding the silhouette is cut fully through.

Learn the carving basics

Before you start cutting

How do I keep the chicken's legs from snapping when I remove the background around them?

Cut the background sections right up to the leg connection but stop and change direction before you reach it. Approach the leg from the opposite side and trim carefully until the last small background piece releases. Never lever a stuck piece free near a connection point.

How deep should shallow scoring be for the face and feather details?

Score just enough to remove the green rind skin and thin the orange flesh by about half its depth, typically a third to a half inch depending on your wall thickness. The goal is letting light diffuse through, not cutting through. Test on a scrap piece of pumpkin first to find the right depth.

Will the scorings show well from a distance?

They will be visible as slightly brighter areas within the solid silhouette, adding texture rather than a bold contrast. Scored details work best at close to medium range (two to five feet). From across a yard, the overall silhouette-versus-open-background contrast is the dominant visual effect.

Your take belongs here, too.

Changed a detail? Made it simpler? Share a photo of your version and tell the community what worked.

Share your pumpkin

More pumpkins like this

You've reached the end · 8 pumpkins
The Patch Report

Fresh pumpkins, in your inbox.

The best new carvings, ideas worth stealing, and how-tos for carving season. Short, seasonal, and gone by November.

A short email during carving season. Unsubscribe anytime. See our privacy policy.