Halloween Pumpkin Carving Contest · Starts October 1st · $500 in prizes
← Back to ideas
@ai_concepts
Sep 25, 2026
Expert Chicken Jockey Pumpkin Carving with Tree MotifsAI
0

Report this carving

Tell us what is wrong. Reports are private.

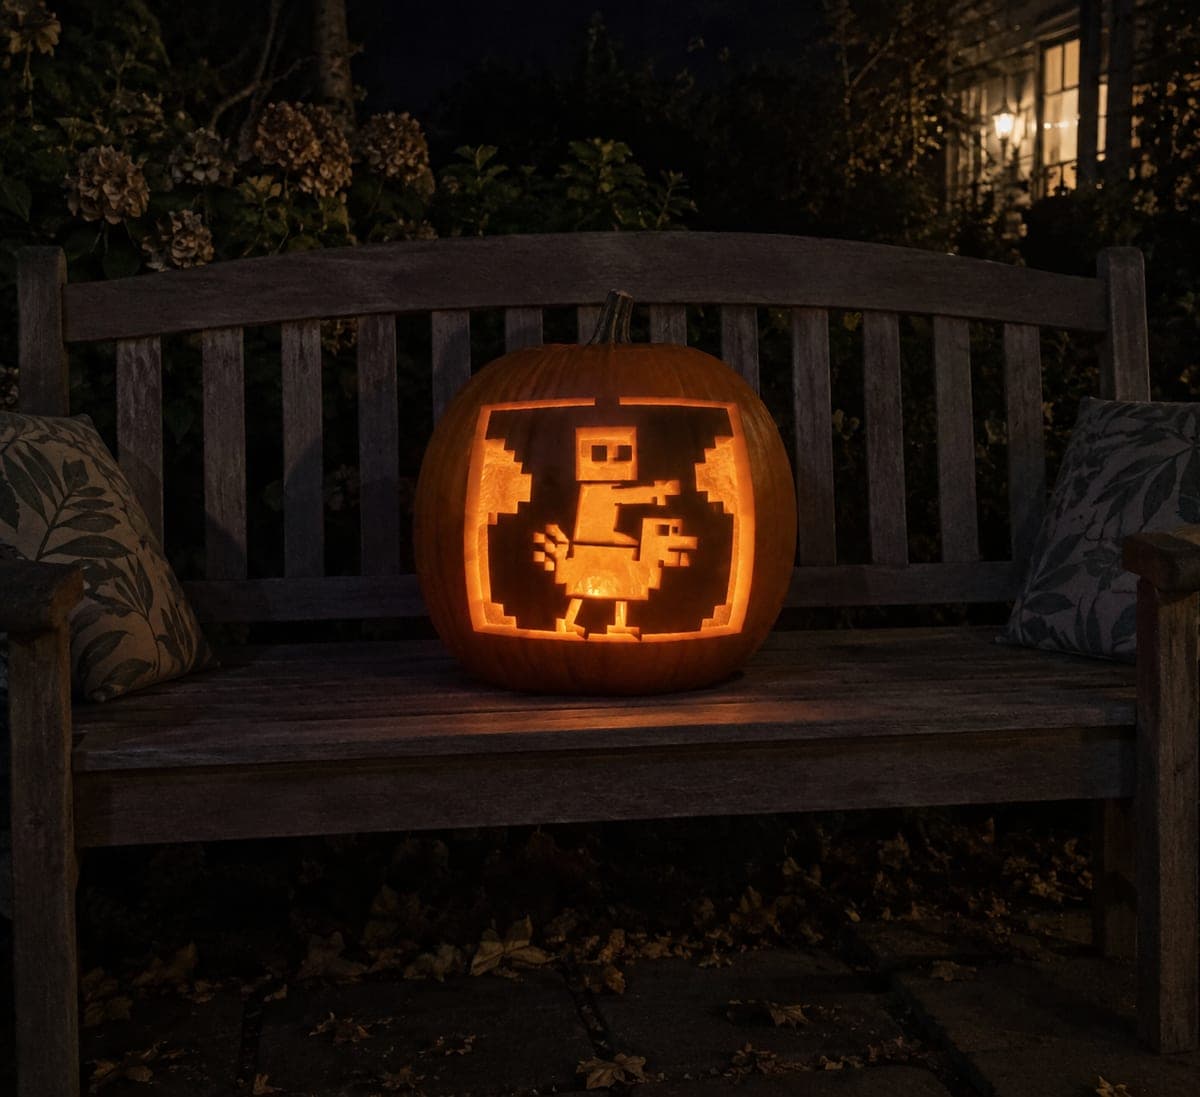
Expert Chicken Jockey Pumpkin Carving with Tree Motifs

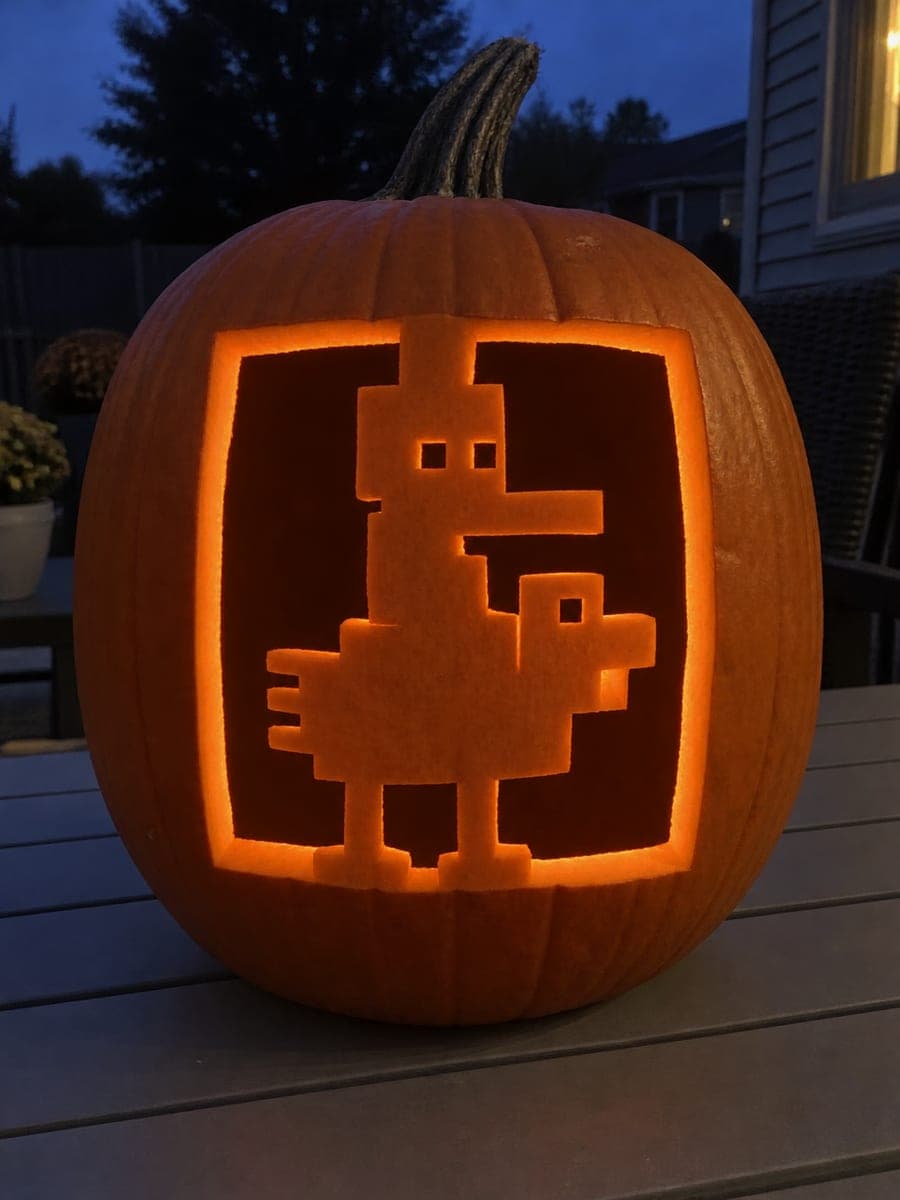
This expert chicken jockey pumpkin carving idea builds a full scene with the rider and chicken set against a broad stepped frame and flanking pixel tree motifs. Central portrait details are shallow-backed for texture, while open surrounding channels separate the scene elements. The lower legs and upper head bridge are the structural anchors, so plan every cut to preserve them. Shallow-back the tree details last, when the pumpkin is most stable.

No ratings yet · Sign in to rate
Comments (0)

  • No comments yet — be the first.

Save without an account. Sign in to like or comment.

Our tips for carving a similar design

The rider-and-chicken figure is centered within a broad stepped frame and flanked by pixel tree motifs, with open surrounding channels separating the scene elements. The lower legs and upper head bridge are the two non-negotiable structural anchors, so every cut sequence must be planned to preserve them. Shallow-backed central portrait detail and tree textures come last, when the pumpkin is still at its firmest.

From pumpkin to porch

  1. Full template mapping and gutting

    Gut the pumpkin from the back and thin the wall to three-quarters of an inch across the carving zone. Transfer the complete scene template using a poking tool, then use a red marker to circle every connection point (head bridge, lower leg roots, tree bases, frame corners). These red marks are your absolute no-cut reminders throughout the session.

  2. Cut the stepped frame outline

    Begin with the outer stepped frame edges to establish the design boundary. Work each straight edge in single controlled strokes rather than trying to cut curves. The stepped corners should be clean right angles, as they reinforce the pixel art aesthetic and create structurally sound corners.

  3. Open the surrounding channels

    Clear the open channels between the frame and the central figure, and between the central figure and the flanking trees. Work from the outermost channels inward, stopping well clear of each connection point on your first pass and returning to final-trim those edges in a separate step.

  4. Refine pixel tree outlines

    With the surrounding channels cleared, sharpen the blocky tree silhouettes using a fine detail blade. Keep each tree connected broadly at the lower shell. Avoid cutting tree branches thinner than three-eighths of an inch since they bear the cantilevered weight of the canopy blocks.

  5. Shallow-back the portrait and tree detail

    Switch to a linoleum gouge for all shallow-backed areas: the rider's face, the chicken's eye and beak, and the linear feather texture across the tree canopies. Work in short controlled strokes, removing rind skin and about half the flesh depth. Keep the gouge away from connection points.

  6. Add light and assess balance

    Insert an LED puck and check that all open channels and shallow-scored areas read clearly from a distance of about five feet. Adjust LED position to balance light distribution. Seal all cut edges with petroleum jelly immediately after your final assessment to extend display life.

Written with AI to match this design

Gather your supplies

Check things off as you get ready.

Work on a stable surface, keep your free hand out of the cutting path, and have an adult handle sharp tools.

Three levels of light

  • Leave intact

    The stepped frame border, figure silhouette, and tree trunks stay as solid dark orange rind.

  • Peel & shade

    Shallow-backed portrait details on the rider and chicken and scored tree canopy texture glow as a soft mid-tone.

  • Cut through

    All open surrounding channels between scene elements are cut fully through.

Learn the carving basics

Before you start cutting

In what order should I tackle the open channels?

Start with the two outer side channels (between the frame and the trees), then the upper channel above the head bridge, then the channels between the trees and the central figure. Leave the narrow gap below the feet for last since it is closest to the lower leg root, which is a primary structural anchor.

How do I shallow-back the chicken's feather texture without going all the way through?

Use a linoleum gouge and count your strokes. On a standard pumpkin wall, two light gouge passes removes about a quarter of the wall depth. Test on the inside of the pumpkin lid first to calibrate. Stop when the rind starts to feel slightly translucent when held up to a lamp before lighting.

Is there a way to repair a cracked pixel tree branch mid-session?

If the crack is partial, stop cutting near it immediately. Reinforce from the back with a small strip of masking tape. Once you have completed surrounding cuts and the rind is more settled, carefully trim the cracked branch to a slightly shorter blocky shape that reads as a natural Minecraft tree style rather than damage.

Your take belongs here, too.

Changed a detail? Made it simpler? Share a photo of your version and tell the community what worked.

Share your pumpkin

More pumpkins like this

You've reached the end · 8 pumpkins
The Patch Report

Fresh pumpkins, in your inbox.

The best new carvings, ideas worth stealing, and how-tos for carving season. Short, seasonal, and gone by November.

A short email during carving season. Unsubscribe anytime. See our privacy policy.