The 2026 contest winners are inGrand Prize, People's Choice and Most Creative, all crowned.
@ai_concepts
Sep 25, 2026
Chica Cupcake Scene FNAF PumpkinAI
0

Report this carving

Tell us what is wrong. Reports are private.

Chica Cupcake Scene FNAF Pumpkin

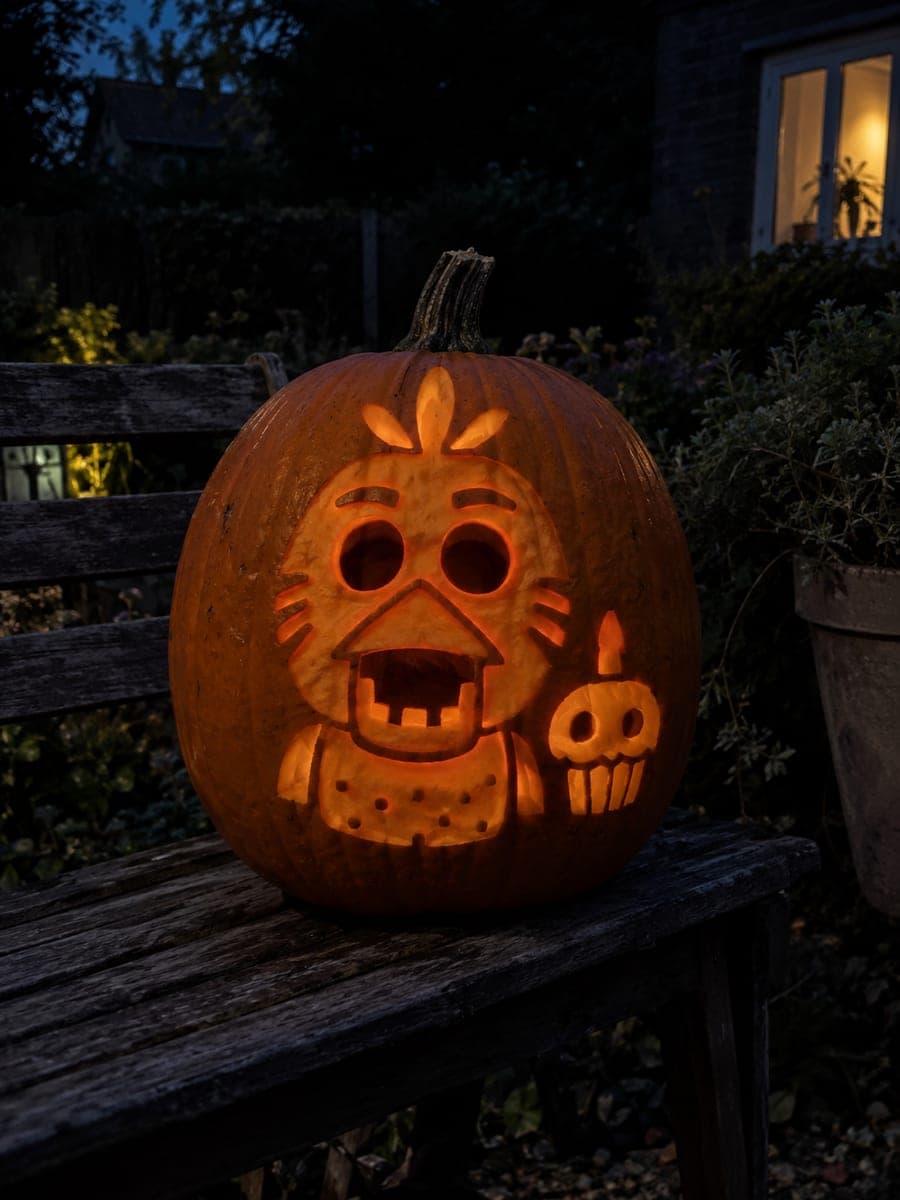
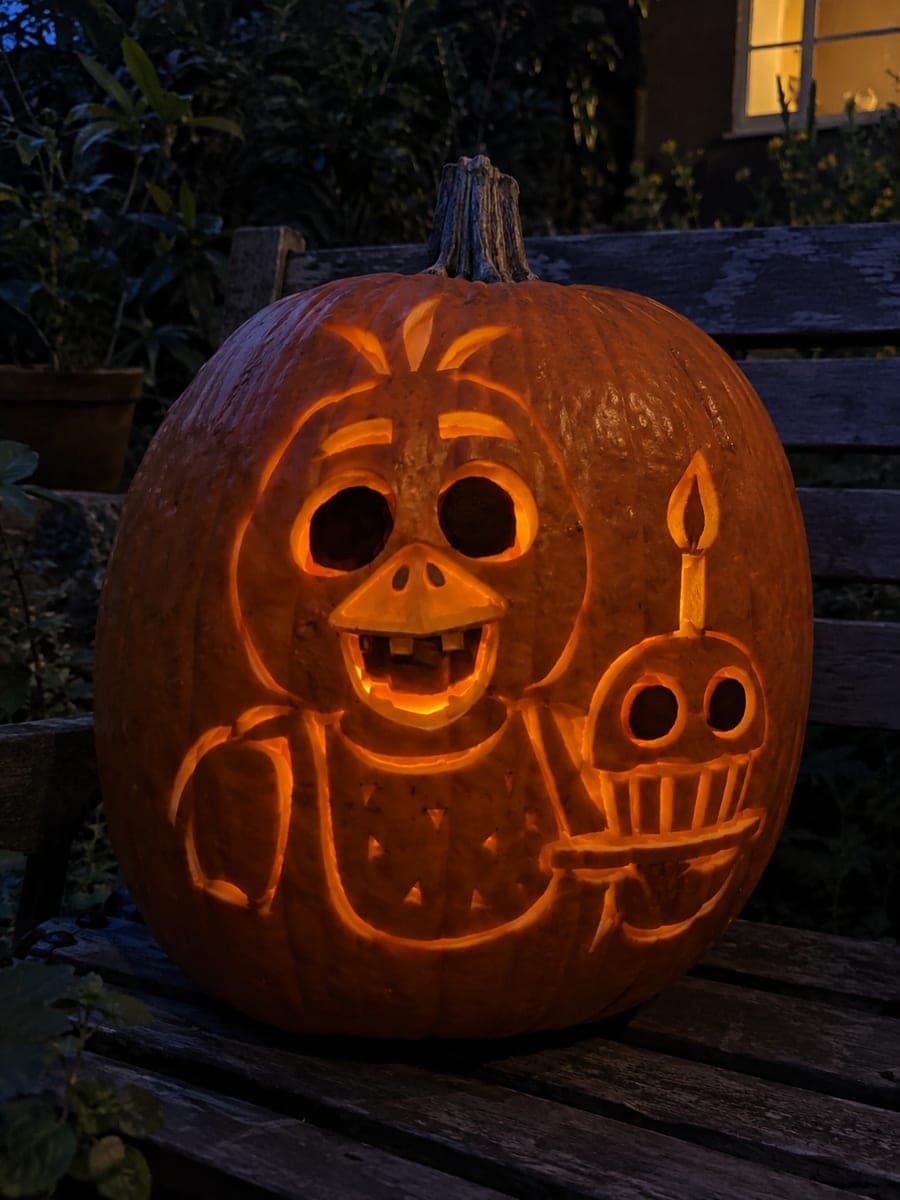
This expert Chica FNAF pumpkin carving uses shading technique to build a full bust scene: empty main eyes and beak, cupcake with its own small eye apertures, rooted teeth, and a complete bib, arms, tray, and candle in shallow-backed outer contour relief. Score the cupcake eye apertures with a fine blade, keeping them tiny and clean. Do all the shallow relief work after the structural cuts are stable. The layered depth of shading technique rewards any Five Nights at Freddy's fan looking for a serious challenge.

No ratings yet · Sign in to rate
ExpertMonstersScaryShaded / Peel

Save this design for carving night, then share a photo of your own jack-o'-lantern once it's glowing.

Five Nights at Freddy's and all related characters, names, logos, and trademarks are the property of their respective owners. This is an unofficial fan carving shared by our community for inspiration only. PumpkinCarvingIdeas.com is not affiliated with, sponsored by, or endorsed by any rights holder or person depicted, and no such connection is implied.

Comments (0)

  • No comments yet. Be the first.

Our tips for carving a similar design

This expert Chica design uses shading technique to build a complete bust scene: hollow main eyes, beak, and cupcake eye apertures are the through-cuts, while the head, bib, arms, tray, cupcake body, and candle are built as interconnected shallow-backed outer contour relief. The outer contour relief is not enclosed with through-cuts, which keeps structural integrity intact. Completing all hollow apertures first and building relief outward is the required order.

From pumpkin to porch

  1. Hollow and create a depth map

    Cut the back lid and scoop to one inch throughout. Before transferring your template, draw a depth map showing all zones: full hollow apertures, half-depth mid relief, and one-quarter-depth fine detail. Shading technique requires this planning document to stay consistent across a complex multi-element composition.

  2. Transfer your expert bust template

    Your template should cover the entire front face of the pumpkin with Chica's head and beak centered, arms extending outward, tray and cupcake in the lower area, and candle at the top of the cupcake. Mark the cupcake eye aperture centers with a stylus punch and label every zone with its intended depth level on the transferred outline before cutting.

  3. Cut the main eye and beak apertures

    Cut both main hollow eyes first, then the beak opening with rooted teeth using the same root-scoring technique as at lower difficulty levels. Confirm all tooth roots are solid before moving to the cupcake section.

  4. Cut the cupcake eye apertures

    Use a fine detail knife or small drill bit to create the tiny cupcake eye apertures. Score the perimeter of each before removing material. Keep these holes small and clean, and work slowly since surrounding rind is already loaded with other cuts nearby. A single LED flashlight check from inside confirms each hole is correctly positioned.

  5. Build the outer contour relief

    Using a flat gouge and narrow V-tool, back-carve the entire outer contour composition, arms, tray, cupcake body, candle, and bib, in overlapping depth layers. Work from the shallowest zones outward to the deepest. The outer contour relief should never form an enclosed through-cut region; every carved area must connect to the surrounding uncut rind at at least one edge.

  6. Refine and light

    Use a V-tool to clean transitions between depth zones. Insert a steady cool white LED to read all depth levels consistently. Display the pumpkin on a low table so viewers can see the full bust composition including the tray and candle elements at the base.

Written with AI to match this design

Gather your supplies

Check things off as you get ready.

Work on a stable surface, keep your free hand out of the cutting path, and have an adult handle sharp tools.

Three levels of light

  • Leave intact

    Retained nose rind and outer pumpkin border at full depth stay dark

  • Peel & shade

    Bib, arms, tray, cupcake body, candle, and head tuft are back-carved at half to one-quarter depth for layered mid glow

  • Cut through

    Both main eyes, the beak gap around rooted teeth, and the tiny cupcake eye apertures are fully cut through

Learn the carving basics

Before you start cutting

The outer contour relief areas feel isolated from each other after carving. How do I make them read as one connected composition?

Use a flat gouge to carve shallow connecting channels between adjacent relief zones at a consistent one-quarter depth. These channels act as visual pathways between the arms, tray, and bib areas and make the composition feel continuous. Keep the channels narrow enough that they read as shadow lines rather than additional depth zones.

How do I keep the cupcake eye apertures from cracking the surrounding cupcake body relief area?

Always cut the cupcake eyes after all surrounding relief is complete and stable. Scored perimeters before cutting reduce crack risk. Leave at least a quarter inch of intact rind between each cupcake eye and the edge of the cupcake body relief zone. If a small crack does appear, stop and stabilize with craft glue before continuing.

Can I complete this design over two sessions rather than all at once?

Yes, completing the hollow apertures in one session and the relief work in a second session the following day is a reasonable approach. Wrap the pumpkin in a damp paper towel and refrigerate it between sessions to slow dehydration. Dry rind becomes brittle, so keeping the pumpkin hydrated makes the second session easier and safer.

Your take belongs here, too.

Changed a detail? Made it simpler? Share a photo of your version and tell the community what worked.

Share your pumpkin

Want more designs like this? Browse our full library of pumpkin carving ideas, or pick a free printable stencil. Every pattern and template in our own collection is free to print at home.

More pumpkins like this

You've reached the end · 8 pumpkins
The Patch Report

Fresh pumpkins, in your inbox.

The best new carvings, ideas worth stealing, and how-tos for carving season. Short, seasonal, and gone by November.

A short email during carving season. Unsubscribe anytime. See our privacy policy.