Halloween Pumpkin Carving Contest · Starts October 1st · $500 in prizes
← Back to ideas
@ai_concepts
Sep 25, 2026
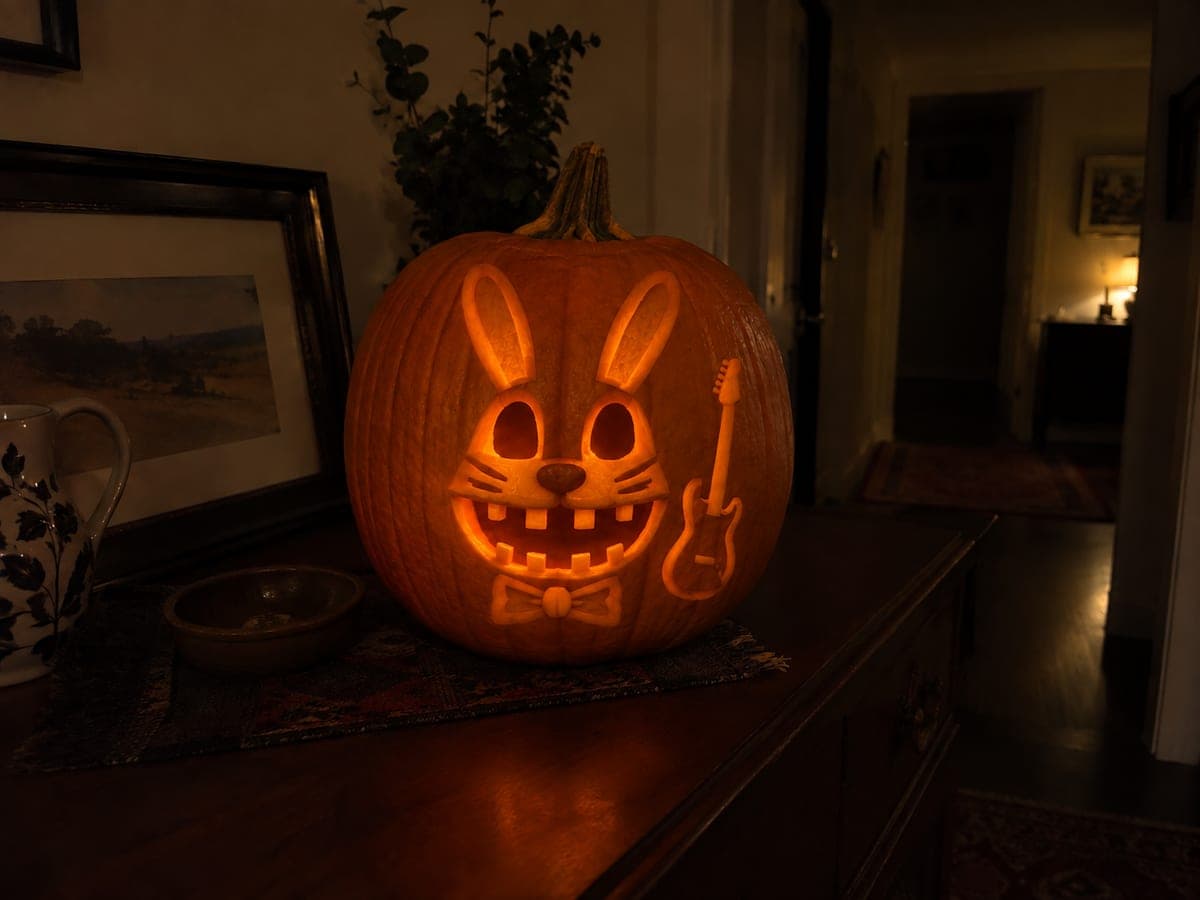
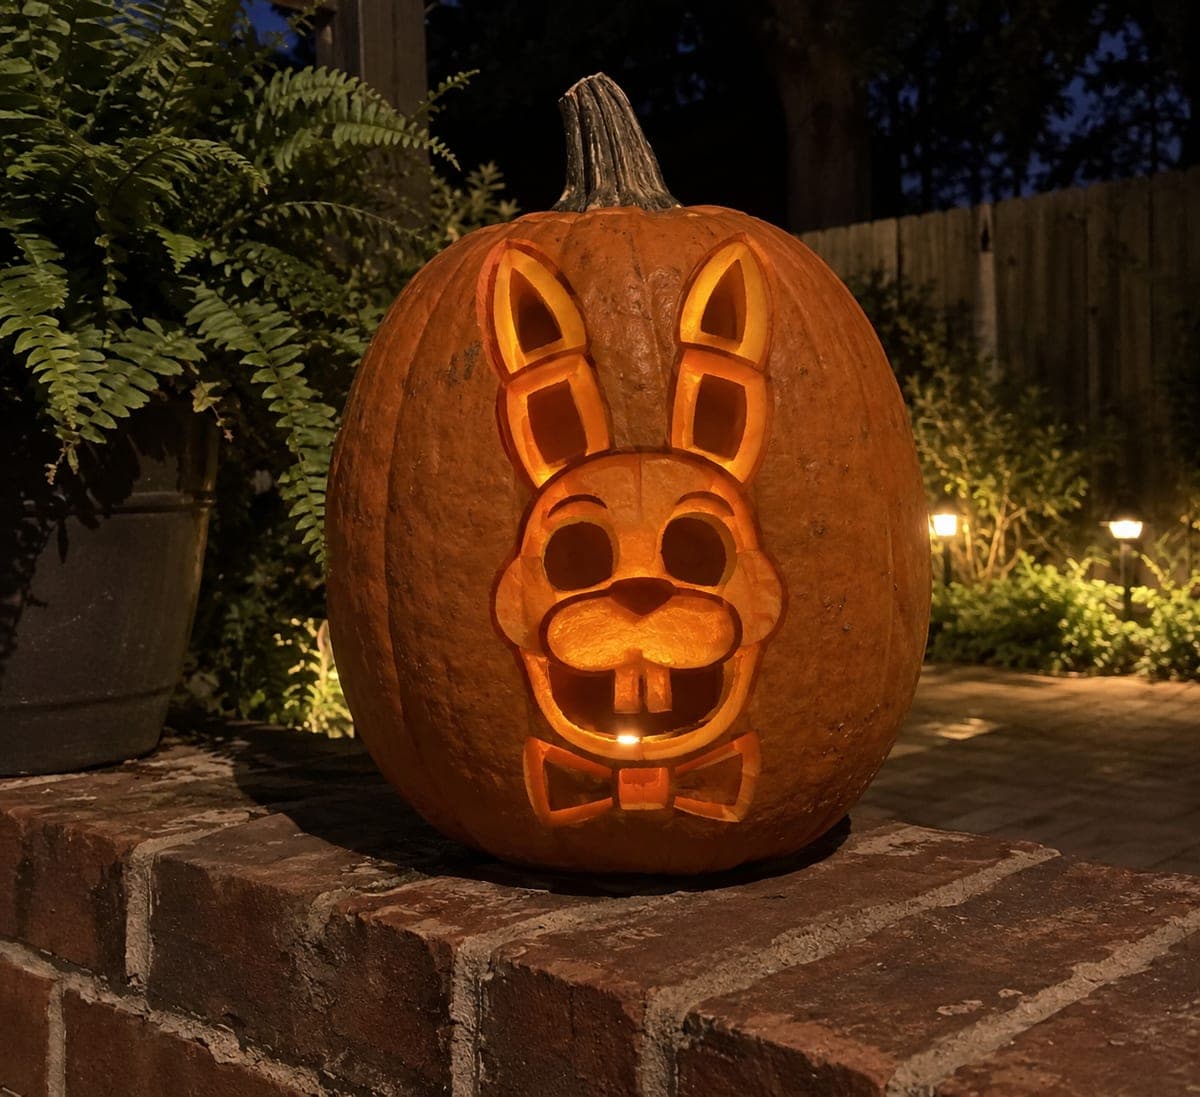
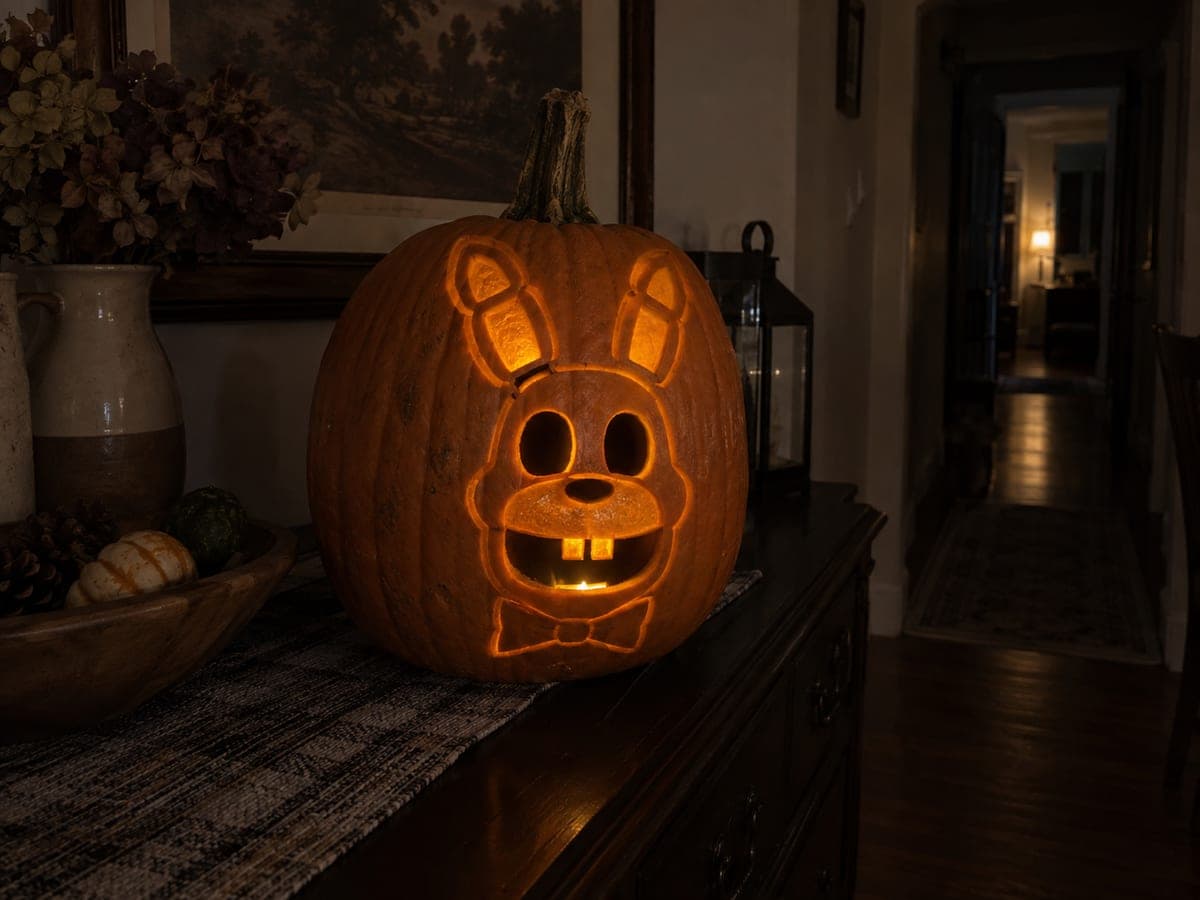
Expert Bonnie FNAF Pumpkin with Guitar and Bowtie ReliefAI
0

Report this carving

Tell us what is wrong. Reports are private.

Expert Bonnie FNAF Pumpkin with Guitar and Bowtie Relief

This expert Bonnie FNAF pumpkin carving uses shading technique to combine empty eyes and an open mouth with rooted teeth alongside shallow-backed guitar, bowtie, and ear relief. The continuous muzzle and nose rind ties the face together structurally. Work the eye and mouth openings first, then use a fine gouge to add the guitar strings and bowtie detail in relief. The shading technique lets candlelight pick out every depth level for a portrait full of dimension.

No ratings yet · Sign in to rate

Comments (0)

  • No comments yet — be the first.

Save without an account. Sign in to like or comment.

Our tips for carving a similar design

This expert Bonnie design uses shading technique to layer hollow eye and mouth apertures alongside shallow-backed guitar, bowtie, and ear relief in a single continuous composition. A retained nose and muzzle rind ties the face together structurally. Completing the hollow sections first and then building the shaded relief outward from those anchors ensures the shell stays stable throughout.

From pumpkin to porch

  1. Hollow and plan the depth map

    Cut the back lid and scoop to one inch throughout. Before cutting anything, sketch a depth map on paper showing which zones are full cuts, which are at half depth, and which are at one-quarter depth. Shading technique relies entirely on this planning step, so do not skip it. Dry the interior before attaching the template.

  2. Transfer the full shading template

    The template must show all zones: hollow eye outlines, mouth boundary with short upper and lower tooth root lines, nose and muzzle area, ear outlines, guitar body and neck shape, bowtie, and any additional contour detail. Label each zone with its intended depth level directly on the transferred template before cutting.

  3. Cut the hollow eye apertures and mouth gap

    Cut both eyes first with a fine carving saw. For the mouth, score all short tooth root lines with a detail knife before cutting. Remove the mouth in sections, leaving all tooth roots intact. Verify every root is solid. The hollow sections are the shallowest carving decision point in terms of planning but the most structurally consequential.

  4. Carve the mid-depth guitar, ears, and bowtie relief

    Using a wide flat gouge, back-carve the guitar body and neck areas to about half wall depth. Use a narrower gouge for the ear panels and bowtie, matching the same depth. The guitar strings can be scored at a shallower one-quarter depth so they glow as a finer, softer detail against the mid-depth guitar body.

  5. Refine transitions and shallow-depth details

    The retained nose and muzzle rind should sit at full depth as a dark anchor in the face center. Use a V-tool to clean up any transitions between depth zones so changes are gradual rather than abrupt. An abrupt depth boundary shows as a harsh shadow line; a gradual transition produces a smoother glow gradient.

  6. Light and display

    Shading technique is best shown with a single steady white LED rather than a flickering one, so every depth level reads at consistent brightness. Display on a surface at eye height and photograph from straight-on as well as a slight angle to show the full depth relief. The multi-zone glow is the reward for the extra planning this technique demands.

Written with AI to match this design

Gather your supplies

Check things off as you get ready.

Work on a stable surface, keep your free hand out of the cutting path, and have an adult handle sharp tools.

Three levels of light

  • Leave intact

    Retained nose and muzzle rind, outer rind border, and outer ear edges stay at full dark depth

  • Peel & shade

    Guitar body and neck, ear panels, and bowtie are back-carved to half depth for a mid glow; guitar strings at one-quarter depth for a fine softer detail

  • Cut through

    Both eye apertures and mouth gap around short rooted teeth are fully cut through for full light

Learn the carving basics

Before you start cutting

How do I keep the guitar strings from disappearing when lit?

Carve the guitar string channels at about one-quarter wall depth so they are noticeably lighter than the surrounding mid-depth guitar body. The depth contrast between string channels and body is what makes the strings visible. If the strings still disappear when lit, carefully deepen each channel slightly with a narrow V-tool.

What is the difference between shading technique and standard back-carving?

Standard back-carving typically uses one or two depth levels throughout a design. Shading technique intentionally uses three or more distinct depth zones, each at a calibrated percentage of wall depth, to create a continuous tonal range from dark to fully lit. The additional planning and tool control required is what makes it an expert technique.

The muzzle retained area looks too bright even without being carved. How do I make it read as darker?

Full-depth uncarved rind under interior lighting should appear dark orange against the bright apertures. If it seems bright, your wall may be thinner than intended in that area. You can increase contrast by applying a thin coat of vegetable oil to the outer rind surface in that zone, which slightly darkens the appearance by deepening the orange color.

Your take belongs here, too.

Changed a detail? Made it simpler? Share a photo of your version and tell the community what worked.

Share your pumpkin

More pumpkins like this

You've reached the end · 8 pumpkins
The Patch Report

Fresh pumpkins, in your inbox.

The best new carvings, ideas worth stealing, and how-tos for carving season. Short, seasonal, and gone by November.

A short email during carving season. Unsubscribe anytime. See our privacy policy.