Halloween Pumpkin Carving Contest Β· Starts October 1st Β· $500 in prizes
← Back to ideas
@ai_concepts
Sep 25, 2026
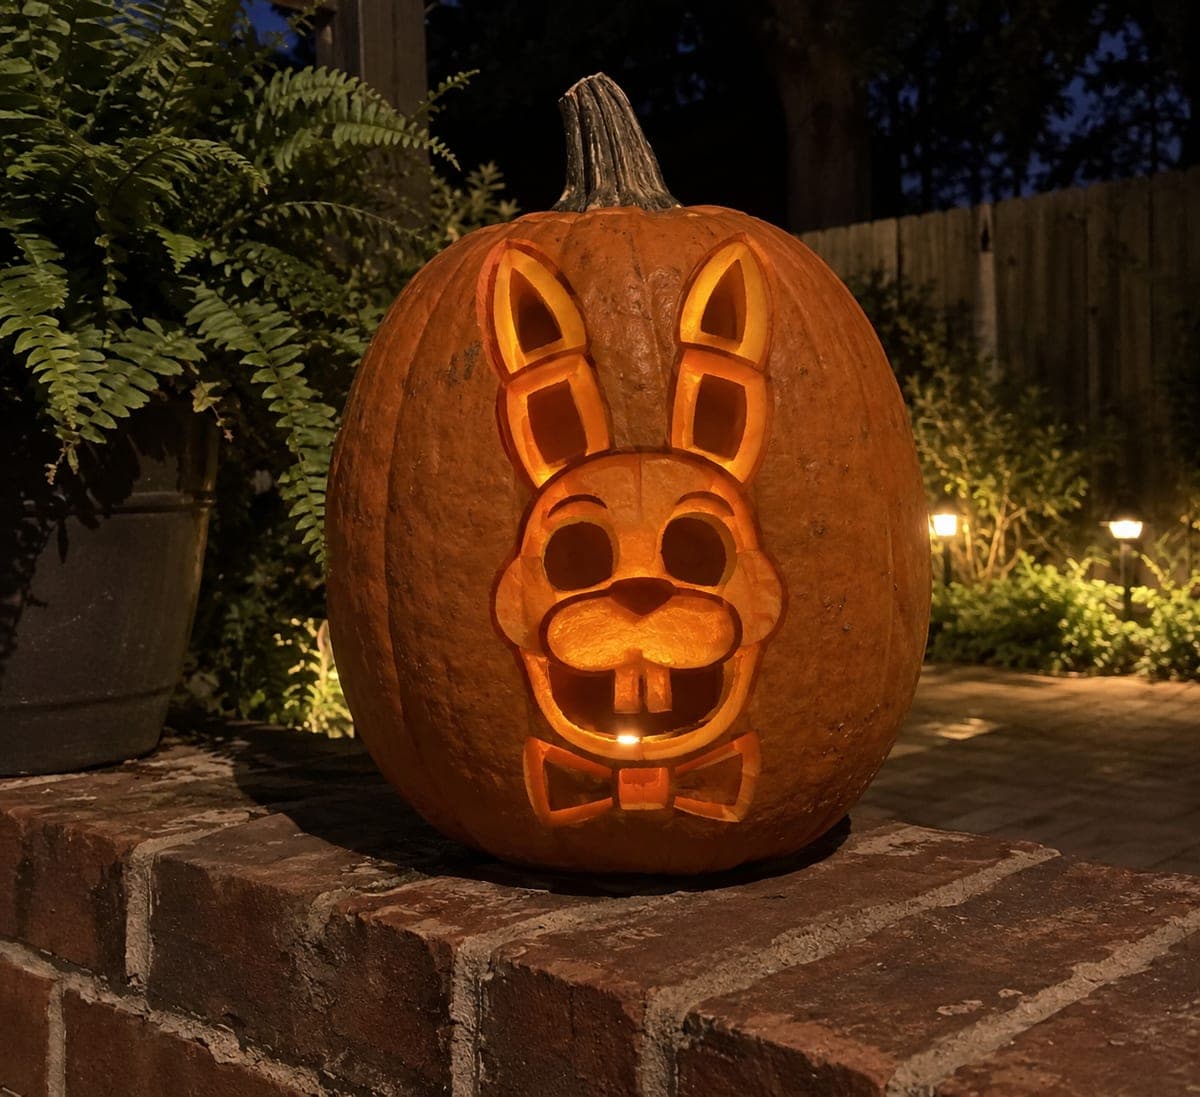
Bonnie FNAF Intermediate Pumpkin with Long Ear PanelsAI
0

Report this carving

Tell us what is wrong. Reports are private.

Bonnie FNAF Intermediate Pumpkin with Long Ear Panels

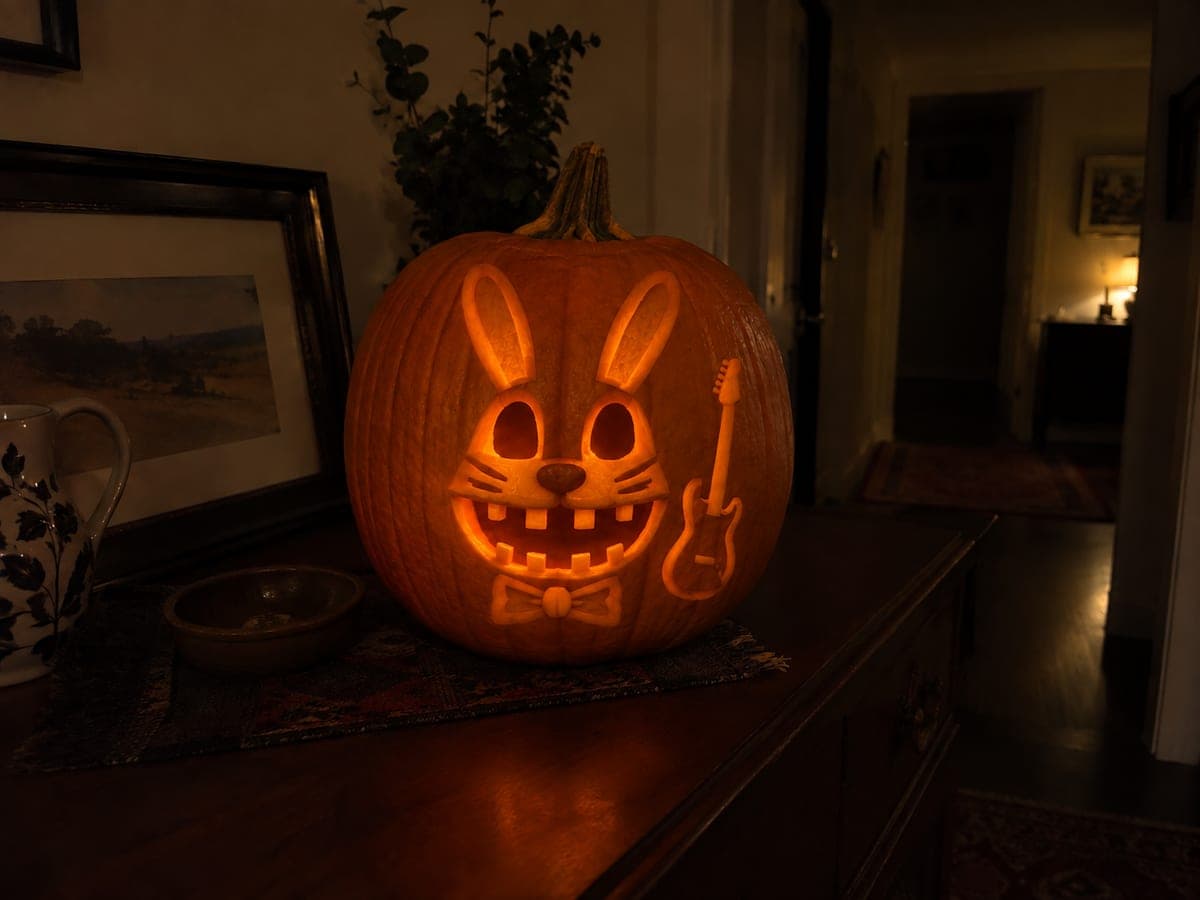
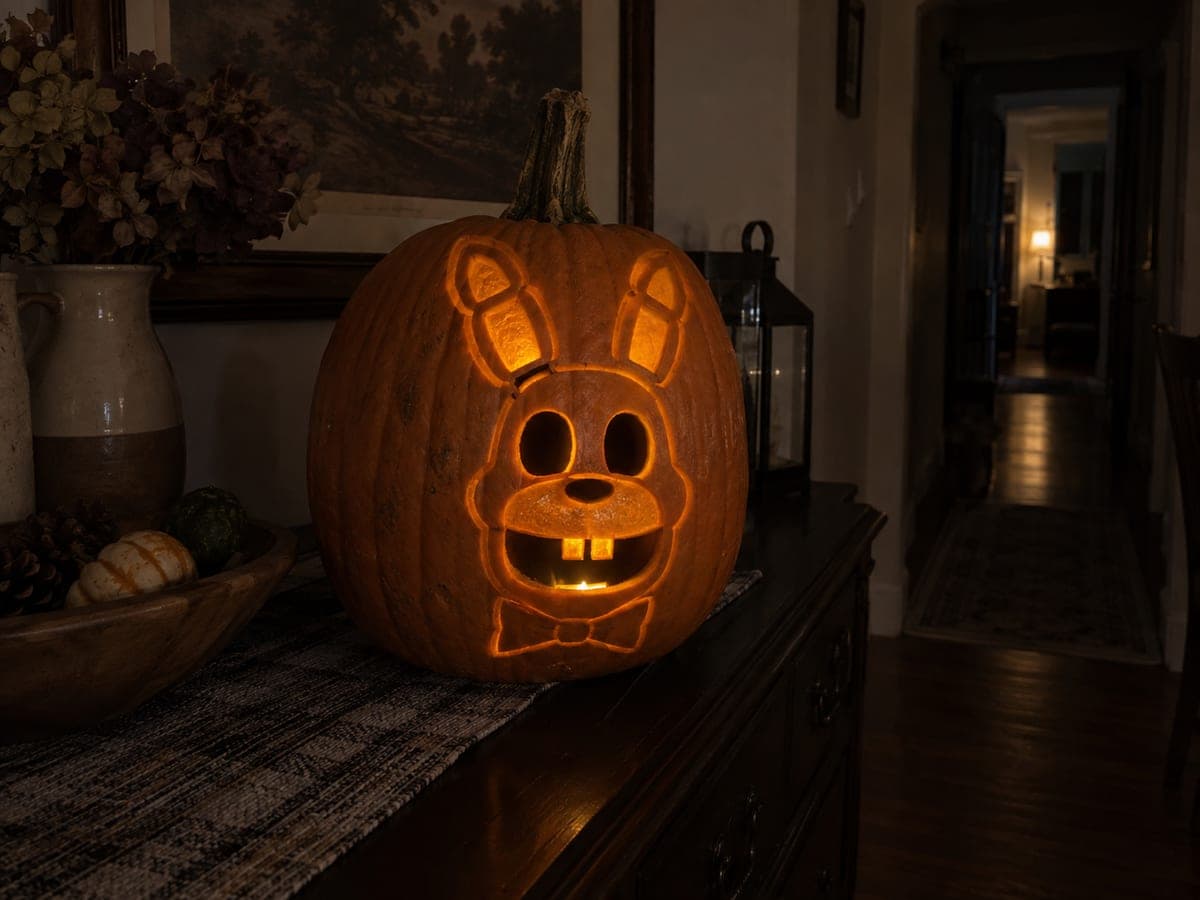
Open eyes, nose, and mouth with two upper rooted teeth are the focal point of this intermediate Bonnie FNAF pumpkin carving, while long ear panels divided by broad rind strips add the character's silhouette. Face and bowtie contour are shallow-backed to complete the portrait. Cut the main facial openings before tackling the tall ear panels, since the ears are the most structurally sensitive elements. Lit from inside, the glowing ear panels give Bonnie an imposing, looming presence.

No ratings yet Β· Sign in to rate

Comments (0)

  • No comments yet β€” be the first.

Save without an account. Sign in to like or comment.

Our tips for carving a similar design

Open eyes, a nose aperture, and a mouth with two upper rooted teeth anchor this Bonnie design, while long ear panels divided by broad rind strips create his signature silhouette. Face and bowtie contour are shallow-backed to complete the portrait. Cutting the main facial openings first and leaving the tall ear panels for last keeps the most structurally delicate elements intact until the face is stable.

From pumpkin to porch

  1. Prepare the pumpkin

    Choose a tall pumpkin so the ear panels have enough vertical room to read clearly above the face. Cut the back lid and scoop to one inch of wall thickness. Dry the interior completely. Mark the vertical center of the face before placing the template so the ears align symmetrically.

  2. Transfer the full template

    The template should show the face features in the lower two-thirds and the two ear panels above them, each panel divided from the rind center by a broad strip of intact rind. Transfer all lines including eye outlines, nose aperture, mouth boundary with tooth root lines, ear panel shapes, the rind divider between them, face contour, and bowtie.

  3. Score the tooth roots

    Before cutting the mouth, score each upper tooth root line with a detail knife. This gives you a clean stop-boundary when cutting the mouth gap and protects the root attachments. Press just deep enough to mark the rind surface.

  4. Cut the main face apertures

    Cut the two eye holes first, then the nose aperture. For the mouth, cut the outer boundary and work carefully around the two rooted tooth shapes. Remove the mouth piece in small sections. Confirm both tooth roots are solid before proceeding.

  5. Cut the ear panels and shallow-back the details

    Now cut the ear panel openings, keeping the broad rind strip between them intact throughout. The strip is the structural backbone of the upper face. After the panels are open, use a gouge to back-carve the face contour and bowtie. Check all depth levels with a flashlight.

  6. Light and display

    Place a cool white LED inside for sharp contrast on the rooted teeth. Display the pumpkin at or above eye level so the full ear panel height is visible. Lit from inside, the glowing ear panels give Bonnie an imposing presence that works well as a porch centerpiece.

Written with AI to match this design

Gather your supplies

Check things off as you get ready.

Work on a stable surface, keep your free hand out of the cutting path, and have an adult handle sharp tools.

Three levels of light

  • Leave intact

    Outer rind, the broad rind divider strip between ear panels, and the tooth root attachments stay dark

  • Peel & shade

    Face contour areas and bowtie outline are shallow-backed for a soft mid glow

  • Cut through

    Eye holes, nose aperture, mouth gap around rooted teeth, and the two ear panel interiors are fully cut through

Learn the carving basics

Before you start cutting

How wide should the rind strip between the two ear panels be?

The divider strip should be at least three-quarters of an inch wide to remain structurally sound through the full display period. Narrower than that and the strip may crack under the weight of the upper pumpkin skin. Wider strips also read clearly as the negative space that separates Bonnie's two distinct ear shapes.

The ear panels are taller than the saw blade can reach in one pass. How do I cut them?

Work the saw from the bottom of the panel upward in sections, overlapping each stroke slightly with the previous one. Alternatively, use a craft knife for the straight sides of the panel and the saw only for the curved top. Always push removed pieces inward rather than outward to avoid stressing the rind divider.

Can I leave the nose as a shallow-backed detail rather than a through-cut aperture?

Yes, making the nose a shallow recess rather than a full aperture is a reasonable simplification that reduces structural risk. It will glow at mid-level rather than full brightness, which still reads clearly against the dark rind surround. If you do cut it through, keep the aperture small to preserve the rind around it.

Your take belongs here, too.

Changed a detail? Made it simpler? Share a photo of your version and tell the community what worked.

Share your pumpkin

More pumpkins like this

You've reached the end Β· 8 pumpkins
The Patch Report

Fresh pumpkins, in your inbox.

The best new carvings, ideas worth stealing, and how-tos for carving season. Short, seasonal, and gone by November.

A short email during carving season. Unsubscribe anytime. See our privacy policy.