Halloween Pumpkin Carving Contest · Starts October 1st · $500 in prizes
← Back to ideas
@ai_concepts
Sep 25, 2026
Easy Foxy FNAF Pumpkin Carving One-Eye Pirate DesignAI
0

Report this carving

Tell us what is wrong. Reports are private.

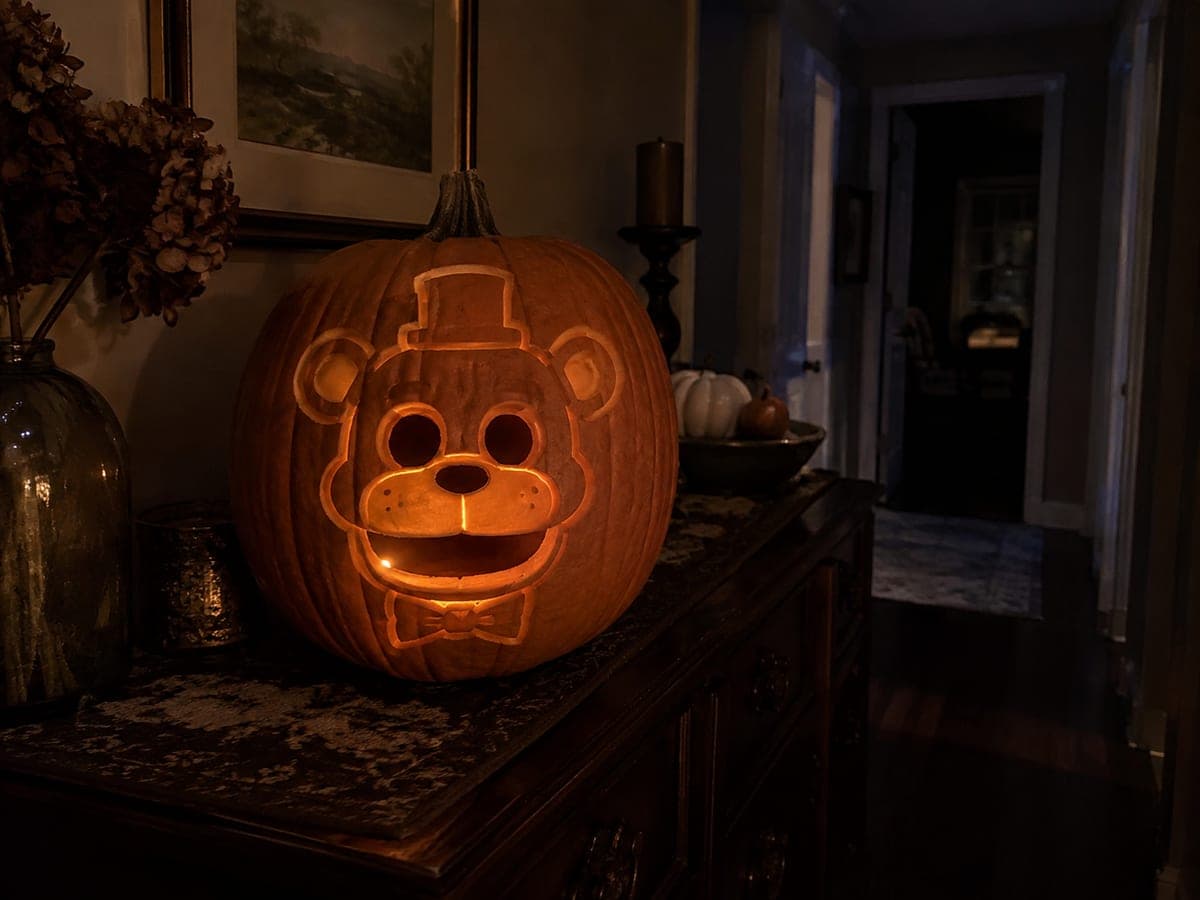
Easy Foxy FNAF Pumpkin Carving One-Eye Pirate Design

A single hollow eye, nose, and open grin with two upper rooted fangs capture Foxy's pirate-animatronic look in this easy Five Nights at Freddy's pumpkin carving idea. Ears, head shape, and eyepatch are shallow-backed to complete the portrait. Cut the single eye hole and grin opening first, then score the eyepatch detail around the empty eye socket. The asymmetric one-eye design is what makes this pumpkin carving idea instantly recognizable from across the yard.

No ratings yet · Sign in to rate

Comments (0)

  • No comments yet — be the first.

Save without an account. Sign in to like or comment.

Our tips for carving a similar design

A single hollow eye, a small nose aperture, and an open grin with two upper rooted fangs are the structural elements of this easy Foxy design. The ears, head shape, and eyepatch are shallow-backed around the hollow eye socket to complete the pirate character. Cutting the single eye hole first gives the entire face its defining asymmetry before any other cuts are made.

From pumpkin to porch

  1. Hollow and prep

    Cut the back lid and scoop to one inch of wall thickness. Foxy's asymmetric single-eye design works well on both round and oval pumpkins. Dry the interior and mark the face center before placing the template so the asymmetric eye position is intentional rather than accidental.

  2. Transfer the asymmetric template

    Tape the scaled template and transfer the single eye circle position on one side of the face, the nose aperture below it, the grin boundary with upper fang root lines, and the ear outlines. Mark the eyepatch boundary clearly around the hollow eye socket since you will back-carve it rather than cut it through.

  3. Score the fang roots and cut the single eye

    Cut the single eye hole first. Then score both upper fang root lines before cutting the grin. This front-loads the most structurally important markings so the grin cut does not accidentally sever a fang root later.

  4. Cut the nose aperture and grin

    Cut the small nose aperture, then the grin opening. Work around each fang shape leaving its base attached to the upper lip. Remove the grin piece in small sections. Confirm both fang roots are solid before moving to the backed details.

  5. Shallow-back the eyepatch, ears, and head shape

    Use a linoleum gouge to back-carve the eyepatch area around the hollow eye socket, the inner ear surfaces, and the outer head contour. The eyepatch should be at about one-third wall depth so it reads as a distinct dark zone that frames the glowing hollow eye. Check depth with a flashlight.

  6. Light and display

    Insert a warm amber LED to give Foxy a torchlit Pirate Cove glow. Close the back lid and position the pumpkin so viewers see the single glowing eye head-on. The backed eyepatch framing that bright single eye is what makes this design instantly recognizable even from a distance.

Written with AI to match this design

Gather your supplies

Check things off as you get ready.

Work on a stable surface, keep your free hand out of the cutting path, and have an adult handle sharp tools.

Three levels of light

  • Leave intact

    Outer rind, the eyepatch face area at shallow back-carve depth, outer ear edges, and fang root attachments stay dark

  • Peel & shade

    Eyepatch surround, inner ear panels, and outer head contour are shallow-backed for soft mid glow

  • Cut through

    Single hollow eye, nose aperture, and grin gap around the two rooted upper fangs are fully cut through

Learn the carving basics

Before you start cutting

The eyepatch and the hollow eye are right next to each other. How do I carve the eyepatch without accidentally cutting into the eye opening?

Back-carve the eyepatch by working outward from the edge of the already-cut eye hole, never toward it. Use a flat gouge held at an angle that pushes material away from the aperture rather than toward it. Score the eyepatch outer boundary first so you have a clear stop-line for the gouge.

Two upper fangs sounds manageable, but how do I keep them from looking too thin?

Keep each fang root at least three-eighths of an inch wide at the lip attachment point. Fangs can taper to a point but the root width is what determines structural strength. If a fang looks too wide in the design, narrow it slightly from the outer edge rather than from the root side.

Should I use red or amber LED lighting for Foxy?

Warm amber is a versatile choice that works well for most settings. A dim red LED is a more thematic option for Foxy and gives the single hollow eye an especially menacing look, though it reduces visibility of the backed eyepatch detail. Having both colors on hand to test before display is the easiest way to decide.

Your take belongs here, too.

Changed a detail? Made it simpler? Share a photo of your version and tell the community what worked.

Share your pumpkin

More pumpkins like this

You've reached the end · 8 pumpkins
The Patch Report

Fresh pumpkins, in your inbox.

The best new carvings, ideas worth stealing, and how-tos for carving season. Short, seasonal, and gone by November.

A short email during carving season. Unsubscribe anytime. See our privacy policy.